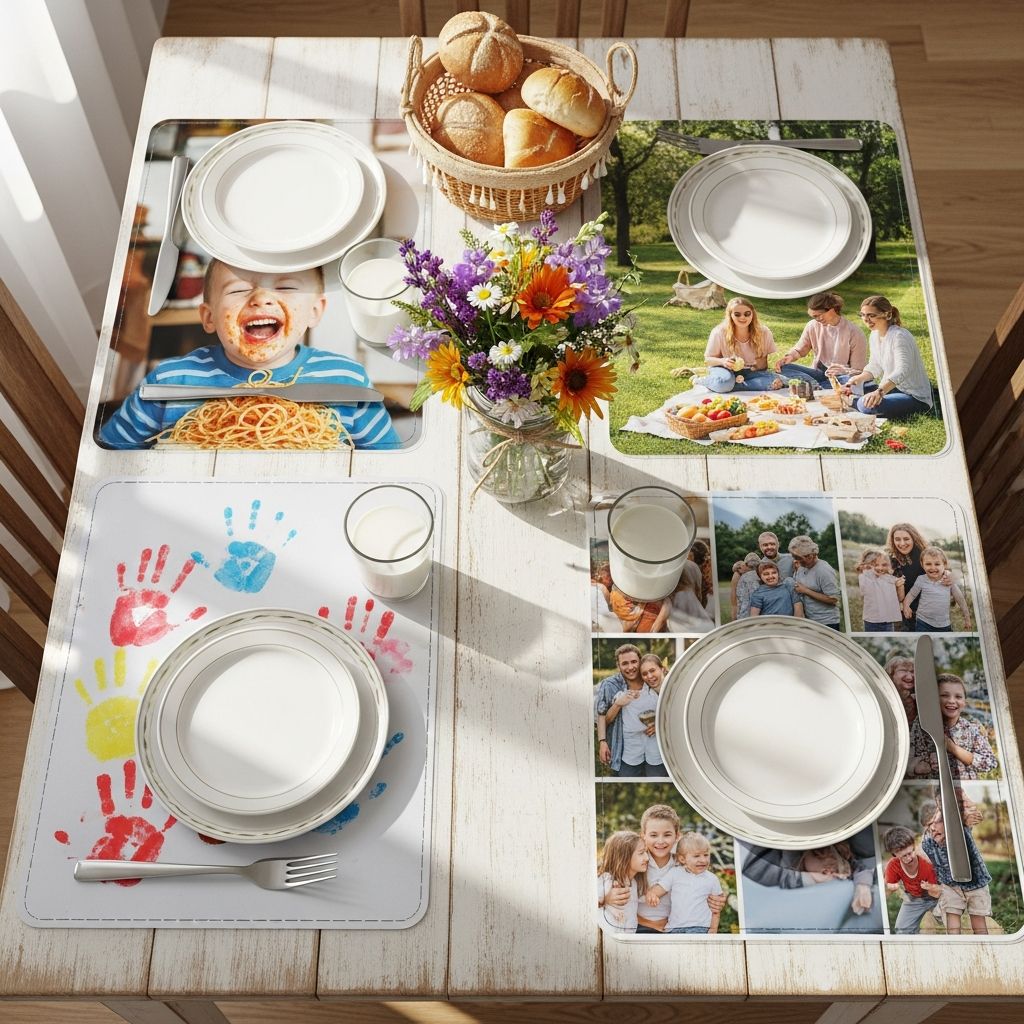
Photo placemats are a simple way to turn favorite memories into something your family uses every single day. Instead of keeping pictures hidden in albums or on your phone, this easy craft lets you showcase them right on the table in a wipe-clean, kid-proof format.
Why Photo Placemats Are Worth Making
Homemade photo placemats blend function and sentiment: they protect your table while sparking conversation and helping kids feel special at mealtimes. They also make thoughtful gifts for grandparents, teachers, or friends who appreciate personalized, handmade items.
Because they are laminated or covered in clear plastic, photo placemats stand up to crumbs, spills, and sticky hands better than paper crafts that quickly fall apart. With a little planning, you can produce a set that looks polished, lasts through many washes, and can be customized for any age or occasion.
Basic Materials and Tools You Will Need
Most supplies for photo placemats are inexpensive and easy to find at office supply, craft, or big-box stores. You can adapt this supply list based on what you already have at home and whether you want to work with printed photos or digital layouts.
- Printed photos (regular photo prints or images printed on copy paper or card stock)
- Base paper such as card stock, construction paper, or decorative scrapbook paper
- Adhesive such as a glue stick, double-sided tape, or photo-safe tape runner
- Clear protection: laminating pouches and a laminator, self-adhesive laminating sheets, or clear vinyl sleeves
- Scissors or a paper trimmer, ruler, and pencil for cutting and measuring
- Optional embellishments like stickers, washi tape, markers, or printed labels
If you prefer a fully digital approach, you can design your entire placemat in a photo-editing or collage program and then print it at home or through an online photo service before laminating.
Ideal Size and Shape for Everyday Use
The most comfortable size for a placemat is usually a horizontal rectangle that fits a plate, cup, and utensils without crowding the neighboring place. A common finished size is approximately 11 × 17 inches, although you can scale up or down depending on your table and printer.
| Finished Size | Best For | Notes |
|---|---|---|
| 11 × 17 inches | Most family tables | Often called “tabloid” size; plenty of room for photos and a plate. |
| 9 × 12 inches | Small tables or preschool kids | Fits a child-sized plate and cup; uses less material. |
| 12 × 18 inches | Large dining tables | More design space but may feel oversized on a narrow table. |
Choose a size that your printer or copy shop can handle easily, and remember to leave at least a small margin around the edges so your laminating method can seal the placemat fully.
Planning Your Photo Story
Before cutting or gluing anything, decide what story each placemat will tell. The most charming sets usually follow a simple theme that reflects whoever will be using them, rather than mixing unrelated pictures at random.
- By child: one placemat per child with their favorite activities, toys, or friends.
- By event: birthdays, vacations, holidays, or school milestones gathered on a single mat.
- By season: winter fun, summer adventures, or back-to-school snapshots.
- By relationship: a “Grandma and Me” or “Cousins” placemat for family gatherings.
This step helps you narrow down which photos to use, keeps your design coherent, and makes it easier for kids to connect emotionally with their placemat.
Selecting and Preparing Your Photos
Pick clear, well-lit images where faces are visible and expressions are easy to read. For kids, choose photos that show them engaged in activities they love, with pets, or with people they see often.
- Aim for a mix of close-ups and medium shots so the layout feels lively rather than repetitive.
- Print a few more photos than you think you will need so you can experiment with different arrangements.
- If using digital images, consider cropping them to similar aspect ratios before printing for an easier collage.
You can print photos on glossy photo paper for maximum color or on matte card stock to reduce glare under overhead lighting.
Designing the Layout: Collage, Grid, or Single Hero Photo
Your layout choice affects how busy or calm the placemat will feel on the table. A simple layout is often easier for children to take in at a glance and helps highlight the photos you love most.
- Single large photo: Works well for a favorite family portrait or a dramatic landscape from a trip.
- Neat grid: Arrange four to eight photos in rows and columns for a clean, organized look.
- Loose collage: Overlap photos at angles for an energetic, scrapbook-style effect.
- Central photo with border: Place one or two photos in the center and surround them with smaller pictures or decorative paper strips.
Lay your photos on the base paper without glue first, adjusting spacing until the design feels balanced and no important details are too close to the edge where lamination will seal.
Step-by-Step: Assembling the Photo Surface
Once your layout is chosen, you can assemble the decorative layer that will become the heart of your placemat. Work on a flat, clean surface to avoid dust and crumbs getting trapped under the final plastic.
- Cut your base. Trim your card stock or decorative paper to the desired placemat size, leaving room for lamination margins.
- Mark gentle guidelines. Use a pencil and ruler to lightly mark where major photos or rows will go so your grid stays even.
- Arrange photos. Place photos according to your plan, checking that no faces land exactly at a fold or edge.
- Adhere the images. Use a glue stick or photo-safe tape to attach each photo, smoothing from the center outward to prevent wrinkles.
- Add decorative details. Insert labels, captions, stickers, or colored paper strips if desired, keeping surfaces as flat as possible for easy laminating.
- Let it dry. If you used liquid glue or paint pens, set the piece aside until everything is thoroughly dry to avoid bubbles inside the plastic.
At this stage you essentially have a finished collage. The next step is adding a protective clear layer so the placemat can be wiped clean and used safely around food.
How to Protect and Waterproof Your Placemat
There are several ways to make your photo placemat water-resistant and durable. The method you choose will depend on what tools you have and how polished you want the final product to look.
Laminator and Pouches
A thermal laminator with large pouches gives the most professional, fully sealed finish. Slide the finished collage into the pouch, ensuring equal margins on all sides, then run it through the laminator according to the machine’s instructions.
- Leave a border of clear plastic around the edges to keep the seal intact.
- Check for any small scraps or dust before sealing, as they will become permanent once laminated.
Self-Adhesive Laminating Sheets
If you do not own a laminator, self-adhesive sheets are a good alternative. These clear sheets are applied manually and pressed around the paper to create a protective coating.
- Peel back a small section of the backing, align carefully, and smooth with a ruler as you go to minimize bubbles.
- Seal the back with a second sheet if needed so the placemat is fully covered on both sides.
Clear Vinyl Sleeves or Page Protectors
For a removable option, slide the finished collage into a heavy-duty clear vinyl sleeve sized for menus or display materials. This method allows you to swap out the artwork later without cutting or re-laminating.
- Choose a sleeve that is food-safe and thick enough to remain flat on the table.
- Trim your collage slightly smaller than the sleeve so it slides in easily without curling.
Safety and Durability Tips for Families
Because these placemats will live on a dining table, safety and longevity matter as much as appearance. A few simple habits will help them last through many meals and dishwasher-less cleanups.
- Avoid very small loose embellishments like beads or sequins that could detach and pose a choking hazard.
- Check edges regularly to be sure the lamination is still sealed; if corners start to peel, trim slightly to prevent moisture from seeping in.
- Wipe with a damp cloth and mild soap rather than soaking in hot water, which can warp the plastic.
- Store placemats flat when not in use so they do not curl or crease.
You can also create a “practice” placemat for very young children, letting them test it with crayons or spills before you commit your favorite photos to the project.
Creative Theme Ideas for Kids and Grown-Ups
Photo placemats can be tailored to almost any interest, age, or celebration. Consider making an entire set built around one theme or mix different designs within a coordinated color palette.
- Alphabet mat: Arrange images of your child with items representing each letter of their name.
- Travel memories: Feature snapshots from a single trip with tiny printed labels for each location.
- Sports spotlight: Use practice and game photos, jersey numbers, and team colors for a young athlete.
- Family tree: Combine photos of grandparents, parents, and siblings with simple relationship labels.
- Pet showcase: Dedicate a placemat to your family pet with action shots and funny captions.
Themed placemats encourage kids to talk about their day, remember relatives who live far away, and feel more engaged during mealtimes.
Using Photo Placemats Beyond Everyday Meals
Once you have a basic process, photo placemats can extend far beyond the kitchen table. They double as learning tools, party decorations, and one-of-a-kind gifts.
- Birthday parties: Create a set featuring photos of the birthday child from each year of their life so far.
- Holiday gatherings: Make place settings with childhood photos of adult guests for instant conversation starters.
- Classroom use: Teachers can use student photos on placemats for art tables or snack time.
- Gifts for relatives: Grandparents often appreciate practical items covered in grandchild photos more than another framed print.
Because they are flat and lightweight, placemats are also easy to mail or pack in a suitcase as travel-friendly presents.
Cleaning and Caring for Your Finished Placemats
Good care will keep colors bright and the plastic clear. Fortunately, maintenance is easy and takes only a minute after each meal.
- Wipe spills quickly with a damp cloth and a drop of mild dish soap if needed.
- Avoid scrubbing with abrasive sponges that can cloud the plastic surface.
- Let placemats air dry fully before stacking them so no moisture gets trapped between layers.
- Keep them out of prolonged direct sunlight to reduce fading over time.
If a placemat eventually becomes scratched or worn, you can reprint or recreate the design with updated photos, turning the project into an evolving record of your family’s story.
Frequently Asked Questions About DIY Photo Placemats
Can photo placemats go in the dishwasher?
Most homemade placemats made with laminating film or adhesive sheets are not designed for dishwashers. The heat and prolonged water exposure can cause the plastic to warp or the seal to fail. Hand washing with a soft cloth is the safest way to clean them.
Is it safe to use photos around food?
As long as the photos are fully enclosed in food-safe plastic and the seal around the edges is intact, the printed layer does not come into direct contact with food. Avoid using loose photos or materials that could flake or peel near plates and utensils.
What if I do not have a laminator?
You can still make durable placemats using self-adhesive laminating sheets or heavy-duty clear vinyl sleeves. Many copy shops and office supply stores also offer lamination services if you prefer a machine-sealed finish.
Can kids help make the placemats?
Children can definitely help choose photos, arrange layouts, and add simple decorations like stickers or handwritten labels. Adults should handle any cutting with sharp tools and the lamination steps that involve heat or precise alignment.
How long do homemade photo placemats last?
With proper sealing and gentle cleaning, many photo placemats remain usable for years. Over time, you may notice surface scratches or slight fading, which can be a good excuse to update the design with newer pictures.
Final Thoughts: Everyday Art from Everyday Moments
DIY photo placemats turn piles of digital and printed pictures into something your family can enjoy at breakfast, homework time, and family dinners. They invite kids into the crafting process, brighten your table, and preserve special moments in a practical, wipe-clean format.
Once you make one set, it is easy to imagine seasonal versions, themed designs, and gift sets for loved ones. With a few basic supplies and a little creativity, your table can become a gallery of your favorite memories.