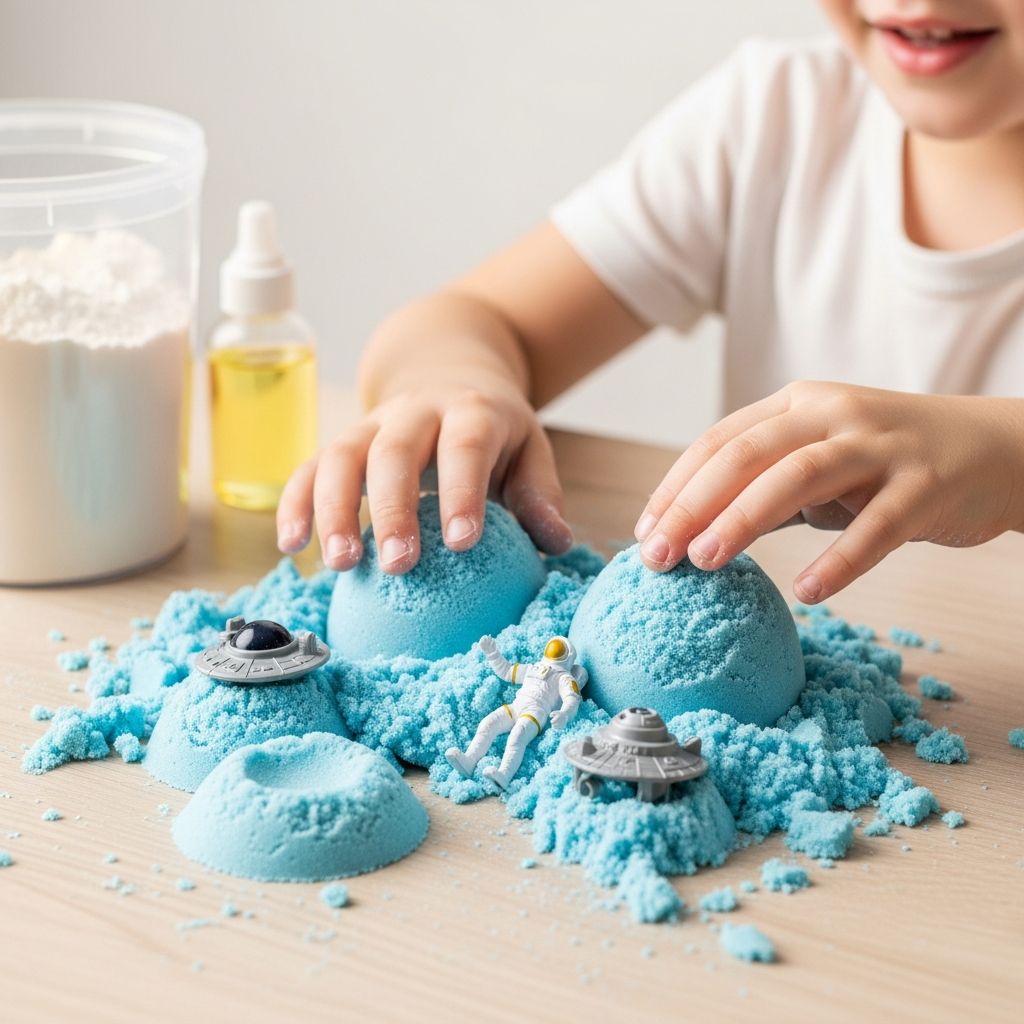
Moon sand has become a favorite at-home and classroom activity for young children because it feels like a cross between dry sand and soft dough. It is easy to mold, holds its shape when pressed, and then crumbles apart with a light touch, making it perfect for sensory play, fine-motor practice, and imaginative building projects.
What Is Moon Sand?
Moon sand is a moldable, soft material made from a combination of a dry base and oil. It behaves a bit like wet beach sand but does not require water, so it stays workable for weeks when stored properly. Children can squeeze it into shapes, press it into molds, slice it with tools, and then crumble it back to a loose, sandy texture.
Unlike commercial modeling compounds that can dry out, moon sand generally stays usable for a long time and can be refreshed with a small amount of added oil. It is most often prepared in large bins or trays, where kids can dig, scoop, pour, and build using cups, spoons, and small toys.
- Soft, crumbly texture that holds shapes when compressed.
- Made from simple pantry or household ingredients.
- Ideal for toddlers, preschoolers, and early elementary-aged kids (with supervision).
Moon Sand vs. Regular Sand and Kinetic Sand
Parents often confuse moon sand with regular sand or kinetic sand because all three are used for scooping and building. The main difference is that moon sand uses a flour-like base mixed with oil, while regular sand is just dry sand, and kinetic sand is typically manufactured with coated grains that cling together.
Moon sand usually feels lighter and more powdery than kinetic sand and tends to be less sticky on hands and tools. It is also much easier to make at home in large quantities with basic ingredients, making it a budget-friendly option.
Key Texture and Ingredient Differences
| Material | Main Ingredients | Texture | Best Uses |
|---|---|---|---|
| Moon sand | Flour or similar base + oil | Soft, moldable, crumbles easily | Indoor sensory bins, pretend baking, simple builds |
| Regular sand | Natural sand | Dry, loose, pours freely | Sandboxes, outdoor play, digging |
| Kinetic sand | Coated sand (commercial product) | Sticky, stretchy, holds shapes very well | Detailed building, sculpting, commercial sets |
Basic Moon Sand Ingredients
The simplest moon sand recipe relies on just two elements: a dry powder base and an oil. The dry component provides bulk and the sandy feel, while the oil helps the mixture cling and hold its shape when pressed. Most homemade versions use inexpensive pantry staples that parents already have on hand.
Moon sand recipes can be adjusted to suit dietary restrictions, household preferences, and the age of the child. Parents of toddlers who still taste or mouth materials may prefer taste-safe ingredients, while families with older children might prioritize scent or texture over edibility.
Common Dry Bases
- All-purpose flour – the most common base, soft and easy to find.
- Whole-wheat or alternative flour – slightly different texture, can be used if needed.
- Cornstarch or cornflour – produces an ultra-soft, silky feel.
- Gluten-free flour blends – useful for sensitive kids if they react to wheat.
Common Oils
- Vegetable, canola, or sunflower oil – budget-friendly, taste-safe options.
- Olive oil or liquid coconut oil – slightly richer texture, often used when families prefer particular oils.
- Baby oil (mineral oil) – popular for older kids; not taste-safe but very smooth and scented.
Is Moon Sand Taste-Safe?
Many parents worry about whether moon sand is safe if a child decides to taste it. Most recipes are technically not meant to be eaten, but selecting edible ingredients can make accidental tastes less concerning. Using flour and a food-grade oil avoids the fragrance and additives that appear in some commercial products.
Families who want an extra layer of safety often pre-bake flour before using it in sensory play to reduce concerns about raw flour. Even with taste-safe ingredients, children should be supervised and taught that moon sand is for playing, not snacking.
- For toddlers and young children, choose food-based oils instead of baby oil.
- Consider baking flour for a short time before use if worried about raw flour.
- Always supervise play and remove the bin if children are actively trying to eat the mixture.
Tips for Safe Moon Sand Play
Moon sand can be part of a safe, engaging play routine when parents set up an appropriate environment and establish simple rules. Because the mixture is crumbly and can scatter, most families find that preparing a limited play zone helps keep both children and floors protected.
Children with allergies, asthma, or sensory processing differences may need extra attention. Sweeping spilled sand promptly, washing hands thoroughly after play, and avoiding fragrances or additives that may irritate skin can go a long way toward making the experience more comfortable.
Practical Safety Guidelines
- Use a large, shallow plastic bin or tray to contain the moon sand.
- Place the bin on a wipeable floor mat, shower curtain, or old sheet.
- Teach children to keep moon sand inside the bin as much as possible.
- Wash hands after play, especially before eating or rubbing eyes.
- Avoid scented oils or dyes if your child has sensitive skin.
Step-by-Step Basic Moon Sand Recipe
The classic home recipe for moon sand is designed to be simple and forgiving, so parents can scale up or down based on the size of the bin and the number of children playing. The typical ratio uses significantly more dry ingredient than oil, which gives the mixture its crumbly, sand-like quality while still allowing it to hold shapes.
You can start with a small batch to test texture and adjust as needed. If the moon sand feels too dry and falls apart easily, add a little more oil. If it feels greasy and clumps too heavily, sprinkle in more flour or other dry base until you reach the desired consistency.
Classic Moon Sand Ratio (Example)
- Dry base (such as flour): large portion, for example 8 parts.
- Oil: about 1 part relative to the dry base.
How to Mix Moon Sand
- Measure the dry ingredient. Pour the flour or other base into a large mixing bowl or directly into the bin.
- Add the oil slowly. Drizzle the oil over the surface so it is somewhat evenly distributed.
- Combine thoroughly. Use your hands, a spoon, or a dough blender to work the oil through the dry ingredient until no large oily patches remain.
- Check texture. Squeeze a handful. If it holds a shape but breaks apart when poked, the consistency is appropriate.
- Adjust if necessary. Add small amounts of oil or dry base until the sand behaves the way you want.
Adding Color and Scents
Once the basic mixture is ready, parents often experiment with color and scent to make moon sand even more inviting. Coloring oil-based mixtures can be slightly tricky, because water-based dyes may bead up instead of spreading evenly. Working the color thoroughly through the sand with hands can help break up clumps and distribute pigment.
Some caregivers prefer to leave the mixture plain, especially for toddlers, while others use color to match holidays or learning themes. A light scent from child-safe ingredients can also make the sensory experience more immersive, but strong fragrances should be avoided if children are sensitive.
Ideas for Color and Scent
- Use powdered or gel coloring for more even distribution than liquid dyes.
- Try naturally colored powders (such as cocoa for brown) for themed play.
- Add a tiny amount of child-safe extract (like vanilla) if scent is desired.
- Create seasonal bins: pastel sand for spring, orange for autumn, etc.
Fun Ways Kids Can Use Moon Sand
Moon sand is versatile and can be used in many different types of activities, from quiet solo play to group games. Children naturally explore pouring, scooping, squeezing, and building, which helps develop hand strength, coordination, and early problem-solving skills. Parents can add a few simple tools and toys to turn the bin into a themed small-world scene or pretend kitchen.
Because moon sand moves and reshapes easily, children get immediate feedback from their actions, which keeps them engaged and encourages experimentation. Many families notice that kids return to the moon sand bin again and again, using it in new ways each time.
Activity Ideas for Moon Sand Play
- Pretend baking station. Add measuring cups, spoons, muffin tins, and cookie cutters so kids can “bake” cakes and cookies.
- Construction zone. Include toy trucks, diggers, and small people figures; encourage kids to build roads and mounds.
- Beach or ocean scene. Scatter shells, plastic sea animals, and small containers for scooping and burying treasures.
- Letter and number practice. Hide alphabet beads or number tiles in the sand and ask children to search and identify them.
- Sculpting and molding. Provide silicone molds, small cups, and plastic knives for slicing and shaping structures.
Benefits of Moon Sand for Child Development
Beyond simple entertainment, moon sand supports a wide range of developmental skills. The resistance of the sand when squeezed helps strengthen muscles in the hands and fingers, which are crucial for later writing, dressing, and manipulating small objects. The constant flow and reshaping also encourage experimentation, creativity, and the use of descriptive language.
Sensory rich materials like moon sand can be especially calming for some children, offering a soothing, repetitive activity that allows them to focus and unwind. When multiple children share the same bin, they have opportunities to practice taking turns, communicating ideas, and cooperating on shared projects.
Key Developmental Gains
- Improved hand strength, grip, and fine-motor coordination.
- Opportunities for counting, measuring, and early science concepts.
- Language development as children describe textures, actions, and creations.
- Social skills when siblings or classmates negotiate sharing tools and space.
Cleaning Up and Storing Moon Sand
Moon sand is designed to be reusable, so most families keep a dedicated storage container for it. After playtime, the sand can be brushed from hands and tools back into the bin, then transferred to a lidded tub or airtight box for future sessions. Small crumbs that escape the play area can usually be swept or vacuumed without much difficulty.
Over time, the sand may pick up lint, dust, or small debris, especially if it is used frequently. If the mixture begins to smell off, clump excessively, or seem unclean, it is best to discard it and make a fresh batch. Regularly refreshing the mixture helps maintain its pleasant texture and appearance.
Storage and Maintenance Tips
- Store moon sand in an airtight container or sealed plastic bag.
- Keep the container in a cool, dry place away from direct sunlight.
- Check the mixture periodically for odor or visible contamination.
- Add a small amount of oil and mix well if the sand starts to dry out.
Variations and Special Moon Sand Recipes
Families often adapt the basic moon sand recipe to address dietary restrictions, sensory preferences, or seasonal themes. For example, using gluten-free flour or cornstarch can make the activity more inclusive for children with wheat sensitivities. Some parents also experiment with adding small amounts of safe glitter or themed accessories for special occasions.
Because moon sand is mixed by hand, small recipe changes are easy to test. Making several different mini batches in separate containers allows you to compare textures, colors, and scents side by side so children can help decide which versions they like best.
Popular Variations
- Gluten-free moon sand. Use gluten-free flour or cornstarch in place of regular flour.
- Seasonal moon sand. Add thematically colored sand and small props for holidays or seasons.
- Texture blends. Mix in a small amount of fine play sand or rice for a grittier feel (for older kids).
- Scented moon sand. Add a tiny amount of child-safe extract or herb (such as dried lavender) for a multisensory bin.
Moon Sand FAQs
Is moon sand safe for toddlers?
Moon sand can be safe for toddlers when made with taste-safe ingredients and used under close supervision. Very young children should always be monitored to prevent them from eating large amounts or rubbing the mixture into their eyes.
How long does homemade moon sand last?
Homemade moon sand can last for several weeks or even longer if stored properly in an airtight container. If it begins to smell, discolor, or accumulate debris, it is better to discard it and make a new batch.
Can moon sand be used indoors?
Moon sand can be used indoors as long as the play area is prepared with a protective mat or sheet and the bin is large enough to catch most of the crumbs. Sweeping or vacuuming after play quickly picks up any scattered pieces.
What if my child has a wheat or gluten allergy?
Children with wheat or gluten allergies can still enjoy moon sand if you substitute a gluten-free flour or cornstarch base. Keep in mind that reactions vary, so follow your child’s specific medical guidance and always monitor their skin and breathing during play.
How do I fix moon sand that is too wet or too dry?
If your moon sand feels too wet and heavy, sprinkle more dry base into the bin and mix thoroughly. If it is too dry and won’t hold its shape, add a small amount of oil, work it in with your hands, and test again until the consistency improves.
Moon sand is a flexible, low-cost way to bring rich sensory play into your home or classroom. With a few simple ingredients and some creativity, you can design engaging activities that support your child’s development, encourage imagination, and turn an ordinary afternoon into a truly hands-on learning experience.