Nothing feels more like instant summer than the soft crunch of shaved ice drenched in bright, sweet syrup. A small snow cone machine can turn an ordinary afternoon into a mini celebration, giving kids a hands-on way to play, create, and cool down. This guide walks you through turning that little gadget into a reliable source of family fun, from setup and safety to flavors, parties, and cleanup.
Why Snow Cones Are Perfect for Families
Snow cones are simple enough for kids to help make but exciting enough that they still feel like a special treat. They use ingredients that are easy to find and relatively inexpensive, making them ideal for repeat use throughout hot months. Because the process is so visual and tactile, snow cones also become a memorable sensory experience for children.
- Low-cost ingredients and reusable cups keep the budget friendly.
- Kids can safely participate in many steps with a bit of guidance.
- Colors, textures, and flavors make it a fun mini science-and-art project.
Choosing the Right Snow Cone Machine
Before getting into recipes and party ideas, it helps to understand what kind of snow cone machine works best for your household. Small countertop models designed for kids typically trade high volume for safety features and ease of use. Think about how often you plan to use it and how many people you’ll serve at a time.
| Type | Best For | Pros | Considerations |
|---|---|---|---|
| Kid-themed countertop machine | Families with young children | Playful design, safer blades, easy to store | Smaller capacity, mostly for occasional use |
| Manual hand-crank shaver | Outdoor use and camping | No electricity required, simple mechanism | Requires more effort to shave ice |
| Electric home shaver | Frequent use and larger families | Fast, consistent ice texture | Louder, usually needs more storage space |
When choosing a kid-focused machine, prioritize sturdy construction, clear instructions, and parts that are easy to take apart and clean. A few themed details can make the machine feel more like a toy without sacrificing practicality.
Setting Up Your Snow Cone Station
You’ll have a smoother experience if you treat snow cones less like a random kitchen project and more like a mini station. A dedicated setup reduces spills, keeps kids in one area, and makes cleanup much easier. You don’t need a lot of space; a corner of the counter or a small folding table works well.
Essential Tools and Supplies
- Snow cone machine or ice shaver
- Ice cubes or small ice blocks (depending on your machine)
- Plastic or paper snow cone cups, or small reusable bowls
- Squeeze bottles or small pitchers for syrups
- Kitchen towels and a tray or rimmed baking sheet to catch spills
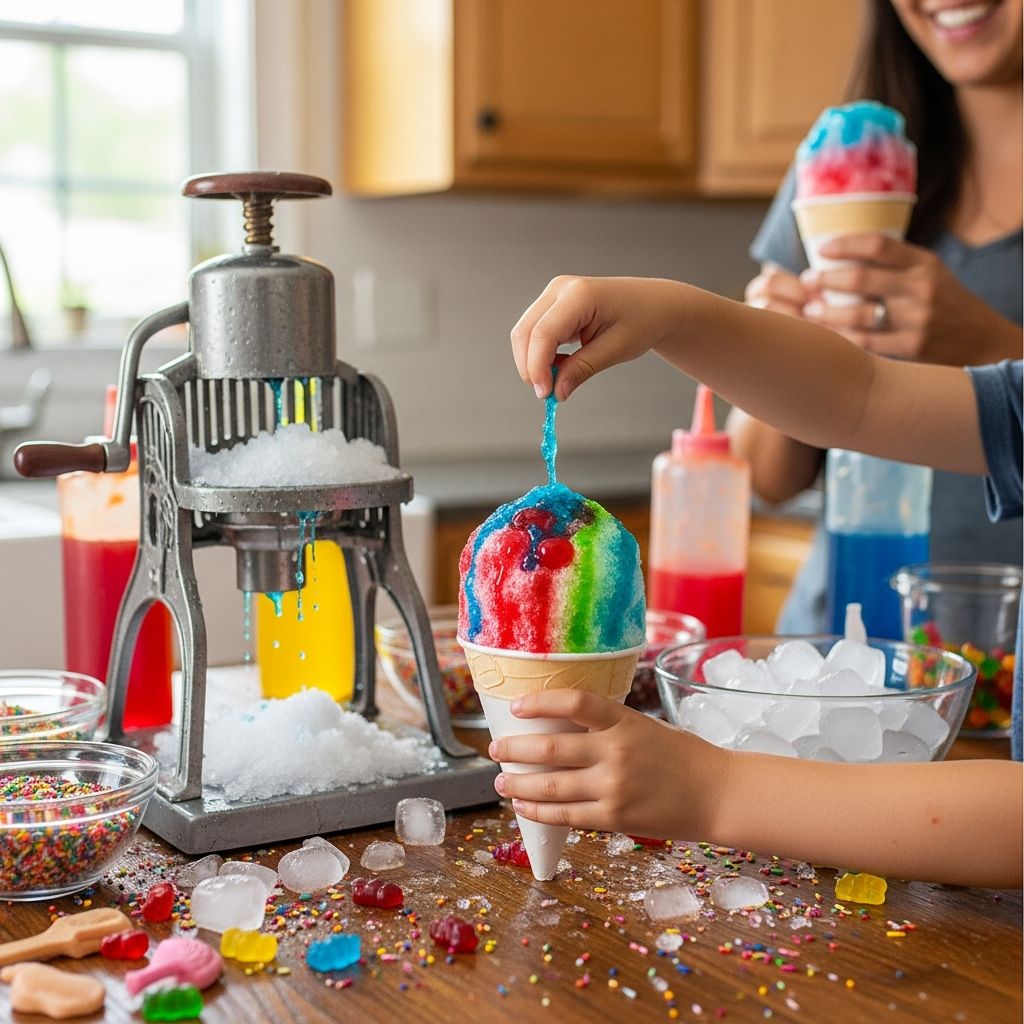
Set the machine on a flat, stable surface and plug it into an outlet clear of any standing water. Place a tray underneath and in front of the machine to catch stray ice and drips, then arrange cups, spoons, and syrups within easy reach. Keeping everything together turns the whole process into a friendly self-serve bar for kids and adults.
Safety Tips When Kids Help
With child-themed appliances, it’s easy to forget that you’re still dealing with moving parts and electricity. A quick safety talk keeps excitement high while minimizing risk. Even if the blades are enclosed, children should understand which parts are off-limits and how to ask for help when they need it.
- Supervise operation closely whenever the machine is running.
- Explain which buttons kids may press and which parts are for adults only.
- Keep small hands away from ice chutes and moving blades at all times.
- Unplug the machine before cleaning or adjusting any internal parts.
Consider assigning age-appropriate tasks. Younger children can choose cups, add toppings, or help carry finished cones, while older kids can help portion ice, measure syrups, or operate the on/off switch under supervision.
Creating the Perfect Shaved Ice
The heart of a great snow cone is the texture of the ice. Ideally, you want ice that’s soft and snowy rather than hard and chunky, so it soaks up flavor from top to bottom. Each machine has a slightly different feel, so expect a little trial and error the first time you use it.
Step-by-Step Ice Prep
- Fill the machine with the recommended amount of ice cubes or blocks.
- Run the machine in short bursts at first to get a sense of the texture.
- Check the shaved ice and adjust if possible (some machines have a coarseness setting).
- Transfer shaved ice directly into cups or a chilled bowl to keep it from melting.
If your ice seems too chunky, try slightly smaller ice cubes or run them through the machine a second time. Packing the shaved ice gently into the cup—firm enough to hold shape, but not crushed—helps the syrup drip through evenly rather than sliding off the surface.
Flavor Ideas: From Classic to Creative
Syrup is where snow cones really come to life. You can use store-bought syrups for convenience, but making your own simple flavors at home is more budget-friendly and allows you to control sweetness and ingredients. Start with a basic simple syrup, then add fruit juices, extracts, or drink mixes for color and taste.
Kid-Friendly Flavor Combos
- Berry Blast: Strawberry and raspberry syrup layered in stripes.
- Tropical Sunset: Pineapple on the bottom, mango in the middle, orange on top.
- Green Garden: Lime mixed with a mild cucumber-mint syrup for a refreshing twist.
- Rainbow Surprise: A tiny drizzle of three to four colors for maximum fun.
For children sensitive to dyes or strong flavors, try naturally tinted syrups using fruit purées, herbal teas, or a splash of 100% juice stirred into lightly sweetened water. Label each flavor and offer tasting spoons so kids can preview their favorite before committing.
Health-Conscious Snow Cone Swaps
Snow cones don’t have to be sugar bombs. With a few thoughtful swaps, you can offer treats that feel indulgent but sit more comfortably with everyday snacking guidelines. The key is balancing sweetness with hydrating ingredients like water or unsweetened tea.
- Use diluted fruit juice instead of heavily sweetened syrup.
- Experiment with stevia or other alternative sweeteners in homemade syrups.
- Blend fresh fruit into a thin purée and strain out the pulp for a smoother drizzle.
You can also control portion size by using smaller cups or serving mini snow cones as a “tasting flight.” Kids usually care more about color and novelty than volume, so small servings can be just as exciting.
Turning Snow Cones into a Party Centerpiece
A snow cone machine makes an easy centerpiece for a themed celebration, whether the theme is classic carnival, beach day, or a character-based party. Because the machine is interactive, kids naturally gather around it, which helps organize the flow of the event.
Simple Snow Cone Bar Setup
- Pick three to five core flavors and label each with a small sign.
- Offer a few toppings such as sprinkles, mini marshmallows, or gummy candies.
- Use color-coordinated cups, napkins, and straws to match your party theme.
- Place a small mat or plastic tablecloth underneath the station for sticky drips.
Consider assigning an older child or adult as the “Snow Cone Captain” to manage the machine and portion control. Rotating this role can keep the station organized while giving each helper a chance to feel important.
Educational Moments Hidden in the Fun
Snow cones offer a great opportunity to sneak in a bit of learning without making it feel like homework. Kids naturally ask questions while waiting for their turn, and you can use those moments to introduce basic concepts from science, math, and even art.
- Talk about how ice melts faster with added liquid and heat.
- Let kids measure ingredients to practice fractions and counting.
- Encourage them to design “signature flavors” and draw labels for each one.
By framing these topics as part of the fun, children associate learning with positive experiences and can feel proud of the treat they helped create from start to finish.
Cleanup: Tackling Syrup and Sticky Surfaces
Snow cone events can leave behind sticky countertops and stray ice, but cleanup is straightforward with a little planning. Addressing spills and drips quickly prevents syrup from drying into stubborn spots, and it keeps ants and other pests at bay.
Quick Cleanup Routine
- Unplug the machine and let any remaining ice melt in a sink or large bowl.
- Disassemble removable parts and rinse them in warm, soapy water.
- Wipe down the exterior with a damp cloth, paying attention to buttons and handles.
- Dry all parts thoroughly before reassembling to avoid mold or mildew.
Encourage kids to help with age-appropriate tasks like wiping tables or carrying cups to the trash. When cleanup is part of the tradition, they learn responsibility along with the fun of making treats.
Storage Tips for Machines and Syrups
Proper storage extends the life of your machine and keeps syrups tasting fresh. Once everything is clean and dry, find a spot where the machine is protected from extreme temperatures and curious hands. If you plan to use it frequently, choose a place that’s easy to access without heavy lifting.
- Store the machine in its original box or a labeled bin when not in use.
- Keep homemade syrups in airtight bottles in the refrigerator.
- Label each bottle with the flavor and the date it was made.
Periodically check your syrups for changes in color, separation, or off smells, and discard any that seem questionable. A fresh batch is quick to make and always tastes better than something that has sat for too long.
Frequently Asked Questions
How much ice do I need per person?
A good rule of thumb is to plan for about one generous cup of shaved ice per snow cone. For a small gathering, a standard bag of ice from the grocery store is usually enough, but families who use their machine often may prefer to keep a dedicated stash of ice trays in the freezer.
Can I use regular ice cubes from my freezer?
Most home snow cone machines are designed to handle standard freezer ice cubes. If your ice is particularly large or oddly shaped, you can break cubes into smaller pieces first to reduce strain on the motor and get a finer shave.
What’s the difference between shaved ice and crushed ice?
Shaved ice is very fine and snow-like, which absorbs syrup evenly and feels soft on the tongue. Crushed ice tends to have larger, rougher pieces, so the syrup may pool at the bottom of the cup instead of soaking through.
How can I avoid making snow cones that are too sweet?
To keep sweetness in check, start with a lighter drizzle and let kids taste before adding more. You can also dilute syrups with water or use fruit juice blends to reduce sugar concentration while maintaining flavor and color.
Is a themed snow cone machine worth it?
A themed machine can make the experience feel magical for young children and encourages them to participate. As long as it is well built, safe, and easy to clean, the decorative design is a fun bonus that can spark excitement every time you bring it out.
Making Snow Cones Part of Your Family Routine
Once you’ve used your snow cone machine a few times, it naturally fits into family rhythms—movie nights, backyard barbecues, after-school treats, and birthday parties. Because the process is flexible, you can keep it simple or turn it into a full-blown activity with themes, toppings, and custom flavors.
With a bit of planning, a small snow cone machine becomes more than a novelty gadget. It turns into an invitation to slow down, gather in the kitchen, and share something bright and refreshing together—one colorful cone at a time.