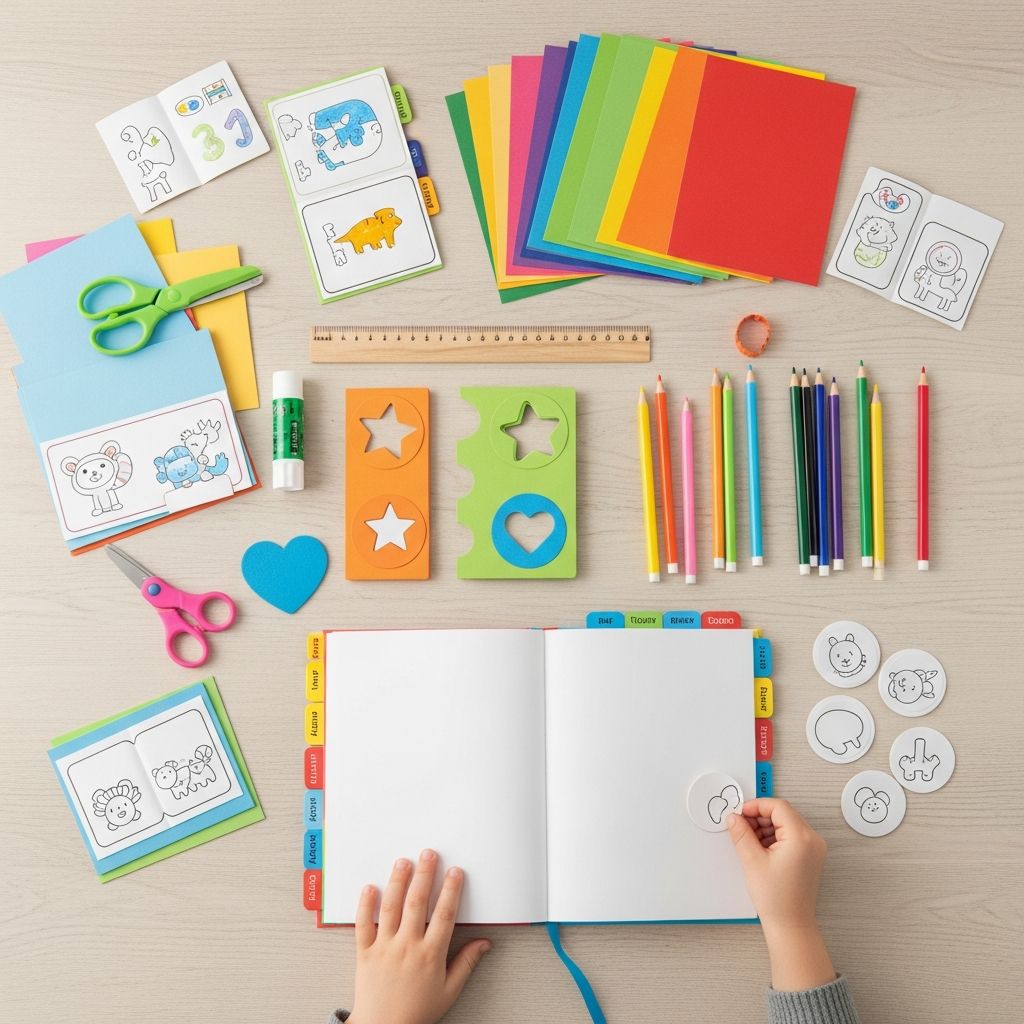
Tabbed books are simple, low-cost mini books with visible tabs that help children organize information, sequence ideas, and review what they have learned. They work beautifully in classrooms, homeschools, clubs, and one-on-one tutoring sessions.
What Is a Tabbed Book?
A tabbed book is a small booklet in which each page extends slightly beyond the one before it, creating a series of labeled tabs along one side or across the bottom. Each tab usually represents a topic, step, category, or question, making the book easy to flip through and visually scan.
Unlike a traditional booklet, a tabbed book gives children a built-in structure for sorting information. Every tab acts like a mental hook: when learners pull a tab, they know that everything on that page belongs to the label or question written on it.
- Tabs make it easy to find sections quickly.
- Each page can focus on a single concept, which reduces overload.
- The finished book becomes a personalized reference tool or study aid.
Why Tabbed Books Help Children Learn
Tabbed books support active learning because children must decide what information belongs under each tab, how to phrase it in their own words, and how to decorate or illustrate it. This decision-making process encourages deeper thinking than simply filling in a worksheet.
They are also ideal for differentiated instruction. Within the same basic project, younger or struggling students can write short phrases and add drawings, while older or more advanced students can include full paragraphs, diagrams, or references.
- Promotes organization: Information is grouped by tabs, not scattered on a single page.
- Encourages summarizing: Limited space forces students to choose key ideas.
- Builds ownership: Children are proud to show and revisit books they created themselves.
Basic Supplies You Will Need
One of the best features of tabbed books is that they require only everyday materials. Most classrooms, homeschool rooms, and offices already have what is needed to begin.
- Plain printer paper or light cardstock (for sturdier pages)
- Scissors suitable for children
- Ruler or straightedge for neat folds and tab spacing
- Stapler, binding clips, or glue for securing the spine
- Pencils, pens, colored pencils, or markers
- Optional: stickers, washi tape, and colored paper for decorative covers
For younger children, consider pre-measuring and lightly penciling in cutting lines and tab guidelines so the final book remains neat, even if fine motor skills are still developing.
Planning the Structure of Your Tabbed Book
Before cutting or stapling, take a moment to plan the content and layout. Clear planning prevents wasted materials and ensures that the finished book matches your learning goals.
- Choose a purpose. Decide whether the book will summarize a unit, introduce a new topic, practice vocabulary, or help review steps in a process.
- Pick the number of tabs. For beginners, three to five tabs usually work well. Older students can manage more tabs, but too many can feel cluttered.
- Assign a topic to each tab. Each tab can represent a chapter, question, subtopic, or category such as “Definition,” “Example,” and “Visual.”
- Decide on page orientation. Tabs can run along the right edge (like a reference manual) or along the bottom edge (like a flip-up chart).
Once these decisions are made with or without student input, you are ready to assemble the basic book.
Step-by-Step Instructions for Making a Simple Side-Tabbed Book
The following method creates a landscape-oriented book with tabs along the right edge. Adjust measurements to match your paper size and the number of tabs you plan to include.
- Stack the pages. Place three to five sheets of paper in a neat stack. All sheets should be aligned at the left edge; the right edges will later be trimmed into tabs.
- Fold the stack in half. Fold the stack from left to right so that the fold forms the spine of the book. Sharpen the crease by running a ruler along it.
- Staple the spine. Place two or three staples along the folded edge. If you prefer a no-staple version, punch two holes near the top and bottom and tie yarn through both holes to create a simple binding.
- Mark the tab widths. Turn the book so that the open, right-hand side faces you. Use a ruler to divide the right edge into equal segments, one for each tab, and lightly mark the lines with pencil.
- Cut the tabs. Starting from the front page, cut along the first pencil line from the bottom edge up to the spine fold. Stop at the fold so the page remains attached. For the second page, cut from the next pencil mark and remove the overlapping strip from the bottom, creating a slightly higher tab. Continue cutting each subsequent page so that every tab is a bit shorter than the one before it and all tabs are visible from the front.
- Label the tabs. Write the title of each section on the showing part of the tab. Use bold lettering and, if desired, color-code the labels by subject or category.
After these steps, you have a blank, labeled tabbed book ready for children to fill with content related to your lesson goals.
Alternative Tabbed Book Layouts
The side-tab example above is only one of many possibilities. Changing where you cut tabs or how you fold paper can create different experiences for children and provide fresh motivation for repeated use.
- Bottom-tab flip book. Tabs appear along the lower edge, and children flip pages upward like a calendar. This works well for step-by-step procedures and sequencing activities.
- Staggered top tabs. Tabs are cut along the top edge, useful for vocabulary sets or thematic lists where each tab covers one term.
- Accordion tabbed strip. Instead of a stapled spine, fold a long strip of paper back and forth like an accordion, then cut staggered ends to form tabs.
- Double-sided tabs. For advanced students, print or write on both sides of each page so that the same tab can contain two perspectives, such as “Cause” on one side and “Effect” on the reverse.
Experimenting with different layouts over time keeps the format from feeling routine while preserving the underlying benefits of organization and interactivity.
Using Tabbed Books Across Subjects
Tabbed books are flexible enough to be used for nearly any subject area and age group. The key is to adapt tab labels and expectations for writing or drawing to match developmental levels and academic goals.
| Subject | Example Tab Labels | Student Tasks |
|---|---|---|
| Reading / Literature | Characters, Setting, Problem, Events, Solution | Summarize story elements, draw key scenes, collect favorite quotes in own words. |
| Science | Question, Hypothesis, Procedure, Results, Conclusion | Document experiments, paste photos, and add diagrams of equipment or observations. |
| History | Timeline, Important People, Daily Life, Conflicts, Lasting Impact | Create an overview of a civilization, event, or time period. |
| Language Arts | Noun, Verb, Adjective, Adverb, Practice Sentences | Define each term, add examples, and write original sentences. |
| Math | Definition, Formula, Example Problem, Word Problem, Real-Life Use | Record key concepts like area, perimeter, or fractions. |
Teachers can also assign open-ended projects in which students choose their own tab labels to show what they found most important about a unit, giving insight into individual understanding and interests.
Integrating Tabbed Books With Lapbooks and Notebooks
Tabbed books fit naturally inside larger projects such as lapbooks, interactive notebooks, or project binders. They can function as mini sections within a broader organizational system, each focusing on a narrow topic while the overall project covers a wider theme.
- Glue a small tabbed book onto a folder flap inside a lapbook to summarize one specific concept.
- Attach a tabbed book to a notebook page with washi tape, creating a flip-out reference section on a key skill or topic.
- Use a whole series of small tabbed books to build a comprehensive portfolio over the course of a semester.
This integration makes reviewing for quizzes and tests more interactive because students physically handle and explore the materials they created themselves.
Tips for Classroom Management and Differentiation
Working with scissors, staplers, and multiple pages can become chaotic without a few simple routines. Establishing expectations ahead of time helps projects run smoothly and keeps the focus on learning.
- Prepare models. Show one or two completed tabbed books so students know what they are working toward.
- Chunk directions. Give one step at a time and walk around to check understanding before moving on.
- Create stations. Set up a Staple Station, Cutting Station, and Decorating Station to avoid crowding and waiting.
- Offer pre-cut options. For younger grades or large groups, pre-fold and pre-staple books, leaving only labeling and content to students.
- Provide extension tasks. Fast finishers can add glossaries, diagrams, or extra examples to enrich their books.
These strategies allow you to keep instruction focused on content rather than logistics while still letting students enjoy the hands-on aspect of the project.
Ideas for Assessment and Reflection
Tabbed books are more than crafts; they can serve as meaningful assessment tools when paired with clear rubrics or checklists. Rather than grading only neatness, consider how accurately and thoughtfully students filled each section.
- Check whether each tab contains the required information in the student’s own words.
- Look for evidence of comprehension, such as correctly sequenced events, logical explanations, or accurate diagrams.
- Invite students to present their books to a partner or small group, explaining why they chose certain words, images, or layouts.
Reflection can be as simple as asking students to write one sentence on the back cover about what they learned and one sentence about what they would change next time.
Frequently Asked Questions (FAQs)
1. How many pages should a tabbed book have?
For most elementary projects, three to six pages work well. Fewer pages keep the activity manageable and prevent students from feeling overwhelmed, while still providing enough space to cover key ideas or steps.
2. What type of paper is best?
Standard printer paper is adequate for short-term use or single-unit projects. If the book will be handled frequently or kept as part of a long-term portfolio, light cardstock provides extra durability without becoming too difficult for children to cut.
3. How can tabbed books be adapted for very young learners?
For preschool and early primary grades, focus on pictures and minimal text. Adults can pre-assemble the books, write the tab labels, and invite children to add drawings, stickers, or a few dictated words to each page.
4. What about older or advanced students?
Older learners can treat each tab as a mini essay or analysis section. Ask them to include citations, diagrams, or data charts inside the book so that the finished project resembles a compact research folder rather than a simple craft.
5. Can digital tools replace physical tabbed books?
Digital notebooks and presentation tools can mimic the structure of tabs, but physical books engage different senses and motor skills. A balanced approach might use digital platforms for final presentations while relying on paper tabbed books for brainstorming, drafting, and initial organization.
SEO-Friendly Implementation Tips
When publishing a guide like this online, consider using keyword-rich subheadings and descriptive alt text for any images that show examples of tabbed books. Clear structure not only improves readability but also helps search engines understand how the page is organized.
- Include common phrases such as “how to make a tabbed book,” “tabbed book template ideas,” and “tabbed book classroom activities” naturally in headings and paragraphs.
- Break long content into distinct sections with informative subheadings so that readers can easily skim to the parts that match their needs.
- Add internal links from related articles on crafts, lapbooks, or notebooking to help visitors discover more resources on your site.
Combining solid educational value with good on-page optimization practices makes the article more useful to teachers and parents who search for hands-on learning ideas.