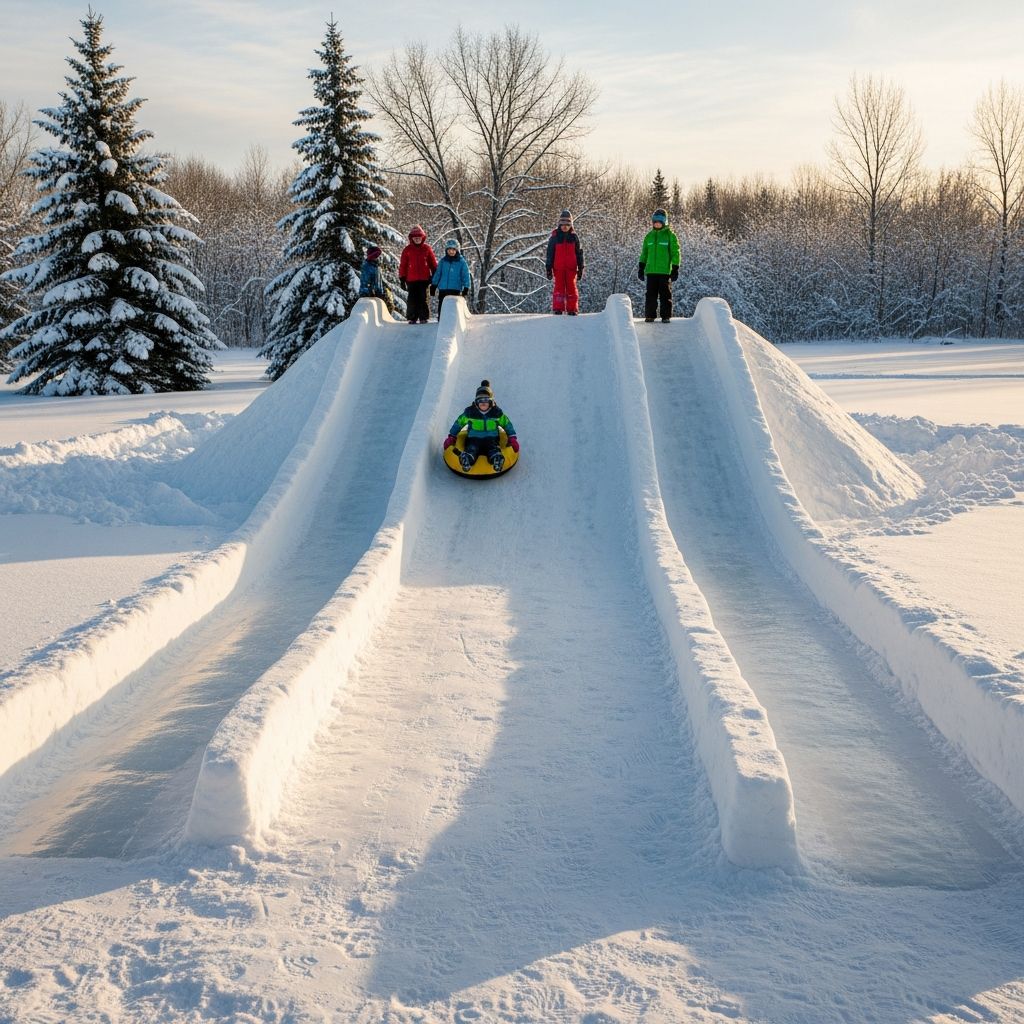
Winter transforms ordinary yards into playgrounds of excitement, and nothing captures that magic quite like a towering snow slide. These homemade structures offer hours of high-speed thrills, fostering family bonds while burning off boundless energy. Whether you’re piling snow into a straightforward chute or engineering a winding luge path, creating your own slide turns a snowy day into an unforgettable adventure. This guide draws from proven techniques to help you build safely and effectively, ensuring smooth rides and lasting memories.
Why Build Your Own Snow Slide?
Commercial sledding hills are fun, but backyard builds let you customize size, shape, and challenge level to match your space and skill. Kids gain confidence climbing heights and zooming down slopes, while parents enjoy the satisfaction of hands-on creation. Physically, it expends massive energy—shoveling, packing, and testing demand teamwork. Plus, it’s budget-friendly, requiring mostly snow, shovels, and sleds you likely already own.
Safety stands paramount: sturdy walls prevent wipeouts, packed surfaces reduce bumps, and adult supervision ensures control. Start small to test, then scale up for epic descents up to 8-10 feet high in modest yards. Environmentally, you’re repurposing natural snowfall, promoting outdoor play over screens.
Essential Tools and Materials
Gathering the right gear streamlines construction and boosts quality. Focus on durable, kid-friendly items.
- Shovels: Adult-sized for piling, kid-sized for detailing. Plastic blades work well on snow without scratching surfaces.
- Sleds: Lightweight plastic or saucer types for testing and riding; heavier ones pack snow firmly.
- Water source: Garden hose or buckets for spraying to harden the slide overnight.
- Packing aids: Trash cans or barrels for curves; ropes for pulling weighted sleds.
- Safety extras: Helmets, gloves, thick snow pants; tarps for base protection if grass is sparse.
For advanced builds, add a snowblower for quick piling or foam cutters for miniature models, though basics suffice for most.
Basic Snow Slide Construction Guide
Begin with a simple mound slide—ideal for beginners and small spaces. Aim for 5-8 feet high and 6-10 feet long.
- Select and Prep Site: Choose a flat, open yard area away from trees, fences, or roads. Clear debris; mark boundaries with stakes.
- Pile the Core: Shovel snow into a central tower, reaching at least 5 feet. Use nearby drifts or shovel from paths for volume.
- Shape the Chute: Flatten the top platform. Carve a wide slope (3-4 feet across) down one side, raising edges 1-2 feet as barriers.
- Pack Firmly: Drag a flat shovel down the center repeatedly. Load a sled with snow and pull it along for compression. Test with light riders to spot dips.
- Add Access: Cut steps into the tower side or boost kids up. For longevity, mist with water before dusk—it freezes into ice for speed.
Daily watering maintains slickness, but avoid excess to prevent uncontrollable speeds. Expect 1-hour build time, yielding hours of play.
Advanced Designs: Curves, Ramps, and Luge Tracks
Elevate your slide with twists for Olympic flair. These demand more snow and time but deliver pro-level excitement.
Curved Ramp Techniques
For banking turns, clear a test path first with an unloaded sled. Pile snow along a planned curve, leaving space for walls. Tamp edges high (2-4 feet) using saucer sleds rubbed back-and-forth like sandpaper. A ‘service ramp’ beside the main path aids repairs and snow transport.
Test iteratively: Light users compact initially; adjust bumps before full crowds. Curves add thrill without needing hills.
Backyard Luge Mastery
Channel winter sports pros with a 100-300 foot track featuring 4-5 bends. Use a snowblower to mound snow at key points: start with a 6-foot ramp, then sculpt walls up to 7 feet.
Outline curves with saucers (4-foot diameter), packing by leaning and pushing. Kids in saucers provide ideal weight for firming. Optional icing on ramps boosts velocity. Stats for inspiration: 30-foot drop over 300 feet, 6-8 hour build.
Multi-Level Towers
Stack multiple chutes or add jumps. Reinforce with packed edges; integrate stairs or ladders for repeat climbs.
Safety Protocols for Thrilling Yet Secure Fun
Speed amplifies risks, so prioritize these rules:
- Supervise all runs; limit to one rider per slide.
- Mandatory helmets and padded clothing; no loose scarves.
- Check for ice buildup—melt excess with warm water if too slick.
- Evacuate if temperatures drop below freezing or wind picks up.
- End sessions before dusk; inspect for cracks daily.
Test every modification yourself first. According to the American Academy of Pediatrics, proper gear cuts sledding injuries by 50%, emphasizing helmets and supervision.
Custom Variations for All Ages
| Design | Best For | Build Time | Key Feature |
|---|---|---|---|
| Straight Chute | Toddlers | 1 hour | Simple, forgiving slope |
| Curved Luge | Kids 5+ | 4-6 hours | Banked turns for speed |
| Ramped Jump | Teens/Adults | 2-3 hours | Airtime element |
| Tower Stack | Families | 3-5 hours | Multiple lanes |
Scale by age: Shallow for little ones, steeper for daredevils. Incorporate themes like bobsled tracks using barrel-packed curves.
Maintenance and Longevity Tips
A well-kept slide lasts weeks. Re-pack worn spots mornings; re-water evenings. Cover during thaws to prevent collapse. If melting accelerates, dismantle gradually to avoid yard ruts.
For indoor fun, scale down with foam and cotton snow for display mountains—great for holiday villages.
Winter Slide Alternatives and Enhancements
No snow? Build wooden ski sleds from old skis: Pair runners, add spacers and decks with screws/nails for DIY toboggans. Enhance slides with lights for night runs or music for atmosphere.
Frequently Asked Questions
How much snow do I need for a giant slide?
Aim for several cubic yards; shovel from driveways or wait for fresh falls. A 5x5x5 foot mound yields a solid 8-foot slide.
Is watering safe for kids?
Yes, lightly—creates firm ice without full slipperiness. Monitor and dilute if too fast.
Can I build on a slope?
Yes, but reinforce uphill sides extra; natural grade aids length.
What if my yard is tiny?
Vertical towers maximize space; 4×6 feet fits basic chutes.
How to dismantle safely?
Melt gradually or shovel away in layers to protect grass.
References
- How to Build a Giant ‘Snow Slide’ With Your Kids — Fatherly. 2023. https://www.fatherly.com/entertainment/how-to-build-giant-snow-slide-winter
- Build a ski sled — Backwoods Home Magazine. 2022-01-15. https://www.backwoodshome.com/build-a-ski-sled/
- How to Build a Backyard Luge — Popular Mechanics. 2024-11-20. https://www.popularmechanics.com/adventure/sports/a6401/how-to-build-your-own-backyard-luge/
- How to build Christmas Village Ski Mountain — YouTube (Hot Wire Foam Factory). 2023-12-10. https://www.youtube.com/watch?v=AQOVCuccmcU
- Making a Curved Snow Ramp — Instructables. 2022-02-05. https://www.instructables.com/Making-a-curved-snow-ramp/