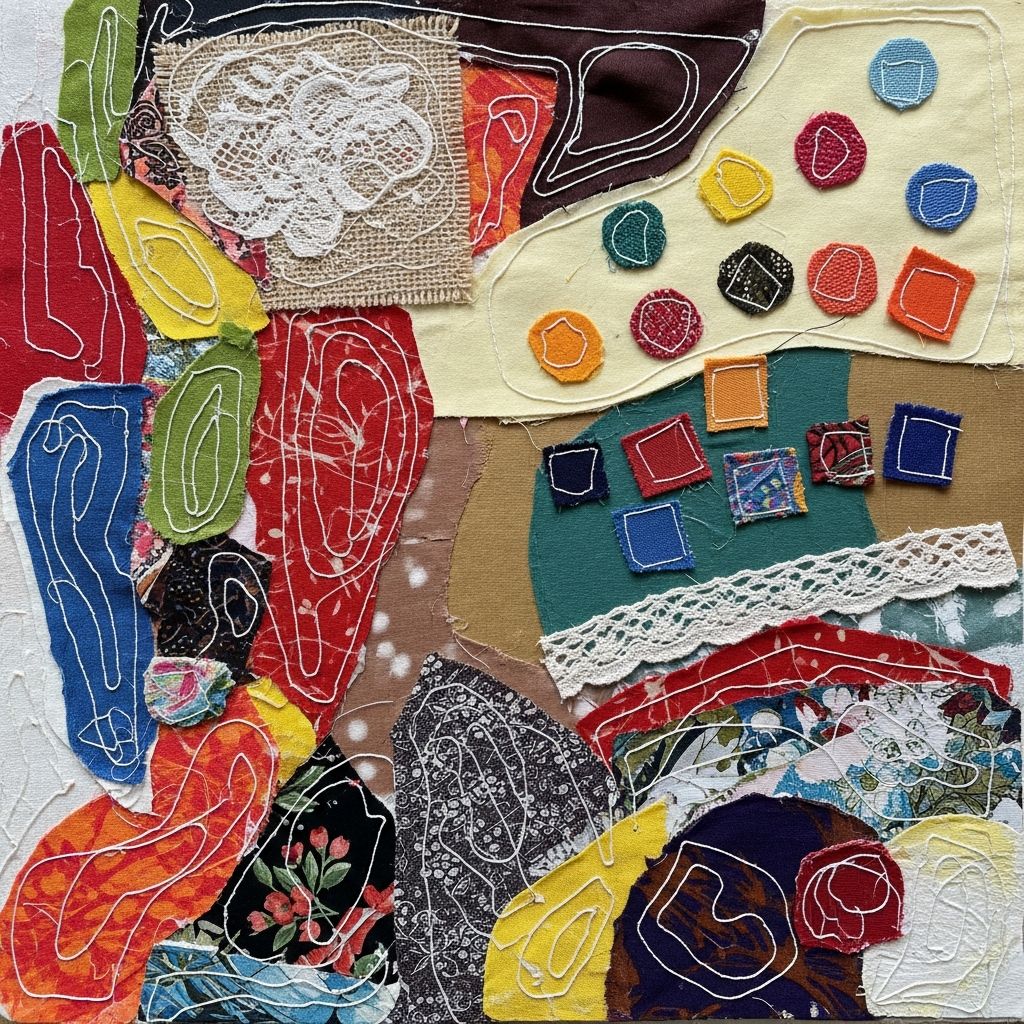
Fabric collage is a relaxed, playful way to turn leftover textiles into colorful art without ever threading a needle. Instead of sewing, you use glue to layer fabric shapes on a sturdy surface, building pictures, patterns, or abstract designs that can be finished in a single afternoon.
This guide walks you through a fresh, beginner-friendly approach to fabric collage, with tips for adults, ideas for crafting with kids, and simple ways to show off your finished pieces at home.
Why Fabric Collage Is Perfect for Beginners
Many people are curious about fabric crafts but feel intimidated by sewing machines, patterns, and technical jargon. Fabric collage removes those barriers and lets you jump straight into playing with color, texture, and composition using only scissors and glue.
Because there is no precise measuring or stitching, fabric collage is forgiving. If you do not like a piece you placed, you can peel it up while the glue is still wet, cover it with another scrap, or rework the design without ruining the project.
- No special skills are required; if you can use scissors and a glue bottle, you can collage.
- Short sessions work well, making this ideal for quick weekend projects or after-school activities.
- Most materials can be upcycled from what you already own, keeping costs and waste low.
Gathering Your Supplies
You do not need a dedicated sewing space or expensive tools for this craft. A cleared table, some scraps of fabric, and basic craft glue are enough to get started, and you can build from there only if you choose.
The checklist below outlines typical materials that work well and notes optional upgrades you might enjoy once you fall in love with the process.
Basic Materials Checklist
- Base surface: Canvas board, heavy cardstock, a wooden panel, or recycled cardboard.
- Glue: White school glue, craft glue, or a strong glue stick that dries clear.
- Fabric scraps: Cotton quilting fabric, old shirts, pillowcases, or worn-out bed linens.
- Cutting tools: Fabric scissors, regular scissors, or child-safe scissors for young artists.
- Protective layer: Newspaper, a plastic tablecloth, or scrap paper to keep glue off your table.
Nice-to-Have Extras
- Markers or crayons to sketch your layout before gluing.
- A small brush to spread glue smoothly under and over fabric pieces.
- Buttons, ribbons, lace trims, or bits of felt for added texture.
- Clear sealer or decoupage medium to protect finished artwork.
| Base Material | Best For | Pros | Considerations |
|---|---|---|---|
| Stretched canvas | Wall art and gifts | Ready to hang, sturdy, professional look | Costs more than paper or cardboard |
| Canvas board | Practice pieces and kid projects | Flat, easy to store, holds glue well | Edges may need tape or a frame to finish |
| Heavy cardstock | Cards and small collages | Inexpensive, cuts easily to size | Can warp with excessive glue or large pieces |
| Recycled cardboard | Eco-friendly experiments | Free, accessible, great for testing ideas | May show texture or bends under heavy layers |
Preparing Your Fabric Scraps
One of the joys of fabric collage is seeing familiar textiles in a new light. An old shirt can become a sky; a striped dish towel can turn into a field; a floral pillowcase can transform into a garden.
Before gluing, a few minutes of preparation will make your scraps easier to work with and help your final piece look more intentional and polished.
Simple Prep Steps
- Wash and dry fabrics: Quickly launder anything that is visibly dusty or stained, then let it dry completely.
- Press if needed: Light ironing removes deep creases, making it easier to glue fabric flat.
- Trim edges: Cut away bulky seams, zippers, and thick hems so only flexible fabric remains.
- Pre-cut shapes: Create a small pile of circles, squares, strips, and organic shapes in a variety of colors.
Having a bowl of pre-cut pieces nearby turns the actual collaging step into a relaxed, intuitive process rather than a constant stop-and-start of cutting and arranging.
Designing Your Fabric Collage Layout
Some people like to dive in and place pieces spontaneously, while others prefer to sketch a loose plan before adding glue. There is no right way, but thinking for a moment about color and composition can make your finished collage more striking.
You can work with recognizable imagery such as houses, animals, or landscapes, or stay entirely abstract with stripes, blocks, and overlapping shapes.
Easy Theme Ideas
- Patchwork meadow: Greens, yellows, and floral prints arranged to look like rolling hills or gardens.
- City skyline: Rectangles and tall strips forming buildings against a sky-colored background.
- Ocean waves: Blues and turquoises layered in curves to suggest moving water.
- Color study: One hue in many patterns and shades, arranged from light to dark.
- Story scene: A simple house, tree, sun, and path that children can help design.
Basic Composition Tips
- Choose one main focus area rather than filling every inch with equally busy patterns.
- Balance busy prints with solid or low-contrast fabrics so the eye has places to rest.
- Consider overlapping a few pieces to create depth instead of placing everything side by side.
Step-by-Step: Gluing the Collage
Once your base, glue, and fabric scraps are ready, the real fun begins. Work slowly at first until you understand how your glue behaves; then, as you gain confidence, you can move more quickly and intuitively.
Remember that fabric absorbs glue, so a little goes a long way. Too much adhesive can soak through and stiffen the fabric more than necessary, or cause lumps under later layers.
Gluing Process
- Prepare your surface: Lay down protective paper and place your base in the center.
- Test a small piece: Glue one fabric scrap to a corner of the base to see how quickly it sets and how much glue you need.
- Apply glue in sections: Spread a thin layer of glue on part of the base or on the back of a fabric piece, not across the entire surface at once.
- Place and smooth: Press each piece gently with your fingertips or a clean, dry cloth to smooth out bubbles and wrinkles.
- Layer and overlap: Add new pieces that tuck under or overlap existing ones, building depth and covering any gaps.
- Topcoat if desired: When the collage is nearly dry, brush a light layer of glue or sealer over the surface for a unified finish.
Tips for Neat Results
- Work from background to foreground, laying skies, water, or large shapes before adding smaller details.
- Keep a damp cloth or wipes nearby to quickly clean sticky fingers and prevent glue smudges.
- If edges lift while drying, press them back down with a bit of extra glue and a gentle weight, such as a book with wax paper in between.
Kid-Friendly Fabric Collage Ideas
Fabric collage is especially well-suited to children because it feels like painting with cloth and has no complicated rules. Adults can handle cutting and glue portions for very young kids, while older children can safely use child-appropriate scissors and low-mess glue sticks.
Setting up a small, repeatable process turns this into a reliable go-to activity for rainy days, playdates, or classroom art sessions.
Making It Safe and Fun
- Offer blunt-tip scissors and non-toxic glue in squeeze bottles or sticks.
- Pre-cut a pile of simple shapes—squares, hearts, circles—so kids can focus on arranging.
- Limit the color palette for very young children to avoid overwhelming choices.
- Use sturdy bases like cardboard that can withstand heavy glue use.
Simple Projects for Children
- Fabric greeting cards: Small scraps glued to folded cardstock to make birthday or thank-you cards.
- Name banners: Large letters cut from solid fabric, collaged onto a strip of cardboard or canvas.
- Shape collages: A page devoted to one shape—like stars or circles—using many patterns and colors.
Finishing and Displaying Your Art
Once your collage is dry, taking a few finishing steps will help it last longer and look more intentional when displayed. Even a very simple design can feel special when it is properly trimmed and framed.
Drying times vary depending on glue type and the thickness of your fabric, so check gently with a fingertip in an unused corner before handling the piece too much.
Finishing Touches
- Trim loose threads and excess fabric extending past the edges of your base.
- Add small details such as hand-drawn outlines, dots, or shapes with permanent markers once the glue is fully dry.
- Brush on a thin coat of clear sealer for extra durability, especially for pieces displayed in busy areas.
Display Ideas
- Frame flat collages in simple frames with or without glass, depending on the thickness of embellishments.
- Hang stretched canvases directly on the wall, or lean them on shelves for a casual look.
- Create a rotating gallery where new fabric collages replace older ones across the seasons.
Common Mistakes and Easy Fixes
Even with a relaxed project like this, small issues may appear, such as wrinkling, visible glue streaks, or designs that feel too busy. Fortunately, most problems can be corrected or disguised without starting over.
Understanding what typically goes wrong will help you adjust your approach and feel more confident experimenting.
| Issue | Likely Cause | Quick Fix |
|---|---|---|
| Fabric wrinkling heavily | Too much glue or uneven spreading | Use less glue, smooth gently from the center outward, and work in smaller sections. |
| Edges lifting | Insufficient glue near the edges | Add a bit more glue under the edge and press under a flat weight until dry. |
| Warped paper base | Thin paper paired with heavy glue or thick fabrics | Switch to sturdier bases like cardboard or canvas board, or use lighter fabric pieces. |
| Design looks cluttered | Too many busy prints with no neutral spaces | Introduce solid fabrics to calm the design, or cover some areas with quieter colors. |
Extending the Technique: Beyond Flat Collages
Once the basic process feels comfortable, you can adapt the same no-sew collage approach to different surfaces and projects. The only real limit is how securely your glue bonds to the chosen material.
Keep in mind that heavily used items, like bags or clothing, will experience wear and tear that simple glue may not withstand. These make better projects for decorative or occasional use unless you shift to sewing or fabric-specific adhesives.
- Decorate the cover of a sketchbook or journal with a fabric scene.
- Glue small collages onto wooden blocks for standing display pieces.
- Make simple wall pennants by collaging onto stiff felt and adding a dowel at the top.
- Create themed sets—such as four small seasonal landscapes—to hang as a group.
Frequently Asked Questions About Fabric Collage With Glue
Do I need special fabric glue?
For most beginner projects on paper, cardboard, or canvas, standard white school glue or craft glue works well. If you are collaging onto non-porous surfaces, check that your adhesive is rated to bond both fabric and the chosen material.
Will the fabric fray at the edges?
Some fabrics naturally fray, which can add charm and texture to your collage. If you prefer clean lines, cut with sharp scissors, use fabrics that fray less (like tightly woven cotton), or apply a thin layer of glue along edges to seal them.
How long does a collage take to dry?
Drying time depends on glue thickness, humidity, and how many layers you build, but most flat collages will feel dry to the touch within a few hours. Waiting overnight before framing or sealing is a safe habit.
Can I wash a glued fabric collage?
Glued collages are best treated as artwork rather than washable textiles. Avoid submerging them in water; instead, dust them gently and protect them from prolonged moisture.
Is this a suitable project for very young children?
Yes, with supervision and age-appropriate materials. Adults can handle cutting while toddlers or preschoolers choose colors and press pre-cut pieces into place with low-mess glue sticks.
Start Creating With What You Have
No-sew fabric collage invites you to treat ordinary scraps as art supplies, explore color and shape in a free-form way, and enjoy the satisfaction of finishing a project quickly. Whether you craft solo or with children, your first collage can lead to many more experiments and a new appreciation for the textiles already in your home.
Gather a handful of fabric pieces, choose a simple base, and let your imagination guide the glue—your next favorite artwork may be made from the cloth you almost threw away.