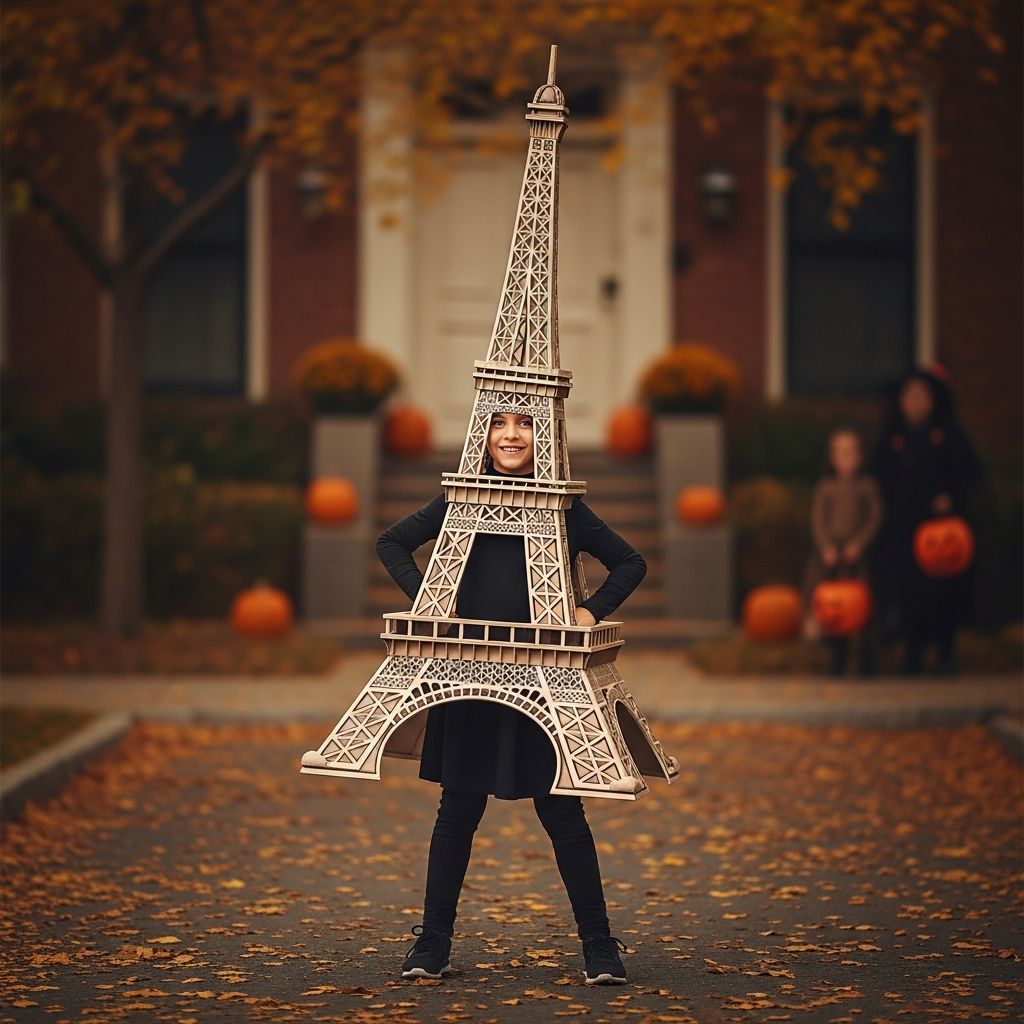
Some Halloween costumes are cute, and some are unforgettable. A towering landmark costume inspired by an iconic observation tower or city skyline easily falls into the second category. Imagine your child walking down the street as a glowing structure, windows twinkling, rising high above a sea of pumpkins and superheroes. This guide shows you how to design and build a tall, dramatic costume using simple materials like cardboard, paint, and a bit of imagination.
This article does not copy any particular tutorial or pattern. Instead, it offers an original blueprint for creating your own unique tower costume that can resemble any famous structure you like—or an imaginary one straight from your child’s mind.
Why Choose a Landmark Costume?
A landmark costume is the perfect blend of art project and dress-up. It lets kids embody a place rather than a character, which can spark conversations and curious questions from friends and neighbors.
- Educational value: Kids learn about architecture, cities, and engineering while helping design their costume.
- High impact, low cost: Cardboard and craft supplies are inexpensive but can produce a show-stopping effect.
- Customizable: You can model the costume after a famous tower, your hometown skyline, or a completely invented futuristic structure.
- Photo-worthy: The dramatic height and shape make for memorable photos you will treasure long after Halloween.
Planning Your Tower Costume Design
Before touching the scissors, spend a few minutes planning the overall look. Decide whether you want a single tower, a cluster of buildings, or a combination of a tall hat and a simpler body piece.
Involve your child in this stage. Ask what kind of building they imagine: sleek and futuristic, retro and rounded, or something whimsical with fun colors and unusual shapes. Sketch a quick front and side view so you both share the same mental picture.
Key Design Decisions
- Height: Aim for something that looks tall but is still practical. A costume that extends 12–18 inches above your child’s head usually looks impressive without becoming unmanageable.
- Width: Make sure your child can walk through doors and sit down in the car. Leave space under the structure for arm movement and candy collection.
- Movement: Decide whether the costume slips on like a sandwich board, straps over shoulders, or is mostly a hat with a simpler body.
Materials and Tools Checklist
You can adapt this list to what you already have at home. The goal is to keep the costume lightweight, sturdy, and safe for an evening of walking.
- Large cardboard sheets or foam board
- Utility knife or craft knife (for adults only)
- Scissors for trimming details
- White or metallic spray paint (or brush-on acrylic paint)
- Colored paper or adhesive vinyl for windows and details
- Strong tape (duct tape or packing tape) for structure and straps
- White glue or hot glue gun (used only by adults)
- Elastic cord, ribbon, or yarn for shoulder straps or chin ties
- Battery-powered tea lights, fairy lights, or a glow stick for the “spire”
- Comfortable base outfit (leggings, long-sleeved shirt, or leotard)
Creating the Tower Body
The body of the costume provides the main vertical shape. Think of it as a wearable column that surrounds your child’s torso while leaving arms and legs free. A simple rectangular body keeps construction quick and sturdy.
Step-by-Step Body Construction
- Measure your child: Measure from shoulder to just above the knees for the costume height. Measure around the chest and add a few inches for comfort.
- Cut the panels: From cardboard, cut two rectangles for the front and back using your measurements. Add side strips if you want a fully enclosed tower.
- Create the neck opening: For a sandwich-board style, leave the top of each rectangle intact. For a box style, cut a semi-circle or U-shape at the top front and back to avoid rubbing on the neck.
- Attach shoulders: Use wide strips of tape or glued straps between the front and back pieces at the shoulder line. Test the length on your child so the costume hangs comfortably.
- Secure the sides: Tape or glue side panels or short straps under the arms to keep the costume from swinging too far forward or back.
Perform a movement check. Have your child walk, sit, and reach for an imaginary doorbell. Adjust panel length or strap placement if the cardboard restricts motion or bumps the back of the knees.
Decorating the Building Body
Decoration is where the magic happens. A simple cardboard rectangle becomes an impressive skyscraper once you add windows, panels, and light details. Work in layers: base color first, then lines, then accents.
Basic Painting and Window Layout
- Prime the surface: Paint the entire body with a base coat. White, silver, pale blue, or gray all make good “concrete and glass” backgrounds.
- Sketch window grids: Lightly draw horizontal and vertical lines to represent rows of windows. Don’t worry about perfect symmetry; a bit of variation makes it feel more handmade and charming.
- Add windows: Glue on small rectangles of dark paper or use paint to create windows. Vary some of them in color (golden, pale blue) to look like lights turned on in different rooms.
- Create accent features: Add stripes, observation decks, balconies, or elevator shafts using strips of colored paper or metallic tape.
Designing the Dramatic Tower Hat
The headpiece is the showstopper. A tiered, circular or polygonal hat can mimic the top of a famous observation tower or a futuristic space station. The idea is to suggest height and structure without adding too much weight.
Stacked Shapes for Height
Instead of a simple flat top, construct several stacked layers that get smaller as they go up. This gives the illusion of height even if the actual hat isn’t very tall.
- Cut several rings or disks from cardboard in decreasing sizes.
- Glue them together with sturdy adhesive, aligning the center holes if you want a spire or glow stick to pass through.
- Round off edges or add small fins and beams to suggest architectural details.
Attaching the Hat Safely
Comfort and stability matter more than exact realism. A costume that constantly slides off will ruin the fun.
- Use a soft beanie or baseball cap as a base and glue the cardboard structure on top.
- Add an adjustable chin strap using elastic cord or ribbon if needed.
- Keep the hat light: if it feels heavy in your hands, remove a layer or switch to foam instead of cardboard.
Adding a Glowing Spire or Beacon
Many towers feature a spire or antenna at the top. You can recreate this effect safely with battery-powered lights. It not only looks impressive but also makes your child more visible in the dark.
- Insert a glow stick or LED tea light into a small cardboard tube at the top of the hat.
- Use fairy lights to outline the hat rim or run down the sides of the building.
- Secure battery packs on the inside of the body piece, away from skin, and accessible for turning on and off.
Comfort and Safety Considerations
DIY costumes should be as safe as they are fun. Keep a checklist in mind as you build and decorate to avoid common issues like tripping hazards, sharp edges, and overheating.
Safety Checklist
- Round off or tape over any sharp corners of cardboard.
- Ensure the costume does not block your child’s vision from the sides or below.
- Choose non-toxic paints and glues appropriate for children.
- Leave enough space under the costume for warm layers if Halloween night is chilly.
- Test walking up and down steps before heading out to trick-or-treat.
Suggested Dimensions by Age
Use the table below as a starting point for sizing your tower costume. Always adjust based on your child’s actual height and comfort.
| Age Range | Approx. Tower Body Height | Approx. Tower Width | Hat Height Above Head |
|---|---|---|---|
| 4–6 years | 18–22 inches | 12–14 inches | 8–10 inches |
| 7–9 years | 22–26 inches | 14–16 inches | 10–12 inches |
| 10–12 years | 26–30 inches | 16–18 inches | 12–14 inches |
Remember that these are guidelines, not rules. Try the structure on your child before final painting to fine-tune the size.
Outfit Ideas to Wear Underneath
The base outfit can either blend into the building or contrast with it. Choose something comfortable that keeps your child warm enough for outdoor activities.
- Monochrome base: A long-sleeved shirt and leggings that match the tower color help the structure look seamless.
- Night-sky theme: Dark clothes with star or galaxy prints make the tower appear to rise out of the night.
- City worker theme: Add a safety vest or mock ID badge so your child becomes both the landmark and its “official caretaker.”
Optional Embellishments for Extra Flair
Once the basic structure is complete, you can keep going with small details that make the costume feel even more special. These touches are optional but can turn a clever idea into a true showpiece.
- Attach miniature paper cars or buses near the base to suggest a busy city street.
- Hang tiny paper flags or banners from the observation deck area.
- Use metallic markers to draw tiny railings, stairs, or antenna details.
- Add a small sign on the back with your tower’s “name” and height for fun.
Time and Budget Overview
Every family’s craft style is different. Some people love to spend hours perfecting details, while others want a weekend-friendly project that looks good enough without a huge time investment. The table below offers rough estimates.
| Project Style | Approx. Time | Approx. Cost (USD) | Complexity |
|---|---|---|---|
| Quick & Simple | 2–3 hours | $10–$20 | Low (minimal detail, basic shape) |
| Detailed Tower | 4–6 hours | $20–$35 | Medium (windows, lights, hat tiers) |
| Showpiece Landmark | 6–10 hours | $35–$60 | High (lighting, intricate details, multiple buildings) |
Making It a Family Project
Transforming cardboard into a skyscraper is more fun with helpers. Older kids can take on more complex tasks, while younger kids handle safer, simple steps.
- Invite children to design window shapes, color schemes, and tower names.
- Assign age-appropriate tasks such as tracing shapes, gluing windows, or applying stickers.
- Play city-themed music or documentaries in the background for extra atmosphere while you work.
Frequently Asked Questions (FAQ)
How early should we start the costume?
Starting about two weeks before Halloween gives you plenty of time to gather materials, build, paint, and make last-minute adjustments. If you are aiming for a very detailed tower, consider beginning even earlier so you can work in short, relaxed sessions.
Can this idea be adapted for adults?
Yes, the same principles work for adults. Increase the measurements, use a slightly sturdier cardboard or foam board, and pay extra attention to shoulder comfort and weight distribution. Adults may want more open sides or arm cutouts for easier movement at parties.
What if it rains on Halloween night?
Light rain is usually fine if you seal the costume with a clear, water-resistant spray or use foam board instead of plain cardboard. For heavy rain, consider keeping the elaborate hat and simplifying the body to a shorter structure or just a decorated poncho to protect your work.
Is it safe to use hot glue and spray paint?
Hot glue and spray paint should only be handled by adults in a well-ventilated area or outdoors. Children can help with decorating after the glued pieces are cool and the paint is completely dry. Always follow the instructions provided by the product manufacturers.
How can we store the costume after Halloween?
If you want to keep the costume for dress-up play or memories, store it in a dry place, away from heavy objects that could crush it. Some families cut a side seam so the costume can be folded flat, then re-taped if they want to use it again next year.
What if my child changes their mind about the theme?
Try to keep the base structure neutral so it can be repurposed. A generic tower can become a space station, a castle, or even a giant robot with some new decorations and a different hat. Remind your child that buildings can transform too—just like their imagination.
Bringing Your Tower to Life
A kid-sized landmark costume is more than just cardboard and paint. It is an excuse to slow down, create something together, and watch your child experience Halloween from a whole new perspective—literally towering over the crowd. With simple materials, a bit of planning, and a playful approach to design, you can build a structure that glows, dazzles, and makes your young architect beam with pride.
Whether your final creation resembles a world-famous tower or a fantastic building that exists only in your family’s imagination, the real reward is the shared project itself. Every cut, brushstroke, and glued window adds another story to the memory of this Halloween.