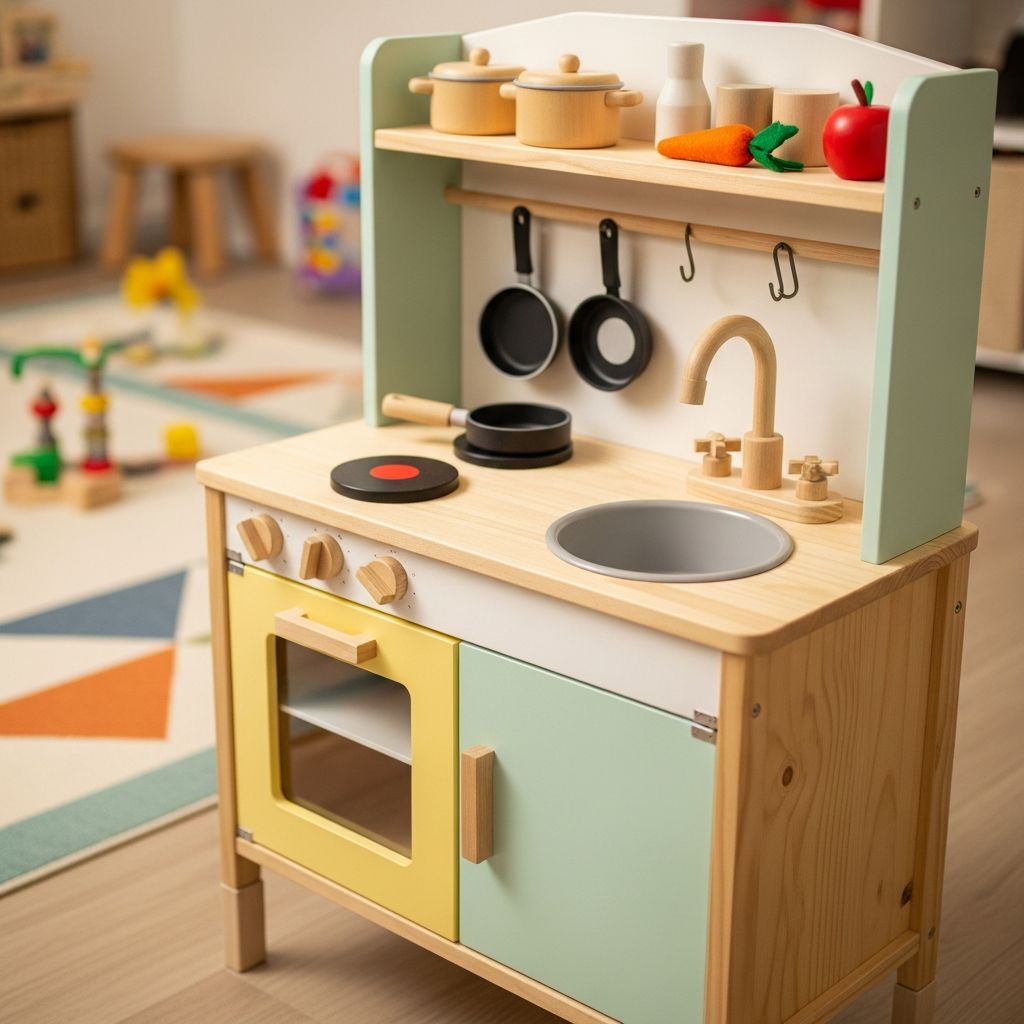
Pretend cooking is one of the easiest ways to invite your toddler into imaginative play, and a homemade play kitchen can become the centerpiece of that world. Instead of buying a ready-made plastic set, you can transform everyday furniture and a few simple materials into a personalized kitchen that fits your home and your child’s personality.
Why Build Your Own Play Kitchen?
A DIY play kitchen lets you control the size, materials, colors, and features so they match your space and your child’s developmental stage. You can emphasize durability and safety while also creating a unique piece that feels like it belongs in your home, not just in a playroom.
Building it yourself also gives you a chance to reuse old furniture, reduce waste, and involve your child in small decisions like colors and knobs. The project can be as simple or as elaborate as you wish, but even a basic setup can inspire hours of pretend meals, tea parties, and restaurant stories.
Planning the Perfect Mini Kitchen
Before you pick up a saw or paintbrush, spend a little time planning what will work best for your child and your home. Good planning prevents frustration and makes the build smoother and more enjoyable.
Think through the following questions as you sketch or list your ideas. You do not need advanced drawing skills; a simple pencil sketch can help you visualize the layout and overall proportions.
Decide on Size and Location
The dimensions of your play kitchen should match both your child’s height and the space where it will live. A countertop that’s too tall can discourage use, while something very low may be quickly outgrown.
- Measure from the floor to your toddler’s elbow and use that as a rough guide for counter height.
- Choose a spot where you can supervise but still let your child play independently, such as near the real kitchen or in a family room.
- Consider floor type; a hard, flat surface keeps the unit stable, while thick carpet may require extra bracing.
Choose Core Features
Decide which elements matter most: a stove, oven, sink, fridge, or simple worktop. Trying to include everything can make the project more complicated than it needs to be, especially for a first build.
- Must-haves for many families: a pretend cooktop, a “sink” for washing, and a small storage cabinet.
- Nice-to-have extras: an oven with window, a fridge compartment, open shelves for dishes, or a pretend microwave.
- Leave room to add features later as your child grows, such as hooks, more shelves, or a chalkboard menu.
Great Bases for a DIY Play Kitchen
One of the easiest ways to build a play kitchen is to start with an existing piece of furniture. This approach keeps costs down and saves you from having to build a structure from scratch.
Look around your home, or browse thrift stores, neighborhood marketplaces, and garage sales to find a sturdy base you can modify.
Common Furniture to Repurpose
- Small wooden nightstand: Works well as a compact sink-and-stove combo with storage below.
- Low bookcase or cube shelf: Offers plenty of open shelving for “oven” and “fridge” sections.
- Old TV stand: Often includes doors and shelves that convert nicely into an oven and cabinet.
- Sideboard or console table: Ideal for families who want a wider kitchen with multiple work zones.
What to Check Before You Buy or Reuse
Not every piece is worth transforming. Make sure the base will be safe and durable for busy toddler play.
- Inspect for wobbling, cracks, or soft, damaged wood.
- Avoid furniture with peeling paint or unknown finishes, especially if it may be very old.
- Check that drawers and doors operate smoothly and can be secured or limited if needed.
Materials and Tools You’ll Likely Need
Your final supply list depends on the design you choose, but a core set of materials and tools shows up in most DIY play kitchen builds. Focus on child-safe, sturdy materials that can handle being bumped, climbed on, and used daily.
| Category | Examples |
|---|---|
| Structure | Old nightstand or shelf, scrap plywood, brackets, wood screws |
| Finishes | Primer, non-toxic paint, clear water-based topcoat |
| Sink & Stove | Metal or plastic bowl, adhesive, wooden circles for burners, round knobs |
| Details | Cabinet pulls, hooks, small towel bar, play faucet or repurposed handle |
| Tools | Screwdriver, drill, sandpaper, saw (if cutting openings), measuring tape |
If you do not own cutting tools, consider designs that only require drilling holes for knobs and using existing openings for storage. You can still create a delightful kitchen by focusing on paint, hardware, and accessories.
Step-by-Step: Transforming Furniture into a Play Kitchen
The process below assumes you are working with a small cabinet or nightstand, but the same concepts apply to most furniture bases. Adapt each step to your specific piece and comfort level with tools.
1. Prepare and Sand the Base
Begin by removing all hardware, such as handles, knobs, and hinges. Take out drawers if you plan to convert them into doors or fixed shelves so you can work more easily.
- Clean the surface with mild soap and water, then let it dry completely.
- Lightly sand all surfaces to help the new paint adhere and to smooth any rough edges.
- Fill large holes or deep scratches with wood filler if needed, then sand again.
2. Cut Openings for the Sink and Oven (Optional)
If your design includes an inset sink or an oven window, mark those areas clearly before cutting. Always prioritize safety and stay within your comfort zone; complex cuts are optional.
- Trace the outline of your bowl on the “countertop” to mark the sink opening, then cut slightly inside the line.
- For an oven window, outline a rectangle on the door and cut out the center, saving the piece if you want to repurpose it as a shelf.
- Sand cut edges thoroughly so there are no splinters or sharp corners.
3. Prime and Paint
Primer helps paint stick and gives you an even base color. Choose low-VOC, child-friendly paints and allow each coat to dry fully according to the manufacturer’s instructions.
- Apply one coat of primer and let it dry completely.
- Follow with one or two coats of your chosen color, using a small roller for large surfaces and a brush for corners.
- Seal with a clear, water-based topcoat if you want extra durability and easier cleaning.
4. Install the Sink and Faucet
Once the paint is dry, you can secure the sink. A metal mixing bowl or sturdy plastic bowl makes a perfect, easy-to-clean basin.
- Test-fit the bowl; it should rest on the rim without falling through.
- Use strong adhesive or small brackets from underneath to hold the bowl in place.
- Create a faucet from a salvaged plumbing fixture, a curved cabinet pull, or a purpose-made toy faucet, and attach it securely.
5. Add Burners, Knobs, and Doors
These small details are what make the kitchen feel real to your child. They also encourage fine-motor practice as little hands twist, turn, and open.
- Cut or buy round wooden discs and paint them as stove burners; glue them in place on the countertop.
- Attach round knobs in a row to suggest burner controls; make sure they are firmly tightened.
- Reinstall doors and add new handles or pulls that are easy for a toddler to grasp.
6. Create Storage and Shelves
Good storage keeps pretend food, dishes, and utensils accessible but contained. A few small organizational touches can make cleanup part of the play routine.
- Use the lower area as a “cabinet” or “oven,” adding a shelf inside if there is enough height.
- Mount a narrow board or ready-made shelf higher up as an open shelf for cups and spices.
- Add adhesive hooks or a rail on the side to hang play utensils, towels, or oven mitts.
Safety Checklist for Toddler Play
Because toddlers explore with their whole bodies, every part of the kitchen should be checked carefully. A few minutes of safety review can prevent avoidable bumps, pinches, and tip-overs.
- Run your hand along all edges to ensure nothing feels sharp or splintered.
- Secure the kitchen to the wall with anti-tip brackets if it is tall or top-heavy.
- Use only non-toxic finishes and avoid small detachable parts that could pose a choking risk.
- Check all screws and bolts periodically; tighten anything that becomes loose over time.
Styling Ideas and Simple Upgrades
Once the basic structure is complete, you can personalize the kitchen to match your child’s interests and your decorating style. This is where color, texture, and small accessories come together to tell a story.
Color and Theme Inspiration
- Modern neutral: Whites, grays, and light wood tones for a minimalist look that blends with grown-up furniture.
- Café or bakery: Soft pastels, striped towels, and a small sign to suggest pastries, smoothies, or coffee.
- Farmhouse: Warm neutrals, faux “tile” backsplash drawn or stenciled on, and metal hooks for utensils.
Accessories That Boost Imagination
Accessories can be a mix of store-bought play food and safe real items from your own kitchen. Children enjoy recognizing real objects in their pretend world.
- Lightweight pots, pans, wooden spoons, and small colanders.
- Recycled food containers (thoroughly cleaned) with labels removed or simplified.
- Child-sized aprons, washable oven mitts, and a small dish towel on a bar.
- A clip-on or wall-mounted chalkboard for daily “specials” or scribbles.
Encouraging Rich Pretend Play
The kitchen itself is only the stage; your toddler’s imagination provides the story. A few gentle prompts can expand how your child uses the space, while still letting them lead the play.
- Invite your child to “cook” a meal that matches what your family is really eating that day.
- Set up a pretend restaurant, food truck, or juice bar and take turns being chef and customer.
- Use the kitchen to practice simple life skills like setting the table, washing dishes, or sorting foods by color or category.
Frequently Asked Questions About DIY Play Kitchens
How long does a project like this usually take?
Most families can complete a basic play kitchen over a weekend, especially if the furniture base is already in good condition. The longest part is often waiting for paint and finishes to dry between coats.
Is it cheaper to build a play kitchen than to buy one?
Costs vary widely, but repurposing furniture you already own or find secondhand can keep expenses relatively low. You will mostly invest in paint, hardware, and a few accessories, which can still be more affordable than many high-quality store-bought sets.
What age is this type of play kitchen best for?
Most toddlers begin to enjoy simple pretend cooking around 18–24 months and may keep using the kitchen for several years. Designing a sturdy, slightly taller piece can allow your child to grow into it rather than outgrowing it too quickly.
How can I make the kitchen easy to move or store?
If you need flexibility, choose a narrow base that can slide against a wall or into a closet when not in use. Adding furniture sliders under the legs can make it easier to reposition the kitchen without scratching floors.
Can I build a play kitchen without power tools?
Yes, especially if you select a base that already has the openings and compartments you want. With hand tools, adhesive, and clever use of existing features, you can still create a charming and functional setup.
Bringing It All Together
A DIY toddler play kitchen is more than a piece of furniture; it is an invitation for your child to explore independence, creativity, and everyday routines in a safe way. By reimagining a simple cabinet or shelf, choosing child-friendly finishes, and adding playful details, you create a miniature culinary world that reflects your family’s life.
The result is a lasting, personal toy that encourages pretend play, language, and social skills every time your toddler stirs an invisible soup or serves a make-believe snack. With a bit of planning and a few basic tools, your child’s new favorite “room” can come to life right in your living space.