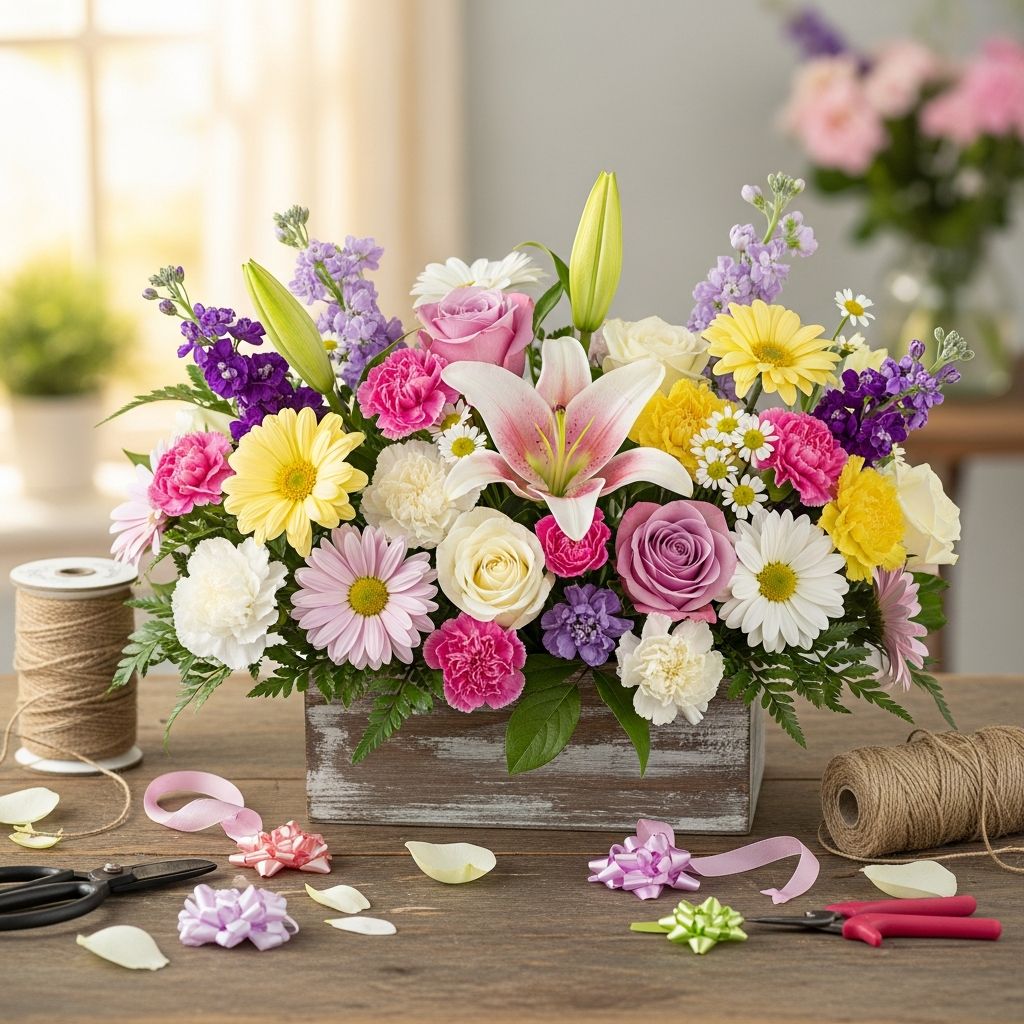
Few gifts feel as special as flowers that were arranged by hand with one person in mind. A DIY Mother’s Day flower arrangement is more than decor; it’s a message of appreciation, gratitude, and love, expressed in petals and color instead of ink.
This guide walks you through planning, styling, and assembling your own arrangements, even if you have never picked up a pair of floral shears before. You will learn how to choose blooms that suit your mom’s personality, assemble them artfully, and present them in creative ways she will remember long after the flowers have faded.
Why Handmade Arrangements Feel Extra Special
Store-bought bouquets are convenient, but they often feel generic. When you design a Mother’s Day arrangement yourself, every stem and ribbon shows that you took the time to think about what she loves. That thoughtfulness is often what makes the gift unforgettable.
Homemade arrangements can also be surprisingly cost-effective. By focusing on seasonal flowers, simple tools, and repurposed containers, you can design something that looks boutique-worthy without a florist’s price tag.
Planning Your Floral Gift
Before you buy a single stem, take a few minutes to plan. Thinking ahead will help the finished arrangement look intentional instead of random and will make the process more relaxing and fun.
- Consider whether your mom prefers bold and modern, soft and romantic, or rustic and natural styles.
- Decide on the size of your arrangement based on where she is likely to display it, such as the dining table, bedside, or desk.
- Set a budget, then work backward to choose flowers and containers that fit within it.
Matching Flowers to Her Personality
One of the easiest ways to make an arrangement feel personal is to let your mom’s personality guide your flower choices. Rather than grabbing a random mixed bunch, think about how she decorates, dresses, and spends her time.
| Personality Style | Suggested Blooms | Color Ideas |
|---|---|---|
| Classic and elegant | Roses, lilies, tulips, eucalyptus | Soft pinks, creams, white, blush |
| Creative and bold | Gerbera daisies, ranunculus, protea, snapdragons | Hot pink, orange, magenta, sunny yellow |
| Nature-loving and relaxed | Wildflowers, chamomile, daisies, greenery, herbs | Earth tones, soft blues, gentle yellows and greens |
| Minimal and modern | Calla lilies, anthurium, orchids, single-variety stems | White and green with one accent color |
If you know your mom’s favorite flower or color, let that be the star of the arrangement and build everything else around it. A simple design built from her favorite tones often feels more thoughtful than a complex bouquet of random colors.
Choosing the Right Flowers and Greenery
For a balanced arrangement, it helps to think in categories rather than individual stems. A typical design works well when it includes three main elements: a focal flower, supporting flowers, and filler greens.
- Focal flowers: The large or distinctive blooms that draw the eye first, such as roses, peonies, sunflowers, or lilies.
- Supporting flowers: Medium-sized stems that add texture, like spray roses, mums, alstroemeria, or snapdragons.
- Filler and greenery: Leaves and small blossoms that fill gaps and soften edges, such as eucalyptus, ferns, baby’s breath, or waxflower.
When shopping, inspect the stems closely. Choose flowers with firm, upright heads, strong color, and leaves that look fresh rather than droopy or yellowing. Buds that are just beginning to open will last longer and allow your arrangement to keep evolving after you gift it.
Color Palettes That Always Work
Color is what gives a Mother’s Day arrangement its mood. A few simple palettes are almost impossible to get wrong and can be adapted to whatever flowers are available at your grocery store or market.
- Soft pastels: Mix blush, cream, lavender, and pale yellow for a gentle, romantic look.
- Sunny brights: Combine orange, fuchsia, and golden yellow for an uplifting, cheerful bouquet.
- Monochrome magic: Choose a single color, such as pink or white, and play with different shades and flower types for a modern, cohesive feel.
- Green and white: Pair plenty of greenery with white blooms for a clean, spa-like aesthetic that suits almost any home.
If you worry about clashing combinations, keep your palette to two main colors plus greenery. That simple guideline makes it easier to improvise without your arrangement looking chaotic.
Containers: Vases, Jars, and Unexpected Vessels
The container can transform a simple collection of flowers into a memorable keepsake. You do not need fancy vases; everyday items often work beautifully and add character to the gift.
- Repurpose mason jars, teacups, pitchers, or small ceramic bowls for cute, informal arrangements.
- Use a clear glass vase when you want the stems and water to become part of the design, especially with long, elegant flowers.
- Wrap plain containers with burlap, lace, ribbon, or decorative paper to coordinate with your flower colors.
Whatever container you choose, make sure it is clean, watertight, and stable. Wide-mouthed vessels are easier for beginners because they give more room to adjust stems and build fullness.
Essential Tools and Simple Prep
You do not need professional tools to create a beautiful Mother’s Day arrangement, but a few simple items will make the process smoother and help your flowers last longer. Gather everything before you start so you can work efficiently.
- Sharp scissors or floral shears for clean cuts.
- A small knife, if needed, to remove tough leaves or thorns.
- Floral tape or regular clear tape to create a support grid on the vase opening.
- Clean water and, if available, a packet of floral preservative.
Before arranging, strip leaves from the portion of each stem that will sit below the waterline. Leaves left in the water break down quickly, clouding the water and shortening the life of the bouquet.
Step-by-Step: Building a Simple Table Arrangement
This basic method works for most medium-sized table arrangements and can be adapted with any combination of flowers and colors. Consider it a framework rather than a strict recipe.
- Prepare the container. Fill your vase or jar with cool, clean water and add floral preservative if you have it. If the opening is wide, place strips of tape across the top in a crisscross pattern to form a grid that will hold stems in place.
- Lay the foundation with greenery. Start by inserting greenery around the edges, angling stems outward slightly to create a loose dome shape. Add a few taller greens toward the center to define the height of your arrangement.
- Add focal flowers. Choose 3–7 main blooms, depending on the size of your vase. Trim the stems at an angle and place them at different heights within the greenery, turning the vase as you work so the bouquet looks good from all sides.
- Layer in supporting flowers. Fill in the spaces between focal blooms with your medium-sized flowers, keeping them slightly shorter than the focal stems. This builds depth and prevents gaps.
- Finish with filler and details. Tuck in small sprigs of filler flowers and additional greenery to soften any harsh lines and cover exposed mechanics or tape. Step back and adjust the balance as needed.
When you’re finished, the arrangement should feel full but not overcrowded. There should still be tiny pockets of space where air and light can move between blooms, helping them stay fresh.
Quick Gift Idea: Hand-Tied Bouquet
If your mom already owns vases she loves, consider giving her a hand-tied bouquet instead of a ready-made arrangement in a container. This option travels easily and allows her to design her own display at home.
- Lay your flowers and greenery out on a table, grouping similar stems together.
- Start with a few focal flowers in your hand, then gradually add supporting blooms and greenery around them, slightly rotating the bouquet after each addition to keep it rounded.
- Once you’re happy with the shape, secure the stems with twine, ribbon, or a rubber band, and trim the bottoms so they are even.
- Wrap the bouquet in tissue paper, kraft paper, or fabric, leaving the blooms visible at the top. Add a note or tag with a personal message.
Keep the stems in water until you’re ready to gift the bouquet, or include a small temporary water source, such as damp paper towels wrapped around the stem ends and covered in plastic.
Creative Themes for Mother’s Day Florals
A themed arrangement can make your flowers feel like part of a larger story or memory. Themes do not have to be complicated; they simply give you a direction when choosing colors and accents.
- Garden tea time: Arrange delicate flowers like spray roses and chamomile in teacups or creamers, and pair them with her favorite tea bags as part of the gift.
- Kitchen herb garden: Combine roses or daisies with potted herbs such as basil, mint, or rosemary in a rustic box or basket for moms who love to cook.
- Memory lane: Use flowers that remind her of a childhood garden, wedding bouquet, or favorite vacation spot, and tuck a small printed photo into the arrangement.
Small details like a vintage key tied to the vase, a meaningful charm on the ribbon, or a handwritten recipe card slipped under the flowers can tie your theme together beautifully.
Finishing Touches That Elevate Your Design
A few final touches can make a simple arrangement look polished and intentional. Focus on small, thoughtful details that appeal to your mom’s tastes and the style of her home.
- Add a ribbon or piece of fabric around the vase neck in a color that echoes one of the blooms.
- Slip a short, heartfelt note onto a wooden skewer or card holder and nestle it into the flowers.
- Place the arrangement on a coordinating tray or small cloth to create a mini vignette on her table or nightstand.
Remember that the personal message you include is as important as the arrangement itself. Even a few sincere lines explaining why you chose certain flowers can deepen the emotional impact of your gift.
Keeping Mother’s Day Flowers Fresh Longer
Part of the gift of a DIY arrangement is helping it last beyond a single day. By following a few simple care steps, you can give your mom flowers that stay vibrant for as long as possible.
- Explain that changing the water every day or two and recutting the stems slightly will help the flowers drink more easily.
- Encourage her to keep the arrangement away from direct sunlight, heat sources, and ripening fruit, all of which can shorten bloom life.
- Suggest removing any fading flowers promptly so the rest of the bouquet continues to look fresh and beautiful.
You can also leave a small printed “care card” with instructions next to the arrangement so she doesn’t have to remember the details.
Frequently Asked Questions About DIY Mother’s Day Arrangements
Do I need special florist tools?
No. A sharp pair of scissors, a clean container, and basic tape are enough for most simple arrangements. Specialty tools like floral foam or wire are optional and mainly useful for more complex designs.
How far in advance can I make the arrangement?
Most flower arrangements can be made one day before Mother’s Day and kept in a cool spot until gifting. If you need to prepare earlier, choose hardy flowers like mums, carnations, and certain roses that hold up well over several days with proper care.
What if I have a very small budget?
Focus on greenery and a few standout blooms rather than trying to fill the vase with expensive flowers. Grocery store bunches, backyard greenery, and repurposed containers can create a charming look without a large investment.
Can children help make the arrangements?
Yes, flower arranging can be a fun, supervised activity for kids. Let them choose colors, place stems, or wrap hand-tied bouquets while an adult handles sharp tools and trimming.
What if I’m not confident in my design skills?
Start small with a single-type arrangement, such as all tulips or all roses in one color. Simple, uniform bunches look chic and intentional, and they are very forgiving for beginners.
Making the Experience Part of the Gift
Finally, remember that the process of creating the arrangement can be part of the celebration itself. Consider inviting your mom to join you for a flower-arranging afternoon, complete with snacks, music, and conversation, and send her home with the bouquet you created together.
Whether you design something intricate or keep it very simple, the real beauty of a DIY Mother’s Day flower arrangement lies in the time, thought, and affection invested in every stem. The flowers will eventually fade, but the memory of your effort and care will stay with her much longer.