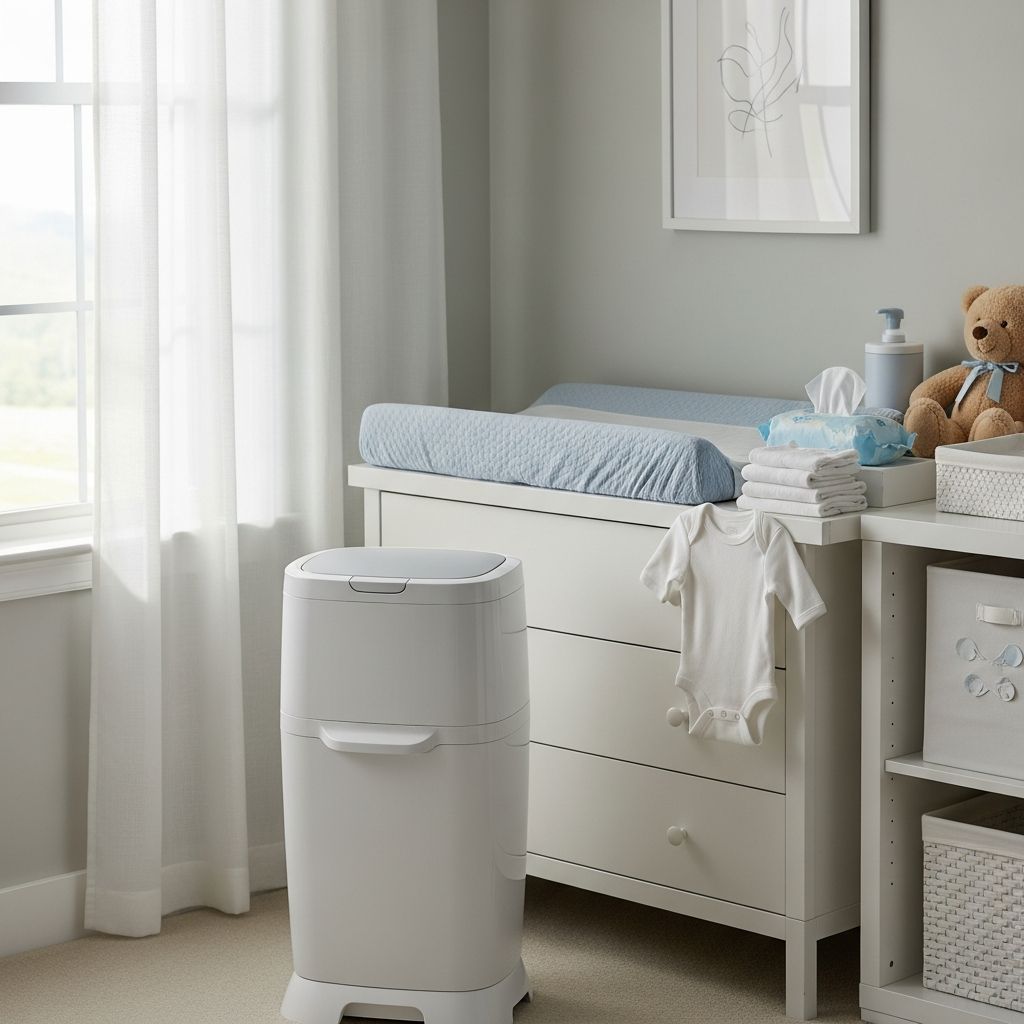
Dirty diapers are unavoidable, but a smelly nursery does not have to be part of the package. With a well-designed diaper pail and a few smart habits, parents can keep odors contained, simplify cleanup, and maintain a more pleasant, hygienic space for both baby and caregivers.
Why a Diaper Pail Matters More Than You Think
Many new parents assume a regular trash can will be enough, only to find that frequent diaper changes quickly overwhelm ordinary garbage bags. A diaper pail is designed specifically to trap odor, make disposal easy with one hand, and store multiple diapers between trips to the outside bin.
Over the course of the first few years, babies can use thousands of diapers, which means a dedicated system for disposal is not a luxury but a huge quality-of-life upgrade. Instead of planning your day around getting smelly trash out of the house, you can drop a diaper into the pail and return to caring for your child.
Key Benefits of Using a Dedicated Diaper Pail
Modern diaper pails, including popular models like the Diaper Genie Expressions, focus on odor control, convenience, and compact design. These features help you maintain a cleaner, calmer environment, even during growth spurts when diaper output seems never-ending.
- Odor containment: Specialized lids, clamps, and liners help keep smells sealed inside the pail instead of drifting through the nursery.
- Germ-conscious design: Multi-layer liners and antimicrobial films used in many systems can help reduce bacterial growth and limit exposure when you open the lid.
- Time-saving convenience: Being able to toss diapers into a nearby pail means fewer trips to the outdoor bin, especially during late-night changes.
- Space-efficient footprint: Most pails are tall and slim so they tuck beside a dresser or changing table without dominating the room.
- Versatile use: Some households later repurpose the pail for incontinence products or pet waste, extending its usefulness beyond the baby years.
Diaper Pail vs Regular Trash Can
It is tempting to try using a standard bathroom or kitchen bin for diapers, especially if you are working with a limited budget. However, there are clear differences in how diaper pails and ordinary trash cans manage odor, hygiene, and long-term costs.
| Feature | Diaper Pail | Regular Trash Can |
|---|---|---|
| Odor control | Engineered lid systems and specialty liners to trap smells. | Basic lid; odors escape more easily, especially when opened. |
| Bag system | Often uses multi-layer refill bags designed for dirty diapers. | Standard kitchen or bathroom trash bags. |
| Capacity use | Designed to hold many small, lightweight items like diapers efficiently. | May fill unevenly with diapers and other household trash. |
| Hygiene focus | Some models include antimicrobial film or mechanisms to minimize contact. | Not optimized for frequent contact with biological waste. |
| Long-term cost | Higher ongoing cost for proprietary refills but better odor control. | Lower bag cost but may require very frequent emptying due to smell. |
| Nursery friendliness | Compact design and neutral aesthetics to blend with baby decor. | May be bulky or visually out of place in a small nursery. |
What to Look For in a Diaper Pail
Not all diaper pails are built the same, and the right choice for one family might not fit another household. Consider how you will use the pail day to day and which features make diaper duty simpler in your specific space.
Odor-Blocking Mechanism
The most important feature is how the pail keeps smells inside once a diaper is dropped in. Many systems rely on a clamping mechanism or inner door that closes after you push the diaper through, while others use twisting liners or multi-layer bags to form a strong barrier.
- Look for pails with a dedicated odor-lock system rather than simply a tight lid.
- Check whether the liners are multi-layered or treated to reduce odor and bacterial growth.
- Think about how quickly the lid closes after you push a diaper through, especially in small rooms.
Ease of Use During Real-Life Diaper Changes
During diaper changes, you may be holding a wiggly baby, wipes, cream, and a dirty diaper all at once. A good diaper pail supports that reality by allowing one-handed operation and straightforward disposal steps.
- Decide whether you prefer a foot pedal, a push button, or lifting the lid manually.
- Consider how easy it is to drop in a diaper with one hand and no fuss.
- Review how the bag is removed and replaced; the process should be simple enough to do while tired.
Size, Capacity, and Placement
Your available floor space and diaper volume help determine the ideal size of your pail. A compact model can comfortably hold several days’ worth of newborn diapers but may need more frequent emptying as your child grows.
- Measure the space beside your changing area before purchasing to be sure the pail fits.
- Note how many diapers the pail can hold at a time; some models advertise approximate capacities, often around a few dozen newborn diapers.
- Check whether the lid clears shelves or wall art when opened.
Refill Costs and Compatibility
Many diaper pails, including popular designs, use proprietary refill cartridges. These liners are often key to odor control but do add an ongoing expense that should be factored into your decision.
- Compare the price per refill and estimate how long a cartridge lasts for your diapering pace.
- See whether the pail works only with one type of liner or if adaptable solutions exist.
- Make sure refills are easy to find locally or that you can order them on a schedule.
Style and Customization Options
A diaper pail will live in your nursery for years, so how it looks does matter. Some models keep a minimal white or neutral design, while others offer interchangeable outer sleeves or decorative covers to match your decor.
- Choose a neutral color if the pail might move between rooms over time.
- Consider fabric sleeves or decorative wraps if you enjoy swapping nursery themes or want the pail to blend more fully into the space.
Getting Started: Setting Up Your Diaper Pail
Once you bring a diaper pail home, a quick and careful setup ensures it works as intended from the first diaper change. Most systems require only a few simple steps to get ready for use.
- Unbox and inspect: Remove all packaging, confirm that the lid, inner clamp, and base are intact, and locate the instruction sheet.
- Install the refill liner: Insert the cartridge or bag according to the manufacturer’s directions, making sure the bag is pulled down evenly and tied at the bottom if required.
- Test the opening mechanism: Practice using the lid button, foot pedal, or top door several times so you can operate it confidently with one hand.
- Choose a permanent location: Place the pail within arm’s reach of your changing station but out of the main walking path to avoid bumps or tipping.
- Add optional odor protection: If you like, place a small deodorizing disc or baking soda packet in the base area, following safety guidelines.
Daily Use Tips for Busy Parents
Once set up, the diaper pail quickly becomes part of your routine. A few intentional habits can extend liner life, improve odor control, and keep the area around the pail tidy and safe.
- Roll diapers tightly before disposal to reduce trapped air and odor.
- For especially soiled diapers, consider a quick extra wrap in a small bag before dropping them in.
- Empty the pail before it is completely full to prevent overstuffing and tearing the liner.
- Wipe the exterior regularly to keep the surface clean, especially around buttons, pedals, or lid handles.
- Keep curious toddlers from opening the pail by placing it where they cannot climb onto it or by using any built-in child-resistant features.
Cleaning, Maintenance, and Hygiene
A diaper pail handles a lot of mess, so regular maintenance keeps it performing well. Fortunately, most pails are made from durable plastic that can be wiped with mild cleaners without rusting or holding stains easily.
Routine Cleaning Schedule
Incorporate pail cleaning into your general nursery maintenance. A quick wipe-down once or twice a week, plus a more thorough wash once a month, goes a long way toward keeping odors at bay.
- Use a gentle, baby-safe cleaner or diluted vinegar solution to wipe inside surfaces after you remove a full bag.
- Let the pail air dry fully before inserting a new liner to discourage lingering moisture and smells.
- Inspect hinges, clamps, or inner doors periodically to clear any trapped bits of diaper or liner.
Dealing With Persistent Odors
Even the best diaper pail can occasionally develop a stubborn smell, especially during hot weather or illness. Addressing the source and refreshing the pail thoroughly usually solves the problem.
- Remove the liner, wash the pail interior with warm, soapy water, then rinse and dry completely.
- Sprinkle a thin layer of baking soda in the bottom of the empty pail if approved by the manufacturer’s care instructions.
- Replace old or damaged liners promptly, as small tears can let odors escape.
Cost Considerations and Budget Planning
While the upfront price of a diaper pail is usually modest compared with other baby gear, ongoing refill purchases can add up. Thinking through your diapering approach, room layout, and tolerance for odor will help you decide how much to invest.
- Initial purchase: Many pails, including customizable models, are priced to be accessible for most new parents and often appear on baby registries.
- Refill frequency: How often you change liners will depend on your baby’s age, the number of children using the pail, and whether you choose to empty it early to reduce smell.
- Alternative uses: Repurposing the pail later for incontinence products or pet waste can make the purchase feel more economical over time.
- Registry strategy: Consider asking for both the pail and several refill packs as gifts so you start with a good supply.
Beyond the Nursery: Who Else Can Benefit?
Although diaper pails are marketed for infants, they serve a broader audience. Households managing adult incontinence or caring for elderly relatives may appreciate the same odor and hygiene benefits that parents enjoy.
- Older adults using disposable undergarments can discreetly dispose of them in a dedicated pail, reducing bathroom odors.
- Families with pets sometimes use a diaper pail to contain used training pads or other waste between trips outside.
- Having a compact, odor-controlling bin can make small bathrooms, guest rooms, or shared living spaces more comfortable.
Frequently Asked Questions About Diaper Pails
Do I really need a diaper pail, or is it optional?
A diaper pail is not an absolute necessity, but most families find that it significantly improves their day-to-day experience. If your nursery is far from your outdoor trash or you change diapers frequently at night, a pail near the changing station will save time and cut down on lingering smells.
How often should I empty the diaper pail?
There is no strict rule, but many parents empty the pail every few days, or sooner during periods of frequent changes. It is usually best to empty it before the bag is tightly packed to avoid tearing the liner and to keep odors from becoming too concentrated.
Are the proprietary refills worth the cost?
Proprietary liners are typically engineered with multiple layers and odor-controlling features, which can make them more effective than standard trash bags for this specific use. While they do represent an ongoing expense, they also help maintain a fresher nursery and reduce the need for constant trips to the outside bin.
Will a diaper pail make my nursery completely odor-free?
No system can guarantee a completely odor-free environment, especially during hot weather or illness. However, a good pail combined with regular emptying, cleaning, and sensible habits will drastically reduce unpleasant smells compared with an ordinary trash can.
Can I keep using the diaper pail after my child is potty trained?
Yes, many families continue to use diaper pails for other purposes. Common uses include disposing of pull-ups during nighttime training, managing adult incontinence products, and containing pet-related waste between trips to the outside trash.
Is it safe to keep a diaper pail in a small nursery?
As long as you follow the manufacturer’s guidelines, empty the pail regularly, and keep it out of reach of curious toddlers, it is safe to use in a small room. Properly sealed lids and liners are designed to contain odors and limit exposure to the contents.
What should I do if my diaper pail starts to smell even after I empty it?
If odors linger after you remove the full liner, give the pail a thorough cleaning with warm, soapy water and let it dry completely. You can then use a mild deodorizing strategy, such as a small baking soda pouch or a nursery-safe deodorizer, as long as it does not interfere with the pail’s mechanisms.
Making Diaper Duty More Bearable
Diaper changes will always be part of life with a baby, but the tools you choose can make a significant difference in how stressful or manageable that routine feels. A thoughtfully chosen diaper pail, used with consistent habits and gentle maintenance, turns a potentially unpleasant task into a quick, contained step in your day.
By planning ahead, investing in a system that fits your space and budget, and caring for it along the way, you create a fresher, more comfortable environment for your baby, yourself, and anyone else who spends time in your home.