Sidewalk chalk is one of the easiest ways to turn an ordinary driveway into a colorful celebration of the Fourth of July. With a few simple supplies and a bit of planning, families can cover their sidewalks with a galaxy of red, white, and blue stars that set the scene for barbecues, parades, and fireworks. This guide walks you through a completely original star-filled chalk project that is simple enough for kids yet impressive enough to wow the whole neighborhood.
Why Chalk Stars Make the Perfect Holiday Craft
Star designs are iconic for Independence Day and instantly call to mind flags, sparklers, and night skies, making them ideal for outdoor decor. Chalk stars require minimal setup, wash away easily with rain or a garden hose, and give kids a hands-on, creative way to help decorate for the holiday. Because the designs are temporary, there is no pressure for perfection, and families can refresh the art throughout the season.
Materials You Will Need
You can customize this project with whatever chalk colors you have, but patriotic shades bring out the holiday spirit best. Most of these supplies are inexpensive and easy to locate at general retailers or craft stores.
- Sidewalk chalk in red, white, and blue (plus optional accent colors like silver, gold, or yellow)
- Thick card stock, cereal box cardboard, or plastic folders for making star templates
- Scissors for cutting out star shapes
- Painter’s tape or low-tack masking tape to hold templates in place
- Rag, paper towels, or soft sponges for gentle blending
- Bucket of water and a cloth for quick clean-up of hands
- Kneeling pad or old towel for comfort while working on concrete
Planning Your Starry Sidewalk Layout
Before anyone starts drawing, it helps to think about how the finished design should look from the street or front door. Decide whether you want a scattered star field, a bold border leading up to the house, or a large patriotic mural as a focal point. Planning also gives kids a clear framework so they know where to place their stars and how much space they have to fill.
Design Ideas to Consider
- Star Pathway: Arrange stars in a line leading from the sidewalk to your front steps, gradually increasing the size of the stars as they move closer to the door.
- Flag-Inspired Corner: Reserve one area of the driveway for a star cluster that echoes the star field of a flag, with blue chalk as the background and white stars on top.
- Galaxy Scatter: Space stars randomly across the driveway so that, viewed from above, the surface resembles a patriotic night sky.
- Driveway Greeting: Surround a “Happy 4th” message with a ring of stars in alternating colors.
Creating Star Templates
Templates make it easy for kids of all ages to create crisp, recognizable star shapes. Reusable stencils also speed up the decorating process and keep designs consistent from one end of the driveway to the other.
Steps for Simple Star Stencils
- Draw stars of several sizes on card stock or thin cardboard. Aim for small (2–3 inches), medium (4–5 inches), and large (6–8 inches) options.
- Cut out each star carefully. For a traditional stencil, cut out the center and discard it, leaving the star-shaped opening. For a solid template, keep the star itself and discard the outer edge.
- Label the backs of the templates with the size or color you plan to use, if desired, so kids can quickly grab the right ones.
- Store finished templates in a resealable bag or envelope so you can reuse them for future holidays or chalk projects.
Step-by-Step: Chalk Star Application
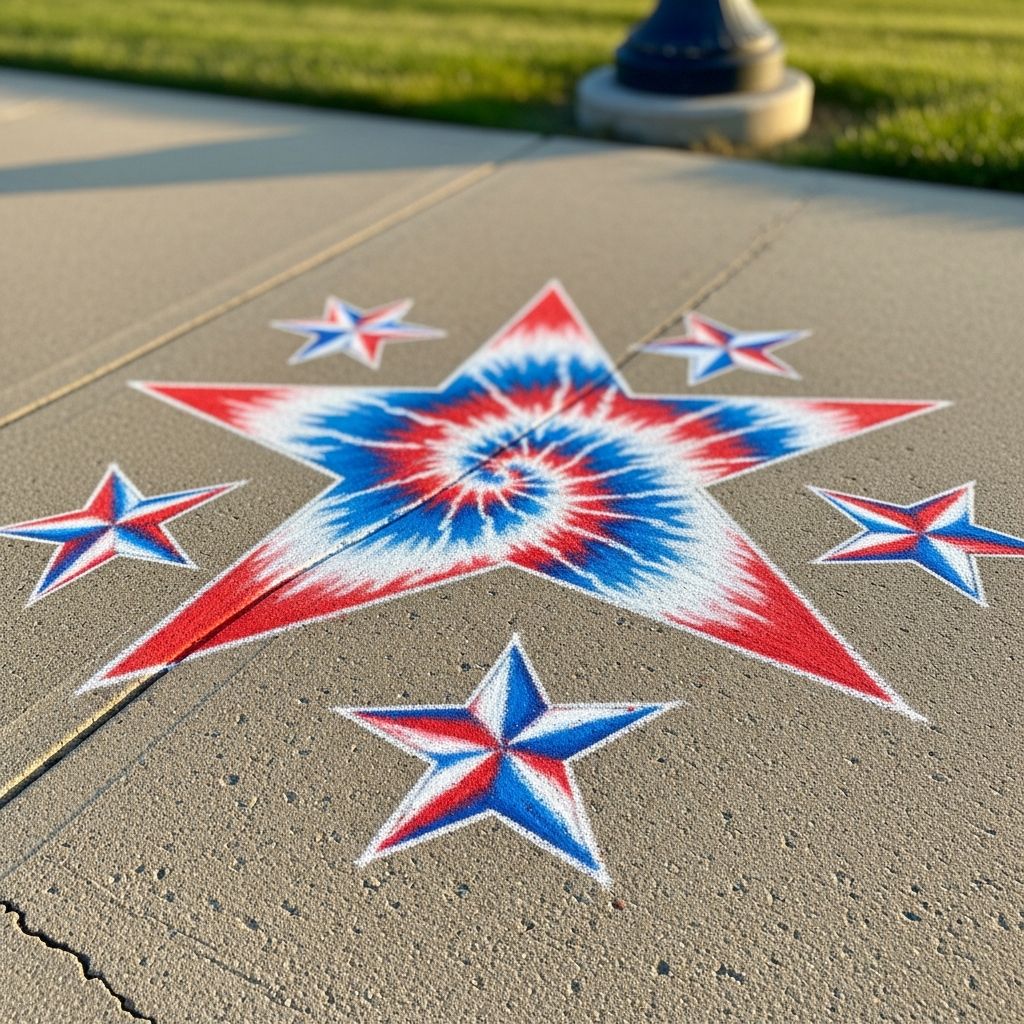
The method described here uses solid star templates to create soft, glowing shapes with a halo of color around each star. Adjust the technique to match your children’s ages and preferences.
1. Prepare the Surface
- Sweep away loose dirt and small stones from the sidewalk or driveway to avoid bumpy lines or scratched chalk sticks.
- Check that the surface is completely dry. Damp concrete makes chalk streaky and less vibrant.
- If the weather is very hot, work in the morning or late afternoon when the concrete is cooler to the touch.
2. Position and Tape the Templates
- Place solid star templates flat on the ground according to your planned layout.
- Use small loops of painter’s tape on the back of each template to keep it from sliding as kids draw.
- Invite children to decide which sizes go where so they feel ownership of the final design.
3. Outline Stars with Chalk
To create a glowing effect, the chalk should sit right up against the edge of each template. Encourage kids to use the sides of the chalk sticks instead of the tips to create broad, bold lines quickly.
- Trace all the way around each star with thick bands of color, about a finger-width wide.
- Alternate between red, white, and blue on different sides of the star, or assign each star a single color for a clean, graphic look.
- Layer colors for a blended effect, such as blue directly next to the template and red just outside for a two-tone glow.
4. Blend the Chalk for a Glow Effect
- With clean, dry fingers or a soft cloth, gently smudge the chalk outward from the edge of each template.
- Work in short strokes away from the star so the center remains sharp and the color seems to radiate outward.
- Wipe or shake off excess chalk dust regularly to keep colors vivid and prevent dull, muddy patches.
5. Reveal the Stars
This is the most satisfying part of the project and a great moment for photos. Kids love lifting the templates and seeing the crisp star shapes surrounded by soft color.
- Carefully peel up the templates and set them aside where they will not be stepped on.
- If any chalk dust has crept under the edges, gently dab the line with a corner of a dry cloth to tidy it up.
- Repeat the whole process in new spots until your sidewalk is as starry as you like.
Optional Variations and Embellishments
Once the basic stars are in place, add detail to make each design unique. Let children experiment with patterns and symbols that feel meaningful to them, while keeping the overall look cohesive with a consistent color palette.
Creative Add-Ons
- Firework Trails: Draw curved lines or zigzags of chalk bursting from one side of a star to suggest motion.
- Striped Stars: Inside open stencils, fill the shape with alternating bands of red, white, and blue.
- Constellations: Connect a group of small stars with thin white lines to mimic star charts.
- Lettered Centers: Add initials or short words like “USA” or “JOY” in the middle of larger stars.
- Glitter Finish (optional): For a temporary sparkle, sprinkle a small amount of biodegradable craft glitter on top of dampened chalk details, keeping safety and local regulations in mind.
Patriotic Star Styles at a Glance
The table below outlines a few simple star styles you can mix and match to build a cohesive yet varied sidewalk display.
| Star Style | How to Create It | Best For |
|---|---|---|
| Glow Star | Use a solid template, draw thick chalk bands around the edge, and smudge outward to create a halo. | Centerpieces and photo backdrops. |
| Outlined Star | Place a stencil and draw a single clean line around the inside or outside, leaving the middle unfilled. | Borders, steps, and long pathways. |
| Filled Star | Trace a star outline, then color the entire interior with solid chalk or simple patterns. | Areas where you want bold, high-contrast shapes. |
| Striped Star | Draw horizontal or diagonal bands within the star and alternate colors for a flag-like look. | Driveway corners or near patriotic displays. |
| Constellation Cluster | Create several small stars and connect them with thin lines to resemble a star map. | Sidewalk edges and storytelling areas for kids. |
Safety and Accessibility Tips
Because this is an outdoor activity on hard surfaces, a few precautions help everyone stay safe and comfortable. Adjust the project to suit the ages and mobility levels of the people participating so that everyone can enjoy the creative process.
- Encourage children to remain inside driveway boundaries rather than near street traffic.
- Have adults or older kids handle scissors for cutting templates, especially with thick cardboard.
- Provide sun hats, water, and sunscreen if you are working outside for long periods.
- Offer a low table or large cardboard placed on sawhorses for children who cannot kneel comfortably on concrete but still want to color on flat templates.
Displaying and Photographing Your Chalk Stars
Once your artwork is complete, consider how it will be enjoyed throughout the day and evening. Natural light, shadows, and even the angle of your driveway can change the appearance of your chalk stars in interesting ways.
- Photograph the designs just after completion, when colors are freshest and before anyone walks through them.
- Take overhead photos from a balcony, porch, or safe ladder position to capture the overall pattern.
- In the evening, illuminate the chalk with outdoor string lights or lanterns and capture the soft glow around the stars.
- Encourage family members or neighbors to pose standing or sitting near the brightest stars for keepsake holiday photos.
Cleaning Up After the Celebration
One of the biggest advantages of sidewalk chalk projects is that they are temporary, which makes them low-pressure for beginners and easy to refresh for future holidays. When you are ready for a blank canvas again, the clean-up can be part of the fun.
- Spray the chalk designs with a garden hose on a gentle setting to prevent splashing debris.
- Use a soft push broom to help spread water over stubborn areas, loosening chalk from the pores of the concrete.
- Allow the area to dry completely before starting new art or holiday décor.
Ideas for Extending the Activity
If kids are eager to keep drawing, you can easily broaden this craft into a whole afternoon of outdoor creative play. Expanding on the star theme keeps the project cohesive while giving children freedom to experiment.
- Invite kids to draw rockets, flags, or fireworks around the star clusters.
- Turn the sidewalk into an obstacle course where children hop from star to star in a particular color order.
- Encourage older children to design their own original constellations and name them after family members or favorite holiday treats.
- Plan a neighborhood “chalk walk” where families decorate their driveways and then stroll around to admire everyone’s designs.
Frequently Asked Questions
Can this project be done with very young children?
Yes. For toddlers and preschoolers, simplify the activity by preparing the star outlines in advance and letting them focus on filling in colors or helping to smudge the halos. Keep sessions short, offer frequent breaks, and emphasize process over results.
What if I do not have painter’s tape?
Low-tack masking tape or removable adhesive putty also works for holding templates in place. Test any adhesive on a small, inconspicuous area of concrete first to make sure it releases cleanly.
Will the chalk stain my driveway?
Most sidewalk chalk is designed to be temporary and will gradually fade with rain and time. On rough or very porous surfaces, bright colors may linger slightly longer, but a thorough rinse with water and gentle scrubbing typically removes remaining residue.
Can I reuse my star templates for other projects?
Absolutely. Store the templates flat in a folder or between heavy books so they do not curl. They can be used again for paper crafts, painted banners, or future chalk designs for other patriotic holidays.
Is it possible to adapt this for other themes?
Yes. Once you are comfortable with the halo technique and template method, you can create hearts for Valentine’s Day, leaves for autumn, or snowflakes for winter celebrations. Simply switch up the colors and shapes to fit the new occasion.
Final Thoughts on Starry Sidewalk Celebrations
Transforming your sidewalk into a starry display is an inviting way to welcome guests, entertain kids, and celebrate the Fourth of July without complicated materials or extensive prep. With a handful of chalk, a few homemade templates, and imagination, your driveway becomes a temporary work of art that captures the joy and color of the holiday. When the rain comes and washes it all away, you will be ready to dream up new designs for the next celebration.