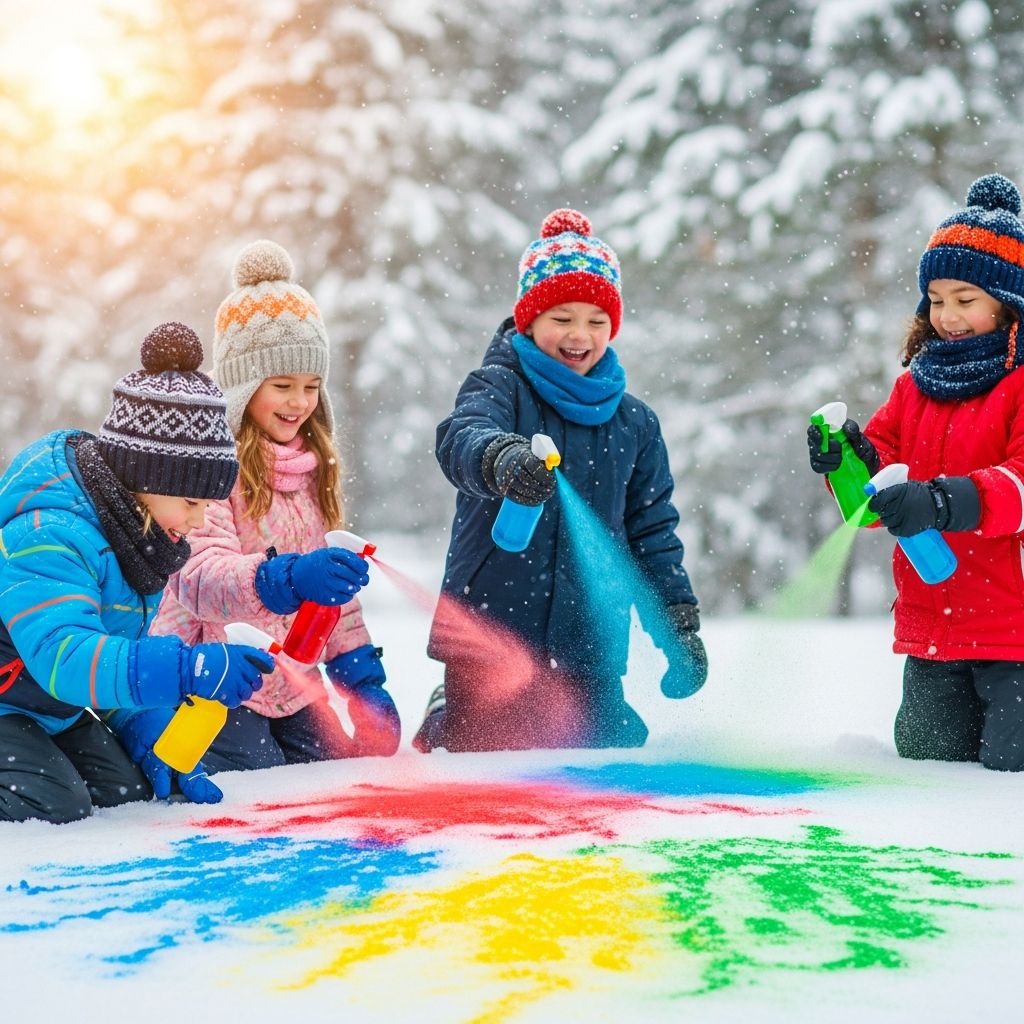
Snow days do not have to mean cabin fever and endless screen time. With a few simple supplies, fresh snow can become a bright, colorful canvas that keeps kids engaged, moving, and creating for hours.
This guide walks you through everything needed to start snow painting with children—materials, setup, color recipes, creative project ideas, safety and cleanup, plus answers to common questions. The goal is not perfection, but playful exploration in a winter wonderland.
Why Snow Painting Is Worth Trying
Snow painting is part art project, part sensory play, and part outdoor adventure. It invites kids to experiment with color and texture while getting fresh air, which is especially valuable in the colder months.
- Encourages creativity and open-ended play instead of rigid craft steps.
- Gets kids moving outdoors, which can boost mood and burn off pent-up energy.
- Uses inexpensive supplies that many families already have at home.
- Works for a wide age range, from toddlers to older children and even teens.
Essential Supplies for Snow Painting
You can keep the setup extremely simple, or turn it into a full-color experience with multiple tools and containers. Start with the basics, then add extras as you discover what your kids enjoy most.
Basic Materials
- Fresh or packed snow (any depth works as long as kids can reach it).
- Water in a jug, pitcher, or measuring cup.
- Food coloring, liquid watercolors, or very diluted washable paint.
- Plastic squirt bottles, spray bottles, or squeeze bottles.
Helpful Extras
- Funnels or a small ladle to pour colored water into containers.
- Plastic cups or jars for mixing colors.
- Paintbrushes (large, cheap brushes work best in the snow).
- Old spoons or droppers for dripping color onto snow sculptures.
- Waterproof gloves or mittens and warm, layered clothing.
- Waterproof mat or tray at the door for wet boots and gear.
Simple Snow Paint Recipes
There is no single “right” way to make snow paint. The recipes below give you flexible options based on what you already own. Adjust the strength of the color by adding more or less pigment.
Colored Water Snow Paint
This is the easiest method and usually the best choice for first-time snow painters.
- Fill a cup or small bowl with water.
- Add several drops of food coloring or a small squeeze of liquid watercolor.
- Stir thoroughly until the color is even.
- Pour into a spray or squirt bottle using a funnel if needed.
- Repeat with new colors in separate containers.
For toddlers, keep the colors less intense by diluting them heavily. This reduces the chance of staining clothing and keeps the focus on the experience rather than bold color coverage.
Washable Paint Snow Color
If you prefer stronger color on the snow, you can dilute washable kids’ paint.
- Add a spoonful of washable tempera or similar paint to a jar.
- Pour in water and mix until the paint is fully thinned into a runny liquid.
- Adjust the ratio: more paint for richer color, more water for a lighter wash.
Use this mixture in squeeze bottles or with large brushes. Because it is more intense, supervise closely to avoid spraying directly on faces, sidewalks, or walls you would rather not decorate.
Thick “Frosting” Style Snow Paint
For kids who love sculpting and layering, a thicker mixture can mimic frosting or puffy paint.
- Combine equal parts flour and water until smooth.
- Add a pinch of salt to help with texture.
- Mix in food coloring until you reach the desired shade.
Serve this thicker paint in squeeze bottles without narrow nozzles, or in cups with sturdy brushes and spoons. Kids can layer it on snow blocks, snowballs, or mini snow castles.
Best Conditions and Setup Tips
Snow painting works in many types of winter weather, but some simple planning makes it more comfortable and successful. Think about temperature, snow quality, and how kids will move through the space.
Choosing the Right Snow
- Powdery snow is great for spray bottles and light mists of color.
- Packable snow works best for building shapes, snowmen, and mini structures to paint.
- Old, crusty snow can be revived with color and turned into a new art surface.
Preparing the Painting Zone
- Select a clear area of snow away from busy paths and driveways.
- Stamp out a large rectangle or several “canvases” using boots.
- Group bottles and materials on a tray or shallow bin where kids can reach them.
- Set a towel or small mat just inside the door for quick gear removal.
For very young children, keep the painting area small and close to the entrance so they can take warm-up breaks easily.
Age-Appropriate Ideas and Activities
Different ages engage with snow painting in different ways. Use the ideas below as starting points and adapt them to your child’s interests and abilities.
For Toddlers and Preschoolers
- Offer just two or three primary colors to avoid overwhelming them.
- Encourage simple actions: squirting, dotting, spraying, and stamping with boots.
- Draw large shapes in the snow (circles, hearts, stars) and let kids fill them with color.
- Practice early literacy by helping them trace the first letter of their name in the snow and then color it.
For Early Elementary Kids
- Challenge kids to create a scene: a garden, a city, or an imaginary creature.
- Experiment with color mixing right in the snow by layering different sprays.
- Have them outline paths or mazes in the snow and then race through them.
- Invite kids to design flags, banners, or pretend storefronts in large snow rectangles.
For Older Kids and Teens
- Encourage them to plan a mural concept before going outside, then sketch it in the snow.
- Introduce basic design ideas like symmetry, contrast, and focal points.
- Ask them to build a snow sculpture and then highlight details with color.
- Let them lead younger siblings in a “snow art class,” giving simple demonstrations.
Creative Project Ideas
Once the basic setup is ready, there are countless ways to play. Use these ideas as building blocks for themed snow days, birthday parties, or classroom enrichment.
Snowy Art Challenges
- Color Hunt: Assign each child a color and challenge them to cover as much snow as possible with their shade.
- Shape Gallery: Adults stamp large shapes in the snow; kids fill each shape using a specific color combo.
- Sky View Art: Create a big design that would look interesting from above, then photograph it from an upstairs window or balcony.
Games With Painted Snow
- Target Toss: Spray circular targets on the snow and toss snowballs toward them for a point-based game.
- Color Trails: Paint paths that kids must follow while skipping, hopping, or walking heel-to-toe.
- Frozen Hopscotch: Draw hopscotch boxes in the snow, color each square, and play with winter boots.
Storytelling and Learning Ideas
- Have kids create characters in the snow, then tell or act out a story with those characters.
- Paint numbers, letters, or simple words for a playful review of school concepts.
- Create a “map” with painted rivers, roads, and mountains, and use toy figures to explore it.
Snow Painting Equipment Comparison
Different tools change how the color lands on the snow. The table below helps you choose options based on the age of your children and the type of effect you want.
| Tool | Best For | Pros | Considerations |
|---|---|---|---|
| Spray bottle | Soft color wash and gradients | Covers large areas quickly; gentle mist looks like airbrushing. | Triggers can be hard for small hands; color may look lighter. |
| Squirt or squeeze bottle | Bold lines, writing, and patterns | Easier for younger kids to grip; creates strong, visible lines. | Color can concentrate in small spots; use diluted mixtures for less staining. |
| Paintbrush | Detail work and filling shapes | Familiar tool for kids; great for thick or semi-thick paint. | Brushes can freeze if left outside too long; hands might get wetter. |
| Droppers or spoons | Drip art and textured effects | Allows slow, thoughtful placement of color; fun for experiments. | Better suited for older kids with good coordination; slower coverage. |
Safety, Comfort, and Cleanup Tips
Snow painting is low risk, but a few safety guidelines make the experience smoother for everyone. Think about both temperature and the materials you choose.
Keeping Kids Warm and Dry
- Dress kids in layers with waterproof outerwear, especially on windy days.
- Use waterproof gloves or mittens, since hands inevitably come in contact with wet snow and color.
- Set a time limit for each outdoor session, and plan short warm-up breaks indoors.
- Keep a change of socks and a dry pair of mittens ready by the door.
Material and Environment Considerations
- Choose non-toxic, washable color sources whenever possible.
- Avoid dark concrete, bricks, or wooden decks if you are unsure whether they might stain.
- Remind children not to eat colored snow and to keep bottles away from their mouths.
- Check that bottles are clearly labeled and not reused later for food or drink.
When the snow melts, most diluted color will disappear with it. If you used stronger pigments, a quick rinse with water on walkways or patios can help disperse leftover color.
Bringing the Snow Art Indoors
If the weather turns too cold or the snow quality changes, you can still continue the fun inside. A small bin or tray of snow can be transformed into a miniature art station.
- Fill a plastic tub or baking tray with clean snow and set it on a towel.
- Provide droppers, small brushes, or teaspoons with very diluted paint or colored water.
- Invite kids to create tiny landscapes, decorate snowballs, or experiment with color mixing.
- Allow the snow to melt naturally in the tray, then pour the water down the sink when finished.
This indoor version works well for apartment living, classrooms, and days when temperatures drop below comfortable outdoor play levels.
FAQs About Snow Painting
Does snow painting stain clothing?
Using heavily diluted food coloring or washable paint significantly reduces the chance of noticeable stains. Dressing kids in older play clothes or dark outerwear provides an added layer of protection.
Is it safe for the environment?
Many families feel comfortable using small amounts of non-toxic, washable color products in outdoor play. If you prefer a more natural approach, you can use food-based colors like diluted fruit juices or homemade vegetable dyes.
What if we do not have spray or squirt bottles?
You can still enjoy snow painting with basic tools. Try small cups of colored water and spoons for pouring, or use old paintbrushes dipped into the mixture and brushed onto the snow.
How long will the artwork last?
The lifespan of snow art depends on weather conditions. Warmer temperatures and direct sun will soften and fade designs quickly, while colder, cloudy days preserve color and shapes for longer.
Can we combine snow painting with snowman building?
Absolutely. Building a snowman, snow animals, or simple snow walls and then decorating them with color is one of the most satisfying ways to use snow paint. Kids love turning plain white sculptures into vibrant characters.
Making Snow Painting a Winter Tradition
Snow painting can become a simple, joyful tradition every time the yard turns white. Whether you keep it as a quiet solo activity or turn it into a neighborhood event, the combination of fresh air, color, and creativity is hard to beat.
Over time, kids will develop their own favorite tools, color combinations, and games. By keeping the supplies handy and the rules flexible, you create space for them to explore, experiment, and make the most of every snow day.