Shadow experiments are a simple and engaging way to introduce children to the science of light. By playing with shadows, kids see how light travels, how objects block light, and why shadows change size and shape throughout the day.
What Are Shadows?
A shadow appears when something blocks light from reaching a surface. The area where the light is blocked looks darker, and that dark shape is the shadow. Understanding this basic idea helps children see that shadows are not separate objects; they are the result of light being blocked.
- Shadows form when an object blocks light.
- The shape of a shadow often matches the outline of the object.
- The direction of the light source determines where the shadow appears.
Key Concepts for Kids
Before starting any activities, introduce a few simple science ideas in child-friendly language. This will help kids connect what they see to what they are learning about light.
- Light source: The place where light comes from, such as the sun, a lamp, or a flashlight.
- Opaque: Objects that do not let light pass through, creating clear, dark shadows.
- Transparent and translucent: Objects that let some or all light through, often creating faint or no shadows.
Materials for Shadow Experiments
Most shadow experiments use everyday items found at home or in a classroom. Gather a variety of objects with different shapes, sizes, and materials so kids can compare the shadows they produce.
- Flashlights or desk lamps
- Paper, pencils, markers, or crayons
- Cardboard cutouts or toys with interesting shapes
- Clear plastic items, wax paper, and solid blocks or books
- Sidewalk chalk for outdoor shadow tracing
Simple Body Shadow Play
One of the easiest ways to explore shadows is to use the body. Take kids outside on a sunny day or into a bright room and have them look at the shadows made by their own bodies.
- Ask children to stand still and notice the shape of their shadow.
- Have them jump, wave, or dance to see how the shadow copies each movement.
- Encourage them to see how many funny poses they can create with their shadows.
Shadow Tracing Outdoors
Shadow tracing is a classic activity that shows children how the sun’s position in the sky changes shadows over time. It also encourages careful observation and drawing skills.
- Choose a sunny spot on the ground, such as a driveway or sidewalk.
- Have a child stand still while another traces the outline of their shadow with chalk.
- Return to the same spot later in the day and trace the new shadow outline.
After a few tracings, kids can compare the shapes and lengths of the shadows. Ask questions such as, “Is your shadow longer or shorter?” and “Has the direction changed?”
Indoor Shadow Tracing on Paper
On cloudy days or in classrooms, move shadow tracing indoors with a lamp or flashlight. This experiment can be done with toys, blocks, or simple cutout shapes.
- Place a piece of white paper on a table near a wall or screen.
- Set an object, such as a toy or block, on the paper.
- Shine a light at the object so it casts a shadow on the paper or wall.
Children can trace the shadow with a pencil or marker. Changing the angle or distance of the light source lets them see the shadow grow, shrink, or stretch in different directions.
Exploring Opaque, Transparent, and Translucent
This activity helps children understand why some objects make strong shadows, while others make weak or no shadows at all. It connects shadow play to the idea of how different materials interact with light.
| Material Type | Light Passing Through | Shadow Appearance |
|---|---|---|
| Opaque | Does not allow light through | Dark, clear shadow |
| Transparent | Allows most light through | Very faint or no shadow |
| Translucent | Allows some light through | Light, blurry shadow |
Give kids a mix of paper, plastic, glass jars, and cardboard, then ask them to shine a light on each and describe the shadows they see. They can sort objects into the three categories based on the shadows and the amount of light passing through.
Shadow Size and Distance Experiment
This experiment shows children that shadows change size when the distance between the object and the light source changes. It introduces the idea that light travels in straight lines and that geometry affects shadow size.
- Place a small toy or shape in front of a wall or sheet of paper.
- Shine a flashlight at it from a short distance so a clear shadow appears.
- Slowly move the flashlight closer to the toy, then farther away.
Ask kids to notice when the shadow becomes larger or smaller. Encourage them to predict what will happen before the light moves and then test their ideas.
Make a Simple Human Sundial
A human sundial uses a person’s shadow to show that the sun’s position changes over the day. This activity also connects basic astronomy to everyday observation.
- Choose a flat outdoor area where shadows are easy to see.
- Have a child stand in the same spot at different times of the day, such as morning, midday, and late afternoon.
- Each time, trace the outline of their shadow and mark the time next to it.
By the end of the day, you will have several outlines pointing in different directions and with different lengths. Children can compare the lines and discuss how the sun appears to move across the sky.
Shadow Puppet Theater
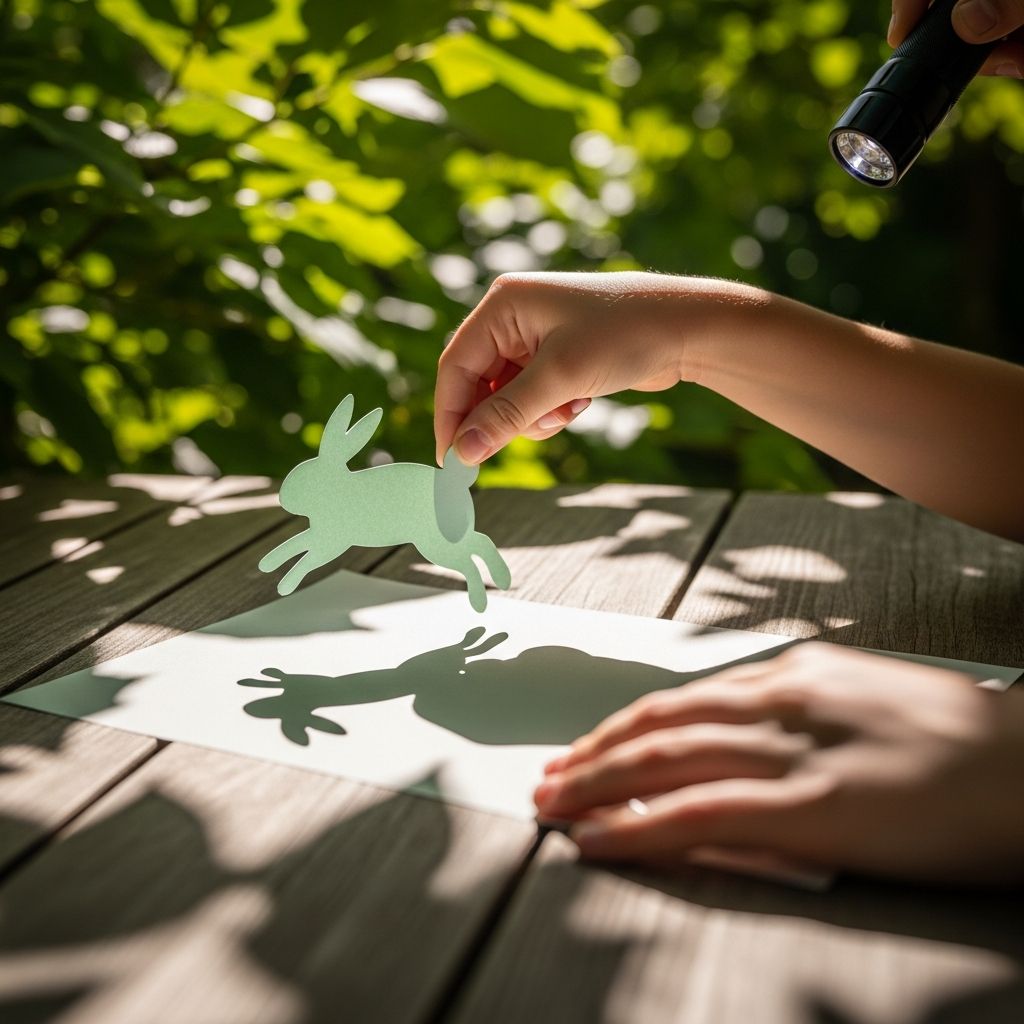
Shadow puppets combine storytelling with simple science. They show that by placing an object between a light source and a screen, a shadow image appears that children can use to act out stories.
- Cut out simple shapes, animals, or characters from cardboard or thick paper.
- Attach each shape to a stick or straw to make a puppet.
- Hang a light-colored sheet or large sheet of paper as a screen and shine a light behind it.
Children can hold their puppets between the light and the screen to create shadow characters. Invite them to create short stories or plays using only the shadows as their actors.
Shadow Art and Creativity
Shadow art invites kids to combine creativity with observation. By tracing or painting around shadows, children can turn simple outlines into colorful artwork.
- Arrange toys or blocks in front of a light so that their shadows fall on paper.
- Trace the outlines of the shadows and then decorate them with colors or patterns.
- Experiment with overlapping shadows to create layered shapes and designs.
This type of activity encourages children to see ordinary objects in new ways and supports both artistic and scientific thinking.
Comparing Natural and Artificial Light
Shadows formed by sunlight can look different from those formed by lamps or flashlights. Exploring both lets children see that light sources can be strong or weak, close or far, and that these differences affect shadows.
- Have kids create shadows outside using the sun and notice their direction and clarity.
- Move indoors and use a lamp or flashlight to make similar shadows with the same objects.
- Discuss how the shadows change when the light source is moved or turned.
This comparison also supports the idea that sunlight is a powerful, distant light source, while a flashlight is weaker and much closer.
Safety Tips for Light and Shadow Experiments
Shadow play is generally safe, but children still need a few reminders when working with bright light sources or outdoor spaces. Simple rules keep experiments fun and accident free.
- Remind kids never to look directly at the sun or shine flashlights into anyone’s eyes.
- Use safe, stable lamps and avoid hot bulbs or open flames.
- Supervise outdoor activities near driveways, streets, or uneven ground.
Frequently Asked Questions (FAQs)
1. Why do shadows change size during the day?
Shadows change size because the sun moves across the sky, changing the angle at which its light hits objects. When the sun is low, shadows are long, and when it is high in the sky, shadows become shorter.
2. Can shadows appear without the sun?
Yes. Any light source, including lamps and flashlights, can produce shadows as long as an object blocks the light and a surface is available to show the shadow.
3. Why are some shadows darker than others?
Some shadows are darker because the object blocking the light is opaque and does not let light pass through. Lighter shadows often come from translucent materials that allow some light to pass.
4. Are shadows always black?
Shadows often look dark or gray, but their exact color can depend on the light source and the surface where they appear. Under colored lights, shadows can even appear tinted.
5. How can teachers or parents use shadow experiments for learning?
Shadow experiments help children practice observation, prediction, and recording results. They are ideal for combining basic physics with art, storytelling, and outdoor play in both home and classroom settings.
Encouraging Ongoing Exploration
Light and shadow experiments open the door to many other science topics, such as reflection, refraction, and the movement of the Earth around the sun. Encouraging kids to ask questions and test their own ideas keeps their curiosity and love of learning growing.