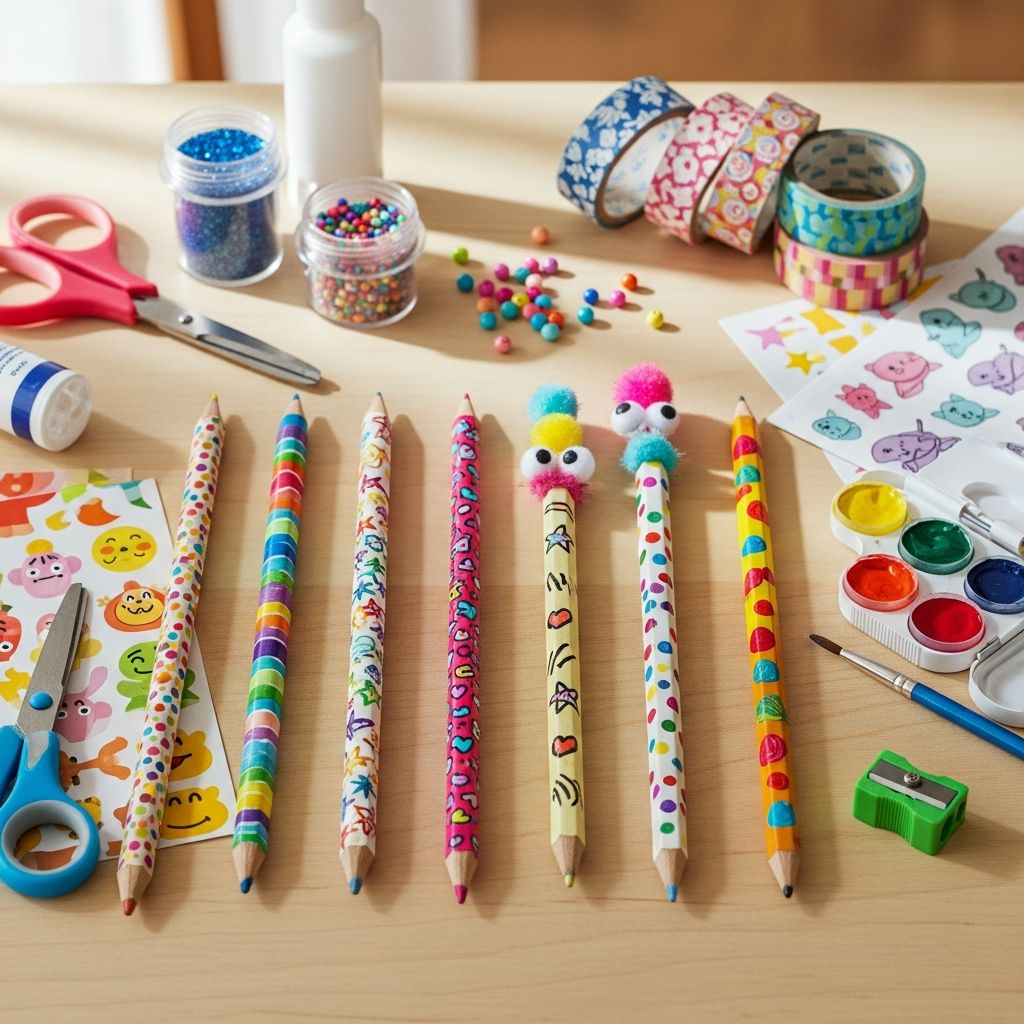
Personalized pencils are an easy way to turn an everyday object into something meaningful, colorful, and fun. Whether you are getting ready for back-to-school season, organizing a home office, planning a party, or looking for an indoor craft that keeps kids busy, decorating pencils offers a low-cost project with impressive results.
Why Personalized Pencils Are Worth Making
Custom pencils do more than just look cute; they solve real-life problems in classrooms, playrooms, and home offices. A name or distinctive design on a pencil can reduce mix-ups, encourage kids to take care of their supplies, and make writing feel a little more special.
Because pencils are inexpensive and widely available, they are perfect for experimenting with new materials and color combinations. This makes them an ideal project for groups, from birthday parties and scout meetings to classroom art centers and family craft nights.
- They help kids quickly recognize their own supplies.
- They encourage ownership and responsibility for materials.
- They make simple gifts, rewards, and party favors feel thoughtful and unique.
Basic Supplies You May Already Have
You do not need specialty equipment to start making personalized pencils. Many households already have enough materials to create unique designs without a trip to the craft store. The list below is intentionally broad so you can choose options that fit your budget and your comfort level with crafting.
Gather a mix of decorative materials and protective finishes. For younger children, focus on simple and safe tools such as tape, stickers, and markers. Adults or older kids can experiment with sealants and sharper cutting tools with appropriate supervision.
- Plain wooden or painted pencils (hexagonal work best for wrapping)
- Washi tape, masking tape, or thin decorative tape
- Colorful permanent markers or paint pens
- Scrapbook paper, tissue paper, or thin gift wrap
- White glue, decoupage medium, or clear-drying craft glue
- Scissors, craft knife (for adults), and a small ruler
- Stickers, alphabet letter stickers, or small labels
- Clear varnish or clear nail polish for optional protection
Simple Tape-Wrapped Pencil Designs
Tape-wrapped pencils are one of the fastest and most beginner-friendly methods. Decorative tape is flexible, easy to reposition, and available in an endless range of colors and patterns. Kids can handle most of this process on their own, with just a little help to trim the ends neatly.
To start, cut a strip of decorative tape slightly longer than the length of the pencil barrel. Press one end of the tape near the eraser, then roll the pencil slowly so the tape wraps around, smoothing any bubbles with your fingers. Trim the excess at the sharpened end with scissors for a clean finish.
Ideas for Tape Patterns
- Diagonal stripes: Wrap narrow tape around the pencil at an angle to create candy-cane style stripes.
- Color blocking: Use short bands of different colored tape stacked like stripes along the length.
- Monochrome minimalism: Choose a single shade for a sleek look, then add a tiny initial near the eraser.
- Mix-and-match sets: Give each pencil in a set its own pattern while keeping one color consistent to tie them together.
Paper-Wrapped Pencils for Detailed Designs
Wrapping pencils with paper creates a smooth, printed look similar to store-bought custom stationery. Thin paper works best because it molds well to the pencil’s shape and sharpens more easily once dry. This method also lets you reuse leftover wrapping paper or small pieces of scrapbook paper that might otherwise be discarded.
Begin by measuring the pencil barrel, then cutting paper strips wide enough to cover the circumference with a slight overlap. Brush a thin layer of glue on the back of the paper or directly onto the pencil, align one edge with the eraser end, and roll the pencil until the paper wraps all the way around. Smooth out wrinkles and allow the glue to dry completely before sharpening or adding extra embellishments.
Sample Paper-Wrapped Ideas
| Theme | Paper Choice | Extra Details |
|---|---|---|
| Galaxy night sky | Dark blue or starry patterned scrapbook paper | Silver gel pen dots or star stickers near the eraser |
| Vintage classroom | Muted stripes or old-book style paper | Small kraft label with a typewritten name |
| Rainbow fun | Bright rainbow or color-blocked wrapping paper | Glitter sealant or iridescent stickers |
| Nature lover | Leaf, floral, or woodgrain patterns | Tiny bee, leaf, or flower sticker near the top |
Adding Names, Messages, and Icons
The detail that truly personalizes a pencil is the name, word, or symbol chosen for the design. This could be a child’s first name, a favorite phrase, a subject label, or even a short motivational reminder. Because the space is tiny, short messages tend to look cleaner and are easier to read.
There are several ways to add text and icons. Alphabet stickers and small label strips are the most straightforward for kids, while adults might opt for paint pens or fine permanent markers. Hand-lettering works nicely on solid or lightly patterned backgrounds, and simple icons such as hearts, stars, or smiley faces can stand in for words for younger children.
- Write the name lengthwise along the pencil for maximum readability.
- Use a contrasting ink color so the text stands out against the background.
- Combine a short word with a small icon, such as “READ” plus a tiny book sketch.
- Label pencils by subject: “MATH,” “MUSIC,” “ART,” or “HOMEWORK.”
Organizing Pencils by Color and Category
Beyond personalization, decorated pencils can be used as a simple organization system. Assigning each child, task, or space its own color or pattern makes it easier to track which supplies belong where. This can dramatically cut down on the constant question, “Whose pencil is this?” in busy households or classrooms.
Consider how pencils are used throughout the day and design sets accordingly. You might create one color for homework time, another for art projects, and a third specifically for travel or on-the-go bags. Combining visual cues with labels can turn a cup of pencils into a small, intuitive filing system.
Organization Ideas
- Assign each family member a signature color or pattern.
- Design pencils with different colors for different subjects or tasks.
- Use gold, silver, or glitter designs for “special use” pencils, such as rewards or test days.
- Store finished pencils in labeled jars or cans for quick access.
Turning Personalized Pencils into Gifts and Favors
Thoughtfully decorated pencils make excellent small gifts that are both charming and useful. They tuck easily into gift bags, teacher appreciation baskets, holiday stockings, and party favor boxes. Because each pencil can be customized, it is simple to include personal touches without spending a lot of money or time.
When giving pencils as gifts, attention to presentation goes a long way. Group them in sets, tie them with ribbon or baker’s twine, and attach a small tag with the recipient’s name or a short message. Coordinating the pencil designs with the occasion makes the gift feel cohesive and intentional.
- Create sets with school colors for graduation or the first day of school.
- Design themed pencils for birthday parties, such as superheroes, animals, or sports.
- Bundle pencils with a notebook or sketchbook for a simple stationery gift.
- Make appreciation packs labeled with phrases like “Thanks for helping me grow.”
Kid-Friendly Crafting Tips and Safety
Because personalized pencils appeal to children, it is important to plan the project with safety in mind. Younger kids can successfully participate if the steps are broken down and the materials are chosen carefully. Adult supervision is essential whenever sharp tools, hot equipment, or strong adhesives are involved.
Consider setting up a dedicated crafting area with washable coverings so kids can work freely without worrying about making a mess. Pre-cut papers or tape strips in advance for very young children, and let them focus on placing stickers, smoothing tape, and choosing colors. This keeps frustration low and makes the activity feel joyful and achievable.
- Reserve cutting and trimming tasks for adults or responsible older children.
- Choose non-toxic, washable markers and glues for family projects.
- Remind kids not to chew on decorated pencils, especially if sealants are used.
- Allow enough drying time before using or sharpening to avoid smudges.
Durability: Helping Designs Last Longer
A bit of extra care can make personalized pencils last through busy backpacks, pencil cases, and homework sessions. A thin protective layer over tape or paper helps prevent peeling and fraying, especially near the sharpened end where friction is highest. At the same time, the finish should be light so that the pencil can still fit inside a standard sharpener.
Apply a small amount of clear-drying sealant, such as decoupage medium or clear nail polish, and let it cure fully before use. Avoid coating the eraser or metal ferrule, and keep the tip area free from thick buildup. Even with protective layers, it can be helpful to remind kids to store their special pencils in a case rather than loose in a bag.
Project Variations for Different Ages
The same basic idea of personalized pencils can be adapted for toddlers, school-aged children, teens, and adults. Adjust the materials and level of detail to match attention span and fine motor skills. This makes the craft flexible enough to use repeatedly over the years, evolving as children grow.
For younger children, focus on bold colors, simple stickers, and sturdy tape that can withstand handling. Older kids and adults often enjoy more intricate patterns, hand-lettered text, and themed sets tied to hobbies or favorite books, movies, and games.
- Toddlers and preschoolers: Large stickers, chunky tape stripes, and pre-cut pieces.
- Elementary-age kids: Simple paper wraps, name labels, and subject themes.
- Teens: Minimalist designs, motivational quotes, and coordinated study sets.
- Adults: Elegant patterns, office branding, and color-coded organizational systems.
Frequently Asked Questions About Personalized Pencils
Do personalized pencils still sharpen properly?
When thin paper or tape is used and applied smoothly, personalized pencils can be sharpened in a regular sharpener without any problem. The key is to avoid overly thick layers near the tip and to let all adhesives dry thoroughly before sharpening.
How can I keep the designs from peeling?
Using a light coat of clear-drying sealant over the surface helps protect against peeling and fraying. Make sure the layer is thin and even so the pencil does not become too bulky for standard sharpeners and containers.
Are there no-mess options for classroom projects?
For group activities, focus on low-mess materials such as decorative tape, stickers, and pre-printed labels. Students can customize their pencils right at their desks with minimal cleanup, while teachers maintain control over any cutting or trimming needed.
Can digital designs be used for personalized pencils?
If you have access to a printer, you can design narrow strips of artwork or text using simple graphic software and print them on regular or adhesive paper. These printed strips can then be wrapped and sealed around the pencil just like any other paper design.
What if a child’s name is long?
Longer names can be split into two lines, written in smaller lettering, or represented with initials and a symbol the child loves. Using initials often keeps the design balanced while still clearly identifying who the pencil belongs to.
Personalizing pencils is a small project with a surprisingly big impact. With a few simple materials and a bit of imagination, families can transform basic school supplies into cheerful, organized, and meaningful tools that children are excited to use every day.