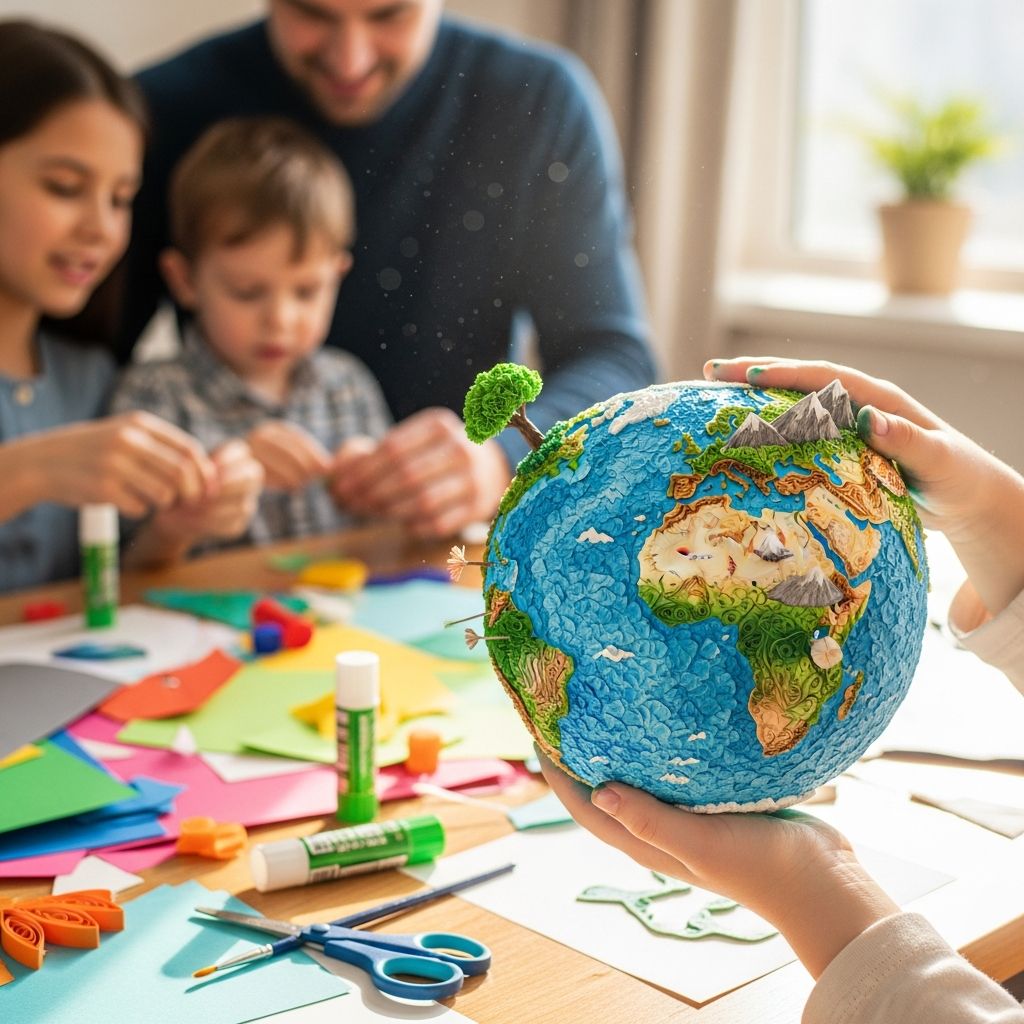
Paper globes are a simple, eye-catching way to celebrate Earth Day with kids while starting meaningful conversations about caring for the planet. By turning ordinary scrap paper into colorful, three-dimensional spheres, families can create beautiful decorations that symbolize our shared home.
Why Paper Globes Make a Perfect Earth Day Craft
Earth Day crafts are most impactful when they are easy to make, safe for kids, and use materials that would otherwise be thrown away. Paper globes fit all of these goals: they are lightweight, customizable, and can be created almost entirely from recycled paper and basic supplies.
Unlike flat art projects, a hanging globe is visible from all directions, which makes it ideal for classroom displays, home windows, and community celebrations. Each globe can represent the Earth itself or a theme your family cares about, such as oceans, forests, or endangered animals.
Materials: Simple Supplies You Already Have
One of the biggest advantages of this project is that it encourages reusing what you already have at home or in the classroom. Almost any kind of lightweight paper will work, and the rest of the supplies are standard craft items.
- Recycled paper (old magazines, colorful mailers, gift wrap scraps, or construction paper offcuts)
- Scissors (child-safe scissors for young kids)
- Glue stick or liquid craft glue
- String, yarn, or thin ribbon for hanging
- Pencil and circular template (such as a cup, jar lid, or roll of tape)
- Optional: hole punch, markers, crayons, watercolor paints, stickers, or eco-themed stamps
Choosing recycled paper reduces waste and opens up opportunities to talk with kids about where paper comes from and why saving trees matters. If your paper is plain, kids can decorate it with Earth-inspired colors before cutting.
Planning Your Globe: Design Before You Cut
Before jumping into cutting and gluing, spend a few minutes deciding what each globe will represent. This planning step can turn a basic craft into a meaningful Earth Day learning project.
- Color theme: Choose colors that remind you of the planet. Blue and green are classic, but browns for forests, white for ice, or bright colors for flowers and wildlife also work.
- Message theme: Assign each globe a focus such as “Clean Oceans,” “Plant More Trees,” or “Save Energy.” Kids can add small drawings or words that match these ideas.
- Size and difficulty: Younger children can make larger globes from fewer circles, while older kids might enjoy smaller, more detailed spheres with many layers.
This design step helps children practice planning and organizing, and it also keeps the project aligned with your Earth Day learning goals. As you plan, ask open-ended questions about what they love most about the Earth and what they want to protect.
Step-by-Step: How to Make a Basic Paper Globe
The basic globe is made from identical paper circles that are folded and glued together. Once you learn this simple structure, you can adapt it for many themes and occasions.
Step 1: Trace and Cut Your Circles
Use your circular template to trace the same circle multiple times on your recycled paper. For a medium-sized globe, 8–12 circles work well; for a fuller sphere, try 14–20 circles. The more circles you use, the rounder the finished globe will look.
- Stack a few sheets together to cut several circles at once if your scissors are sharp and safe.
- Mix and match colors or patterns so the final globe has visual interest.
Step 2: Fold Each Circle
Fold each circle exactly in half, with the most colorful or decorated side facing inward. This fold creates a straight edge that will later be used for gluing the pieces together.
- Encourage kids to line up the edges carefully to practice fine motor skills.
- Press the fold firmly so the crease is sharp and easy to work with.
Step 3: Glue the Folded Circles into a Stack
Take two folded circles and apply glue to one half of the first circle. Press the half of the second circle onto it, lining up the folded spines and edges. Continue adding folded circles one half at a time to build a stack.
- Always keep the folded edges aligned, like the pages of a little book.
- Alternate colors if you want a repeating color pattern when the globe opens.
Step 4: Add the Hanging String
Before closing the globe into a full sphere, cut a length of string or yarn. Place it along the folded spine of the stack, leaving extra length at the top to hang the globe. Add a line of glue over the string and press it gently so it adheres.
- Tie a small loop or knot at the top now, while the globe is still flat.
- For more durability, sandwich the string between two glued halves in the middle of the stack.
Step 5: Form the Globe
Once the glue is mostly dry, open the stack like a fan so that the first and last folded halves meet. Glue these two halves together to close the shape into a sphere. Adjust the folds gently until the globe looks round and even.
- If you see gaps, press the glued edges together more firmly.
- Let the globe dry fully before hanging it to avoid tearing or slipping.
Earth-Inspired Variations for Your Paper Globes
Once you master the basic structure, you can turn these globes into miniature worlds, habitats, or environmental reminders. This keeps the activity fresh and allows you to revisit it for different age groups and topics.
Painted Planet Globes
Instead of starting with patterned paper, have kids paint or color their own Earth-like circles first. They can add blue oceans, green landmasses, and white polar caps. The shapes do not need to be geographically accurate; the goal is to resemble the idea of a planet.
- Use watercolor paints on thicker paper for a soft, blended look.
- For quick drying, markers or crayons are less messy than paint.
Habitat Story Globes
Assign each globe a habitat such as rainforest, desert, ocean, or Arctic. On each circle, kids can draw an animal, plant, or feature from that habitat. When the globe is assembled, it becomes a rotating story of that ecosystem.
- Encourage kids to research one interesting fact about each animal they draw.
- Use one circle as a “title page” with the habitat name written on it.
Promise Globes with Eco Pledges
Turn each globe into a set of personal promises to the planet. On the inside or outside of the circles, kids can write short pledges such as “I will recycle,” “I will turn off lights,” or “I will pick up litter.” The finished globe becomes a daily reminder of those commitments.
- Use different colored pens for different types of actions (home, school, community).
- Hang the globes near the front door or classroom window so the promises stay visible.
Safety and Age-Appropriate Tips
Because this project involves cutting and glue, a few simple safety guidelines help keep the experience positive. Tailor the steps to the age and skill level of the children involved.
- Offer pre-cut circles for very young children or use large shapes that are easier to handle.
- Choose blunt, child-safe scissors and supervise closely during cutting.
- Use non-toxic glue and keep a damp cloth nearby for sticky fingers.
- For toddlers, focus on decorating the circles while an adult assembles the globe.
Older kids can take on more responsibility, such as measuring, tracing, and designing patterns, which turns the craft into a project they can proudly complete on their own.
Educational Connections: Turning Craft Time into Learning Time
Paper globes naturally lend themselves to discussions about geography, sustainability, and science. Simple prompts and mini-lessons help transform this craft into a hands-on learning experience.
| Theme | How to Use the Globe | Conversation Starters |
|---|---|---|
| Recycling | Use only scrap paper and talk about where it came from. | “How does recycling help trees and animals?” |
| Oceans | Color more than half of each circle blue to show how much of Earth is water. | “What creatures live in the ocean and how can we keep it clean?” |
| Habitats | Assign each circle a different habitat creature or plant. | “What does this animal need to survive?” |
| Energy Use | Write energy-saving tips on each section of the globe. | “What is one thing we can change at home to save energy?” |
| Global Community | Decorate circles with flags, faces, or cultural symbols from around the world. | “What does it mean that we all share one planet?” |
By pairing the craft with open-ended questions, adults can encourage kids to think critically about the environment and their role in protecting it. These conversations tend to flow naturally while hands are busy creating.
Display Ideas: Turn Your Globes into an Earth Day Exhibit
Finishing the globes is only the beginning. How you display them can amplify their impact and inspire others to think about Earth Day. A thoughtful display sends the message that caring for the planet is something to celebrate all year round.
- Window forest: Hang multiple globes from different lengths of string in a front window so they catch the light and sway with the breeze.
- Classroom canopy: Suspend globes from the ceiling in a cluster over a reading corner to create an “Earth cloud” of floating planets.
- Family gallery: Add name tags, ages, and each child’s eco-promise underneath their globe for a personalized touch.
- Community board: If allowed, hang a few globes in a local library, community center, or hallway with a note about using recycled materials.
Encouraging kids to explain their globes to visitors builds confidence and reinforces the environmental messages that inspired their artwork.
Making the Craft More Eco-Friendly
Since the purpose of Earth Day is to highlight environmental care, the way you handle materials during this project matters. Small choices add up and help kids see that their actions have real-world effects.
- Choose paper that has already been used on one side, such as flyers or old worksheets.
- Limit plastic-based decorations like glitter and opt for colored pencils or paper confetti instead.
- Use reusable tools, such as metal rulers and durable templates, rather than single-use items.
- Collect all leftover scraps and talk about how they can become the starting point for another craft.
Even discussing these choices with kids helps them build habits of mindful consumption and creative reuse that extend beyond Earth Day.
Frequently Asked Questions About Paper Globes for Earth Day
How many circles are needed for one globe?
There is no single correct number, but 8–12 circles usually produce a nicely rounded globe that is easy for kids to assemble. Using more circles makes the sphere fuller and smoother, while fewer circles create a more geometric, faceted look.
What if my globe does not look perfectly round?
Uneven globes are very common, especially the first time you try this craft. Often the shape improves if you gently adjust the folds and press the glued edges together again; remind kids that variation is normal and that every handmade globe is unique, like our planet’s many landscapes.
Can this project work for a large group or classroom?
Yes, paper globes are ideal for groups because each child can work on their own set of circles, and the only shared supplies are scissors, glue, and templates. To save time, prepare stacks of pre-cut circles in advance and set up workstations for tracing, cutting, decorating, and gluing.
How can I adapt this for very young children?
For toddlers and preschoolers, focus on decorating large circles with crayons, stickers, or sponge-painted dots, and let an adult handle the folding and gluing. You can also create flat, two-circle “mini globes” rather than full spheres to keep the process short and manageable.
Do paper globes have to be only for Earth Day?
Not at all; once kids know how to make them, globes can be adapted for many celebrations. Change the colors and decorations to match other seasons or holidays, such as autumn leaves, winter snowflakes, or birthday patterns.
Extending the Activity Beyond Crafting
When the glue has dried and the globes are hanging, the Earth Day experience can continue through related activities and reflection. This helps children understand that caring for the planet is a long-term practice, not just a one-day event.
- Invite kids to choose one eco-promise from their globes and track their progress for a week.
- Pair the craft with an outdoor activity like a nature walk or neighborhood cleanup.
- Read picture books about the Earth, recycling, or climate and ask kids to point out connections to their globes.
By revisiting the globes and the ideas behind them throughout the year, you reinforce the message that creativity and environmental care can go hand in hand.