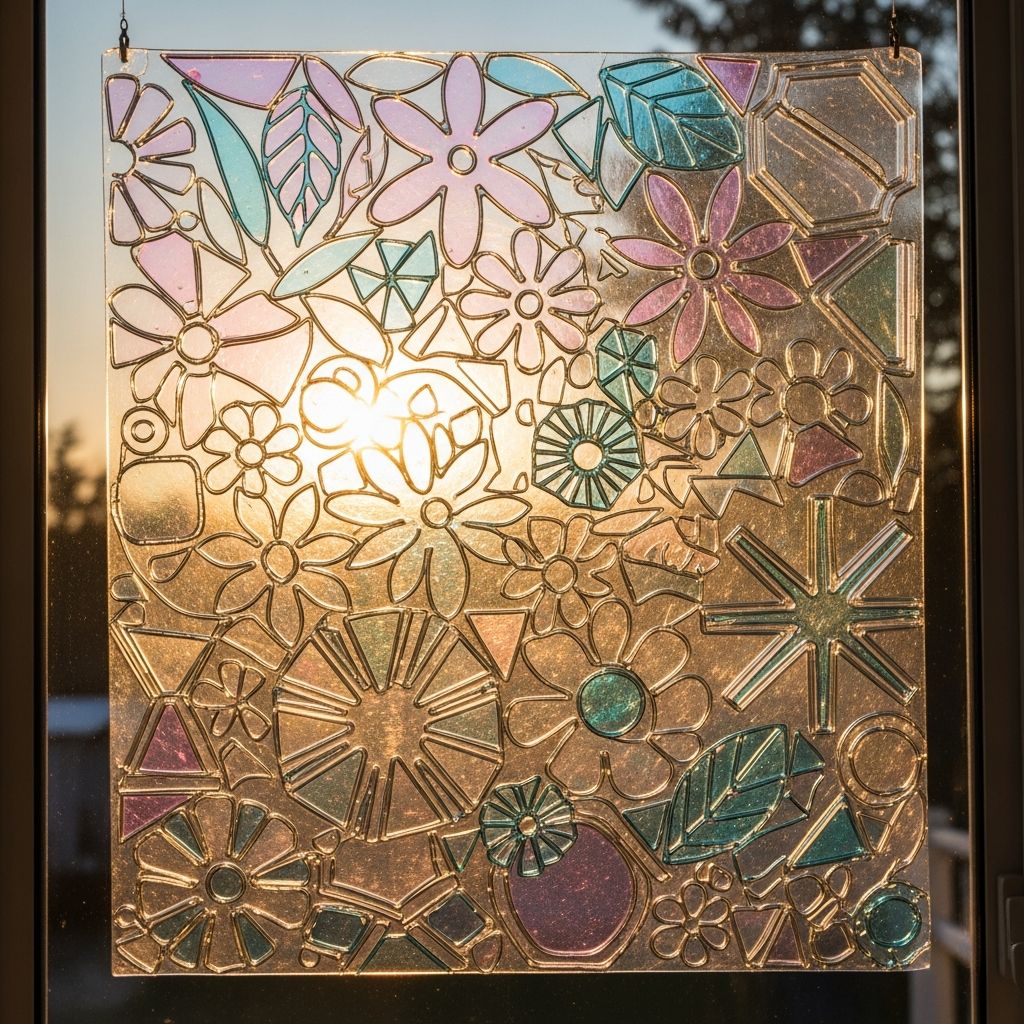
Empty plastic milk jugs can become the star of your next family craft session when transformed into glowing window art that catches the light and brightens any room.
This guide walks you through cleaning, cutting, decorating, and displaying milk-jug panels as vibrant sun catchers, mobiles, and hanging scenes, all while keeping the process simple enough for kids and satisfying for adults.
Why Craft with Milk Jugs?
Plastic milk jugs are typically made from a flexible plastic that cuts easily with scissors yet is sturdy enough to hold its shape in hanging decorations.
The plastic is slightly textured on one side and semi-translucent, which makes it ideal for holding marker color and letting sunlight glow through the designs like faux stained glass.
- Eco-friendly: Reuse a common household item instead of throwing it away or immediately recycling it.
- Budget-conscious: Most materials are basic supplies many families already own, like markers and scissors.
- Kid-approved: Children can draw, color, cut, and hang their own creations with light adult supervision.
Basic Materials You Will Need
Before starting, collect a small set of tools and supplies so that kids can create without constant pauses to find things.
- Clean, dry plastic milk jugs (any size with flat sides).
- Sharp scissors for adults and safety scissors for kids.
- Permanent markers or paint pens in bright, bold colors.
- Optional: hole punch, string or fishing line, beads, suction cups with hooks, or tape for hanging.
Permanent markers adhere well to the textured side of the jug, which helps prevent smearing and offers richer color once the art is in the window.
Preparing the Milk Jug Canvas
Proper preparation makes the plastic smoother to work with and gives kids more freedom to create without wrestling with bulky bottles.
- Wash and dry: Rinse the jug with warm soapy water, remove the label, and let the plastic dry completely inside and out.
- Trim off curved areas: Adults can cut away the top, bottom, and handle to isolate the flat side panels.
- Flatten the panels: Press the plastic gently with your hands so each piece lies relatively flat, ready for drawing or tracing.
Once cut into panels, the plastic feels more like sturdy paper and becomes easy for young crafters to handle and decorate safely.
Project 1: Freeform Sun Catcher Panels
This project focuses on simple, irregular panels that kids can fully cover with their own drawings, patterns, or traced images.
Step-by-step instructions
- Choose a panel shape: Use the pre-cut pieces as-is or trim them into organic shapes like clouds, waves, or rounded rectangles.
- Select the drawing side: Work on the slightly textured outside of the original jug so the markers adhere better.
- Sketch lightly: Kids can first sketch in pencil if they want guidelines, or draw directly with permanent markers for bold images.
- Add color: Encourage them to fill in shapes with multiple colors, leaving a few small clear areas for light to shine through more brightly.
- Cut out details: Older kids may cut around individual drawings (like stars or animals) to create separate hanging charms.
- Punch a hole: Use a hole punch at the top of each piece if you plan to hang them individually.
When hung in a sunny window, these panels give a soft stained-glass feel as the light travels through the colored plastic.
Design themes kids love
- Nature scenes with flowers, trees, and rainbows.
- Outer space with planets, rockets, and shooting stars.
- Fantasy worlds with dragons, castles, and magical creatures.
- Everyday favorites like pets, desserts, or sports icons.
For younger children, adults can pre-cut basic shapes (hearts, circles, or letters of their names) for them to color freely, turning the project into both a craft and a letter-recognition activity.
Project 2: Layered Window Mobile with Beads
Once kids master simple panels, they can combine several small pieces into a vertical mobile that dances in the light and moves with the breeze.
Creating the pieces
- Cut multiple small shapes from the plastic such as leaves, raindrops, or geometric designs.
- Color each shape with a specific palette, for example blues and greens for a water-themed mobile.
- Use a hole punch at the top of each shape to prepare it for stringing.
Adding beads between shapes gives the mobile visual rhythm and extra sparkle, especially when sunlight catches translucent or metallic beads.
Assembling the mobile
- Prepare the hanger: Use a sturdy stick, an embroidery hoop, or a repurposed metal ring as the top support.
- Cut several lengths of string: Vary the lengths so the shapes hang at different heights.
- Thread beads and shapes: Alternate beads and plastic pieces on each string, tying knots under each element to hold it in place.
- Attach strands to the hanger: Tie the top of each string to the support and balance the arrangement so the mobile hangs evenly.
- Hang near a window: Use a ceiling hook or a curtain rod to display the mobile where it can move slightly in natural air currents.
This style of mobile works beautifully in a child’s room, a reading nook, or even on a covered porch where wind and light interact with the artwork.
Project 3: Scene-in-a-Window Story Strip
For kids who enjoy storytelling, a horizontal “story strip” made from milk-jug panels can turn a window into an illustrated tale that unfolds from left to right.
How to build a story strip
- Cut long panels: Trim the jug into longer strips instead of smaller shapes, joining pieces with clear tape if needed.
- Plan the story: Ask children to think of a simple narrative such as “A butterfly explores a garden” or “A rocket travels to a new planet.”
- Divide into sections: Mark soft vertical divisions with a light line so each segment shows one moment in the story.
- Illustrate the scenes: Starting from one end, kids draw each part of the story in order along the strip, adding color and background details.
- Attach to the window: Use removable adhesive or small suction cups with clips to display the strip across a lower or upper part of the glass.
Parents can prompt discussion by asking children to “read” their window story aloud, which supports both creative expression and language development.
Tips for Tracing and Detailing Artwork
Because milk-jug plastic is translucent, kids can trace favorite images placed underneath the panel, such as book covers, printed outlines, or simple coloring pages.
Older children may enjoy adding finer details like outlines, patterns, or shading with darker markers once the basic shapes are colored in.
- Secure the paper and plastic to the table with tape to prevent slipping while tracing.
- Start with lighter colors, then layer darker shades on top for depth.
- Use a very fine black marker at the end to outline major shapes for a stained-glass-style effect.
Safety and Age Guidelines
With thoughtful preparation, this craft can be adapted to a wide range of ages while keeping safety a priority.
Adults should handle tasks that require sharp tools or precise cutting, while kids focus on drawing, coloring, simple cutting, and assembling.
| Age Group | Suggested Activities | Adult Role |
|---|---|---|
| Preschool (3–4) | Coloring pre-cut shapes, choosing beads, helping place pieces on strings. | Cutting plastic, punching holes, tying knots, supervising marker use. |
| Early Elementary (5–7) | Drawing their own designs, cutting simpler shapes, assisting with mobile layout. | Handling initial jug cutting, checking edges, guiding tool use. |
| Older Kids (8+) | Tracing detailed images, designing scenes, assembling full mobiles independently. | Spot-checking for safety, offering creative suggestions as needed. |
Creative Variations and Seasonal Ideas
Once everyone understands the basic technique, it is easy to tailor milk-jug window art to seasons, holidays, or room themes.
Using color schemes and recurring motifs helps the window feel harmonious even when many separate pieces hang together.
- Spring: Flowers, umbrellas, raindrops, and butterflies in pastel colors.
- Summer: Suns, ocean waves, fish, and beach balls in bright yellows and blues.
- Autumn: Leaves, pumpkins, acorns, and cozy mugs in oranges, reds, and browns.
- Winter: Snowflakes, stars, mittens, and evergreen trees using cool blues and silvers.
Families can also create name banners, birthday motifs, or themed decorations for a child’s favorite storybook or movie, always keeping designs original and hand-drawn.
Displaying Your Finished Window Art
How the art is hung can be just as important as the designs themselves, affecting how light passes through and how easily pieces can be rearranged.
Choose methods that will not damage window frames and that allow for seasonal rotation or new additions as kids keep creating.
- Suction cups with hooks: Ideal for individual panels or mobiles; they grip smooth glass and remove cleanly.
- Transparent tape: Works for lightweight story strips or small shapes; test first on a corner of the window.
- String across the window: Tie a thin line across a frame and clip art pieces to it with mini clothespins for easy swapping.
Cleaning and Reusing the Artwork
Over time, dust or fingerprints may collect on hanging pieces, especially if they are at kid height.
Light cleaning keeps colors bright and also extends the life of each piece for long-term display or seasonal reuse.
- Wipe gently with a soft, slightly damp cloth, avoiding harsh scrubbing that might remove color.
- Store off-season pieces flat in a shallow box between sheets of paper to prevent bending.
- Recycle panels when they become too scratched or faded, replacing them with fresh creations.
Frequently Asked Questions (FAQs)
1. Do I have to use permanent markers?
Permanent markers are recommended because they adhere well to the textured plastic surface and stay vivid over time, even in sunny windows.
Washable markers may bead up or fade quickly on smooth plastic, so they are better suited for temporary projects or for very young children practicing on scrap pieces.
2. Can children cut the plastic themselves?
Adults should always make the first cuts to break down the jug into flat panels, since the curves and thickness can make it tricky and require sharper scissors.
Once panels are prepared, many school-aged children can safely trim simpler shapes with kid-friendly scissors, as long as an adult checks for sharp edges.
3. What if we don’t have suction cups?
If suction cups are not available, small loops of clear tape can attach panels directly to the window, especially for lightweight pieces.
Alternatively, create a hanging line across the window frame using string or yarn and clip artwork to it, making it easy to rearrange or remove.
4. Will the colors fade in the sun?
Over long periods of direct sunlight, some fading is natural, especially with lighter colors, but many permanent markers stay bright for months.
Rotating pieces seasonally or moving them to a slightly less intense window can help preserve color while giving kids excuses to craft new designs.
5. Can we combine this with other materials?
Milk-jug panels pair nicely with beads, ribbons, tissue paper overlays, or even small bells tied to the bottom of mobiles for a gentle sound.
Always keep the total weight manageable so that suction cups or hanging lines can hold the decorations securely without stressing your windows or hardware.
Encouraging Creativity and Sustainability
Transforming milk jugs into window art teaches children that everyday objects can become beautiful when viewed with creativity and care.
This simple craft blends art, storytelling, and environmental awareness, showing kids that reusing materials can be both fun and visually rewarding in their own living spaces.