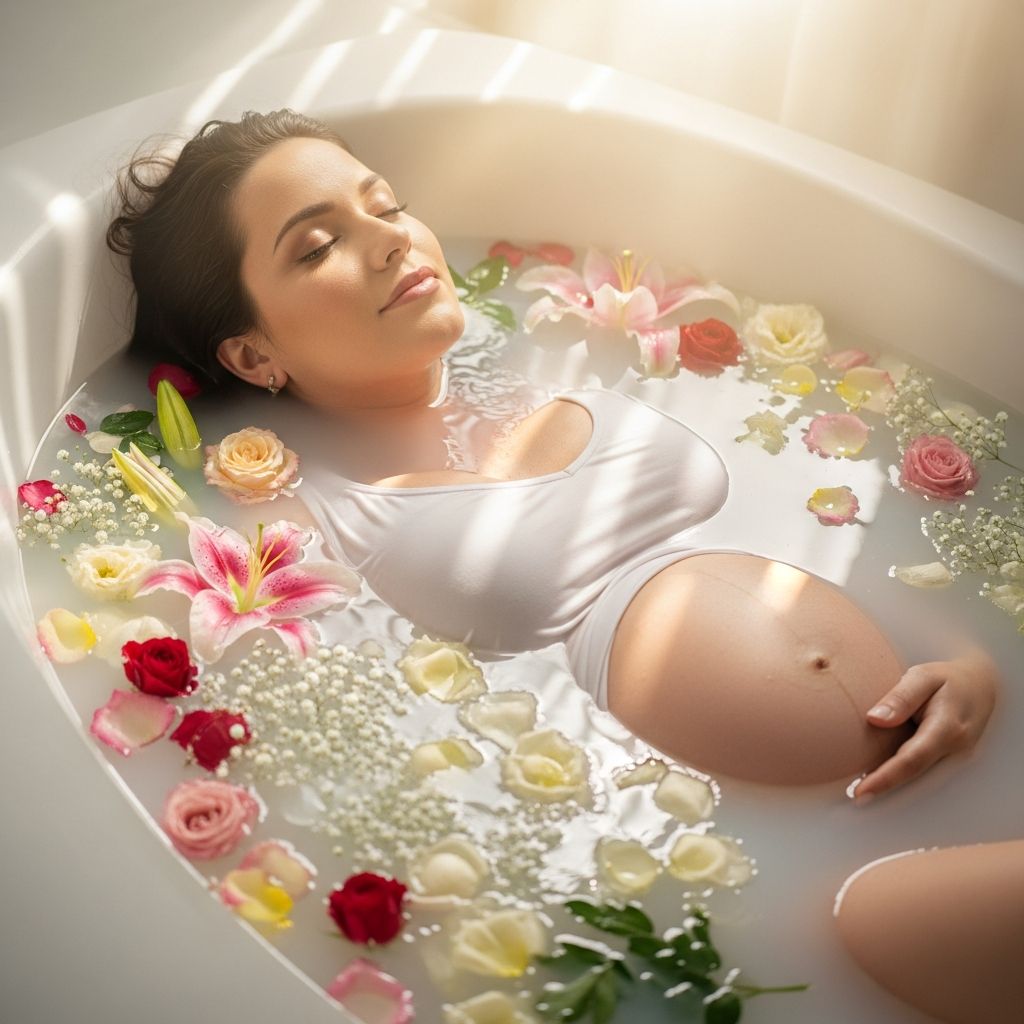
Milk bath maternity photography blends simple household elements with thoughtful styling to create soft, luminous portraits that celebrate pregnancy in a calm, intimate way. This guide walks through every step of the process, from planning and setup to posing and safety, so you can create images that feel both artistic and deeply personal.
Why Milk Bath Maternity Photos Feel So Magical
A milk bath turns a plain bathtub into a bright, creamy canvas that naturally draws attention to the expecting parent and baby bump. The milky water softens harsh lines, smooths skin tones, and adds a dreamy, painterly quality to the images. When combined with flowers, greenery, or fabric, it creates a scene that feels luxurious while still being surprisingly accessible to set up at home.
Beyond the aesthetic, a milk bath session can be a moment of pause in the whirlwind of pregnancy. Warm water, gentle movement, and intentional self-care help the subject relax, which shows up in the final photos as genuine serenity and connection. Instead of a posed, stiff shoot, the session often feels like a quiet ritual honoring this particular chapter of life.
Planning Your Milk Bath Session
Good planning makes the actual shoot smoother, safer, and more enjoyable. Before anyone steps into the tub, think through timing, location, and what kind of mood you want the images to convey. Having a clear vision helps guide every other choice, from wardrobe to lighting.
Start by deciding whether you want to work with a professional photographer or attempt the session at home with a partner or friend behind the camera. A professional brings technical expertise and backup equipment, while a DIY approach offers more privacy and flexibility. Both can yield beautiful results with thoughtful preparation.
Choosing the Best Time in Pregnancy
The sweet spot for most maternity sessions is when the baby bump is clearly defined but movement is still relatively comfortable. Many pregnant people find that late second trimester to early third trimester works well, when the belly shows prominently in photos and energy levels may still be reasonably stable. Extremely late in pregnancy, getting in and out of the tub can feel more challenging and may require extra help.
Scheduling earlier is also helpful if you are coordinating with a photographer or reserving a studio with a suitable bathtub. Planning a target week with some flexibility allows room for illness, weather, or simple fatigue without losing the chance for the session.
Setting the Scene: Space, Tub, and Light
Most milk bath maternity photos take place in an ordinary bathroom, but a bit of rearranging and styling can transform the space. The main goal is to create a clean, uncluttered environment that allows the tub, water, and subject to become the visual focus. Removing toiletries, shower curtains, and countertop clutter instantly makes the room feel more like a studio.
Lighting is just as important as the tub itself. Soft, diffused light flatters skin tone and reduces harsh shadows, which suits the gentle mood of these photos. Natural window light is often ideal, especially when filtered through a sheer curtain or thin fabric to soften the brightness.
Comparing Common Setup Options
| Element | Best Option | Why It Works Well |
|---|---|---|
| Bathtub style | White or light-colored tub | Enhances the milky water and keeps the scene bright. |
| Lighting | Window light or large softbox | Creates the soft, airy look associated with milk bath images. |
| Background | Plain tile or painted wall | Prevents distractions so the viewer’s eye stays on the subject. |
| Camera angle | Overhead or slightly angled down | Emphasizes the belly and the circular frame of the tub. |
Creating the Milk Bath: Ratios, Temperature, and Color
The heart of this style is, of course, the milky water itself. Contrary to what the name implies, you do not need a tub full of pure milk. Most setups rely on a base of warm water with enough milk or whitening additive to make the water opaque and creamy. This approach is more economical and easier to control.
The goal is a soft, even opacity where you cannot clearly see the bottom of the tub, but the surface still reflects light gently. You can adjust the strength based on personal preference: more milk for a dense, bright white; less for a softer, more translucent appearance.
Basic Steps for Mixing Your Milk Bath
- Fill the tub halfway with warm water that feels comfortable to the pregnant person, not hot.
- Gradually add whole milk, evaporated milk, or a milk bath substitute (such as powdered creamer or specialized bath products) to the water.
- Stir gently with your hand to distribute the liquid evenly without creating too many bubbles.
- Adjust the amount until the water looks creamy enough to hide details under the surface while still reflecting light.
- Allow the mixture to settle for several minutes so air bubbles can rise and disappear before adding decorations.
Different milk types and additives produce slightly different tones and textures. Whole cow’s milk tends to create a warm, natural white, while powdered creamer can deliver a thicker, more opaque look with a subtle off-white hue. Some photographers prefer evaporated milk because it stores easily and can be poured straight from the can as needed.
Styling the Scene: Flowers, Greenery, and Props
Milk bath styling is where you can personalize the session to reflect mood, season, and personality. The most popular decorations are fresh or artificial flowers, but foliage, citrus slices, fabric, and small props can all work beautifully if used thoughtfully. The key is to enhance the subject, not overwhelm them.
When choosing colors, consider skin tone, wardrobe, and the emotional tone you want the photos to evoke. Soft pastels create a romantic feel, while bold jewel tones read more dramatic. Monochromatic palettes keep things minimal and elegant, whereas multicolored arrangements feel playful and whimsical.
Decoration Ideas That Photograph Well
- Floating flowers: Whole blooms or large petals scattered on the surface frame the bump and face without feeling cluttered.
- Greenery stems: Eucalyptus, ferns, or soft leaves add texture and a spa-like feeling while breaking up blocks of color.
- Citrus slices: Orange, lemon, or grapefruit slices create a fresh, graphic pattern that feels modern and bright.
- Soft fabrics: Sheer fabrics or lace draped in the water can both preserve modesty and add movement to the composition.
- Sentimental objects: A tiny pair of baby shoes, an ultrasound print sealed safely in a frame, or a simple ribbon can introduce personal meaning.
If using real flowers, trim stems short to help them float and remove any loose leaves that might sink or cling awkwardly to the skin. Artificial flowers can be more predictable and reusable, but make sure dyes are water-safe and do not bleed onto the tub or skin.
What to Wear: Outfits and Modesty Options
Wardrobe choices set the tone of the session, from modest and romantic to artistic and intimate. The belly is usually the focal point, so select clothing that gently highlights the bump without feeling restrictive. Remember that fabric behaves differently in water, absorbing color and clinging in ways that may be more or less flattering than on dry land.
Comfort and confidence matter more than any specific style rule. Choose pieces that feel good on the body and align with the subject’s personality, cultural background, and comfort with partial nudity. Having multiple options at hand allows quick changes if something does not look or feel right once it is wet.
Popular Wardrobe Choices
- Sheer maternity gowns: Long, flowing pieces that soften lines and let the shape of the belly show through.
- Lace bralettes and underwear: Provide coverage while still feeling delicate and feminine in close-up shots.
- Tube tops or bandeaus: Simple tops that keep attention on the belly and can be paired with sheer skirts or fabrics.
- Strategic drapes of fabric: Fabric alone can create a timeless, almost sculptural look when arranged across the body and water.
- Implied nude styling: For those comfortable with it, careful posing, flowers, and fabric placement can maintain modesty while embracing a more intimate aesthetic.
Posing Tips for Flattering, Natural Images
Because much of the body sits below the waterline, posing in a milk bath is more about small movements than big shifts. Tiny changes in angle, chin position, and hand placement can transform a photo from stiff to serene. Working slowly and communicating clearly helps the subject relax into each pose.
Remember that safety and comfort come first. Slippery surfaces, fatigue, and the unique physical changes of pregnancy all mean that poses must be easy to enter and exit. Supportive partners or assistants can help adjust flowers or fabrics so the expecting parent does not need to twist or stretch awkwardly.
Simple Poses That Work Well
- Reclined with head toward the edge: The subject leans back, supported by a rolled towel, with the bump centered in the frame and hands resting gently on or around the belly.
- Side turn for profile: A slight turn of the torso and hips highlights the curve of the belly, especially when shot from above or at a three-quarter angle.
- Hands on heart or belly: One or both hands lightly placed on the bump or over the heart add emotional connection and a sense of quiet anticipation.
- Eyes closed for serenity: Asking the subject to close their eyes and take a slow breath creates a peaceful, almost meditative expression.
- Partner participation: A partner’s hands on the belly, or a close-up of intertwined fingers resting on the bump, introduces intimacy without needing both bodies fully in the tub.
Safety and Comfort Considerations
While a milk bath session can feel like a spa treatment, pregnancy adds extra factors to keep in mind. Water should be warm but never hot, as high temperatures can be unsafe during pregnancy and increase the risk of dizziness or overheating. Short sessions with breaks between poses are usually more comfortable than one long stretch in the tub.
All participants should feel empowered to stop or adjust the session at any point. If the pregnant person feels lightheaded, overheated, or simply tired, step out, rest, and hydrate. Having a non-slip mat, a sturdy helper nearby, and towels within arm’s reach all contribute to a safer experience.
Hygiene and Skin Considerations
- Use clean tubs and thoroughly rinse away any cleaning product residue before filling.
- Avoid adding ingredients that might irritate sensitive skin, such as strong fragrances or essential oils without proper dilution.
- After the session, rinse off in clean water to remove milk sugars or bath additives from the skin.
- Pat dry gently and moisturize if desired to lock in hydration.
Camera, Angles, and Technical Tips
Any camera that allows basic exposure control and focus adjustments can work for a milk bath session, from a smartphone to a professional DSLR or mirrorless system. The most important technical elements are steady framing, correct focus on the eyes (when visible), and enough light to avoid harsh noise or blur. Using a tripod can help keep angles consistent, especially when shooting from above.
Overhead angles are particularly popular because they showcase the circular tub, the floating decorations, and the belly all in one frame. If shooting from above, ensure the camera is secure and stable—standing on a step stool or ladder requires caution and a spotter. Slightly angled shots from the side or at three-quarter view add variety and can flatter the face and neck.
Quick Technical Checklist
- Use soft, even light to avoid sharp shadows on the face and belly.
- Focus on the eyes or the belly, depending on the frame and composition.
- Keep the shutter speed high enough to prevent motion blur, especially if hand-held.
- Check the screen often to adjust exposure and composition as flowers and fabric shift.
- Capture both wide shots for context and close-ups for intimate details.
After the Shoot: Cleanup and Image Finishing
Once the final photos are taken, drain the tub promptly and remove any plant material to avoid staining. Rinse surfaces with clean water and, if necessary, use a mild cleaner after the milk has been washed away. Launder any fabrics used in the tub according to their care labels, checking for any lingering petal or dye residue.
On the editing side, gentle adjustments usually work best. Slightly brightening the exposure, softening contrast, and enhancing skin tones can emphasize the dreamy character of the images without making them look artificial. Consistent color grading across the final set helps the photos feel like a cohesive story rather than a random assortment of frames.
Frequently Asked Questions
Do I need a huge bathtub for milk bath maternity photos?
No, a standard household bathtub is usually enough for this type of session. Because the focus is often on the upper body and belly rather than the full length of the body, careful framing can make a smaller tub look spacious in photos.
Is it possible to do a milk bath shoot at home without a professional photographer?
Yes, many people successfully create milk bath maternity images at home with a partner or friend handling the camera. With good natural light, thoughtful styling, and attention to safety, a DIY session can still look polished and meaningful.
What type of milk works best?
Whole milk, evaporated milk, or non-dairy substitutes combined with water can all create a milky effect. The exact choice often comes down to availability, cost, storage, and personal preference about what you want in contact with your skin and plumbing.
How long should a milk bath maternity session last?
Most sessions in the tub itself run between 20 and 45 minutes of actual shooting time, broken into shorter segments with breaks as needed. The total appointment, including setup and cleanup, is usually longer, but the pregnant person should not remain in the water for extended periods if they feel tired or overheated.
Can I include my partner or older children in the milk bath photos?
Yes, partners and children can be included, either by joining briefly at the edge of the tub or by contributing hands, kisses, or close-up interactions. Just remember that adding more people changes how much space is available and may affect how you style decorations and frame each shot.