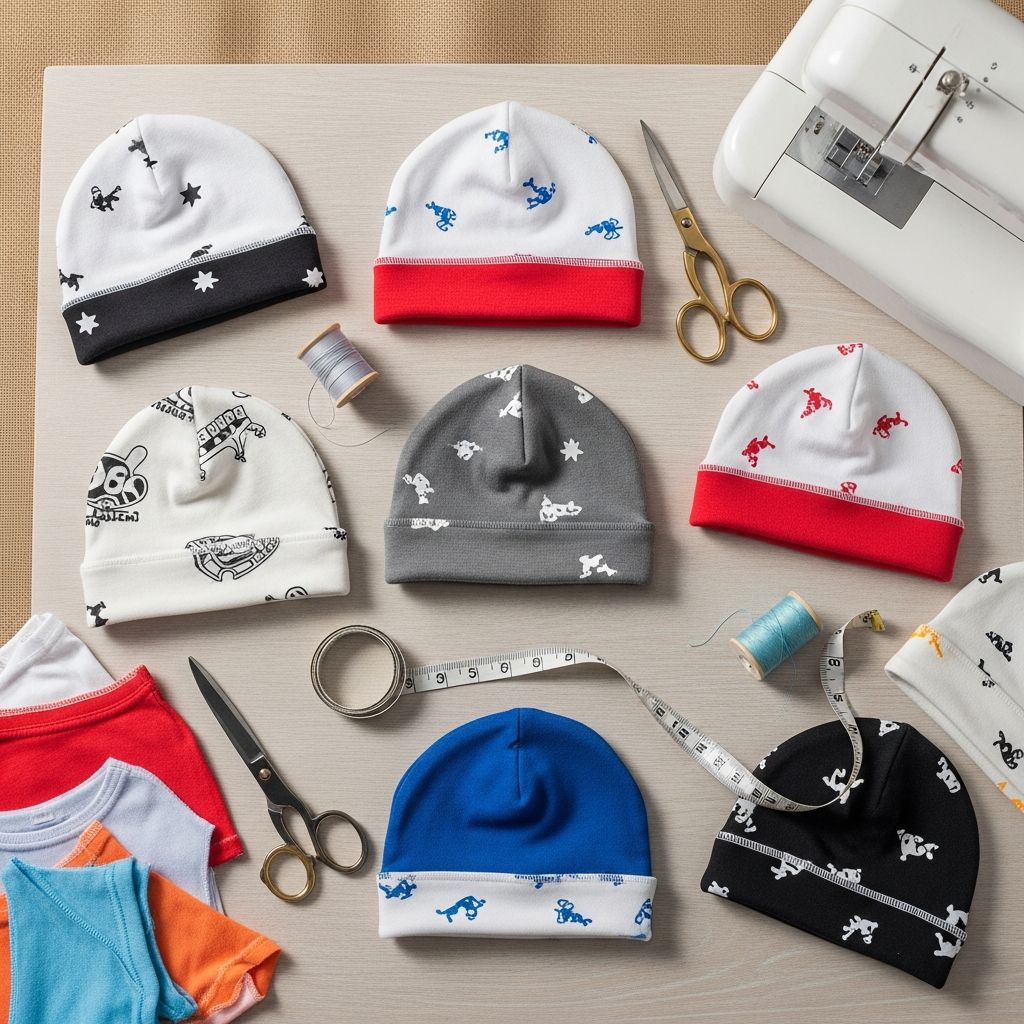
Soft, stretchy newborn hats are essential for keeping a baby warm, and they are surprisingly easy to sew from an old T-shirt you already own. Reusing a favorite shirt gives new life to a well-loved item and creates a sentimental keepsake for your baby or as a thoughtful handmade gift.
This guide walks through everything from choosing the right shirt to finishing a neatly sewn hat, using simple techniques that even a cautious beginner can master. By the end, you will know how to draft a basic pattern, cut safely, and sew a comfortable cap that actually fits a newborn’s delicate head.
Why Upcycle a T-Shirt into a Baby Hat?
Newborns lose heat quickly through their heads, so a lightweight knit hat helps them stay cozy without overheating. An old T-shirt is usually soft from repeated washing, which makes it gentle on a baby’s sensitive skin and ideal for a snug cap.
Upcycling also reduces textile waste and puts sentimental garments back into daily use, whether it is a shirt from a special trip, a team logo, or simply a color you love. Instead of storing or discarding it, you can convert it into a functional accessory with emotional value attached.
Choosing the Right Shirt and Fabric
The fabric you start with will determine how comfortable and durable the hat will be. Not every T-shirt works well, so spend a moment inspecting the garment before cutting into it.
- Prefer soft cotton or cotton-blend knits: Aim for a shirt that feels smooth and stretchy rather than stiff or scratchy.
- Avoid heavy or very thin fabric: Thick sweatshirts may feel bulky on a newborn, while ultra-thin, worn-out shirts can curl and develop holes along the seams.
- Check stretch direction: Gently pull the fabric in different directions; the direction with more stretch should go around the baby’s head, not top to bottom.
- Inspect for stains and holes: Plan your pattern placement to avoid any worn spots, printed cracks, or faded areas that might weaken the hat.
Essential Tools and Materials
You do not need advanced sewing equipment to make a newborn hat. A basic machine that can sew a zigzag stitch and a few simple tools are enough to complete this project.
| Item | Purpose |
|---|---|
| Soft knit T-shirt | Main fabric for the hat body |
| Paper and pencil | Drafting and adjusting the pattern |
| Fabric scissors | Cutting clean, accurate fabric pieces |
| Pins or clips | Holding layers together while sewing |
| Measuring tape or ruler | Checking dimensions and seam allowances |
| Sewing machine with zigzag stitch | Creating flexible seams that can stretch |
| Thread (polyester or cotton blend) | Strong seams that resist snapping |
| Iron (optional) | Flattening seams and improving finish |
Drafting a Simple Newborn Hat Pattern
A newborn hat can be reduced to a slightly rounded rectangle with a gentle dome on top. Drafting your own pattern allows you to adjust the width and height based on the baby’s head measurements or your preferred style.
- Measure the head: For a typical newborn, use a head circumference of about 34–36 cm. Divide this measurement by two to get the flat pattern width, then subtract about 1–1.5 cm to account for fabric stretch and a snug fit.
- Choose the height: A finished hat height of about 12–14 cm works well for most newborns. Add 1.5 cm to this measurement to cover seam allowances at the top and bottom.
- Draw the base rectangle: On paper, mark the width and height, then round the top corners into a smooth arch to create a dome shape.
- Add seam allowance: Add about 0.6–1 cm around the sides and top of the pattern for seams, leaving the bottom edge as the hat opening.
Cutting the Hat from a T-Shirt
Cutting accurately saves time later and makes sewing easier. Work on a flat surface and keep the fabric still while tracing and cutting around your pattern.
- Use the shirt’s hem: Place the bottom of your pattern along the finished T-shirt hem so you do not have to sew a separate hem later.
- Fold for symmetry: Fold the shirt so you can cut two identical layers at once, forming the front and back of the hat in one step.
- Align the stretch: Position the pattern so that the widest part runs across the stretchiest direction of the fabric, usually side to side across the shirt.
- Cut slowly: Follow the drawn lines with sharp scissors, keeping them perpendicular to the fabric for clean edges.
Sewing the Basic Newborn Hat
Once your pieces are cut, sewing the hat is a matter of stitching simple curved seams. A small zigzag stitch is ideal because it stretches with the fabric and prevents threads from snapping when the hat is pulled over the baby’s head.
- Place right sides together: Lay the two hat pieces with the right (outer) sides facing each other, aligning all edges.
- Pin the curves: Use pins or clips around the curved top and sides to keep the fabric from shifting.
- Set the stitch: Choose a short zigzag stitch and medium width so the seam can flex and the raw edges stay enclosed.
- Sew side and top seams: Start at one bottom corner, stitch up the side, follow the curve over the top, and sew down the other side, leaving the bottom edge open.
- Trim and turn: Carefully trim any bulky seam allowance at the top curve, then turn the hat right side out and shape the dome with your fingers.
Adding a Simple Fold-Up Cuff
A cuff gives the hat a neat finish and a bit of extra warmth over the ears. Using the existing hem of the T-shirt makes this step very quick and keeps the inside comfortable against the baby’s skin.
- Use a deep hem: If the shirt has a wide hem, cut the hat pattern slightly taller so you can fold up a generous cuff.
- Press the fold: After turning the hat right side out, fold the hem up once or twice and press with a warm iron to set the crease.
- Secure if desired: For a cuff that stays in place, add a few small hand stitches at the side seams to tack the cuff to the hat.
Optional Design Variations
Once you can sew a basic hat, small changes in shape and details can transform it into a distinctive accessory. These variations do not require a new pattern from scratch, only minor edits to the top or height.
- Top-knot hat: Extend the top of the pattern into a narrow tail, sew as usual, and knot the tail for a playful look.
- Rounded beanie: Keep the dome barely curved for a closer, more streamlined silhouette that fits easily under a hood.
- Double-layer hat: Cut two pairs of hat pieces, sew two hats, and nest them with wrong sides together to create a reversible, thicker cap.
Safety and Comfort Tips for Newborn Wear
Newborn clothing must prioritize safety and comfort over decoration. Because the hat sits close to sensitive skin and near the face, every seam and detail matters.
- Avoid scratchy elements: Skip beads, hard labels, and rough appliqués that could irritate or pose a choking hazard.
- Keep seams smooth: Press seams flat and consider placing the seam allowances toward the outside if the baby’s skin is very sensitive.
- Check fit regularly: The hat should stay on without leaving marks on the forehead or around the ears; loosen the pattern if it seems too tight.
- Supervise wear: Remove the hat during sleep if local safety guidelines advise against head coverings in cribs, especially if the baby tends to pull clothing over the face.
Care and Washing Instructions
Because the hat started its life as a T-shirt, it often tolerates the same wash routine. Still, baby skin can be sensitive to detergents and rough handling, so err on the gentle side.
- Use mild detergent: Choose a fragrance-free or baby-formulated detergent to reduce the risk of irritation.
- Wash in cool or warm water: Moderate temperatures help preserve the fabric’s stretch and keep colors from fading too quickly.
- Air-dry when possible: Laying the hat flat or drying on low heat protects the elastic fibers in the knit fabric.
Ideas for Gifting and Personalization
A small upcycled hat can be the highlight of a baby gift set, especially if the fabric has personal meaning, such as a shirt from a family event or a favorite sports team. Simple embellishments can make each hat unique without compromising safety.
- Coordinated sets: Sew matching hats for siblings using different sections of the same shirt, or pair the hat with a handmade blanket or burp cloth.
- Fabric-only decorations: Add soft, securely sewn fabric shapes like stars or hearts from leftover knit scraps, placing them away from the face area.
- Handwritten tags: Attach a small paper tag explaining the origin of the shirt and the story behind it to turn a simple hat into a meaningful keepsake.
Frequently Asked Questions
How long does it take to sew one newborn hat?
Once the pattern is drafted and the supplies are gathered, most people can cut and sew a basic newborn hat in about 20–30 minutes. The process becomes even faster when making several hats at once because you can cut and sew in small batches.
Do I have to use a sewing machine?
A sewing machine makes the project faster and produces more durable seams, especially with a zigzag stitch. However, it is possible to sew the hat by hand using a small backstitch and a stretch-friendly thread; just take extra care to keep stitches even and secure.
What if my T-shirt fabric does not stretch much?
If the shirt has very little stretch, the finished hat may fit tightly or feel uncomfortable. In that case, widen the pattern slightly and plan to use it for a doll or as practice, then save more elastic knits for hats the baby will actually wear.
Can this pattern be adapted for larger babies?
Yes, simply measure the baby’s current head circumference, divide by two, and adjust the pattern width accordingly while adding a little extra height. As babies grow, you may also want to make the hat deeper so it covers the ears more fully in cooler weather.
Is it safe to add ears or other 3D details?
Soft, fabric-only details that are firmly sewn into the seams are usually safer than glued or rigid decorations. Avoid anything small that could detach, and always check that the inside seams remain smooth wherever extra pieces are attached.