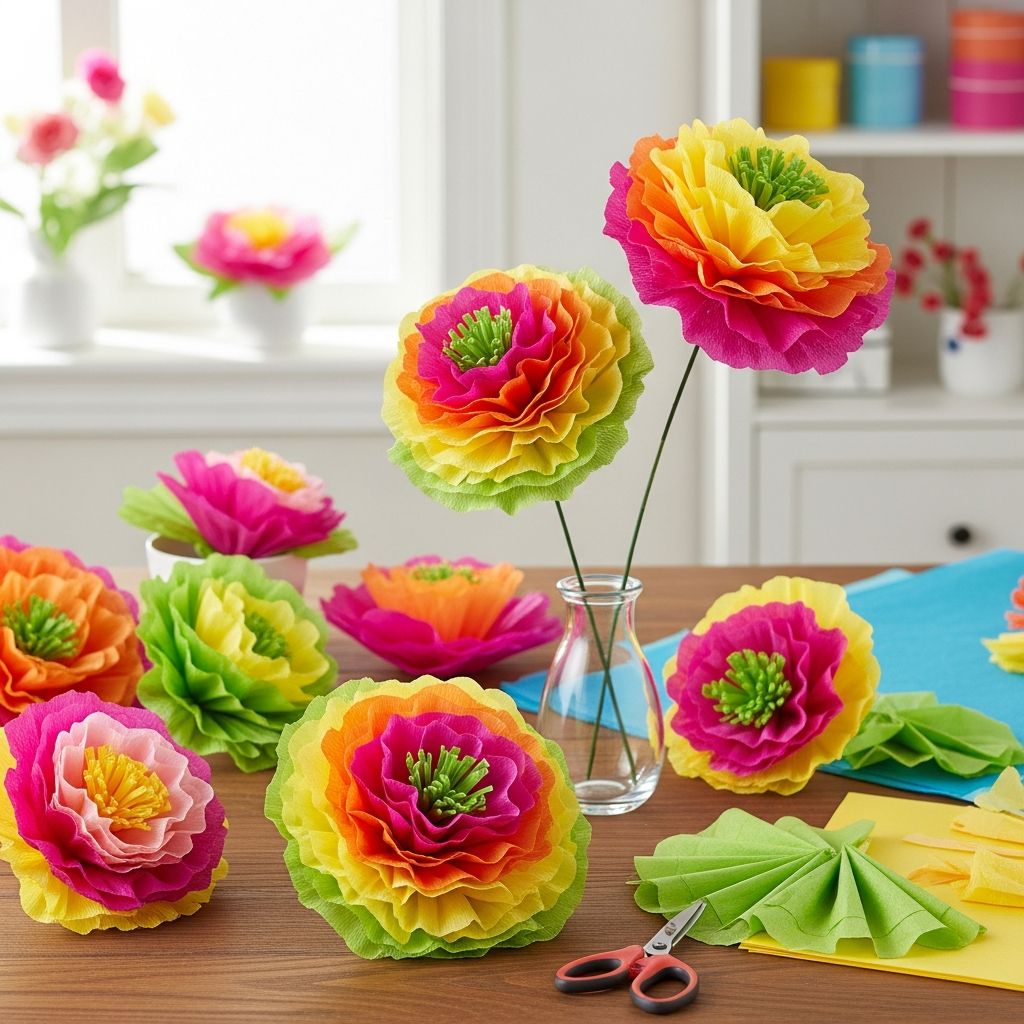
Creating tissue paper flowers offers a delightful way to add color and whimsy to any space or celebration. These lightweight, customizable blooms require minimal materials and can be assembled in minutes, making them ideal for family bonding activities or last-minute party setups. Whether you’re decorating a birthday bash, enhancing a wedding backdrop, or simply brightening a child’s room, tissue paper flowers provide endless creative possibilities without the fuss of fresh petals.
Why Choose Tissue Paper for Flower Crafts?
Tissue paper stands out for its affordability, availability, and versatility in crafting artificial flowers. Unlike real blooms that wilt quickly, these paper versions maintain their shape and vibrancy indefinitely, offering long-lasting decor solutions. Their delicate texture mimics natural petals effectively, and the material’s pliability allows for fluffing into realistic 3D forms. Families appreciate how these projects encourage fine motor skills in children while producing professional-looking results. Bulk packs from craft stores keep costs low, often under a dollar per flower when making multiples.
Environmental benefits include reusability; once an event ends, flowers can be stored flat and redeployed. Customization thrives here—mix colors for ombre effects, gradients for sunflowers, or patterns for exotic varieties. This craft suits all skill levels, from toddlers supervised with safety scissors to adults crafting intricate garlands.
Gathering Your Essential Materials
Stocking up is straightforward with everyday items. Core supplies include:
- Tissue paper sheets: 20×26 or 20×30 inches work best; opt for 8-10 sheets per large flower.
- Wire or pipe cleaners: For stems, providing flexibility and strength.
- Scissors: Sharp crafting shears for clean cuts.
- Stapler or floral wire: To secure the center securely.
- Ruler and cutting mat: Optional for precision in bulk production.
For themed flowers, incorporate green tissue for leaves or contrasting centers in yellow or orange. Safety tip: Use child-safe scissors for young makers to prevent accidents. These basics yield dozens of flowers, scalable for personal or event use.
Mastering the Classic Accordion Fold Technique
The accordion method forms the foundation for most tissue paper flowers, producing full, lush blooms efficiently. Begin by stacking 8 equal-sized sheets, aligning edges perfectly. Fold the stack in half lengthwise, then repeat perpendicularly to create a compact rectangle.
- Position the stack horizontally and fold into 1-inch accordion pleats, pressing firmly for sharp creases.
- Secure the center with a staple or twisted pipe cleaner, trimming excess paper.
- Shape petal edges: Round for roses, scallop for peonies, or point for mums by cutting both ends post-folding.
- Gently fan out layers, pulling upward from the center one by one to avoid tears.
This yields a 12-inch bloom; adjust sheet count for smaller sizes. Patience prevents rips—start centrally and alternate sides for balance.
Customizing Petal Shapes for Unique Blooms
| Petal Style | Description | Best For |
|---|---|---|
| Rounded | Smooth curves on both ends | Classic roses, soft peonies |
| Scalloped | Wavy cuts mimicking petals | Dahlias, layered fullness |
| Pointed | Triangular tips | Wildflowers, edgy mums |
| Asymmetric | One side longer | Modern, abstract designs |
Experiment post-stapling: Experiment with cuts to define flower personality. Combine styles on one bloom for hybrid effects, enhancing visual interest in bouquets.
Scaling Down: Mini Flowers for Delicate Touches
Smaller flowers suit favors, hair clips, or table scatters. Resize squares accordingly:
- 12+ inches: 8 layers for grandeur.
- 8-11 inches: 6 layers for medium.
- 4-7 inches: 5 layers for petite.
- Under 4 inches: 4 layers for tiny accents.
Follow standard folding but use fewer pleats. Attach to toothpicks for cupcake toppers or clips for wearables. These minis pack big charm in small packages, perfect for kids’ parties.
Adding Stems, Leaves, and Realistic Details
Elevate basic flowers with stems: Thread pipe cleaners through the center staple, twisting securely. For leaves, cut separate green tissue into teardrop shapes, fringe edges, and wrap around stems with tape or glue dots.
Create centers by fringing smaller contrasting squares and cupping over the core. Add glitter or beads for sparkle. Pro tip: Vary stem lengths for dynamic arrangements in vases.
Creative Projects and Display Ideas
Beyond singles, assemble into:
- Garlands: String blooms horizontally for backdrops.
- Centerpieces: Cluster in vases with filler greens.
- Photo booths: Giant versions (double sheets) for walls.
- Wreaths: Glue to foam rings seasonally.
Color-coordinate for themes—pastels for nurseries, metallics for holidays. Involve kids in assembly lines for efficiency during events.
Tips for Success and Common Mistakes to Avoid
Achieve flawless results with these insights:
- Match tissue quality: Avoid thin varieties prone to tearing.
- Pull gently: Inner tugs minimize rips.
- Store flat: Press between books to retain shape.
- Scale production: Prep accordions ahead for speed.
Frequent pitfalls include over-tight staples splitting paper or uneven folds causing lopsided blooms. Practice on scraps builds confidence.
Family-Friendly Adaptations for Children
Kids adore this craft’s tactile joy. Simplify by pre-cutting stacks, letting them handle fluffing. Use blunt scissors and non-toxic glue. Themes like rainbows or unicorns spark imagination. Educational perks: Teaches symmetry, color theory, and patience. Group sessions yield party-ready decor while fostering teamwork.
Seasonal Twists and Holiday Variations
Adapt for occasions:
- Halloween: Orange-black spiders.
- Christmas: Red-green poinsettias.
- Valentine’s: Heart-petal roses.
- Spring: Pastel tulips with pipe stems.
Layer metallics for shimmer or dye with markers for custom hues.
Frequently Asked Questions
How long does it take to make one tissue paper flower?
Basic blooms take 5-10 minutes; practice speeds it to under 5. Bulk prep halves time.
Can I use crepe paper instead of tissue?
Yes, crepe adds texture but is sturdier; adjust folds for stretchiness.
Are these flowers reusable?
Absolutely—flatten and store in bags for future events, lasting years.
What if my layers tear during separation?
Tears blend in amid fluff; minor ones add character. Start centrally.
How do I make extra-large flowers?
Double sheet sizes and use 10-12 layers for 24-inch giants.
Advanced Techniques for Pro-Level Blooms
For realism, fringe petal edges pre-folding or cup layers individually. Dye tissue with food coloring for ombres. Combine with pom-poms for hybrid florals. These elevate crafts to gallery-worthy art.
References
- How to Make Tissue Paper Flowers Four Ways — Hey Let’s Make Stuff. 2023-05-15. https://heyletsmakestuff.com/our-wedding-paper-flowers-tutorial/
- Try This Easy DIY Tissue Paper Flower Project With Kids — Orange County Mom Collective. 2022-08-10. https://orangecounty.momcollective.com/parenting-wisdom/activities/try-this-easy-diy-tissue-paper-flower-project-with-kids/
- Easy Tissue Paper Flowers: 5 Steps (with Pictures) — Instructables. 2021-11-20. https://www.instructables.com/Tissue-Paper-Flowers/
- How to Make a Tissue Paper Flower: A Dazzling Tutorial — Creative Live. 2023-02-14. https://www.creativelive.com/blog/how-to-make-a-tissue-paper-flower/