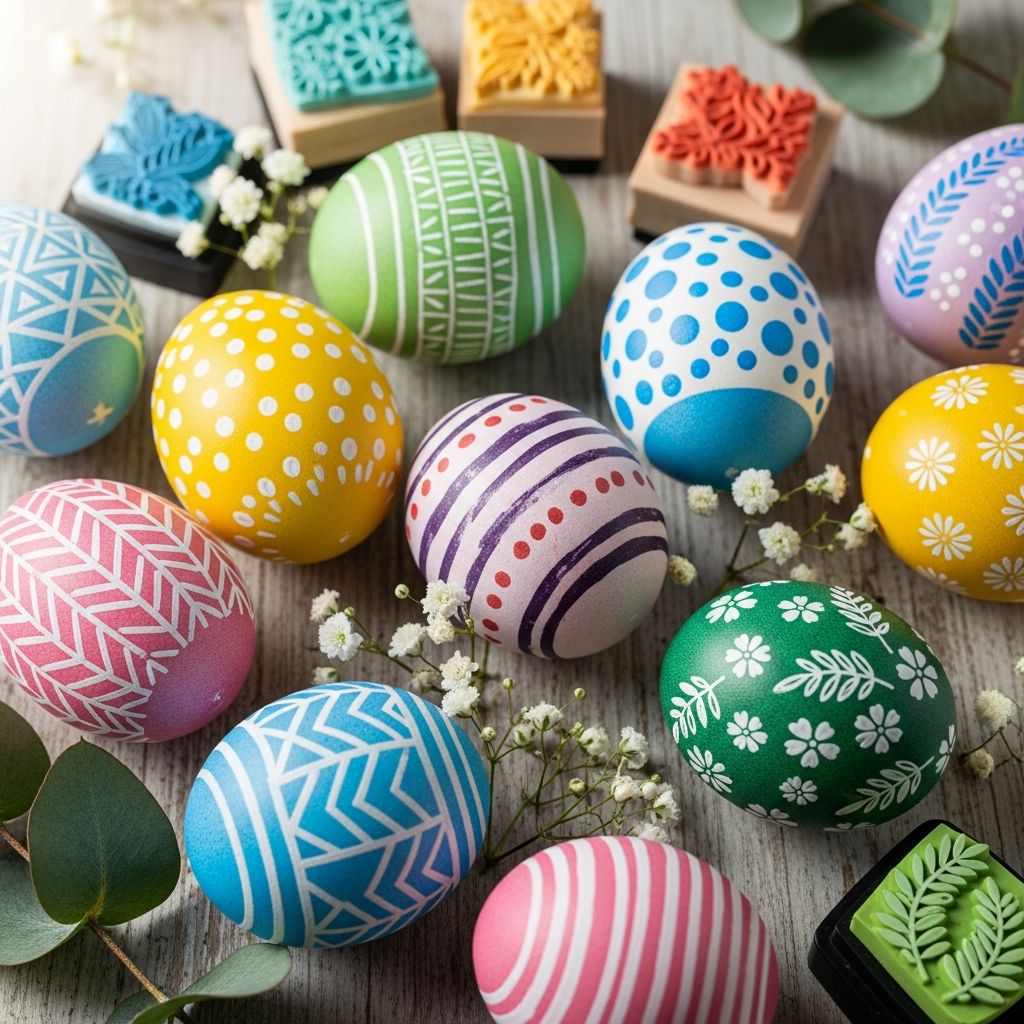
Rubber stamping is an easy way to turn ordinary Easter eggs into polished, graphic little artworks without complicated painting or advanced drawing skills. This guide walks through tools, methods, and creative ideas for making rubber stamped Easter eggs that look professional but remain simple enough for an afternoon craft session.
Why Try Rubber Stamped Easter Eggs?
Traditional dye kits are fun, but rubber stamps give eggs a different look: crisp lines, repeatable patterns, and the chance to add words, dates, or tiny illustrations. Instead of relying on random color effects, stamping lets you plan designs and produce cohesive sets of eggs for centerpieces, place settings, or gift baskets.
- Stamped designs are clearer than many freehand marker drawings.
- You can reuse the same stamps year after year for consistent styles.
- Alphabet and motif stamps make personalization quick and neat.
Choosing the Right Eggs
The type of egg you work with affects durability, food safety, and how long your designs will last. Before buying supplies, decide whether the eggs will be eaten, displayed for a few weeks, or kept as long-term decorations.
| Egg Type | Best Use | Pros | Cons |
|---|---|---|---|
| Hard-boiled real eggs | Short-term display and same-day eating | Inexpensive, easy to find, natural surface | Short shelf life, must consider food-safe supplies |
| Blown-out real eggs | Seasonal displays that last several weeks or longer | Lightweight, real shell texture, reusable if stored carefully | Fragile, preparation takes extra time |
| Wooden eggs | Long-term decor and children’s play sets | Very sturdy, easy to handle, smooth surface for stamping | Cost more upfront, not edible |
| Plastic craft eggs | Kid-friendly projects and egg hunts | Durable, hollow, often pre-primed | Some inks may smudge, surface can be slick |
| Paper-mâché eggs | Painting and mixed-media stamping | Absorbent, lightweight, good for acrylic paints | Not food-safe, need sealing for durability |
Essential Tools and Supplies
You do not need a full studio to stamp eggs. A few carefully chosen items make the process smoother and help protect both the eggshells and your work surface.
- Eggs: Choose one type from the table above based on how long you want to keep the finished eggs.
- Rubber or clear stamps: Small motifs, letters, numbers, and borders work better than oversized designs.
- Ink pads: Dye-based or pigment inks labelled for non-porous or semi-porous surfaces; if eggs will be eaten, choose food-contact-safe options and keep ink on the shell only.
- Gloves: Light disposable gloves keep ink off hands and prevent smudges.
- Paper towels and scrap paper: For test stamping, blotting, and protecting your table.
- Fine-tip markers (optional): For tiny details, dots, or outlines after stamping.
- Clear spray sealer or brush-on varnish (optional): For long-lasting display eggs only, not for eggs that will be eaten.
Preparing Eggs for Stamping
Prep work is not glamorous, but it makes stamping much more satisfying. Clean, dry shells reduce smearing, and a stable work setup keeps the eggs from rolling away mid-design.
- Clean the shells: Wipe real eggs gently with a slightly damp cloth to remove dust or stray feathers, then allow them to dry completely before stamping.
- Check for cracks: Set aside any eggs that flex or show hairline breaks, since pressure from the stamp can cause further damage.
- Set up a drying station: Use an empty egg carton, small bottle caps, or rings of crumpled paper to cradle eggs upright while ink dries.
Basic Rubber Stamping Technique for Eggs
Eggs are curved and fragile, so the technique is slightly different from stamping on flat paper. The main goal is gentle contact: enough to transfer the ink, but not enough to crack the shell or distort the design.
- Ink the stamp lightly: Tap the stamp onto the pad instead of pressing the pad into the stamp. Check the surface: it should look moist but not flooded.
- Hold the egg securely: Cradle the egg in your non-dominant hand with fingertips spread so pressure is even.
- Rock, do not grind: Bring the stamp straight down, then very slightly rock it from side to side or top to bottom to follow the curve, lifting away after a second or two.
- Let each impression dry: Place the egg in your drying station and wait a few minutes before rotating and stamping the next area to avoid fingerprints and smears.
- Clean stamps as you go: Wipe with a damp cloth or stamp cleaner when changing colors, especially when working with light shades after dark ones.
Layering Color: Dye, Paint, or Bare Shell?
You can stamp directly on plain white or brown shells, but adding background color creates more depth. There are three common ways to approach color when working with stamped eggs.
- Stamp on plain eggs: This emphasizes line work and lettering, ideal for minimalist black or single-color designs.
- Stamp over dyed eggs: First dye the eggs with food color or a dye kit, let them dry thoroughly, then stamp on top for contrast.
- Stamp over painted bases: For wooden or paper-mâché eggs, apply a thin coat of acrylic paint, let it cure, and stamp with a contrasting color.
Design Ideas for Stamped Easter Eggs
Stamps make it possible to create coordinated sets of eggs that share a theme, color palette, or message. The ideas below can mix and match; you might use one theme per carton or combine several styles for a more eclectic basket.
- Monogram eggs: Use a single large initial for each family member, stamping in their favorite color, then add tiny dots or hearts around the letter with a fine marker.
- Calendar and countdown eggs: Stamp numbers from 1 to 12 or 1 to 24 on individual eggs to create an Easter countdown or an egg “advent” display.
- Botanical patterns: Small leaf, branch, or flower stamps repeated around the egg create a wreath-like effect without having to paint freehand vines.
- Story eggs: Use alphabet stamps to add one short word to each egg, then arrange them in a basket so that the words read as a phrase.
- Graphic borders: Tiny stars, triangles, or chevrons stamped along the center of the egg form a belt-like band that looks crisp and modern.
Tips for Crisp Impressions on Curved Shells
Eggs are challenging surfaces because they are both curved and delicate. A few small adjustments to technique can turn smudgy marks into clean, defined prints.
- Choose smaller stamps: Designs that fit comfortably on a fingertip flex better around the curve than large blocks.
- Use less ink than you think: Over-inking fills in fine lines and encourages slip; a slightly drier stamp often yields a sharper image.
- Practice on a test egg: Keep one egg just for practice and test each new stamp and color combination before committing to your final eggs.
- Stamp in sections: For long borders, stamp a short segment, let it dry, then carefully align and add the next segment.
Safety and Food Considerations
When decorating eggs that will be eaten, treat the shell as a barrier that should not be compromised. Cracked eggs should be used for cooking rather than decorating, and any inks or coatings must stay on the outside only.
- For edible eggs, avoid spraying sealers or varnishes and choose products that are labelled safe for contact with food surfaces or keep the decorated eggs strictly for display.
- Refrigerate hard-boiled eggs if they will be eaten later, and discard them after a reasonable time out of the refrigerator according to standard food safety guidelines.
Finishing and Sealing Display Eggs
If your eggs are purely decorative—such as wooden, plastic, or well-dried blown shells—sealing them gives a finished look and protects the stamped design. This is especially helpful for eggs that will be handled by children or stored from year to year.
- Confirm ink is dry: Wait at least the full drying time recommended on the ink packaging before sealing.
- Choose an appropriate sealer: A clear acrylic spray or brush-on matte varnish preserves the look without adding cloudiness; always work in a well-ventilated area and protect surrounding surfaces.
- Apply in thin layers: Several light coats are better than one heavy coat, which might cause ink to run or pool around stamp lines.
- Label storage containers: Once eggs are fully cured, store them in padded boxes or old egg cartons marked with the year and design style, so they are easy to find next season.
Creative Variations on Stamped Eggs
Once the basic technique feels comfortable, stamped eggs can become part of more experimental projects. Mixing stamping with other mediums allows for richer textures and more complex designs while still keeping the process approachable.
- Embossed look on faux eggs: Use heat-safe faux eggs and embossing powder with pigment ink to create slightly raised, glossy designs.
- Stamped layering over watercolor: For non-edible eggs, lightly wash the surface with watered-down paint, then stamp darker images on top once fully dry.
- Mixed-media collage: Combine light stamping with small torn papers, tissue, or washi tape for a layered, scrapbook-inspired egg collection.
- Metallic accents: Add metallic ink highlights or outline stamped shapes with a fine metallic pen to catch the light in a centerpiece.
Simple Project Plan: One Afternoon Stamped Egg Set
The outline below turns the techniques into a practical schedule. This is useful if you want to finish a carton of eggs in a single afternoon without feeling rushed.
- Hour 1 – Prep and background: Clean eggs, decide on a theme, and dye or paint backgrounds if using color washes.
- Hour 2 – Stamping: Test stamps on scrap paper, then decorate eggs in batches, rotating between them while each one dries.
- Hour 3 – Details and finishing: Add fine-marker accents, assemble eggs in baskets or cartons, and, for non-edible eggs, apply a light sealing coat.
Frequently Asked Questions
Can I eat eggs that have been decorated with rubber stamps?
If the eggs are hard-boiled and you want to eat them, keep inks and coatings limited to products identified as safe for use on items that contact food, and do not eat any eggs with cracked shells or heavy varnish. When in doubt, treat stamped eggs as display-only and boil a separate batch for eating.
What kind of stamps work best on eggs?
Small, flexible stamps with simple line art or clear lettering work better than large, highly detailed images. Foam-backed and clear photopolymer stamps cling gently to the shell and are easier to curve around the egg’s surface.
Why does my ink smear or rub off?
Smearing usually means the ink has not fully dried or is not formulated for smooth, slightly porous surfaces like eggshell or plastic. Try a different ink type, reduce the amount of ink on the stamp, and allow more drying time between impressions.
How do I stamp alphabet phrases in straight lines?
For precise wording, arrange letters on an acrylic block, practice on paper to check spacing, then very lightly mark guidelines on the egg with a pencil, erasing them after the ink dries. Alternatively, stamp one letter at a time and use the previous impression as a visual guide.
Can children help with stamped Easter eggs?
Yes, children can participate if the supplies are age-appropriate and an adult handles fragile steps such as blowing out eggs or using sealers. Offer them sturdier options like wooden or plastic eggs and simple stamps that do not require perfect alignment.
Making Stamped Eggs Part of Your Easter Tradition
Rubber stamped Easter eggs blend the charm of classic egg decorating with the clarity of printed designs, making them a satisfying project for beginners and experienced crafters alike. Once the basic process becomes familiar, it is easy to build a yearly collection of eggs that reflect evolving color palettes, themes, and family milestones.