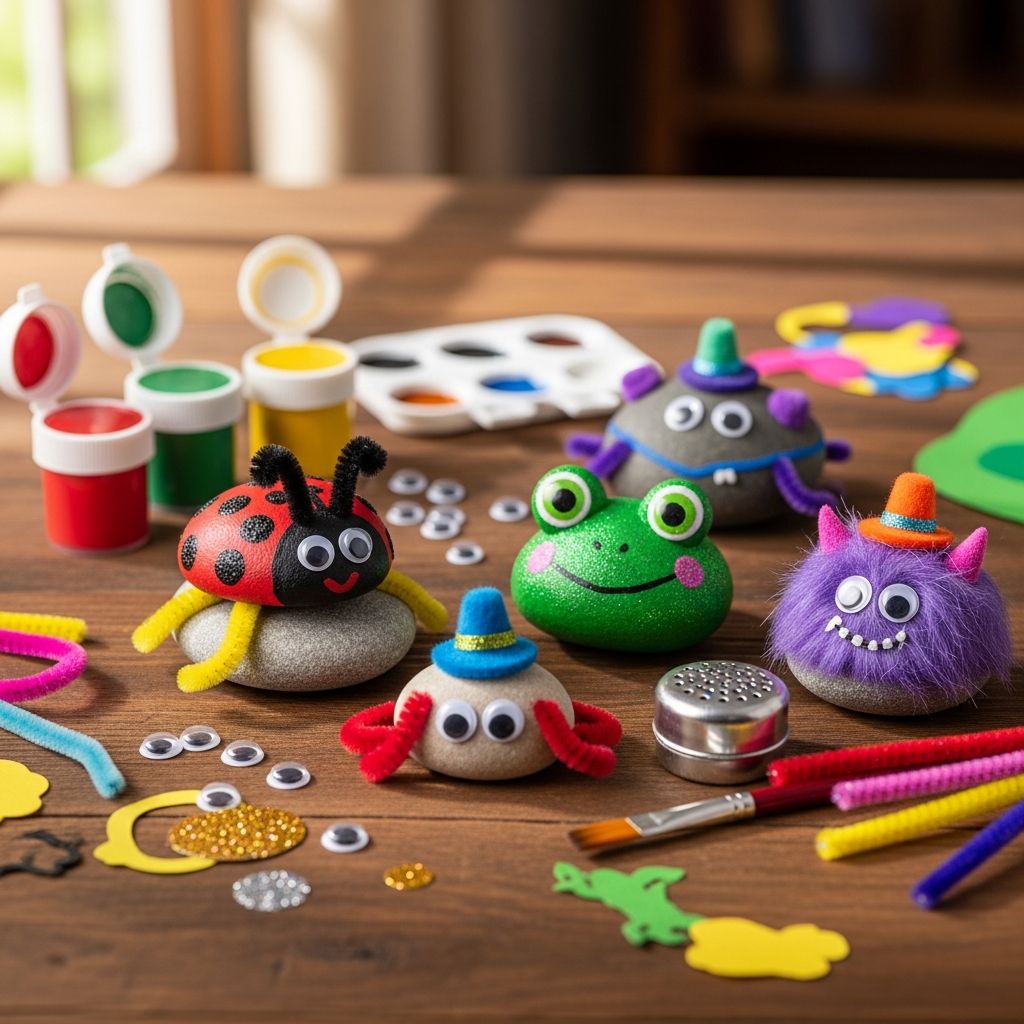
Pet rocks are a timeless kids’ craft: simple, inexpensive, and endlessly imaginative. With a handful of stones, some paint, and a few basic supplies, children can design their own quirky companions, invent stories about them, and even build little homes for their new rock friends.
This guide walks you through everything you need to know to create pet rocks with kids, from choosing the right stones and paints to designing characters and caring for finished creations.
Why Pet Rocks Make an Ideal Kids’ Craft
Pet rocks are more than just cute decorations. They provide a practical way to encourage creativity, fine motor skills, and imaginative play, all with materials you can often gather outdoors.
- Low cost: Rocks are free, and most other supplies are common craft items.
- Open-ended creativity: There is no “right” way to make a pet rock; every stone can become a unique character.
- Short setup time: Once rocks are clean and dry, kids can start painting almost immediately.
- Suitable for many ages: With supervision, toddlers can enjoy simple designs, while older kids can add detailed features.
Materials and Tools You’ll Need
You can keep this project very simple or add extra embellishments. Here are the most useful supplies and some notes on choosing child-friendly, durable options.
Basic Supplies
- Rocks: Smooth stones are easier to paint than rough or flaky ones. Avoid rocks that are extremely heavy or sharp-edged, especially for young children.
- Paint: Acrylic craft paint is commonly used for rock painting because it adheres well and dries quickly. Washable tempera paint can be used with younger children, but it may not be as permanent.
- Paintbrushes: A mix of small and medium brushes works best for base coats and details.
- Palette or disposable plate: Helpful for organizing small amounts of paint.
- Water cup and paper towels: For rinsing brushes and cleaning small spills.
Optional Decorations
- Googly eyes: Add instant personality, but supervise closely with small children due to choking risk.
- Permanent or paint markers: Useful for faces, patterns, and writing names once the paint is dry.
- Glue: White craft glue works for most decorations; a low-temperature hot glue gun is better for older kids and adults.
- Yarn, felt, or pom-poms: Great for hair, tails, ears, or hats.
- Eco-friendly sealant (optional): A clear, non-toxic sealer helps protect the paint if the rocks will be handled often or placed outside.
Suggested Workspace Setup
- Cover the table with newspaper, an old tablecloth, or a washable mat.
- Provide old T-shirts or aprons to protect clothing.
- Use trays, cardboard, or paper plates to keep each child’s supplies and rock contained.
Preparing Your Rocks
Taking a few minutes to clean and prep the rocks helps the paint last longer and makes the surface easier to work on.
- Choose your stones. Look for rocks that fit comfortably in a child’s hand and have at least one fairly flat side.
- Clean the rocks. Rinse off dirt and mud under running water. For very dirty stones, use a brush or old toothbrush.
- Let them dry completely. Moisture under the paint can cause peeling or uneven coverage.
- Optional: Add a base coat. Painting a layer of white or light-colored acrylic paint can help bright colors stand out, especially on dark stones.
| Preparation Step | Why It Helps | Tips with Kids |
|---|---|---|
| Washing rocks | Removes dirt so paint adheres better. | Turn it into a mini “rock car wash” to make cleaning fun. |
| Drying rocks | Prevents peeling and uneven paint. | Lay rocks on a towel; let kids label or sort them while they dry. |
| Base coat | Makes colors brighter and more even. | Let older kids help with this step; younger children can start with pre-primed rocks. |
Step-by-Step: Making Your First Pet Rock
Once your rocks are clean and dry, it’s time for the fun part. You can follow the steps below as a general guide and adapt them to suit the age and interests of the children.
- Choose the “personality” of the rock.
Ask kids what they imagine their stone might become:- A friendly monster
- A favorite animal
- A silly cartoon-style face
- A tiny superhero or wizard
- Paint the base color.
Apply one or two coats of a single color over the entire rock or on the main area to be decorated. Allow it to dry between coats. - Add details.
Once the base is dry, use smaller brushes or markers to add:- Eyes, noses, and mouths
- Stripes, spots, or patterns
- Wings, tails, or paws
- Clothing details like capes, bow ties, or hats
- Glue on extras.
When the paint is completely dry, glue on googly eyes, yarn hair, pom-pom noses, or felt ears. Hold each piece in place for a few seconds to help it stick. - Optional: Seal the rock.
For rocks that will be handled frequently or kept outdoors, a clear acrylic or water-based sealer can help protect the paint and decorations. - Give your pet rock a name.
Naming the rock helps kids connect with their creation. They can write the name on the bottom of the stone or on a small tag.
Design Ideas to Spark Imagination
If kids feel stuck about what to paint, offer a few gentle suggestions instead of fixed templates. Here are some simple, adaptable themes.
Animal-Inspired Pet Rocks
- Classic pets: Dogs, cats, bunnies, or turtles with simple ears and painted faces.
- Wild creatures: Lions, owls, foxes, or frogs with bold colors and simple shapes.
- Sea life: Fish, whales, or octopus characters using bright blues and greens.
Fantasy and Storybook Characters
- Monsters: Mix-and-match eyes, teeth, and patterns for silly or friendly monsters.
- Superheroes: Capes, masks, and simple initials painted on the front.
- Magical beings: Tiny wizards, fairies, or dragons using glitter accents (for older kids).
Pattern and Shape Rocks
- Emoji rocks: Simple round shapes with expressive faces.
- Geometric designs: Stripes, polka dots, and zigzags.
- Nature themes: Leaves, flowers, rainbows, or suns painted on smooth surfaces.
Safety and Age-Appropriate Tips
Like any craft project, pet rocks are safest when materials and supervision are matched to the age of the children.
- Paint safety: When working with young children, choose non-toxic, child-safe paints that clearly indicate compliance with art material safety standards. Keep paint away from mouths and eyes.
- Small parts: Googly eyes, tiny pom-poms, and beads can pose a choking hazard for children under three years old or any child who still explores objects by mouthing them. For this age group, consider drawing eyes with markers instead of gluing on small pieces.
- Glue choices: White craft glue is generally safer for younger children; hot glue guns should be handled by adults or responsible older kids.
- Handwashing: Encourage kids to wash their hands after painting and before snacks or meals, especially if using acrylic paints.
Using Pet Rocks in Play and Learning
Once the craft session is finished, pet rocks can continue to support imaginative play and simple learning activities.
Imaginative Play
- Create a “rock family” with different personalities and roles.
- Build a small home or habitat using a shoebox, cardboard, or recycled containers.
- Invent daily routines: feeding the rock, reading to it, or tucking it into a small “bed.”
Learning Extensions
- Storytelling: Encourage children to tell or write stories about where their rock came from and what it likes to do.
- Sorting and counting: Sort rocks by color, size, or type of character and count how many belong to each group.
- Emotions and social skills: Draw different facial expressions on rocks (happy, sad, surprised) and use them to talk about feelings.
Outdoor vs. Indoor Pet Rocks
Where you keep your pet rocks can affect how you finish and care for them.
| Location | Best Practices | Extra Considerations |
|---|---|---|
| Indoors | Display rocks on shelves, desks, or windowsills away from direct moisture. | Sealant is optional; handle rocks gently to preserve decorations. |
| Outdoors | Use outdoor-safe or water-resistant sealers to protect against rain and sun. | Expect some fading or wear over time; this can be a chance to repaint or redesign later. |
Cleanup and Storage Tips
Good cleanup habits make future craft sessions easier and extend the life of your supplies.
- Rinse paintbrushes in water until the water runs mostly clear, then lay them flat to dry.
- Place leftover paint in airtight containers when possible, or scrape excess from palettes before discarding.
- Store dry pet rocks in a shoebox, plastic bin, or on a dedicated “rock shelf.”
- Keep small decorations and glue in a clearly labeled container out of reach of very young children.
Frequently Asked Questions (FAQs)
What kind of paint works best on rocks?
Acrylic craft paint is commonly used because it adheres well to rock surfaces and becomes water-resistant when dry. For very young children, non-toxic washable paints are safer, but the designs may not last as long.
Do I have to seal my pet rocks?
Sealing is optional for indoor rocks that are mostly decorative. If the rocks will be handled frequently, played with outdoors, or exposed to moisture, a clear sealer helps protect the paint and decorations.
How long do painted pet rocks last?A: Indoors, painted rocks can last for years if handled gently. Outdoors, sunlight, rain, and temperature changes can gradually fade or chip the paint; a protective sealant can slow this process.
Q: Can toddlers make pet rocks too?
Yes, with careful supervision and age-appropriate materials. Avoid small parts like googly eyes and use large, non-toxic, washable paints. Adults can handle any cutting or gluing steps that involve sharper tools or hot glue.
Is it okay to collect rocks from parks or natural areas?
Always follow local rules and guidelines. Some parks and protected areas prohibit removing rocks or natural materials to protect ecosystems. When in doubt, choose rocks from your own yard, purchased garden stones, or other permitted locations.
References
- Rock art: Painting and decorating stones — University of Illinois Extension. 2020-06-15. https://extension.illinois.edu/blogs/illinois-nutrition-ed-program/2020-06-15-rock-art-painting-and-decorating-stones
- Painting with children: Tips for parents and teachers — National Association for the Education of Young Children (NAEYC). 2017-03-01. https://www.naeyc.org/resources/pubs/yc/mar2017/art-experiences
- Labeling of Hazardous Art Materials — U.S. Consumer Product Safety Commission. 2021-08-01. https://www.cpsc.gov/Business–Manufacturing/Business-Education/Business-Guidance/Labeling-of-Hazardous-Art-Materials
- Choking hazards — U.S. Consumer Product Safety Commission. 2020-11-01. https://www.cpsc.gov/Safety-Education/Safety-Education-Centers/cribs-and-sleep/Choking-Hazards
- Leave No Trace: Principle 4 – Leave What You Find — Leave No Trace Center for Outdoor Ethics. 2020-01-01. https://lnt.org/why/7-principles/leave-what-you-find/