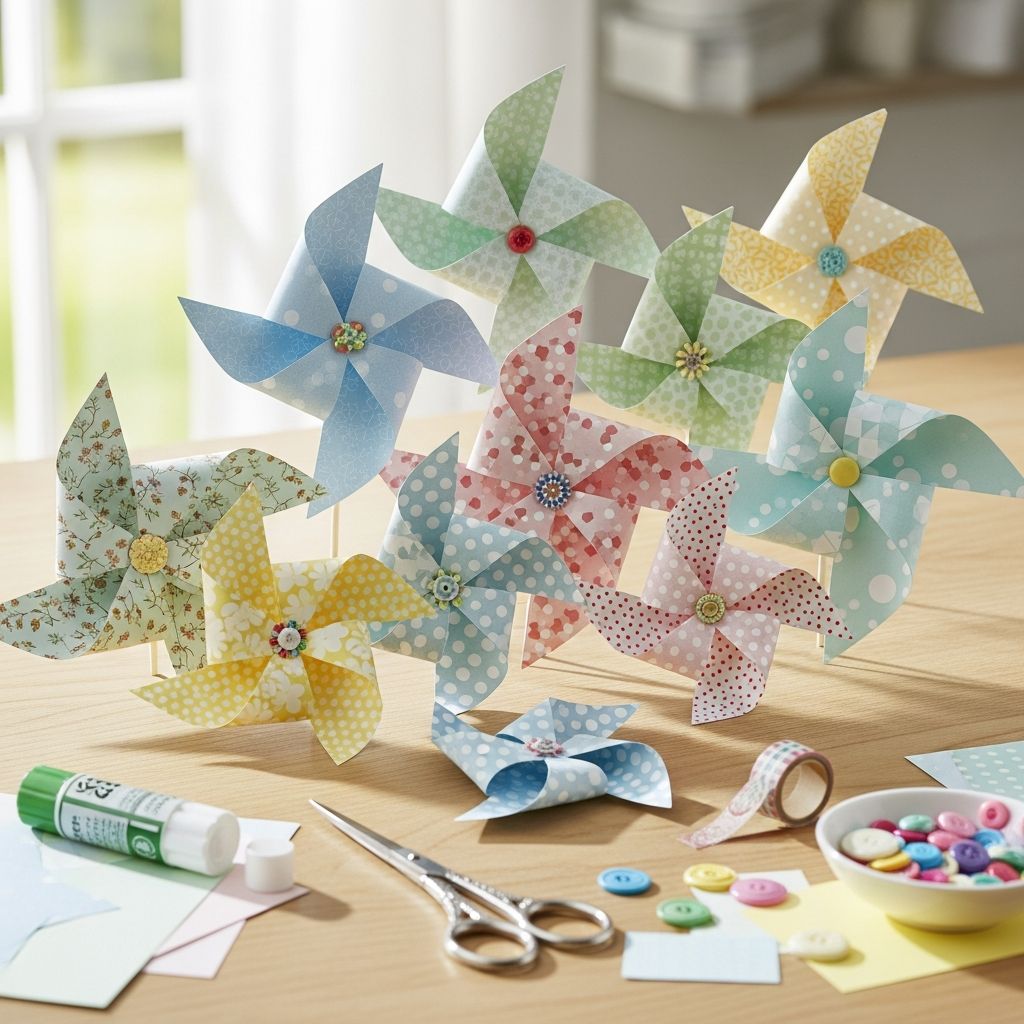
Paper pinwheel flowers are a charming blend of simple engineering and colorful design. They are easy enough for children to make with supervision, but flexible enough that adults can turn them into polished home decor or party centerpieces.
This guide walks through everything you need: materials, step-by-step instructions, troubleshooting tips, and creative variations. Use it to plan a rainy-day activity, a classroom project, or a bright bouquet for your next celebration.
Why Pinwheel Flowers Are the Perfect Craft
Pinwheel flowers offer more than just a cute finished project. They help children explore color, shape, and motion in a very hands-on way, and they encourage experimentation because each flower can look different from the last. Adults appreciate that the supplies are inexpensive and easy to store.
- They use basic, easy-to-find materials.
- They can be adapted for different ages and skill levels.
- They work for many occasions: birthdays, classroom displays, holidays, and photo backdrops.
Essential Supplies and Substitutions
You do not need specialty tools to create pinwheel flowers. Most of what you need is already in a basic craft drawer. If you are working with a group, prepare the materials in advance so that assembly time runs smoothly.
| Core Item | Purpose | Possible Substitutes |
|---|---|---|
| Colored paper or cardstock | Creates the petals of the pinwheel flower. | Scrapbook paper, wrapping paper mounted on plain paper, recycled folders. |
| Wooden dowel or straw | Acts as the flower stem and handle. | Bamboo skewers (with points trimmed), pencils, paper-rolled tubes. |
| Push pin or small brad | Holds the pinwheel together and allows it to spin. | Thin wire twisted through, small paper fastener, sewing pin with bead. |
| Bead or button | Reduces friction and decorates the center. | Stacked sequins, small felt circle, foam sticker. |
| Glue or tape | Secures decorations and stem covering. | Glue stick, double-sided tape, low-temp hot glue (for adults). |
Optional Decorative Extras
- Markers, crayons, or paint for patterns and details.
- Glitter or metallic pens for highlights.
- Stickers, washi tape, or paper punches for added shapes.
- Ribbon or yarn to wrap stems or hang pinwheel garlands.
Planning the Size and Shape of Your Flower
Before you cut anything, decide how big and bold you want your flowers to be. Larger squares create more dramatic, slower-spinning pinwheels, while smaller squares are lighter and spin with very little breeze. Typical sizes for home crafts range from 10–20 cm (4–8 inches) per side.
- Use thicker paper for large pinwheels so the petals keep their shape.
- Use lighter paper for very small pinwheels so they spin freely.
- Stick to a square base if you are new; try scalloped or rounded edges later.
Step-by-Step Instructions: Classic Pinwheel Flower
The classic pinwheel flower starts with a simple square and a few straight cuts. Adults can prepare the base, and children can help with folding, decorating, and arranging the finished flowers.
1. Prepare the Square
- Cut a neat square from your chosen paper.
- Lightly mark the center with a pencil dot by drawing faint diagonals corner to corner and finding where they cross.
- Erase most of the lines so only the small center mark remains; this mark will guide your cuts.
2. Decorate Before Assembly
Decorating the flat square is often easier than decorating a finished pinwheel. This stage is ideal for involving young children who may not be handling pins or scissors independently yet.
- Add stripes radiating from the center to the corners for a burst effect.
- Draw polka dots, spirals, or simple flowers on one or both sides.
- Layer light colors first and add darker details later so designs remain clear.
3. Cut the Petal Slits
- Use scissors to cut along each diagonal toward the center, stopping about 2–3 cm from the middle point.
- Ensure each cut stops at roughly the same distance from the center to keep the pinwheel balanced.
- Double-check that the paper has four equal flaps forming the future petals.
4. Form the Petals
To create the spinning shape, you will fold alternating points inward toward the center. Take your time; sharp folds and accurate alignment help the flower spin smoothly.
- Choose one corner of a cut section and gently bend it toward the center, without creasing the entire triangle flat.
- Skip the next corner, then fold the following one in, and continue alternating until you have four points overlapping at the center.
- Hold all four folded tips firmly at the center with your fingers so they do not spring back.
5. Attach the Center and Stem
- Place a bead, button, or small decorative circle over the overlapped tips at the center.
- Carefully push a pin or small brad through the bead, through all four paper tips, and then through the center mark of the square.
- Insert the pin into the top of the wooden dowel, straw, or other stem material. For safety, embed it into a small rubber eraser or cork on the stem, or bend the brad legs securely.
- Test the flower by blowing gently or rotating the stem between your fingers. The petals should spin freely without scraping the stem.
Safety Tips for Crafting with Children
Because this project uses sharp tools and small parts, adults should manage the riskiest steps and tailor responsibilities based on age. Establish some simple ground rules before the crafting session begins.
- Have an adult handle pins, sharp scissors, and hot glue.
- Use blunt-tip scissors and non-toxic glue for younger crafters.
- Keep small beads and buttons away from toddlers who may put them in their mouths.
- Store finished pinwheels with pointed stems in a container rather than loose in a toy area.
Creative Design Variations
Once you are comfortable with the classic pinwheel flower, experiment with different shapes, layers, and textures. Small changes can transform the look while keeping the basic motion intact.
Layered Petal Pinwheels
- Cut two squares of different sizes or colors.
- Build a complete pinwheel with the larger square.
- Build a second pinwheel with the smaller square and attach it on top of the first using the same pin or brad.
- Rotate the top pinwheel slightly so its petals sit between the lower petals, creating a fuller, multi-layer bloom.
Shaped Edges and Patterns
- Use decorative scissors to create scalloped or zigzag edges on the square before cutting the diagonals.
- Punch small holes near the tips of the petals for a lace-like effect.
- Alternate solid and patterned papers in a bouquet for a more dynamic arrangement.
Themed Seasonal Flowers
Pinwheel flowers can easily match holidays and seasons just by varying colors and small details. Customize them to your calendar, or use them to mark classroom events and family celebrations.
- Spring: Pastel tones with drawn leaves and simple dotted centers.
- Summer: Bright, saturated colors with sunburst patterns and glitter accents.
- Autumn: Warm oranges, reds, and browns with leaf-shaped tips and metallic highlights.
- Winter: Cool blues and silvers with snowflake doodles and shimmering edges.
Arranging Pinwheel Flowers in Bouquets and Displays
A single pinwheel flower is cheerful, but a group of them looks spectacular. Treat them as you would fresh flowers: vary heights, mix colors, and give them a clear focal point in the room or event space.
- Place several stems in a jar filled with dried beans, sand, or pebbles for stability.
- Wrap a ribbon around a small cluster and tie a bow for a handheld bouquet.
- Insert pinwheel flowers among artificial greenery to create a mixed arrangement.
Table Centerpiece Ideas
- Create a low arrangement in a shallow container for dining tables, so guests can still see each other.
- Mix pinwheel flowers with LED tea lights or fairy lights for evening events.
- Label each stem with a tiny tag that doubles as a place card at parties.
Classroom and Group Project Tips
Pinwheel flowers are excellent for groups because they can be broken into manageable steps and easily adapted to different ages. Teachers and group leaders can prepare certain components ahead of time to fit within a single lesson or meeting.
- Pre-cut squares and partially cut diagonals for younger students.
- Organize stations: one for decorating, one for cutting, one for assembly.
- Use color themes for different groups, then combine all the flowers into one large display.
Common Problems and Simple Fixes
If your pinwheel flower does not spin as expected, small adjustments often solve the issue. Use the table below to diagnose and correct common problems.
| Issue | Likely Cause | Quick Fix |
|---|---|---|
| Pinwheel will not spin | Center pin is too tight or pressed directly against the stem. | Loosen the pin slightly or add a small bead between the paper and stem. |
| Pinwheel spins unevenly | Petals are cut to different lengths or folded unevenly. | Trim petals to similar lengths and refold carefully toward the center. |
| Paper tears near the center | Paper is too thin or pin was pushed too close to the edge of the folds. | Reinforce the center with a small paper circle or use thicker paper for the next flower. |
| Stem wobbles or bends | Stem material is too weak for the flower size. | Switch to a sturdier dowel or reinforce a straw by placing a skewer inside. |
Eco-Friendly and Budget-Conscious Ideas
Pinwheel flowers are naturally economical, but they are also an excellent way to reuse and repurpose materials. Turning everyday scraps into bright decorations helps reduce waste and sparks creativity.
- Use pages from old magazines or catalogs, trimming them into squares.
- Cut squares from paper grocery bags and decorate them with bright paint or markers.
- Reuse gift wrap by mounting it on plain paper for added strength.
- Save stems from broken artificial flowers and attach pinwheels to them.
Frequently Asked Questions
How old should children be to make pinwheel flowers?
Children as young as preschool age can help decorate and fold pinwheel petals, but an adult should be responsible for any steps involving sharp tools or small hardware. Older children can handle more of the cutting and assembly as long as they understand basic safety rules.
Which type of paper works best?
Standard colored printer paper is a good starting point because it is light enough to spin and sturdy enough to hold its shape. Cardstock works well for larger flowers or when you want them to last longer, but very heavy paper may require a stronger breeze to spin.
Can pinwheel flowers be used outdoors?
Yes, as long as you consider wind and weather. Place them where they can catch a gentle breeze but not be battered by strong gusts, and avoid leaving them out in the rain, which can weaken the paper and glue.
How long do paper pinwheel flowers last?
With gentle handling and dry storage, pinwheel flowers can last for months. Avoid crushing them in drawers or containers, and store them upright in a jar, box, or vase when they are not on display.
Can I make mini pinwheel flowers for gifts or cards?
Mini versions work beautifully as embellishments for gift wrapping, party favors, and greeting cards. Use smaller squares, omit the spinning mechanism, and simply glue the folded pinwheel flat to your project, or mount it on a short toothpick stem.
Bringing Your Paper Garden to Life
Pinwheel flowers transform simple paper into a moving, colorful display that appeals to both children and adults. Once you master the basic steps, you can create entire bouquets, themed decorations, and classroom projects tailored to any season or celebration.
Set up a small crafting station with precut squares, stems, and embellishments, and let everyone in the family design their own unique flower. Over time, your collection of paper blooms will grow into a bright, reusable garden that never wilts.