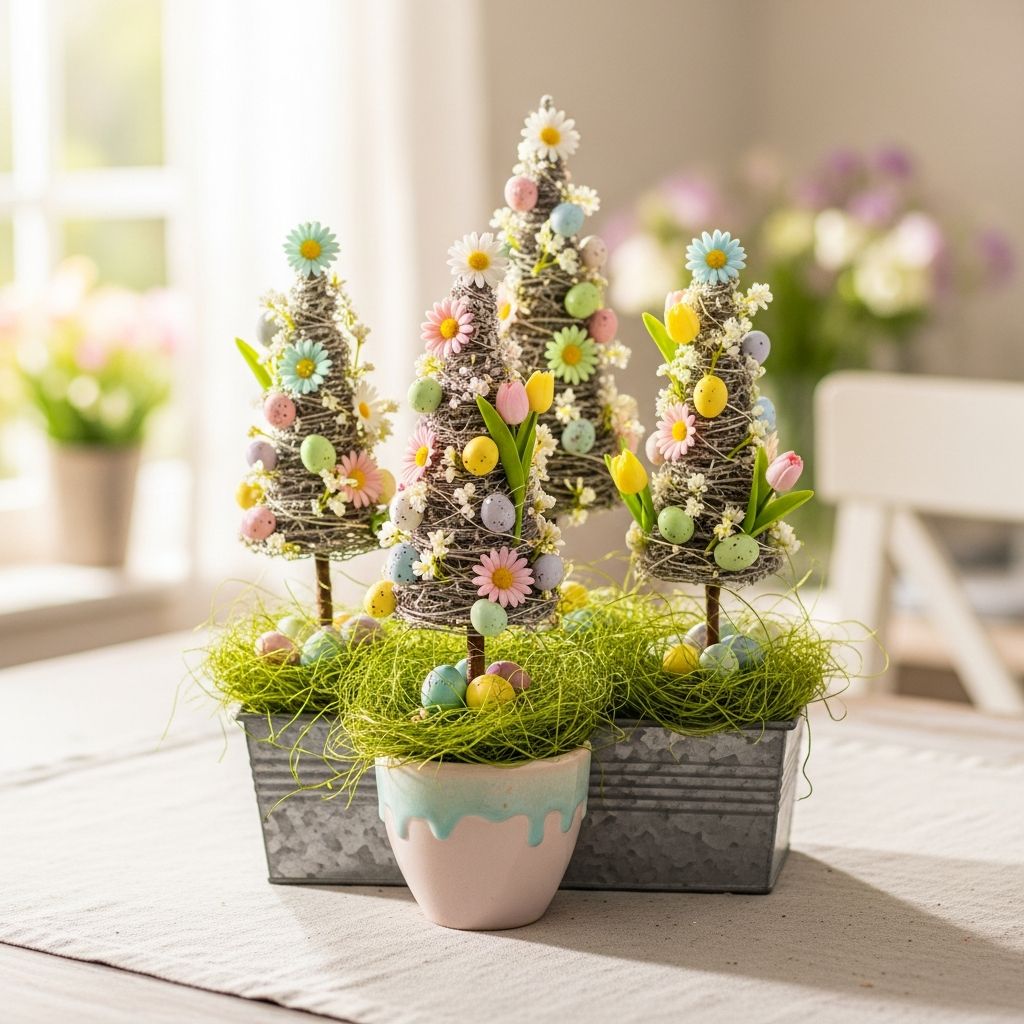
Mini Easter trees are an easy way to bring color, height, and a bit of whimsy to your spring décor while staying simple enough for children to help with. Instead of buying pricey centerpieces, you can transform inexpensive supplies into unique trees that work as place settings, gifts, or cheerful accents on a bookshelf or windowsill.
Why Mini Easter Trees Are Worth Making
Mini trees fit perfectly on a crowded table, add vertical interest, and can be customized to match any color palette, from soft pastels to bold neon shades. They also offer a manageable crafting project that can be finished in an afternoon, making them ideal for families, classrooms, or anyone short on time but rich in creativity.
- They are budget-friendly and make use of small containers, leftover craft paint, and basic decorative bits.
- Each tree can be personalized with names, colors, or tiny tags, so they double as place cards and party favors.
- The scale is small enough that you can create several trees at once for a coordinated look across the table or home.
Materials and Tools You Will Need
You can adapt this project to whatever you have on hand, but the list below outlines a reliable starting point. Choose colors and textures that feel right for your style—minimalist, rustic, neon, or anything in between.
- Tree base: miniature pots, recycled jars, small tins, or sturdy paper cups.
- Tree structure: twigs, small branches, wooden skewers, or pipe cleaners shaped into trunks and branches.
- Filler for stability: modeling clay, floral foam, air-dry clay, or tightly crumpled paper.
- Paint: acrylic craft paint in spring or neon colors, plus a small brush.
- Ornaments: miniature plastic eggs, felt shapes, pom-poms, beads, sequins, buttons, or paper cutouts.
- Hangers: thin ribbon, thread, baker’s twine, or embroidery floss.
- Adhesives: craft glue or a low-temperature glue gun for adults.
- Optional extras: glitter, stickers, tissue paper “grass,” name tags, or tiny banners.
Step-by-Step: Building the Mini Tree Base
Start by creating a stable base so the tree stands upright and can be moved easily from room to room. This section walks through a flexible process that works with many different container types.
- Choose your container. Pick something that is heavy enough not to tip when the tree is decorated. A small ceramic pot, metal pail, or glass jar tends to be sturdier than a lightweight plastic cup.
- Customize the outside. Paint the container with your chosen colors, using stripes, color blocking, dots, or a simple solid coat. Add an extra layer of paint for opacity if needed and set it aside to dry completely.
- Fill the container. Press floral foam, modeling clay, or air-dry clay tightly inside. The filler should reach close to the rim so the trunk can be inserted securely.
- Prepare the trunk. Select a twig or a bundle of skewers or pipe cleaners twisted together to form a trunk. Test-fit it in the filler, adjusting the height so that ornaments will sit above the rim of the container without towering too high.
- Secure the trunk. Push the trunk firmly into the filler at the center, then reinforce with glue if needed. Wiggle the trunk gently; if it leans, remove and add more filler, then try again until it stands straight.
Creating Branches and Structure
The branches give your tree character. They can be sparse and modern or full and whimsical depending on how many offshoots you create. It is helpful to think about balance: you want enough branches to hold ornaments, but not so many that the tree looks cluttered.
- Natural branches: If using a real twig or branch, trim any extra offshoots that look messy and keep a few carefully spaced branches for ornaments.
- Wire or pipe cleaner branches: For an artificial trunk, twist additional pieces around the main stem and bend them outward and upward, forming smaller twigs at the ends.
- Painted branches: Coat the entire structure in a bright or neutral color to unify the look; allow to dry thoroughly before decorating.
Designing Mini Easter Ornaments
The ornaments are where the personality of your mini Easter trees really shines. Aim for a mix of shapes and textures so the tree looks interesting from every angle.
Simple Ornament Ideas
- Mini eggs: Use tiny plastic eggs or make your own from air-dry clay, then paint them with stripes, dots, or geometric patterns.
- Paper shapes: Cut egg, bunny, or flower shapes from colored cardstock; add details with markers or pens.
- Soft accents: Glue small pom-poms together into clusters, or stitch quick felt shapes and lightly stuff them with scrap fabric.
- Sparkle elements: Decorate plain shapes with glitter, sequins, or metallic pen details for extra shine.
Adding Hangers to Ornaments
Every ornament needs an easy way to hang on the branches. For consistency, choose one type of hanger material, like pastel embroidery floss or bright neon ribbon, and use it on all ornaments.
- Cut lengths of ribbon or thread around 10–15 cm, depending on the size of your tree and how low you want ornaments to hang.
- Fold each piece in half and tie a small knot at the open ends to make a loop.
- Attach the knotted end to the top of each ornament with strong craft glue or by threading through a small punched hole.
- Let everything dry fully, especially if you used thick glue or layered paint.
Color Scheme Ideas for Different Styles
To keep your project from feeling random, choose a color palette before you start painting or cutting ornaments. The table below suggests a few combinations and where they work best.
| Style | Main Colors | Best For | Extra Touches |
|---|---|---|---|
| Soft Spring Pastels | Mint, blush pink, pale yellow, sky blue | Formal brunch tables, baby showers | Sheer ribbons, tiny pearls, subtle glitter |
| Bold Neon Pop | Electric pink, lime, turquoise, bright orange | Kids’ tables, playful parties | Chunky glitter, bold stripes, graphic patterns |
| Modern Minimal | White, gray, kraft brown, soft gold | Small apartments, Scandi-inspired decor | Simple shapes, clean lines, tiny gold accents |
| Nature Inspired | Sage, cream, soft brown, moss green | Rustic tables, outdoor settings | Twine, tiny wooden beads, dried moss |
Decorating and Balancing Your Mini Tree
Once your ornaments and tree structure are ready, it is time to assemble everything. Approach this step as if you are styling a small Christmas tree: work from the inside out, and keep stepping back to see the overall shape.
- Hang larger ornaments first, spacing them evenly so no side feels too heavy.
- Fill in gaps with smaller accents like beads or single sequins on string.
- Rotate the tree a full turn to check all angles, adjusting ornament placement for balance.
- Add a tree topper if desired, such as a paper flower, a tiny bow, or a sparkling star cutout.
Finishing Touches at the Base
The container and its top surface can be as decorative as the tree itself. This is also a smart place to add names if you intend to use the trees as place cards.
- Cover visible filler with shredded tissue paper, faux moss, or curled paper strips.
- Glue a mini banner or label along the rim with the guest’s name or a short seasonal message.
- Wrap a band of ribbon or washi tape around the container for quick embellishment.
- Place small candies, foil-wrapped eggs, or confetti around the base if the trees will not be handled too much.
Using Mini Easter Trees in Your Home
These small trees are flexible enough to move from room to room as your plans change through the season. You can start with them on a mantel, then transfer them to the dinner table for a special meal.
- Table place settings: Position one tree at each plate and let guests take them home as favors.
- Centerpiece cluster: Group three or five trees of different heights in the middle of the table for a layered look.
- Kids’ craft corner: Arrange them on a side table, and keep extra ornaments nearby so children can swap decorations over the holiday weekend.
- Entryway display: Line a narrow shelf or console with coordinated trees to greet guests with a bright burst of color.
Kid-Friendly Tips and Safety Notes
Because these trees are small and use many tiny pieces, it is important to adapt the project to the age group that will be involved. Adults or older teens should handle any cutting tools and hot glue, while younger children can focus on safer tasks.
- Provide child-safe scissors and pre-cut small shapes for toddlers or preschoolers.
- Use non-toxic, washable paints and glues whenever children are crafting.
- Skip very small beads or sequins if there are children who might put them in their mouths.
- Let adults insert the tree trunk into the filler and handle any wiring or shaping that requires strength.
Variations for Other Seasons
Once you master the concept of a mini holiday tree, you can reuse the same basic structure for different celebrations. Simply swap out the ornaments, color scheme, and labels to match the next occasion.
- Spring into summer: Replace eggs with mini suns, clouds, and tiny pinwheels in bright primary colors.
- Autumn harvest: Use tiny paper leaves, acorns, and warm orange or mustard tones.
- Winter celebrations: Switch to stars, snowflakes, and metallic ornaments in silver, gold, and deep blue.
Frequently Asked Questions (FAQs)
How long does it take to make one mini Easter tree?
Most people can complete one tree in about one to two hours, depending on how intricate the ornaments are and how many paint layers you apply. Working assembly-line style by painting multiple containers and creating ornaments in batches can significantly reduce the total time if you are making several trees.
Can I use real branches from outside?
Yes, real branches work beautifully and add a natural charm. Choose branches that are dry, not freshly cut, and give them a quick wipe to remove dust. If you are concerned about insects or sap, let the branches sit indoors for a few days and consider sealing them with a clear spray or a coat of acrylic paint before decorating.
What if my tree keeps tipping over?
If your tree is top-heavy, try adding more filler or using a heavier container, such as a small ceramic pot or glass jar. You can also glue pebbles or coins to the inside bottom of the container before adding the filler, which increases stability without changing the appearance.
How can I store the trees after Easter?
Allow all glue and paint to dry completely, then either wrap the entire tree in soft tissue and store it upright in a box, or carefully remove the ornaments and pack them separately. Label the box clearly and keep it in a cool, dry place to prevent colors from fading or decorations from crushing.
Are these mini trees suitable as gifts?
Mini Easter trees make wonderful host or teacher gifts, especially when personalized with a name tag or favorite colors. Place each tree in a clear cellophane bag, tie the top with ribbon, and attach a small note to turn it into a ready-to-give present.
Wrapping Up Your Mini Easter Tree Project
With a handful of simple materials and a little imagination, mini Easter trees can become a signature part of your spring celebrations year after year. Their compact size makes them approachable for new crafters while still offering endless opportunities for customization and creative expression.