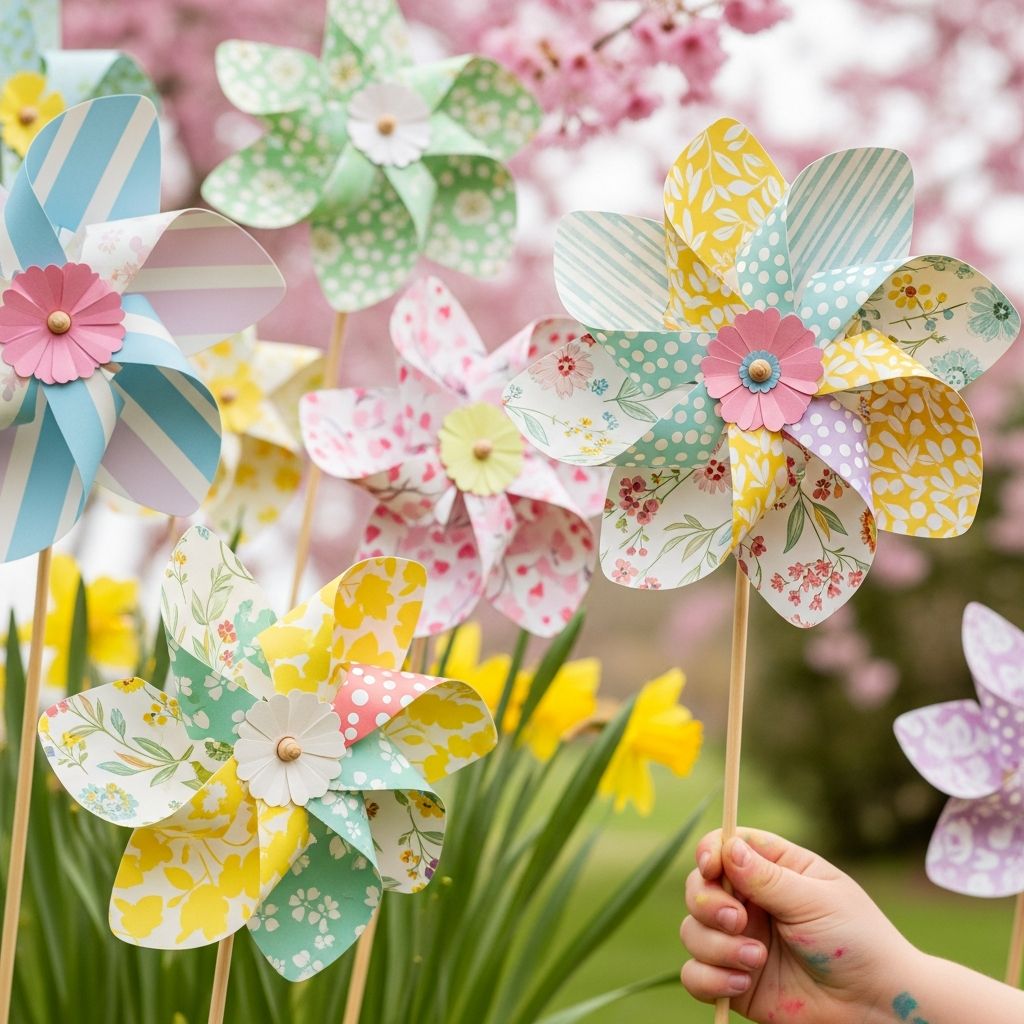
Flower pinwheels are the perfect blend of art and motion: they look like cheerful blossoms when still and transform into whirling bursts of color as soon as the wind picks up. This guide walks you through creating sturdy, spinning flower pinwheels with cardstock and simple hardware, then explores safe variations, display ideas, and kid-friendly learning twists.
Why Flower Pinwheels Make the Perfect Spring Project
Unlike flat paper flowers, pinwheel blooms invite kids to interact with their creations, chase the wind, and explore simple science concepts like motion and air resistance. They also pull double duty as seasonal decorations for gardens, porches, party tables, and classroom bulletin boards.
- They are inexpensive to make with basic craft supplies.
- They scale easily for groups, from one-on-one crafting to full classrooms.
- They can be customized with different colors, patterns, and petal shapes.
- They provide a gentle introduction to how wind can create movement.
Materials and Tools You Will Need
Choose sturdy but easy-to-cut materials so the finished pinwheels can withstand handling and outdoor breezes. Cardstock is ideal because it holds its shape better than thin copy paper without being too difficult for older kids to cut.
Core Supplies
- Cardstock sheets in bright or pastel colors (single- or double-sided)
- Pencil and ruler (for measuring and marking)
- Scissors suitable for the crafter’s age and skill level
- Paper fasteners (brads) or small bead plus thin wire
- Hole punch or push pin (for making center holes)
- Wooden dowels, unsharpened pencils, or paper straws for stems
- Glue stick or craft glue
- Round object (cup, lid, or compass) for tracing a circle center if desired
Optional Embellishments
- Markers, crayons, or colored pencils for patterns
- Stickers, sequins, or small foam shapes
- Green floral tape or washi tape to wrap stems
- Paper leaves or felt leaves for added detail
Understanding the Basic Pinwheel Flower Shape
Most spinning pinwheels start with a square piece of paper that is cut inward from each corner and then folded toward the center. For a flower look, you can soften the corners into petal shapes, layer a floral silhouette behind the pinwheel, or add a decorative center that resembles a blossom’s core.
| Style | How It Looks | Best For |
|---|---|---|
| Classic square pinwheel | Sharp, geometric blades that spin smoothly. | Quick projects and younger crafters. |
| Rounded petal pinwheel | Softer, petal-like edges for a floral feel. | Spring decor and garden “blooms”. |
| Layered flower and pinwheel | Flat flower behind a spinning top layer. | Centerpieces, party decorations, photo props. |
Step-by-Step: Crafting Your First Flower Pinwheel
The following instructions describe a single pinwheel that spins freely on a dowel and features petal-like blades. Read through all steps once before starting so you can set up an efficient crafting station.
Step 1: Prepare and Cut the Square
- Use a ruler to measure a square on your cardstock (for example, 15 cm by 15 cm or 6 inches by 6 inches).
- Lightly draw the square with a pencil and cut it out carefully with scissors.
- If you want softer petals, round each corner of the square with small curved cuts.
Step 2: Mark the Center and Cutting Lines
- Use the ruler to draw light diagonal lines from one corner to the opposite corner, forming an “X” across the square.
- Where the diagonals cross is the center point; mark it with a small dot.
- From each corner, mark a point about two-thirds of the way toward the center along the diagonal line; this mark will show how far you should cut.
Step 3: Create the Pinwheel Blades
- Cut along each diagonal line from the corner toward the center, stopping at the mark you made earlier.
- Choose one side of each cut corner (for example, always the right flap) to become the blade that folds inward.
- Lightly curl or bend each chosen blade toward the center to make folding smoother later.
Step 4: Decorate Before Assembly
Decorating before assembly makes the process easier and helps kids focus on one step at a time. Encourage them to personalize each blade and the center area before any folding happens.
- Add stripes, dots, or spirals to each blade with markers or crayons.
- Glue on small paper circles or stickers near the tips of the blades.
- Decorate the center dot with a contrasting color so the spinning pattern stands out.
Step 5: Fold and Secure the Blades
- Using a hole punch or a push pin, carefully make a small hole through the center dot. Adults should assist younger children with this step.
- Make a small hole at the tip of each chosen blade (the same corner on every side). Keep the hole close enough to the tip so the blade can reach the center.
- Starting with one blade, gently bring the hole at its tip toward the center hole without creasing the paper sharply. Hold it in place with your thumb.
- Repeat with the remaining blades, stacking their tip holes neatly over the center hole.
- Push a paper fastener (brad) through all of the collected blade holes and the center hole from front to back.
- Bend the fastener’s prongs open on the back side, but do not flatten them completely; leave a tiny bit of space so the pinwheel can turn.
Step 6: Attach the Pinwheel to Its Stem
- Make a shallow starter hole near the top of your dowel or unsharpened pencil with a push pin.
- Slide the prongs of the fastener around or into the dowel, depending on the fastener type, and secure it so that the pinwheel can still rotate.
- If the fastener goes through the dowel, ensure the hole is snug; if the pinwheel feels tight, gently loosen the fastener a little.
- Optionally, wrap the dowel with green tape to resemble a stem and glue on one or two paper leaves.
Safety Tips for Crafting with Kids
Crafting is more enjoyable when everyone feels safe and confident. Adjust tools and materials according to the age and skill level of the children involved, and model each step slowly before letting them try it independently.
- Use safety scissors with rounded tips for young children.
- Have an adult handle push pins, hole punches, and any cutting of dowels.
- Store brads and beads in a small dish and supervise closely with toddlers and preschoolers.
- Remind kids to hold the dowel or stem, not the spinning blades, when they run with their pinwheels.
Creative Variations and Design Ideas
Once you have made a basic flower pinwheel, try experimenting with different scales, layering techniques, and color schemes. Small changes in shape or pattern can completely transform the personality of the finished bloom.
Color and Pattern Experiments
- Alternate colors: Use two squares of different colors, glue them back-to-back, and then follow the same cutting and folding steps.
- Gradient petals: Shade each blade from dark at the tip to light near the center to mimic natural petals.
- Patterned paper: Use scrapbook paper or lightly printed wrapping paper for built-in designs.
Layered Flower Pinwheels
- Cut a large flower shape (such as a daisy or sunflower silhouette) from cardstock.
- Glue the flat flower to the dowel first, then assemble and attach a smaller pinwheel on top.
- Add a decorative center over the fastener, such as a foam circle or felt button, to hide the hardware.
Themed Pinwheel Gardens
- Rainbow garden: Make seven pinwheels in different rainbow colors and line them up in order.
- Butterfly meadow: Add small paper butterflies or ladybugs on the stems or leaves.
- Night sky blooms: Use dark blue or black cardstock with silver or metallic marker stars.
Outdoor Display and Decoration Ideas
Finished flower pinwheels can brighten many different spaces, indoors and outside. Keep them away from heavy rain and direct sprinklers, but do let them catch light breezes for the best spinning action.
- Arrange a row of pinwheels along a walkway or garden border.
- Cluster several in a flowerpot filled with sand, pebbles, or floral foam.
- Use them as centerpieces for spring parties, baby showers, or Easter brunch.
- Attach them to a classroom bulletin board with removable adhesive, allowing them to spin.
Turning Pinwheels into a Learning Activity
Beyond fun, pinwheels offer simple ways to weave in lessons about science, art, and even math. This makes them ideal for teachers, homeschoolers, and families looking for hands-on enrichment.
Simple Science Connections
- Have children compare how fast pinwheels spin in light versus strong breezes.
- Ask them to predict which blade shape (sharp or rounded) will spin more easily.
- Use a fan on a low setting to create a controlled wind source for experiments.
Math and Measurement Moments
- Practice measuring squares of different sizes and comparing their areas.
- Count how many spins occur in ten seconds and record the results.
- Sort finished pinwheels by size, number of blades, or color scheme.
Art and Design Skills
- Discuss warm versus cool colors and create different themed sets.
- Explore symmetry by designing patterns that repeat on every blade.
- Encourage kids to name each pinwheel and write a short description or story about it.
FAQ: Common Questions About Flower Pinwheels
How can I make the pinwheel spin more smoothly?
If your pinwheel feels stiff, check that the fastener is not pressed too tightly against the paper. Gently loosen the prongs a bit and ensure there is a tiny gap so the blades can move freely. You can also add a small bead between the pinwheel and the dowel as a spacer.
What kind of paper works best?
Lightweight cardstock offers the best balance between sturdiness and flexibility. Thin printer paper may flop or wrinkle in humid air, while very thick cardboard can be difficult to cut and fold neatly, especially for young children.
Can these pinwheels stay outside permanently?
These flower pinwheels are best for fair weather and short-term outdoor display. Over time, moisture, sun, and wind will fade the colors and soften the paper. For longer use, consider laminating the square before cutting or using plastic-coated paper.
How do I adapt this project for toddlers?
For very young children, pre-cut the squares and make all holes in advance. Let them focus on decorating, choosing colors, and helping fold the blades inward while an adult handles the assembly and attachment to the stems.
What if I don’t have paper fasteners?
As an alternative, you can thread a small bead and the pinwheel onto a thin piece of wire and twist the wire around the dowel, leaving enough looseness for the pinwheel to turn. Always trim or tuck sharp wire ends so they are not exposed.
Final Thoughts on Your Spinning Spring Garden
A handful of paper squares, a few simple tools, and a bit of imagination are all it takes to transform a window box, garden bed, or classroom corner into a lively display of spinning blooms. Once you master the basic technique, creating pinwheel flowers in different colors, sizes, and styles becomes a relaxing, repeatable project you can return to throughout the season.