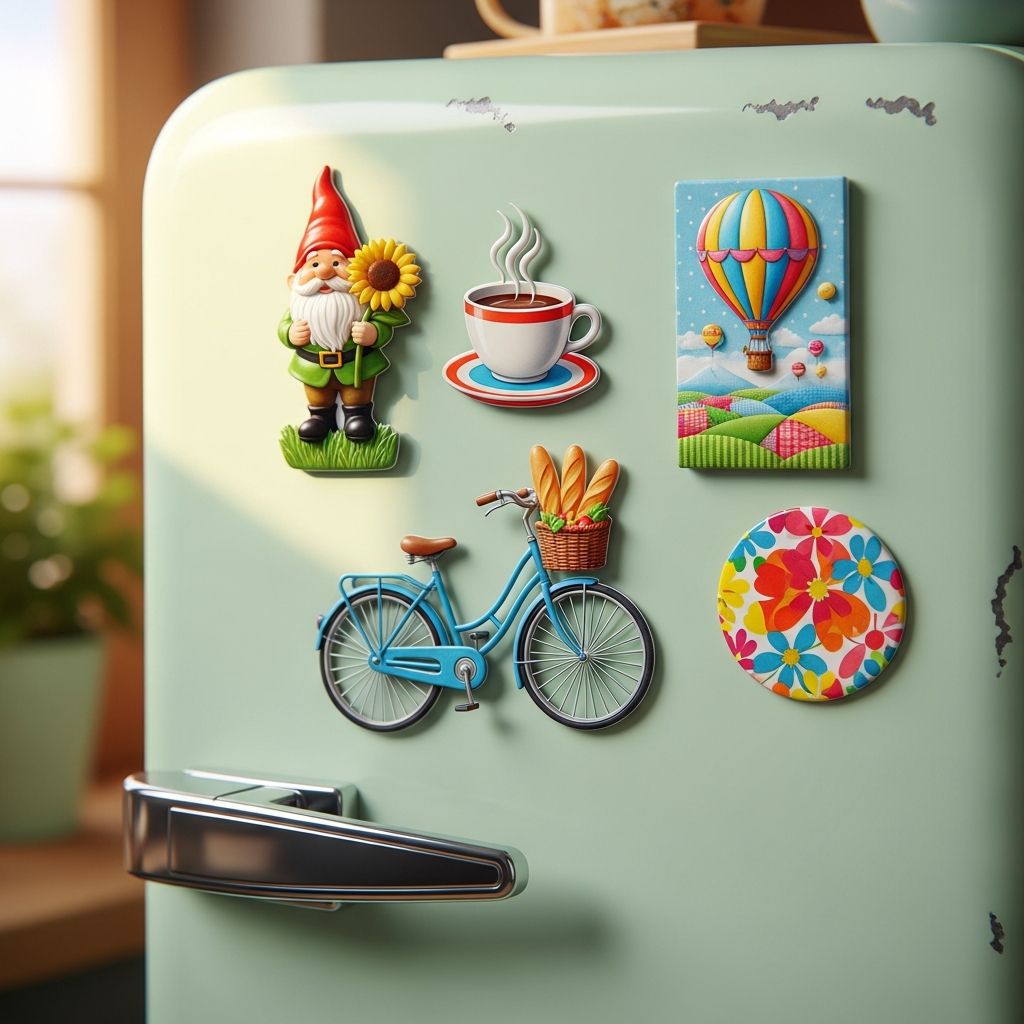
Decoupage refrigerator magnets are a quick, low-cost craft that transforms leftover paper and basic supplies into colorful, useful decor. This guide walks you through everything you need to know—from choosing surfaces and adhesives to sealing, troubleshooting, and crafting with kids.
Why Make Your Own Fridge Magnets?
Homemade magnets are more than just decorations. They can:
- Display kids’ artwork, notes, and reminders in a personal way.
- Use up small scraps of paper, napkins, and packaging instead of throwing them away.
- Serve as affordable, customizable gifts for teachers, neighbors, and coworkers.
- Provide a short, satisfying craft that fits into a busy day.
Craft activities like simple papercrafts and decoupage can support fine motor skills and creativity in children, especially when projects are open-ended and process-focused.
Basic Materials and Tools
You can make decoupage magnets with a wide range of supplies you may already have at home. Here are the essentials:
Core Supplies
- Flat surfaces (also called blanks): small wood tiles, MDF shapes, bottle caps, ceramic tiles, or thick cardboard.
- Paper or images: scrapbook paper, decorative napkins, magazine clippings, printed photos, or children’s drawings.
- Decoupage medium: a commercial decoupage glue, or a mix of white PVA glue and water.
- Magnets: craft magnets, magnetic tape, or recycled magnets from business cards.
- Clear sealer (optional but recommended): brush-on acrylic sealer, water-based polyurethane, or clear spray finish.
Helpful Tools
- Scissors or a craft knife and cutting mat.
- Soft paintbrush or foam brush for applying glue.
- Ruler and pencil for measuring and marking.
- Old gift card or scraper for smoothing out bubbles.
- Wax paper or baking parchment to protect your work surface.
| Surface Type | Pros | Considerations |
|---|---|---|
| Wood tiles or MDF shapes | Lightweight, easy to drill or sand, inexpensive. | May need light sanding and a base coat for best results. |
| Ceramic or porcelain tiles | Very durable, smooth finish. | Heavier; require stronger magnets and careful handling. |
| Metal bottle caps | Great for small designs and upcycling. | Curved edges limit image size; check for sharp edges. |
| Cardboard or chipboard | Easy to cut into any shape; ideal for kids’ crafts. | Less durable; needs thorough sealing against moisture. |
Step-by-Step: Classic Decoupage Magnet
This basic method works for most surfaces and papers. Adjust the steps slightly for special finishes like glitter or resin.
1. Prepare Your Work Area
- Cover the table with newspaper, a craft mat, or parchment paper.
- Ensure good ventilation if you plan to use spray sealers or solvent-based finishes.
- Set out all materials organized by type so you can work quickly once you start gluing.
2. Choose and Cut Your Images
- Trace around your magnet surface on the back of your paper, then cut just slightly smaller than the outline so the paper does not hang over the edges.
- Use small, sharp scissors for curves and detailed shapes.
- For napkins, gently separate and discard the plain backing layers so you only use the printed top layer—this helps it blend seamlessly.
3. Prime the Surface (Optional but Helpful)
Applying a light base coat of paint or decoupage medium can help the paper adhere better and keep colors true:
- Paint porous surfaces like wood or cardboard with a thin layer of white or light-colored acrylic paint.
- Allow the primer coat to dry fully before continuing.
Water-based acrylic craft paints are generally low in volatile organic compounds (VOCs) when compared with solvent-based alternatives, which can improve indoor air quality while crafting.
4. Glue the Paper in Place
- Brush a thin, even coat of decoupage medium onto the surface of your blank.
- Position your paper carefully; press it gently from the center outward.
- Use your fingers or a plastic card to smooth out air bubbles, working slowly to avoid tearing, especially with thin napkins or tissue.
- Wipe away any excess glue that squeezes out at the edges.
5. Seal the Top
- Once the bottom layer of glue feels dry to the touch, brush a light coat of decoupage medium over the top of the paper.
- Apply strokes in one direction for a neater finish; if desired, apply a second coat at right angles to the first after it dries.
- Allow the piece to dry completely according to product instructions.
Many craft glues and clear finishes are water-based acrylic emulsions and rely on evaporation for curing; adequate drying time helps prevent cloudy finishes and tacky surfaces.
6. Attach the Magnet
- Flip the decorated piece over.
- Use a strong craft adhesive or the self-adhesive backing of magnetic tape.
- Position the magnet near the center so the magnet can support the weight evenly.
- Press firmly and let the adhesive cure fully before using the magnet on your fridge.
Select magnets strong enough to hold their own weight plus papers or photographs. Ceramic craft magnets and rare-earth magnets generally provide stronger holding power than thin flexible sheets.
Creative Design Ideas and Variations
Once the basic technique feels comfortable, experiment with different styles and themes.
Theme Ideas
- Photo magnets: Mini family photos or pet portraits with a glossy sealer.
- Typography: Favorite short quotes or single bold words printed in interesting fonts.
- Seasonal sets: Pumpkins for autumn, snowflakes for winter, flowers for spring.
- Kids’ drawings: Scan or photograph children’s artwork, print it smaller, and decoupage onto magnet blanks.
- Travel memories: Cut pieces from maps, brochures, and ticket stubs as souvenirs.
Surface and Finish Experiments
- Layered paper collage: Overlap several images or patterns for a more textured, scrapbook-like look.
- Painted backgrounds: Paint abstract colors or simple patterns on the base before adding paper elements.
- Glitter accents: Sprinkle fine glitter into a wet top coat for sparkle.
- Dimensional coatings: After the glue dries completely, add a domed resin layer for a glass-like finish (adults only; follow safety directions carefully).
Kid-Friendly Decoupage Magnet Projects
With some preparation, this craft is very accessible to school-age children and can be adapted for younger kids through simplified steps.
Making the Project Safe for Children
- Choose non-toxic, water-based glues and paints labeled safe for children.
- Pre-cut small shapes and images so kids can focus on arranging and gluing.
- Use sturdy surfaces like thick cardboard, large wood shapes, or oversized bottle caps to make handling easier.
- Skip sharp tools; adults should handle craft knives and detailed trimming.
Organizations such as the U.S. Consumer Product Safety Commission emphasize reviewing labels to ensure art materials meet safety standards, especially for children’s use.
Simple Project Ideas for Kids
- Alphabet magnets: Cut letters from magazines or print large initials. Let children spell names or simple words.
- Story characters: Use small pictures of favorite animals, vehicles, or book characters so kids can invent stories on the fridge.
- Learning sets: Make magnets that show numbers, shapes, or colors for playful learning.
- Gift packs: Have children assemble magnet sets for family members, creating designs based on hobbies or favorite colors.
Tips for Durable, Long-Lasting Magnets
Spending a little extra time on finishing will help your magnets look better and last longer.
Choosing the Right Adhesives and Sealers
- Use an adhesive compatible with both your surface and magnet type; check the product label.
- For porous surfaces, water-based decoupage mediums usually work well.
- For very glossy surfaces like ceramic or glass, consider lightly sanding the back or using a specialty adhesive recommended for non-porous materials.
- Apply two to three thin coats of sealer instead of one thick coat to reduce drips and brush marks.
Avoiding Common Problems
- Wrinkling or bubbling: Use less glue, work from the center outwards, and let layers dry completely before adding more.
- Cloudy finish: Cloudiness often indicates trapped moisture; allow more drying time and avoid heavy coats in humid conditions.
- Poor adhesion to the fridge: Upgrade to a stronger magnet or increase the contact area on the back of your piece.
- Peeling paper edges: Make sure the paper is fully sealed, and touch up edges with a fine brush and extra glue.
Eco-Friendly and Upcycled Magnet Ideas
Decoupage is a natural fit for upcycling—using materials that might otherwise be discarded.
- Cut motifs from greeting cards, gift wrap scraps, or calendar pages.
- Flatten metal bottle caps and turn them into tiny framed images.
- Reuse cardboard from cereal boxes as a base, adding extra sealer for durability.
- Turn outdated business-card magnets into new designs by gluing decorated cardstock on top.
Creative reuse and small-scale upcycling projects can help reduce household waste and introduce children to sustainability concepts in a hands-on way.
Gift and Display Ideas
Handmade magnets are easy to personalize, wrap, and mail.
- Bundle sets of four or six magnets tied with ribbon as teacher or neighbor gifts.
- Package magnets on a small piece of cardstock or inside a reusable metal tin.
- Create themed sets—like coffee motifs for a coffee lover or garden images for a plant enthusiast.
- Attach a small note explaining that the magnets were handmade and include the maker’s name and date.
Frequently Asked Questions (FAQs)
What type of paper works best for decoupage fridge magnets?
Thin to medium-weight paper such as napkins, tissue, or standard scrapbook paper generally works best. Very thick cardstock can be harder to smooth, while extremely thin paper requires a gentle touch but blends beautifully once sealed.
Do I need a special decoupage glue, or can I use regular white glue?
You can use a commercial decoupage medium for consistent results, but many crafters successfully thin white PVA glue with a little water. Test on a scrap first to check for wrinkling and clarity once dry.
How long should I let my magnets dry before using them?
Most water-based decoupage mediums feel dry within an hour, but for best durability, allow at least 24 hours before heavy use or stacking the magnets together so the finish can cure fully.
Will these magnets damage my refrigerator surface?
Properly sealed magnets with smooth backs should not scratch most refrigerator finishes. If you are concerned, choose thin flexible magnets and check occasionally for any grit or dried glue on the magnet side that could mark the surface.
Can I wash decoupage magnets if they get dirty?
Wipe them gently with a slightly damp cloth and dry immediately. Do not soak magnets in water or put them in the dishwasher, as this can weaken the glue and cause the paper to lift.
References
- Young Children and the Arts: Creative Education in the Classroom — National Endowment for the Arts. 2011-01-01. https://www.arts.gov/sites/default/files/ArtsLearningYoungChildren.pdf
- Volatile Organic Compounds’ Impact on Indoor Air Quality — U.S. Environmental Protection Agency (EPA). 2023-03-14. https://www.epa.gov/indoor-air-quality-iaq/volatile-organic-compounds-impact-indoor-air-quality
- Magnets for Education and Industry — Arnold Magnetic Technologies. 2022-06-01. https://www.arnoldmagnetics.com/resources/magnet-faqs/
- Safe Use of Epoxy and Resin Systems — European Chemicals Agency (ECHA). 2020-10-01. https://echa.europa.eu/support/practical-examples-of-exposure-scenarios/epoxy-resins
- Art and Craft Safety Guide — U.S. Consumer Product Safety Commission (CPSC). 2000-06-01. https://www.cpsc.gov/s3fs-public/5015.pdf
- Global Waste Management Outlook — United Nations Environment Programme. 2015-09-01. https://www.unep.org/resources/report/global-waste-management-outlook