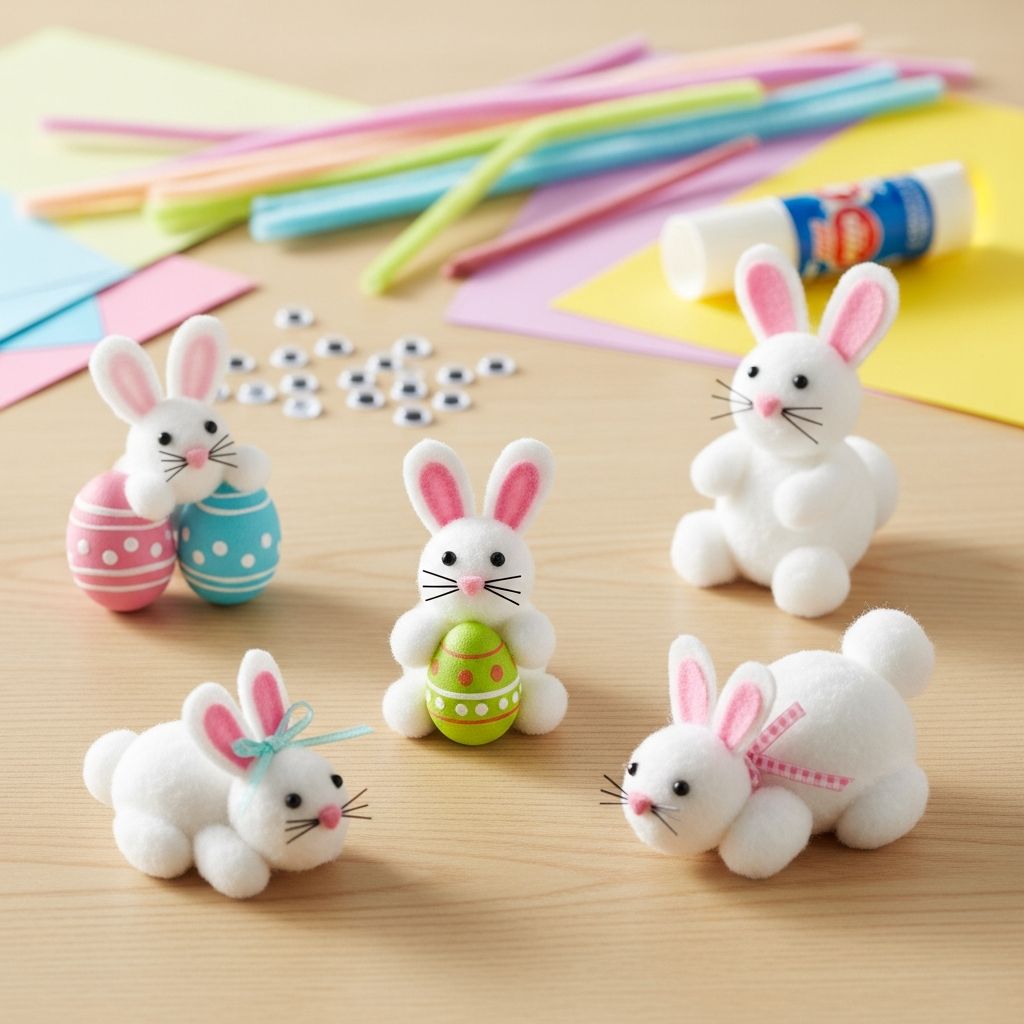
If you are looking for a soft, charming, and budget-friendly craft project for Easter or springtime, cotton ball bunnies are a perfect choice. This guide walks you through every step, from gathering supplies to displaying your finished fluffy rabbit family, using clear instructions and simple materials you may already have at home.
Why Cotton Ball Bunnies Are the Perfect Spring Craft
Cotton ball bunnies combine easy steps with impressive results, making them ideal for preschoolers, older kids, teens, and adults who enjoy hands-on seasonal projects. The texture of the cotton encourages sensory exploration, while cutting, gluing, and decorating support fine motor skills and creativity.
- Great for classrooms, playdates, or family craft nights.
- Flexible enough to adapt for a quick 15-minute activity or a more detailed, hour-long project.
- Uses inexpensive, widely available supplies that can be swapped for what you already have.
Supplies You Will Need
You can create these bunnies with just a few basic materials. Feel free to substitute with similar items depending on what is in your craft drawer.
Core Craft Supplies
- Cotton balls (white or pastel colors)
- Thick paper or light cardboard (for the base shape)
- Safety scissors
- Liquid school glue or tacky craft glue
- Pencil for tracing the bunny outline
Optional Decorative Details
- Googly eyes or small paper circles for eyes
- Colored paper or felt for nose and inner ears
- Markers or crayons for whiskers, mouth, and other features
- Ribbon or yarn for a bow or scarf
- Mini pom-poms or extra cotton for a tail
- Glitter glue or stickers for a more festive look
Planning Your Bunny Design
Before you squeeze out any glue, take a moment to plan the size and style of your bunny. Decide whether you want a big statement bunny for a centerpiece or several small bunnies to line a windowsill or mantel.
- Sketch a simple outline of a bunny profile or a front-facing bunny on scrap paper to test proportions.
- Choose a color theme such as classic white, pastel rainbow, or even bright, unconventional hues.
- Consider how you will display the bunny later so you can choose a sturdy base material if needed.
Step-by-Step Guide to Making a Cotton Ball Bunny
The following steps walk through a straightforward flat bunny craft. This version works well for hanging on walls, doors, and bulletin boards, and can easily be adapted for different ages.
Step 1: Create the Bunny Template
Start by drawing a simple bunny outline onto your thick paper or light cardboard. You can freehand a rounded head with long ears and a plump oval body, or lightly draw a few shapes and connect them until you are happy with the silhouette.
- Keep the lines smooth and simple so it is easy to cut out.
- If working with very young children, pre-cut the shapes to save time and reduce frustration.
- For multiple bunnies, create one sturdy template and trace it several times.
Step 2: Cut Out the Bunny Shape
Carefully cut along the outline with scissors, turning the paper rather than the scissors for cleaner curves. The cutout does not need to be perfect; the cotton balls will cover small uneven edges.
- Older kids can cut out their own bunny to practice control and coordination.
- You can simplify the shape for beginners by making shorter, wider ears and a more basic body outline.
Step 3: Prepare the Cotton Balls
Decide how fluffy you want your bunny to look before you start gluing. You can use the cotton balls as they come for a rounded, cloud-like surface, or gently pull them apart to create a softer, more textured effect.
- For extra fluff, pinch and stretch each cotton ball into a small sheet before placing it on the bunny.
- For a neater look, roll smaller pieces of cotton to fit into narrow areas like ears and paws.
- Mix different shades of white or pastel cotton balls for subtle color variation.
Step 4: Add Glue to the Base
Apply glue to a small section of the bunny at a time so it stays workable and does not dry too quickly. A thin but even layer provides enough adhesive without soaking the paper.
- For young children, an adult can spread the glue with a brush or cotton swab.
- Work from one end of the bunny (such as the feet or ears) toward the other, pressing cotton balls into place as you go.
Step 5: Cover the Bunny with Cotton
Press cotton balls onto the glued areas, placing them closely together so no base shows through. Overlapping slightly helps create a plush, three-dimensional look.
- Use smaller bits of cotton in tight spots around the edges and between the ears.
- Leave a small space free of cotton where the face details will go if you want a smoother drawing surface.
- Gently pat the entire bunny when you finish to make sure all pieces are firmly attached.
Step 6: Create the Bunny Face and Ears
Once the cotton is in place, it is time to give your bunny a personality. You can keep it simple or make expressive, cartoony features depending on the age and style you prefer.
- Glue on googly eyes or draw eyes with a marker or crayon.
- Cut a small triangle or oval from pink paper or felt for the nose and attach it near the center of the face.
- Draw or glue thin strips of paper for whiskers, and add a smile or tiny teeth if you like.
- Add inner ears by cutting smaller shapes from pink or patterned paper and gluing them onto the cotton-covered ears.
Step 7: Add the Tail and Final Touches
Every bunny needs a fluffy tail. Roll a fresh cotton ball into a tight circle and glue it firmly to the back or side of the bunny’s body, depending on the pose of your design.
- Decorate with a ribbon bow, small flower cutouts, or stickers near the neck or ear.
- Write your name and the year on the back as a keepsake, especially if this is a child’s first bunny craft.
- Allow the project to dry completely before moving or hanging it to prevent pieces from sliding out of place.
Creative Variations for Different Ages
One of the best parts of cotton ball bunnies is how easily the project can be customized. Whether you are crafting with preschoolers or older kids, you can adjust the steps to match attention span and skill level.
Simple Toddler-Friendly Version
- Use a large, clearly outlined bunny shape with minimal detail.
- Apply glue for the child and invite them to simply stick cotton balls anywhere inside the outline.
- Skip small details and finish the face yourself with a marker for a quick, low-stress version.
Detailed Bunny for Older Kids
- Encourage older children to design their own bunny pose, such as sitting, hopping, or holding an Easter egg.
- Add accessories like paper carrots, mini baskets, or a background scene with grass and flowers.
- Experiment with patterns using colored cotton, such as spots, stripes, or ombre ears.
3D Standing Bunny Option
If you prefer a standing decoration, you can adapt the project into a simple three-dimensional design.
- Cut two identical bunny shapes from cardboard and glue them back-to-back with a slight gap at the bottom.
- Attach a folded strip of cardboard between the feet to form a base that helps the bunny stand upright.
- Cover both sides with cotton balls and decorate each side with a face or pattern.
Fun Ways to Display Your Cotton Ball Bunnies
Once the glue has dried, your fluffy bunnies can brighten nearly any space in your home, classroom, or community center. Think of them as customizable accents that can be tailored to your seasonal décor.
| Location | Display Idea |
|---|---|
| Front door | Attach a ribbon loop to the top of the bunny and hang as a soft spring door decoration. |
| Classroom wall | Create a bunny gallery by lining up students’ projects along a bulletin board with name tags. |
| Mantel or shelf | Arrange several bunnies of different sizes together, perhaps with paper eggs and flowers. |
| Table centerpiece | Prop 3D bunnies among colored paper grass and plastic eggs for an Easter meal centerpiece. |
| Gift tags | Make small bunny versions, punch a hole at the top, and tie them onto gift bags or baskets. |
Practical Tips and Safety Notes
Even though this is a simple craft, a few small precautions and tricks can make the experience smoother and more enjoyable, especially when working with young children.
- Cover the work surface with newspaper, a plastic tablecloth, or parchment paper for easy cleanup.
- Use non-toxic, washable glue and supervise any children who tend to put objects in their mouths.
- Pre-portion glue onto a small plate so kids can dip cotton balls rather than handling an open bottle.
- Allow extra drying time if your bunny has a very thick layer of cotton and glue.
- Store finished bunnies away from moisture and direct sunlight to keep them fluffy and bright.
Eco-Friendly and Budget-Saving Ideas
If you want to make your project more sustainable, there are several easy ways to reduce waste and reuse items you already have. These tweaks can also help lower the cost of group activities.
- Cut bunny shapes from recycled cardboard boxes instead of new poster board.
- Use scraps of fabric, yarn, or tissue paper in place of store-bought embellishments.
- Repurpose cotton from old, clean cotton pads by pulling them apart into fluffy pieces.
- Encourage kids to design backgrounds on leftover paper instead of using new sheets for every layer.
Frequently Asked Questions About Cotton Ball Bunny Crafts
How long does this craft usually take?
For a single, medium-sized bunny with simple details, expect the project to take about 20 to 40 minutes, plus drying time. Younger children may work more slowly, so consider stretching the activity into two short sessions: one for gluing the cotton and one for decorating the face and accessories.
Can I make this project with a large group of kids?
Yes, this craft works very well for groups such as classrooms, parties, or community events. Prepare by pre-cutting bunny shapes, sorting cotton balls into small containers, and setting up glue stations so several children can work at once without crowding.
What if I run out of cotton balls?
If you do not have enough cotton balls, you can fill in gaps with crumpled tissue paper, small pieces of felt, or even scrap paper torn into small bits. Mixing textures can actually give your bunny a more interesting and unique appearance.
How can I store the bunnies for next year?
Allow the glue to dry completely, then place each bunny in a flat box or large envelope to protect it from dust and crushing. Keep them in a cool, dry place so the cotton stays fluffy rather than becoming flattened or discolored.
Is there a mess-free alternative to liquid glue?
If you prefer less mess, you can use double-sided tape or adhesive dots to attach the cotton. While the bond may not be quite as strong as liquid glue, this method keeps hands cleaner and can be easier to manage with very young crafters.
Start Your Fluffy Bunny Collection
With a small pile of cotton balls, a bit of glue, and your imagination, you can create an entire collection of soft, whimsical bunnies for Easter and spring. Whether you display them on a wall, share them as handmade gifts, or simply enjoy the process of crafting together, these cotton ball bunnies are a simple way to add warmth and creativity to the season.