Building Your Own Cloth Diaper System: A Practical Home Guide
Creating cloth diapers at home has become an increasingly popular choice for parents seeking to reduce waste, lower costs, and have greater control over the materials touching their baby’s sensitive skin. Unlike commercial diapers made with synthetic materials and chemical processes, homemade cloth diapers allow you to select natural, breathable fabrics that prioritize both comfort and environmental sustainability. Whether you’re motivated by environmental concerns, budget constraints, or simply the desire for a personalized approach to baby care, understanding the fundamentals of diaper construction empowers you to create functional, durable products for your household.
Understanding Diaper Structure and Fabric Components
Every functional cloth diaper consists of several essential layers, each serving a specific purpose in keeping your baby comfortable and protected. The fundamental structure includes a moisture-wicking layer against the skin, an absorbent core layer, and a waterproof outer barrier that prevents leaks. Understanding these components is crucial before beginning your construction project, as each layer contributes distinct functionality to the overall performance of the finished diaper.
The Moisture-Wicking Layer
The inner layer that contacts your baby’s skin must effectively pull moisture away from the skin surface and direct it toward the absorbent core. This stay-dry functionality prevents prolonged moisture exposure that can lead to diaper rash and discomfort. Performance fabrics specifically engineered for this purpose provide superior moisture management compared to standard cotton. Microfleece materials demonstrate particular effectiveness because they naturally wick moisture away from the body while maintaining a dry feel against delicate skin. Alternatively, specially treated performance jersey fabrics and microfiber options offer similar benefits and are readily available from fabric suppliers specializing in diaper-making materials.
The Absorbent Core
The middle layers function as the primary absorption system, holding the moisture that has been wicked away from your baby’s skin. Hemp cotton blends and bamboo-based fabrics provide natural, sustainable alternatives to synthetic absorbent materials. These plant-based fibers offer excellent absorbency while remaining gentle on sensitive skin. Some advanced fabric options combine multiple absorbent materials into single integrated layers, reducing the number of separate fabric pieces required while maintaining or even improving overall absorbency. The thickness and composition of this layer directly influence how long the diaper can remain in use before requiring a change.
The Waterproof Outer Shell
The outermost layer must prevent liquid from escaping while still allowing the fabric to breathe adequately. Hydrophobic nonwoven materials create an impermeable barrier that keeps moisture contained within the diaper layers. Modern waterproof fabrics designed specifically for cloth diapers balance impermeability with breathability, preventing the accumulation of heat and moisture that can cause discomfort or skin irritation. This outer layer can be constructed from polyurethane laminate (PUL) fabrics or other water-resistant materials that remain durable through repeated washing and use.
Essential Materials and Tools for Diaper Construction
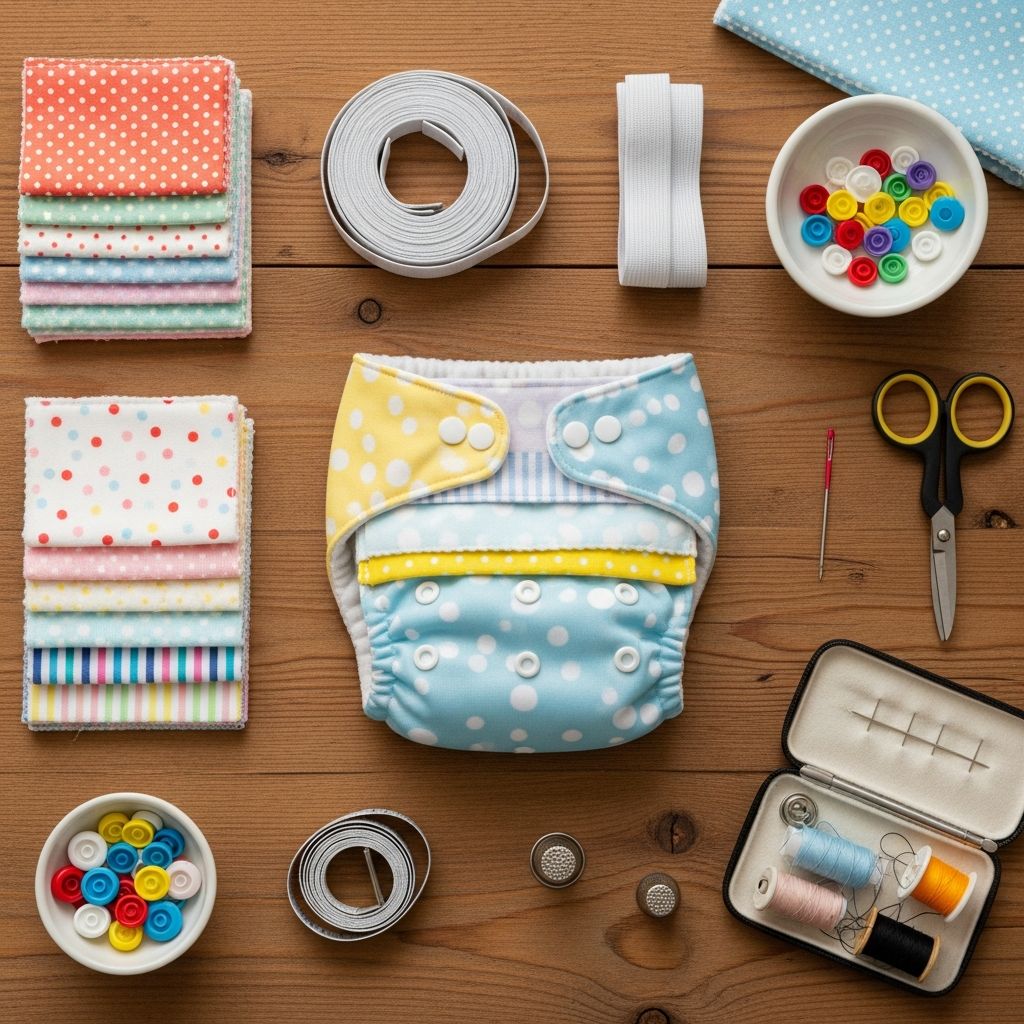
Before beginning your diaper-making project, assembling all necessary materials ensures a smooth construction process without interruptions. Having everything organized and accessible makes the work more enjoyable and reduces frustration during assembly.
Fabric Materials
- Stay-dry wicking fabric (microfleece, performance jersey, or microfiber) for the inner layer
- Absorbent core fabrics such as hemp cotton fleece, bamboo fleece, or organic cotton
- Waterproof outer shell material (PUL fabric or hydrophobic nonwoven)
- Thread in colors matching your selected fabrics
- Elastic for leg cuffs and waistband closure
- Closures such as plastic snaps, hook-and-loop fasteners, or velcro strips
Equipment and Tools
- Sewing machine (serger optional but helpful for finished edges)
- Scissors or rotary cutter for precision cutting
- Measuring tape for accurate dimensions
- Cutting mat to protect work surfaces
- Pattern templates or marking tools for consistent sizing
- Pins or clips for securing fabric layers during construction
- Iron for pressing seams (optional but improves finished appearance)
Step-by-Step Diaper Assembly Process
Creating cloth diapers involves sequential steps that build upon each other to produce a finished product. Following a logical progression ensures all components are properly integrated and secured.
Preparing Your Fabric
Begin by washing all fabric materials before construction, as this prevents shrinkage and removes any manufacturing residues or finishes. After drying, lay fabrics flat and cut them according to your chosen diaper size specifications. Create a template from your first cut piece, using it consistently for all subsequent pieces to ensure uniformity across your diaper set. Size variations include newborn dimensions of 10 inches by 4 inches, medium size of 12 inches by 5 inches, and large size of 14 inches by 5 inches. After cutting, gently round the corners of each fabric piece; this refinement prevents sharp corners and creates a more professional appearance while improving the diaper’s fit around your baby’s legs.
Layering and Securing
Stack your fabric layers with the inner moisture-wicking layer positioned on top, followed by the absorbent core layers, and the waterproof shell as the outermost layer. Using pins or fabric clips, secure these layers together to prevent shifting during sewing. This preparation step ensures that all layers remain properly aligned throughout the construction process.
Stitching the Diaper Together
Using your sewing machine, stitch around the perimeter of the layered fabric approximately one-quarter inch from the edge. Ensure that all layers are caught by the stitching, particularly at the corners and along the leg portions where durability is most critical. Start your stitching with a few forward and backward passes to create a strong anchor point, then continue around the entire diaper before ending with additional securing stitches. This construction method creates a quilted effect that holds the layers together permanently while distributing stress across multiple stitch lines rather than concentrating it in a single seam.
Adding Closures and Elastic
After the basic assembly is complete, attach elastic to the leg cuffs to create a snug fit that prevents leaks around the legs. Position elastic slightly stretched along the leg edges and attach it securely using a zigzag stitch or serger, which provides flexibility and prevents the elastic from snapping during use. For the waistband closure, install either plastic snaps at multiple points to allow size adjustment as your baby grows, or apply hook-and-loop fasteners that enable infinite size adjustment. Multiple closure points provide better leak prevention by distributing tension evenly around your baby’s waist rather than concentrating it in one location.
Creating Absorbent Insert Options
Many cloth diaper systems benefit from separate, replaceable insert layers that increase absorbency without requiring the entire diaper to be changed. These inserts can be constructed using similar techniques to the full diaper but are typically smaller and feature minimal waterproofing, since the diaper shell provides that function.
Insert Construction
Layer two pieces of hemp cotton fleece or bamboo fabric with a thin microfleece layer on top, then stitch them together approximately one-quarter inch from all edges. The resulting three-layer sandwich provides excellent absorbency while maintaining the stay-dry surface that your baby prefers. These inserts can be stored separately and inserted into the diaper shell only when needed, allowing the outer shell to dry between uses while the inserts are being washed. This modular approach extends the lifespan of expensive waterproof fabric by reducing washing frequency of the complete diaper structure.
Supplementary Diaper Care Products
Beyond the diaper structure itself, complementary products enhance the effectiveness of your cloth diaper system and protect your baby’s delicate skin.
Homemade Diaper Detergent
Creating a specialized washing solution for cloth diapers ensures thorough cleaning without introducing harsh chemicals that could irritate sensitive skin. A simple four-ingredient formula combines natural components with proven stain-fighting and cleaning abilities. Mix together shredded Dr. Bronner’s Pure Castile Bar Soap (one full bar), two cups of Arm & Hammer Super Washing Soda, two cups of Borax, and one-half cup of Arm & Hammer Baking Soda. Blend these ingredients thoroughly using a food processor to eliminate any chunks, then store in an airtight container. Use approximately one-quarter cup per wash load. This homemade solution costs significantly less than commercial detergents while remaining gentle enough for sensitive infant skin and effective at removing both stains and odors.
Natural Diaper Cream
Protecting your baby’s skin during inevitable diaper rash situations can be accomplished with a homemade cream using natural, skin-nourishing ingredients. Combine 50 grams of coconut oil, 20 grams of beeswax, 20 grams of shea butter, and 10 grams of arrowroot powder or cornstarch. Melt the coconut oil, beeswax, and shea butter together using a double boiler method, then allow the mixture to cool slightly. Just before solidification, stir in the arrowroot powder or cornstarch to prevent clumping, then pour into clean, reusable containers for storage. The coconut oil provides antimicrobial properties, beeswax creates a protective barrier, shea butter delivers moisturizing benefits, and arrowroot powder helps absorb excess moisture. This preparation naturally addresses the causes of diaper rash while remaining completely free of synthetic chemicals or preservatives.
Fabric Selection Considerations
Choosing appropriate fabrics represents one of the most important decisions in your diaper construction project, as fabric quality directly influences durability, absorbency, and comfort.
| Fabric Type | Primary Function | Key Benefits | Best Applications |
|---|---|---|---|
| Microfleece | Stay-dry inner layer | Excellent moisture wicking, comfortable against skin, durable | Inner contact surface |
| Hemp Cotton Blend | Absorbent core | High absorbency, natural fibers, sustainable, durable | Core absorbent layers |
| Bamboo Fleece | Absorbent core | Naturally antibacterial, soft, breathable, eco-friendly | Core absorbent layers |
| Organic Cotton | Absorbent core | Natural, soft, breathable, suitable for sensitive skin | Core absorbent layers |
| PUL (Polyurethane Laminate) | Waterproof shell | Reliable leak prevention, durable, washable | Outer waterproof layer |
Sizing and Fit Considerations
Creating diapers that fit properly ensures both comfort and leak prevention. Most homemade diaper designs accommodate growth by incorporating adjustable closures that allow the same diaper to fit from newborn size through toddlerhood. Multiple snap placement options or hook-and-loop fasteners enable caregivers to customize the fit for each individual baby’s unique body shape and size. Taking careful measurements of your own baby helps inform your pattern choices, ensuring that your homemade diapers fit better than generic patterns might provide.
Cost and Environmental Benefits
Creating cloth diapers at home typically costs between 40 and 60 percent less per diaper than purchasing equivalent commercial cloth diapers, while offering additional customization options. Over the course of a baby’s diapering years, this savings accumulates substantially. Beyond financial benefits, homemade cloth diapers reduce the massive volume of disposable diapers entering landfills annually. Each baby requires thousands of disposable diapers during their early childhood years; choosing cloth alternatives eliminates this waste while creating a more sustainable approach to infant care.
Maintenance and Longevity
Proper care extends the lifespan of your homemade diapers significantly. Wash diapers separately from other clothing using your homemade detergent formula, rinse thoroughly to remove all soap residue, and dry completely before storage. Avoid fabric softeners and bleach, which damage elastic and waterproof coatings. When maintained properly, well-constructed cloth diapers remain functional through multiple children and can be passed forward to other families, extending their environmental value even further.
Frequently Asked Questions About Homemade Cloth Diapers
Q: How many cloth diapers should I make or have available?
A: Creating 12 to 15 complete diapers allows sufficient rotation for daily use while some are being washed and dried. With separate inserts, you may need fewer complete diaper shells. Consider your laundry schedule when determining quantities.
Q: Can I use regular fabric or do I need specialized materials?
A: While regular cotton can work for absorbent layers, specialized fabrics designed for diapers perform significantly better. The stay-dry materials and waterproof shells are particularly important for function and comfort. Regular polyester fabric does not provide adequate waterproofing.
Q: How do I prevent leaks with homemade diapers?
A: Proper fit is essential; ensure closures are snug without being too tight. Use adequate absorbent layers for your baby’s age and wetness patterns. Ensure the waterproof shell covers all areas, particularly around the legs and waistband. Adding elastic to leg cuffs creates a seal that prevents side leaks.
Q: Are homemade diapers suitable from newborn stage?
A: Yes, homemade diapers work well from birth using adjustable closures. Many parents create separate newborn-sized diapers for the first few weeks, then transition to one-size systems. Pattern options accommodate various starting sizes.
Q: How often should I wash homemade cloth diapers?
A: Wash diapers every two to three days depending on your supply and water usage preferences. Most families wash approximately twice weekly. Separate diapers from other clothing and use your specialized homemade detergent formula.
Q: Can I customize patterns or add designs to homemade diapers?
A: Yes, the outer layer can feature any fabric pattern you prefer, including printed fabrics or colorful solids. Some parents add decorative stitching or fabric paint designs. Just ensure that any embellishments don’t compromise the waterproof integrity of the shell.
Q: What should I do if the waterproof coating begins to deteriorate?
A: PUL fabric remains durable through hundreds of wash cycles when properly maintained. If deterioration occurs, you can replace just the outer waterproof shell while reusing the inner layers, extending the useful life of your creation.
References
- Homemade Cloth Diaper Detergent — Faithful Acres Farmhouse. 2022-12-01. https://faithfulacresfarmhouse.com/2022/12/01/homemade-cloth-diaper-detergent/
- How can I make a natural diaper cream myself? — Jude’s Family. https://www.judesfamily.com/en/blogs/academy/wie-kann-ich-eine-naturliche-windelcreme-selber-machen
- Your Step-by-Step Guide To Making Reusable Diapers — Wazoodle. https://wazoodle.com/blogs/other-blogs/your-step-by-step-guide-to-making-reusable-diapers
- DIY Cloth Diaper Inserts — Farmhouse on Boone. https://www.farmhouseonboone.com/diy-cloth-diaper-inserts/
- Eco-Friendly Diaper Materials — BB Kitty. https://bbkitty.com/what-are-diapers-made-of/
- Raw Material Used in the Manufacturing of Diapers — Favourite Hub. https://favouritehub.com/raw-material-used-in-the-manufacturing-of-diapers/