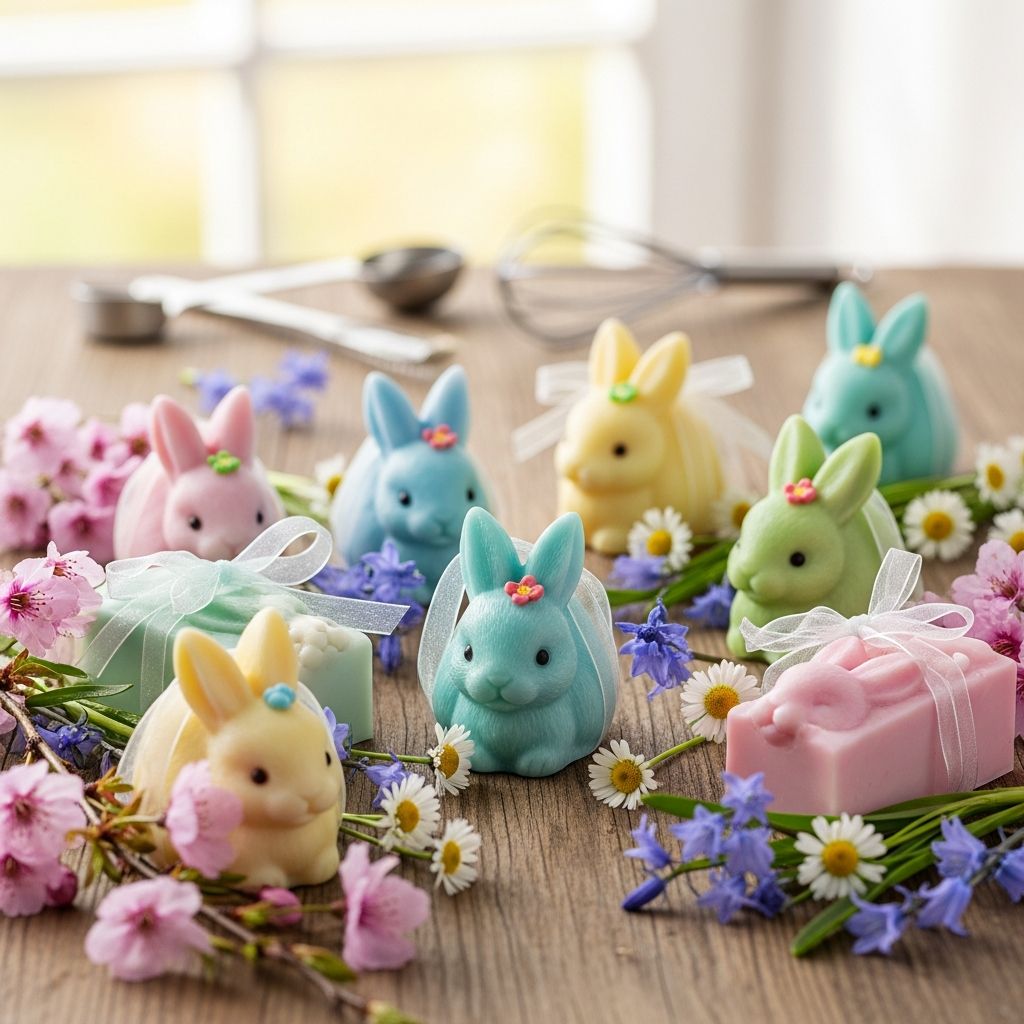
Handmade bunny-shaped soaps are a delightful way to celebrate spring, add charm to your bathroom, or create thoughtful gifts for friends and family. This guide walks you through every step of the process—from choosing the right soap base and molds to adding colors, scents, and decorative details, all using simple melt-and-pour techniques that are accessible even for beginners.
Why Make Bunny Soaps at Home?
Creating bunny soaps at home offers a playful blend of creativity and practicality. Instead of relying on store-bought novelty bars, you can control the ingredients, colors, and fragrances while tailoring each bar to the recipient or occasion.
Handmade soaps also provide a hands-on activity for families, craft groups, and classrooms. Children can help with safe, supervised steps like choosing colors, stirring melted base, and decorating finished bars, making the project as memorable as the final product.
Essential Supplies and Tools
Before melting anything, gather your supplies so the process feels smooth and enjoyable. Working in an organized way helps you pour the soaps quickly before the base cools and hardens.
Core Ingredients
- Melt-and-pour soap base: Choose from clear, goat milk, shea butter, or glycerin bases depending on the look and skin feel you prefer.
- Colorants: Use liquid or powder colorants specifically made for soap to avoid staining skin or tubs.
- Fragrance or essential oils: Soap-safe scents allow you to create calming, fruity, or floral bunny soaps.
Molds and Equipment
- Bunny molds: Silicone rabbit-shaped molds or trays give your soaps their character and make unmolding easy.
- Microwave-safe jug or double boiler: A glass measuring cup for microwave use or a heatproof bowl over simmering water is ideal for melting the base.
- Heat-resistant spatula or spoon: Use this for gentle stirring to minimize bubbles.
- Spray bottle of isopropyl alcohol (70% or higher): A quick spritz on the surface helps pop air bubbles.
Optional Decorative Add-ons
- Biodegradable glitter or mica for a shimmery coat or inner sparkle.
- Small soap embeds (mini hearts, flowers, or eggs) to nestle inside clear bunny soaps.
- Natural additives like oatmeal, dried calendula petals, or poppy seeds for texture.
| Soap Base Type | Appearance | Skin Feel | Great For |
|---|---|---|---|
| Clear glycerin | Transparent, glassy look | Light, rinses clean | Embedding tiny shapes or glitter |
| Goat milk | Creamy and opaque | Gentle and conditioning | Soaps for sensitive or dry skin |
| Shea butter | Rich white or ivory | Soft and moisturizing | Gift sets and luxury-feel bars |
| Olive oil blend | Pale, slightly translucent | Silky, nourishing lather | Everyday family bath bars |
Preparing Your Workspace Safely
Although melt-and-pour soap making is relatively simple, it still involves hot liquid, fragrances, and colorants. A little preparation goes a long way toward preventing spills, burns, and frustration.
- Cover the work surface with parchment paper, a silicone mat, or a washable tablecloth.
- Keep paper towels or clean cloths nearby to wipe up drips before they dry.
- Set molds on a sturdy tray so you can move them without wobbling once filled.
- If working with children, assign them cold tasks like choosing colors, placing embeds, and helping package finished soaps.
Always follow recommended usage rates for fragrance and color to keep your soaps skin-friendly. Check packaging guidelines for safe percentages per pound of soap base.
Step-by-Step: Basic Bunny Soap Method
This step-by-step sequence covers a straightforward bunny soap that you can later adapt with layers, swirls, or hidden surprises. The process relies on melting, scenting, and pouring the base into your molds with minimal fuss.
1. Cut and Measure the Soap Base
- Use a clean knife to cut the soap base into small cubes of similar size.
- Weigh or roughly measure the amount you need based on mold volume; it is better to have a little extra than not enough.
- Place cubes into a microwave-safe jug or double boiler bowl.
2. Melt the Base Gently
- Microwave method: Heat in 20–30 second bursts, stirring between each, until mostly melted with just a few small pieces remaining.
- Stovetop method: Place the bowl over a pot of gently simmering water, stirring occasionally until smooth.
- Allow residual heat to melt remaining chunks so you do not overheat the base, which can cause cloudiness or a rubbery texture.
3. Add Color and Fragrance
- Stir in soap-safe colorants a drop or pinch at a time, mixing thoroughly to avoid streaks.
- Add fragrance or essential oils according to the recommended usage rate, usually measured in drops or grams per ounce of base.
- Stir slowly to blend without whipping air into the mixture.
4. Prepare the Molds
- Ensure your bunny molds are clean and completely dry.
- If using embeds, place them carefully into each cavity first.
- Lightly spritz the empty molds with isopropyl alcohol to help the soap settle smoothly.
5. Pour and Set
- Pour the melted soap slowly into each cavity, aiming for the center and avoiding splashing onto mold edges.
- Immediately spritz the surface with alcohol to break up air bubbles.
- Allow the molds to rest undisturbed at room temperature until firm, usually 30–90 minutes depending on size.
6. Unmold and Cure Briefly
- Once solid and cool, gently pull the sides of the silicone mold away from the soap to release suction.
- Press from the back of each cavity to pop out the bunny soaps.
- Let the bars sit in a cool, dry area for a day to fully harden and evaporate excess moisture before wrapping.
Creative Design Ideas for Bunny Soaps
Once you master the basic method, you can play with layers, colors, and textures to create unique soaps for different themes or seasons. Treat each bunny as a tiny canvas and experiment with contrasts and embellishments.
Pastel Spring Bunnies
- Use a creamy white or goat milk base tinted with soft pastel colorants such as lavender, mint, peach, or baby blue.
- Add gentle floral or herbal scents like lavender, chamomile, or rosemary for a calm, spa-like bar.
- Pour different colors into separate mold cavities to create a rainbow of bunnies for a gift box or basket.
Clear Surprise Bunnies
- Choose a clear glycerin base so embedded elements remain visible.
- Place tiny soap shapes, confetti-style sprinkles (made for soap), or biodegradable glitter in the base of each mold.
- Pour lightly tinted clear soap over the embeds to achieve a floating effect inside each bunny.
Layered Two-Tone Rabbits
- Pour a shallow first layer in one color and allow it to cool until a soft skin forms.
- Spritz the surface with alcohol to help the next layer adhere.
- Pour a second, contrasting color on top and let it fully harden before unmolding.
Two-tone bunnies can mimic clothing, dipped chocolate, or decorative blankets, giving each bar a playful, storybook quality.
Family and Party-Friendly Uses
Bunny soaps shine as seasonal accents, but they are versatile enough to use all year. Their friendly shape can ease bath-time resistance in young children, and their compact size fits well into guest bathrooms or travel kits.
- Easter baskets: Tuck a few pastel bunnies into a nest of paper shreds as a candy-free treat.
- Baby showers: Wrap neutral-colored rabbit soaps as favors or part of a bath-time gift set.
- Birthday parties: Set up a simple decorating station where children can choose colors and scents for pre-poured bases.
- Teacher or neighbor gifts: Pair bunny soaps with washcloths or hand creams in a small gift bag.
Packaging and Storage Tips
Proper packaging keeps your bunny soaps looking crisp and clean while preserving fragrance. Because melt-and-pour bases can attract moisture from the air, a moisture-resistant wrapping method is especially helpful.
- Wrap each bar tightly in plastic wrap or shrink film to protect against humidity and soap “sweating.”
- Add paper labels or belly bands with the fragrance name, ingredient list, and date made.
- Store finished soaps in a cool, dry place away from direct sunlight to prevent fading and scent loss.
- For gifting, place wrapped bunnies in small boxes, organza bags, or reusable tins lined with shredded paper.
Common Mistakes and How to Avoid Them
Even a simple craft can present small challenges. Recognizing common pitfalls ahead of time saves both ingredients and frustration, especially if you are planning multiple batches for gifts or events.
Overheating the Soap Base
- Problem: Soap becomes thick, rubbery, or develops a strong, unpleasant odor.
- Solution: Use short heating bursts, stir frequently, and stop once nearly melted so residual heat completes the job.
Persistent Air Bubbles
- Problem: Visible bubbles cluster on the surface or around embeds.
- Solution: Stir gently rather than whipping, pour slowly, and spritz the surface with alcohol immediately after pouring.
Layers Separating
- Problem: Layered bunnies split apart when unmolded or after a few uses.
- Solution: Pour the next layer while the previous one is firm but still slightly warm, and always spritz with alcohol between pours to encourage bonding.
Frequently Asked Questions
Can children safely help make bunny soaps?
Children can safely participate in many steps with adult supervision. An adult should handle cutting and melting the base, while kids choose colors and scents, place embeds in molds, and help with unmolding and packaging.
How long do homemade bunny soaps last?
Properly wrapped and stored bunny soaps typically maintain good lather and scent for 12–18 months. Fragrance may fade over time, especially if bars are stored in warm or sunny locations, but the soap will generally remain usable.
Which fragrances work best for bunny soaps?
Light, cheerful scents tend to suit bunny designs, including citrus, berry, floral, and herbal blends. For households with sensitive skin, consider unscented or very lightly scented bars using gentle essential oils, and always test on a small area first.
Do I need preservatives for melt-and-pour soap?
Melt-and-pour bases are typically formulated with necessary stabilizers, so additional preservatives are not usually required. Avoid adding water-based ingredients or fresh botanicals that can introduce mold or shorten shelf life.
Can these soaps be sold or only gifted?
Bunny soaps can be either gifted or sold, but selling requires more planning. Research local labeling regulations, insurance needs, and ingredient disclosures to ensure your products are compliant and safe for customers.
Final Thoughts on Crafting Bunny Soaps
Handmade bunny soaps transform everyday washing into a small moment of joy, whether perched beside a sink or hidden in a seasonal gift basket. With a basic melt-and-pour process, some playful molds, and a few creative touches, you can design unique bars that reflect your style, favorite scents, and the personalities of the people who will use them.
Once you are comfortable with this project, consider expanding into themed animal soaps, seasonal sets, or personalized bars featuring initials and favorite colors. The same core techniques apply, allowing your soap-making hobby to grow right along with your imagination.