Easter is the perfect excuse to mix creativity, color, and a little bit of magic at the kitchen table. Instead of filling baskets with only candy, you can turn broken or forgotten crayons into adorable bunny-shaped treasures that children will actually use long after the holiday is over. This project is simple, budget-friendly, and a fun way to give old art supplies a second life.
This guide walks you through how to make bunny crayons from scratch, plus how to customize them for different ages, organize a craft party, and present them as thoughtful gifts or egg fillers. Everything is designed to be easy to follow, even if you are trying this kind of craft for the first time.
Why Bunny Crayons Make the Perfect Easter Project
Bunny crayons are more than a cute novelty; they are a smart and practical Easter activity that works for a wide range of ages. They combine holiday charm with everyday usefulness, and they are ideal for families looking to reduce waste while still celebrating in style.
- They reuse broken or unwanted crayons instead of throwing them away.
- The bunny shape adds a festive touch that fits naturally into Easter baskets and egg hunts.
- The chunky shape is easy for small hands to grip, especially for toddlers just learning to draw.
- This project can be completed in an afternoon, with plenty of kid-friendly steps like peeling crayons and choosing color combinations.
Gathering Your Supplies
Before you start, take a few minutes to collect everything you need. It helps to set up a designated workspace, such as a kitchen counter or table covered with parchment paper or an old towel. The list below keeps things simple and flexible, so you can substitute when needed.
Basic Materials
- Old or broken crayons (paper wrappers removed)
- Silicone bunny-shaped mold suitable for baking
- Baking sheet to support the mold
- Oven or toaster oven
- Knife or crayon cutter for adults only (optional, for chopping crayons)
- Paper towels or parchment paper for easy cleanup
Optional Extras
- Small bowls or cups for sorting colors
- Cellophane bags, ribbon, or twine for packaging gifts
- Stickers or tags to label colors or add names
- Markers or pens if you plan to create customized gift tags
Preparing Crayons for Melting
Good preparation makes the rest of the project go smoothly, especially when children are helping. This phase is perfect for involving kids with simple jobs while adults handle the safe use of knives or ovens.
Step 1: Peel and Sort
Peeling crayons can be surprisingly satisfying for children and is a great fine-motor activity. You can turn it into a mini-game, such as who can peel a certain number of crayons first or who can find the most shades of a single color.
- Remove all paper wrappers, checking carefully for any leftover bits near the tips.
- Sort crayons by color families: warm colors, cool colors, neutrals, or multicolor mixes.
- Throw away any crayons that are sticky, rubbery, or very dirty.
Step 2: Break or Chop
Once crayons are peeled and sorted, they need to be broken into smaller pieces so they can melt more evenly. Adults can handle knife work while children help by snapping crayons into chunks.
- Break crayons into pieces roughly the size of small beans or nuts.
- Use a cutting board and a sturdy knife if you prefer more uniform pieces (adults only).
- Keep colors grouped together in bowls to make customizing each bunny easier later.
Oven Settings and Safety
Bunny crayons rely on gentle, even heat. Melting crayons does not require high temperatures, so low settings and patience are your best friends. Take extra care with ventilation and supervision, especially if you are crafting with children.
| Step | Recommendation | Notes |
|---|---|---|
| Oven temperature | Approximately 250–275°F (120–135°C) | Lower temperatures reduce the risk of scorching. |
| Preheating | Always preheat fully | Ensures even melting across all cavities. |
| Melting time | 10–20 minutes | Check frequently toward the end; ovens vary. |
| Cooling | At least 30 minutes | Longer cooling helps bunny shapes release cleanly. |
Filling the Bunny Mold
Filling the mold is where the artistry begins. Children will love choosing color combinations and arranging tiny chunks inside each bunny cavity, creating a surprise pattern that only appears once the crayons melt and cool.
Color Ideas for Each Bunny
- Rainbow swirl: Mix every color you have into each bunny for a playful, unpredictable look.
- Pastel dream: Use only light colors like soft pinks, light blues, and pale yellows.
- Galaxy night: Combine dark blues, purples, and a touch of white for a space-inspired blend.
- Garden mix: Blend greens, yellows, and a bit of pink or orange for a springtime palette.
When placing pieces into the mold, gently mound them slightly above the rim of each cavity. Crayons shrink as they melt and cool, so filling generously helps create solid, chunky bunny shapes without gaps.
Melting and Cooling the Crayons
With the mold filled, it is time for the most technical part of the project: melting and cooling. This stage requires adult supervision and careful handling of hot materials, but children can observe the transformation from a safe distance.
Step-by-Step Melting Process
- Place the silicone bunny mold on a baking sheet to keep it stable.
- Preheat the oven to your chosen low temperature.
- Carefully slide the baking sheet into the center of the oven.
- Check every few minutes once you reach the 10-minute mark, watching for fully liquefied wax with no solid chunks.
- When the crayons are completely melted, turn off the oven and remove the tray with oven mitts.
Allow the crayons to cool completely before attempting to remove them. Moving too quickly can cause cracks or dents, so be patient. For faster results, you can place the cooled tray in the refrigerator for a short time to help the crayons firm up.
Removing and Finishing Your Bunny Crayons
Once fully cooled, the crayons should pop out of the silicone mold with a gentle push from the underside of each cavity. Work slowly and support the mold so you do not accidentally bend or snap any delicate ears.
- Press from the bottom of each bunny cavity rather than pulling on the top surface.
- If a bunny seems stuck, let the mold sit in the refrigerator or freezer for a few extra minutes.
- Inspect each crayon and gently trim any sharp edges or overflow with a small knife (adults only).
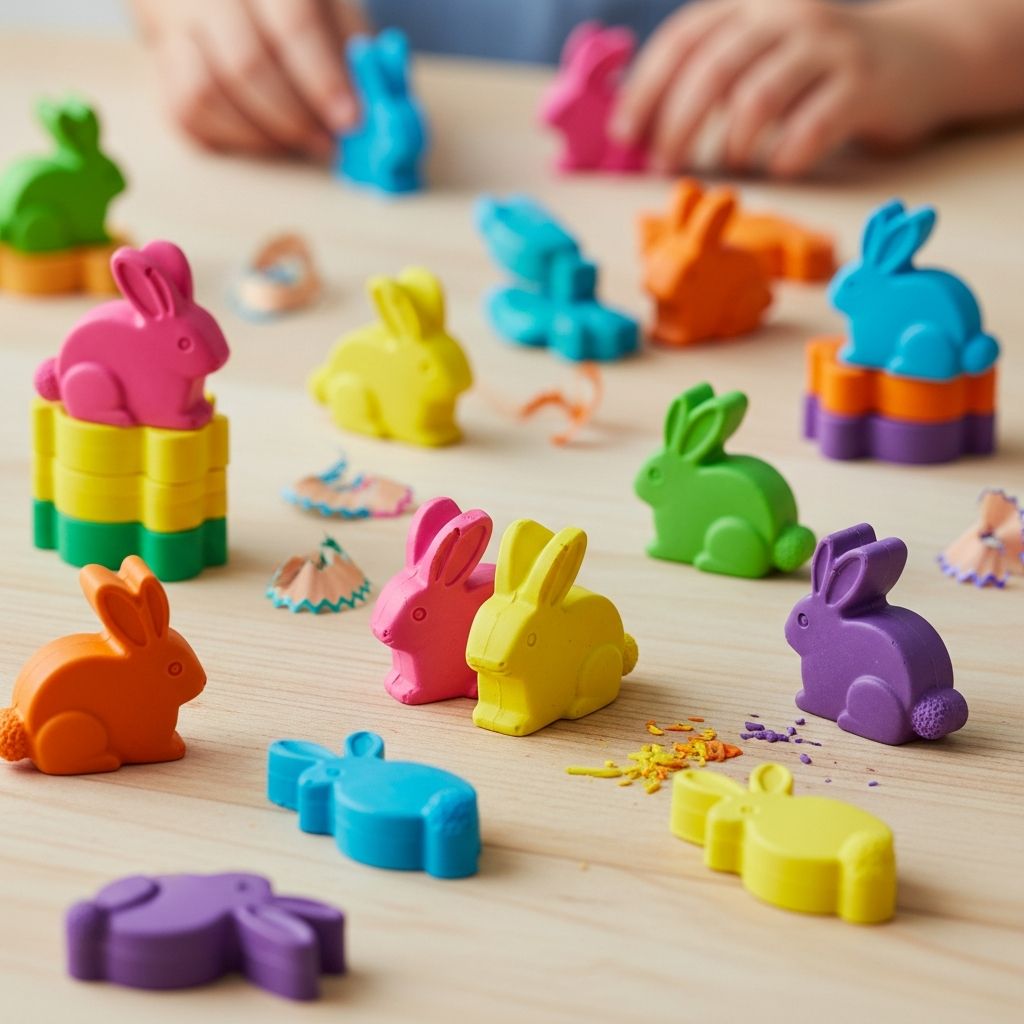
Set the finished bunny crayons on a clean plate or tray. The marbled patterns and color combinations will be more visible now that the wax is fully solid. Children will enjoy choosing their favorite designs or trading with siblings and friends.
Creative Ways to Use Bunny Crayons
Once you have a batch of bunny crayons, there are many ways to incorporate them into Easter celebrations and everyday play. They are both decorative and functional, making them a versatile addition to your holiday plans.
Easter Basket and Egg Ideas
- Slip a single bunny crayon into a plastic egg as a candy alternative.
- Bundle two or three crayons together in a small cellophane bag tied with ribbon.
- Create color-themed sets, such as “spring garden” or “ocean waves,” and label them with homemade tags.
Art Activities for Kids
- Set up a drawing station on Easter morning with bunny crayons and spring-themed coloring pages.
- Encourage kids to trace around the bunny shapes before coloring them in.
- Use the crayons to decorate homemade Easter cards, place cards, or gift tags.
Hosting a Bunny Crayon Craft Party
Bunny crayons also make a memorable group activity for playdates, classroom celebrations, or family gatherings. With a bit of planning, you can turn this simple project into a mini workshop where every child heads home with their own colorful creations.
Party Planning Checklist
- Prepare peeled and broken crayons ahead of time so kids can jump straight into choosing colors.
- Set up separate color stations (reds/pinks, blues/greens, etc.) to minimize chaos and spills.
- Have an adult in charge of oven handling while children focus on filling the molds.
- Offer small paper bags or boxes so each guest can take home cooled bunny crayons at the end.
Tips for Success and Troubleshooting
Even a simple project can come with surprises. If something does not go as planned the first time, these practical tips can help you adjust and improve your next batch of bunny crayons.
Common Issues and Quick Fixes
- Uneven color patches: Use smaller crayon pieces and stir gently with a toothpick right after melting, if needed.
- Cracked crayons: Let them cool at room temperature longer before chilling to reduce temperature shock.
- Soft or crumbly texture: Ensure crayons are standard wax crayons rather than washable or novelty brands that may melt differently.
- Strong wax smell: Increase ventilation by opening windows and using the lowest effective oven temperature.
Safety Considerations for Families
Although this project is kid-friendly, adult supervision is important whenever heat and sharp tools are involved. Setting clear boundaries and assigning age-appropriate tasks ensures everyone can enjoy the process safely.
- Assign children jobs like peeling, sorting, and choosing colors while adults handle cutting and oven use.
- Keep hot trays out of reach until the mold is cool enough to touch comfortably.
- Remind younger children that bunny crayons are not candy, even though they look festive and colorful.
- Use only food-safe silicone molds if you plan to reuse them later for baking, or dedicate a separate mold just for crafts.
Frequently Asked Questions
Can any brand of crayons be used?
Most standard wax crayons work well, but different brands can melt at slightly different rates. If you mix many brands together in a single bunny, you might see some colors melt faster than others, which can create interesting swirl patterns. For more predictable results, use a single brand per batch.
Is it safe to use a regular oven?
Yes, a regular kitchen oven is fine as long as you stick to low temperatures and good ventilation. Use a baking sheet to stabilize the mold and avoid spills, and always allow everything to cool fully before handling. If you are concerned about wax residue, dedicate one silicone mold specifically for crafts.
How long do bunny crayons last?
Bunny crayons can last as long as regular crayons if stored properly. Keep them in a cool, dry place and avoid leaving them in direct sunlight or hot cars, which can cause them to soften or warp. When treated gently, they will survive many drawing sessions and remain a favorite tool in the art box.
Can this project be adapted for other holidays?
Absolutely. Once you are comfortable with the melting and molding process, you can switch to different shapes for other seasons, such as hearts, stars, or leaves. The basic technique stays the same, and the process becomes a reusable template for any celebration.
What if I do not have a bunny mold?
If you cannot find a bunny-shaped mold, any small silicone mold will work, including flowers, eggs, or geometric shapes. The important part is that the mold is heat-safe and flexible, so the finished crayons release easily after cooling.
Making Easter More Creative and Sustainable
Turning old crayons into bunny-shaped art tools is a small change that can make Easter feel more personal, more creative, and less wasteful. Instead of buying a pile of disposable trinkets, you are transforming something you already own into a gift that encourages drawing, storytelling, and imagination.
Whether you make a single batch for your own children or host a neighborhood craft afternoon, bunny crayons invite kids to see everyday materials in a new way. The next time you find a handful of broken crayons at the bottom of a drawer, you will know that they are just one melting session away from becoming the stars of your next Easter celebration.