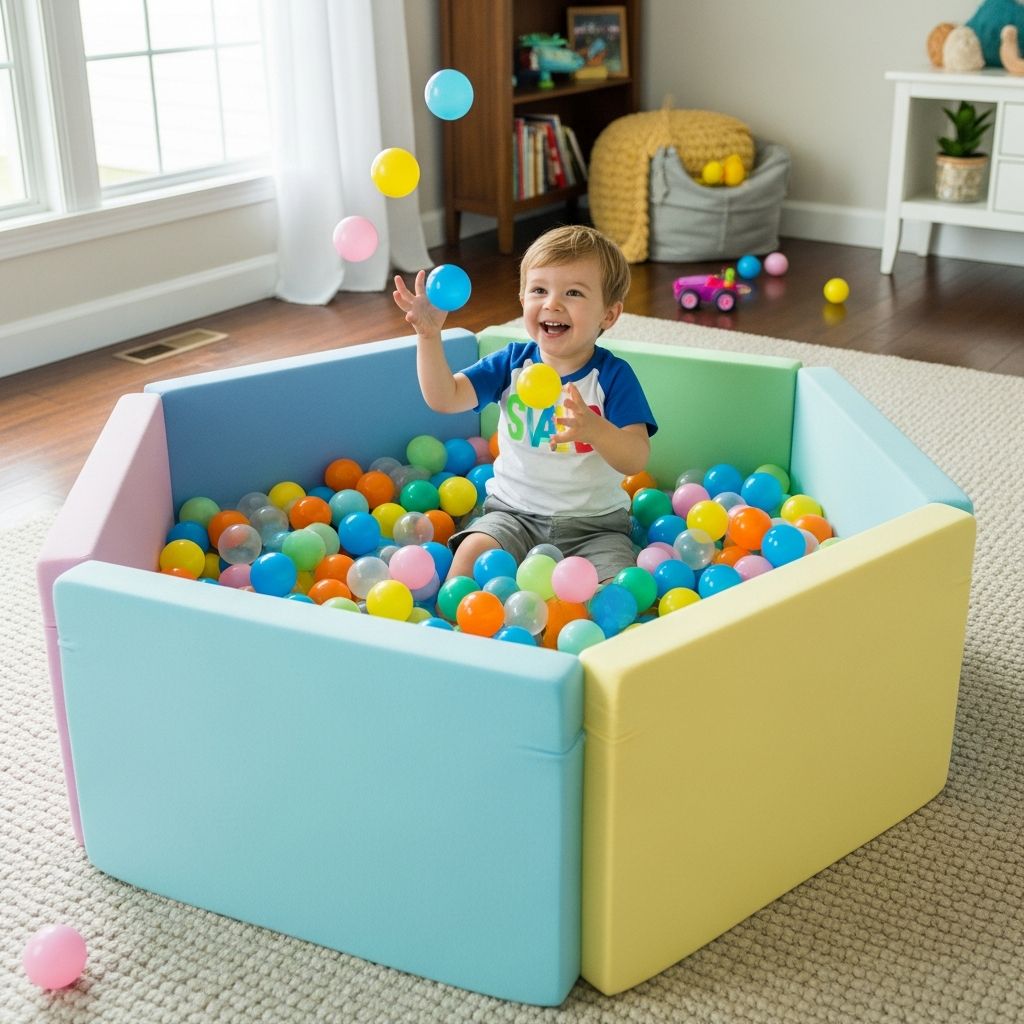
Creating a ball pit at home is an easy way to turn an ordinary afternoon into a giggle-filled adventure. With a few simple materials and some thoughtful safety steps, you can design a cozy play space that works in a living room corner, playroom, or even a small apartment bedroom.
This guide walks through everything from planning and materials to setup, safety, cleaning, and creative play ideas. The goal is to help you build something fun that feels manageable, safe, and suited to your family’s space and budget.
Why a Home Ball Pit Is Worth It
A DIY ball pit is more than just a bucket of plastic balls. It can be a safe zone for movement, a sensory-rich environment for little ones, and a simple way to keep kids busy when outdoor play is not an option.
- Physical development: Crawling, scooping, tossing, and climbing in and out of the pit builds strength, balance, and coordination.
- Sensory exploration: The feeling of sinking into lightweight balls, plus the visual impact of bright colors, offers a rich sensory experience.
- Flexible setup: You can use a portable container, store the balls in a bin, and bring the pit out only when needed.
Planning Your Ball Pit Space
Before buying anything, decide where the ball pit will live. A little planning helps you avoid tripping hazards and clutter, and it ensures kids can play safely and independently for short stretches.
- Location: Choose a low-traffic area where adults can still easily supervise—like a living room corner, playroom, or spacious bedroom.
- Flooring: Carpet, rugs, or foam tiles are ideal under the pit to soften any slips or tumbles.
- Nearby hazards: Keep the pit away from hard furniture edges, floor lamps, cords, and shelves that can be climbed.
Choosing the Right Size
Your child’s age, how many kids will use the pit, and the size of your home are the main factors in deciding how big to go.
- Babies (sitting, not yet walking): A small, shallow container is best so you can sit right beside them and support their balance.
- Toddlers: Aim for enough space for them to move freely but not so big that supervision becomes difficult.
- Multiple kids: Give everyone enough room to sit and scoot without climbing over one another constantly.
Materials You Can Use for the Pit
The simplest way to build a ball pit is to start with a container that already has soft or rounded sides. From there, you only need balls and a padded base. Below are common container options and what to consider for each.
| Container Type | Best For | Pros | Potential Drawbacks |
|---|---|---|---|
| Inflatable kiddie pool | Toddlers and preschoolers | Soft sides, portable, easy to store when deflated | Can puncture; needs occasional refilling with air |
| Foam playpen or play couch pieces | Indoor playrooms and nurseries | Very soft, modular, blends with decor | Usually smaller; often more expensive |
| Pop-up play yard or fabric playpen | Travel and shared spaces | Lightweight, folds away, multipurpose | Sides may be lower or more flexible |
| Sturdy plastic storage tub | Older toddlers with supervision | Durable, easy to clean, inexpensive | Hard edges; may need extra padding around corners |
Step-by-Step: Setting Up Your DIY Ball Pit
Once you have a container in mind, setting everything up can usually be done in under an hour. The steps below focus on safety and comfort as much as fun.
Step 1: Prepare the Floor
Start by creating a cushioned, non-slip surface under the pit. This keeps kids safer as they climb in and out, and it makes adult kneeling or sitting more comfortable.
- Lay down interlocking foam tiles, a thick play mat, or a folded blanket (tucked flat so it doesn’t bunch).
- If you have hardwood or tile, ensure the mat can’t slide by placing a rug pad or non-slip backing underneath.
Step 2: Set Up the Container
Place your chosen container on the padded area and make sure there is open space around at least one side for easy entry and exit.
- For inflatables: Inflate fully so the sides are firm enough to support kids leaning on them.
- For foam or playpen setups: Confirm all panels are securely attached and stable.
- For tubs or rigid containers: Check for sharp edges; you can cover corners with foam edge protectors or folded towels and tape.
Step 3: Choose and Add the Balls
Not all plastic balls are created equal. Pay close attention to size and quality when buying ball pit balls, especially for babies and younger toddlers.
- Diameter: Look for balls that are large enough that they cannot fit completely in your child’s mouth. Many ball pit balls are about 2.5 inches in diameter.
- Material: Choose BPA-free, phthalate-free plastic if possible, and avoid any that feel brittle or collapse easily.
- Color mix: Bright multi-colored sets are visually engaging; a limited palette (like pastels) can look calmer in small spaces.
How Many Balls Do You Need?
The number of balls depends on the size of the container and how deep you want the pit to be. A shallow layer is often best for babies, while a deeper fill can be exciting for confident toddlers.
- Small container (about 3 feet across): Start with 200–400 balls for a light layer; 500–800 for a deeper fill.
- Medium container (about 4–5 feet across): Plan for 800–1,200 balls for a satisfying depth.
- Shallow setups for babies: Use fewer balls so they stay mostly on top rather than sinking in.
Begin with fewer balls than you think you need. You can always add more later after seeing how your child moves and reacts in the pit.
Safety Guidelines Every Parent Should Follow
A home ball pit can be very safe when used thoughtfully. The key is active supervision and a few common-sense rules that match your child’s age and abilities.
- Always supervise: Treat the ball pit like a bathtub—never leave young children alone in it, even for a minute.
- Age-appropriate use: Very young babies should only use the pit while fully supported by an adult sitting with them.
- One rule for climbing: Teach kids to use a designated “in and out” side rather than tipping the walls or jumping over.
- No rough play: Discourage wrestling, pushing, and throwing balls at faces, especially with mixed age groups.
Choking and Entrapment Concerns
Home ball pits often use larger balls than commercial playground pits, which can actually reduce some risks. Still, there are important precautions to consider.
- Check that balls are too large to fit fully into a child’s mouth.
- Remove any broken, cracked, or squashed balls immediately.
- Keep the area under and around the pit free of small toys that could get hidden under the balls.
Keeping Your Ball Pit Clean and Fresh
Because kids use their hands, mouths, and feet in the pit, regular cleaning is essential. The good news is that you can create a cleaning routine that feels manageable instead of overwhelming.
Simple Cleaning Routine
- Daily quick check: Remove any visible debris, spilled snacks, or wet items.
- Weekly wipe-down: Wipe the container walls and base with a mild soap solution or a child-safe cleaner, then dry thoroughly.
- Regular ball cleaning: Periodically wash the balls in batches using a bathtub, large bin, or mesh laundry bags in the shower.
Allow everything to dry completely before reassembling the pit to reduce the chance of mold or odors.
Age-by-Age Play Ideas
Your ball pit can “grow” with your child if you adjust the types of games and challenges offered. Below are ideas tailored to different age groups so the pit stays interesting over time.
For Babies (With Close Supervision)
- Support your baby in a seated position while they touch, grab, and release balls into the pit.
- Roll individual balls across the surface toward them so they can track movement with their eyes.
- Introduce a few balls at a time instead of filling the pit completely to prevent overwhelm.
For Toddlers
- Practice climbing in and out, holding the side for balance.
- Play color-finding games, asking your child to locate or collect a certain color.
- Use small buckets or containers for scooping and pouring balls.
For Preschoolers
- Set up simple challenges like “can you find all the blue balls in 30 seconds?”
- Combine the pit with a soft slide so kids can slide into the balls (only when supervised and on an appropriate height).
- Play pretend games, turning the pit into a “treasure pool” with hidden objects to find.
Creative Ways to Maximize a Small Space
Even a very compact home can host a ball pit if you are strategic about storage and layout. The trick is choosing equipment that can be easily put away or that serves more than one purpose.
- Use a collapsible or inflatable container that can slide under a bed or into a closet.
- Store balls in a rolling bin or large fabric basket when the pit is not assembled.
- Designate a multi-use corner where the pit, reading nook, or building blocks area takes turns.
Making the Ball Pit Part of Daily Routines
Instead of treating the ball pit as a rare novelty, weave it into everyday routines as a tool for transitions, movement breaks, and calming play. This helps kids know what to expect and can even reduce screen time.
- Offer 10–15 minutes of ball pit time after naps to help kids wake up gently.
- Use it as a quick movement break between homework or quiet activities.
- Pair pit time with music for a mini dance-and-play session.
Frequently Asked Questions (FAQs)
1. What age is appropriate for a home ball pit?
Babies who can sit with support can enjoy a very shallow ball pit as long as an adult is sitting right beside them, offering hands-on support. Most older babies, toddlers, and preschoolers can enjoy a deeper pit with consistent, close supervision and clear rules about safe play.
2. How do I know if the balls are safe?
Look for balls that are large enough not to fit in your child’s mouth, made from non-toxic plastic, and free of strong chemical odors. When the balls arrive, inspect them for cracks, sharp seams, or misshapen pieces, and discard any that look damaged.
3. Can I use the pit outside?
Yes, many families set up ball pits outdoors on warm, dry days, especially in a shaded yard or on a covered patio. Just be sure to place a mat underneath, avoid direct midday sun that can heat up plastic, and bring the balls and container inside after use to keep them clean and prevent weather damage.
4. How often should I clean everything?
Do a quick check after each play session to remove any debris or wet spots. Plan on wiping down the container about once a week if it is used frequently, and give the balls a more thorough wash every few weeks or after illness, big spills, or outdoor use.
5. What if I don’t have room for a full pit?
If space is tight, think of the ball pit as a pop-up activity instead of a permanent fixture. A small inflatable pool or shallow storage bin filled with a modest number of balls can be brought out for special play sessions and stored in a closet or under the bed when not in use.
Final Thoughts
A DIY ball pit does not have to be elaborate, expensive, or permanent to be a big hit with kids. With a safe container, the right kind of balls, and a bit of thoughtful planning, you can create a colorful play space that encourages movement, imagination, and joyful noise right at home.
Start small, observe how your child responds, and tweak the setup as you go. Over time, the ball pit can become a familiar, happy spot your child looks forward to visiting again and again.