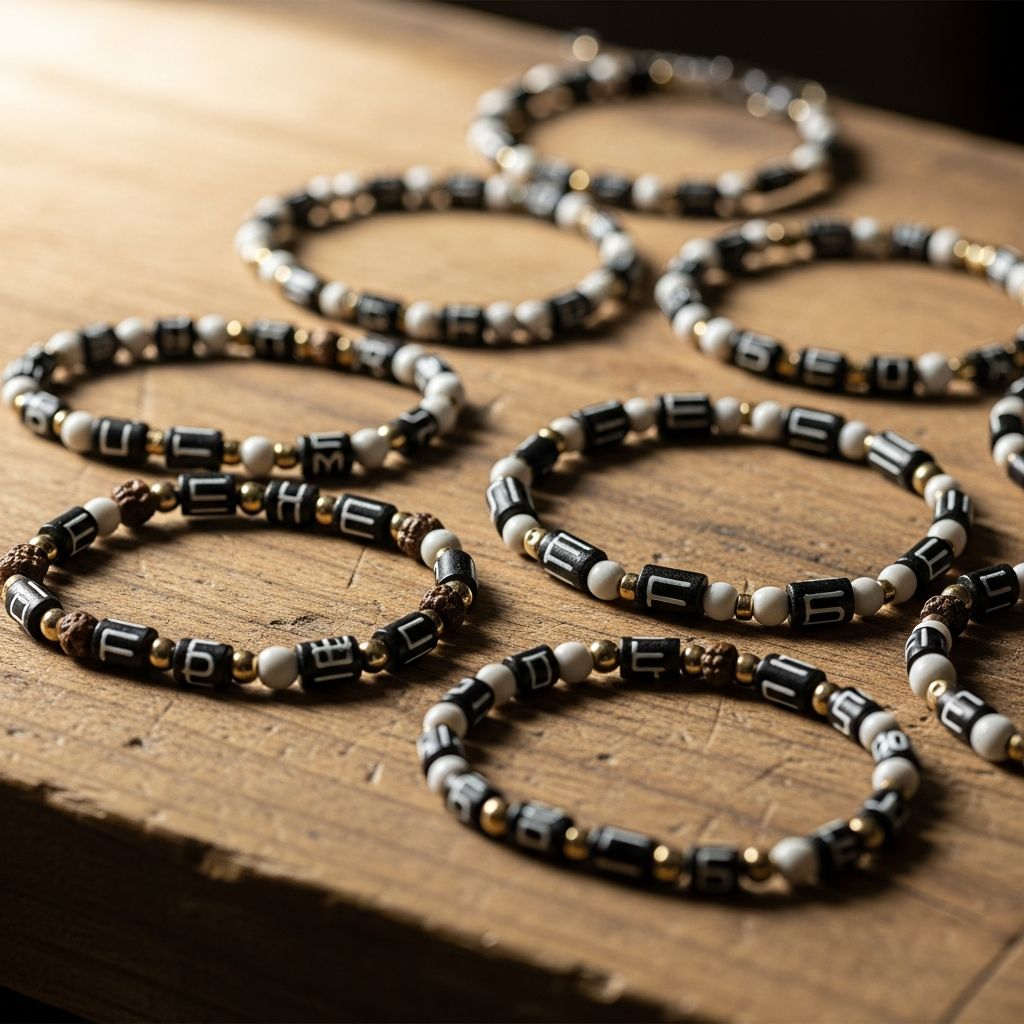
Morse code bracelets are a clever way to hide words, names, or affirmations inside a stylish piece of jewelry. Instead of engraving a message, you translate each letter into dots and dashes, then represent those signals with beads arranged in a meaningful pattern.
This project is beginner-friendly, kid-approved, and surprisingly educational. As you bead, you also explore the basics of encoding information, an idea at the heart of modern digital communication.
Why Morse Code Bracelets Make a Brilliant Craft
Before we dive into the how-to, it helps to understand why this project stands out from typical beading activities.
- Secret messages: Only people who know the code (or have your key) can read the bracelet.
- Highly personal: Encode a name, a short phrase, a date, or even coordinates.
- Flexible for ages: Young kids can focus on patterns and color, while older kids and adults can dive into coding concepts.
- STEM connection: Morse code was one of the earliest digital codes, using just two states (signal/no signal) to transmit information.
- Portable gift: Finished bracelets are lightweight, mailable, and make thoughtful friendship or family gifts.
Understanding Morse Code in Simple Terms
Morse code is a system that represents each letter and number as a sequence of short and long signals, commonly called dots and dashes. Historically, these signals were sent as pulses of electrical current along telegraph wires or as flashes of light or sound.
For this project:
- A dot becomes one type or size of bead.
- A dash becomes a different type or size of bead.
- A space between letters can be a small spacer bead or a specific color choice.
- A space between words can be a longer run of spacers or a distinctive separator bead.
You do not need to memorize the entire Morse code chart. Print or sketch a small reference card and keep it next to your beading area.
Tools and Materials You Will Need
You can adapt this project to what you already own, but the following list gives you a reliable starting point.
| Item | Recommended Choice | Notes |
|---|---|---|
| Beads for dots | Small round seed beads (2–3 mm) | Pick a light or bright color for easy visibility. |
| Beads for dashes | Long bugle beads or slightly larger rounds | Visually distinct from dot beads for quick reading. |
| Spacer beads | Tiny seed beads or metallic spacers | Used between letters and words. |
| Stringing material | Stretch cord (0.7–1 mm) or beading wire | Stretch cord is easiest for kids; wire is more durable. |
| Fastener (if not using stretch) | Lobster clasp + jump rings or sliding knot | Choose based on your jewelry-making comfort. |
| Basic tools | Scissors, small pliers, tape | Tape helps keep beads from sliding off the cord. |
| Work surface | Felt square or dishcloth | Prevents runaway beads and makes layout easier. |
| Optional | Glue or clear nail polish | Secures the final knot on stretch bracelets. |
Planning Your Secret Message
The most successful bracelets start with thoughtful planning. Take a few minutes before touching any beads.
1. Choose Your Word or Phrase
Pick something short enough to fit comfortably on a bracelet:
- A first name or nickname
- A simple phrase like “brave”, “breathe”, or “bestie”
- Initials or a special date (you can encode numbers too)
- A private inside joke, motto, or family word
For younger children, sticking to their first name keeps the project manageable while still feeling personal.
2. Translate It into Morse Code
Using a Morse chart, write your message on paper and underneath each letter write its dot–dash sequence.
- Place a vertical line or slash between letters.
- Leave a slightly larger gap or draw two lines between words.
This handwritten key will be your map when you start arranging beads.
3. Assign Beads to Symbols
Decide on a clear system so that you can decode the bracelet later:
- Dot: one small round bead (for example, white).
- Dash: one long bugle bead or two small beads (for example, black).
- Letter gap: one tiny metallic spacer bead.
- Word gap: three spacer beads or a unique accent bead.
Write down your bead key on the same paper as your message so you can double-check as you go.
Step-by-Step: Stringing a Stretchy Morse Code Bracelet
Stretchy bracelets are comfortable, easy to put on, and simple enough for beginners. The steps below outline a reliable method inspired by common jewelry-making practices.
Step 1: Cut and Secure Your Cord
- Measure around your wrist with a flexible tape or string.
- Add at least 10–15 cm of extra length to make tying knots easier.
- Cut the stretch cord to this length.
- Tape one end of the cord to the table so beads will not slide off.
Step 2: Add Starter Beads
Most bracelets look more finished if the Morse code message sits in the center, with simple beads on either side.
- String a short row of plain beads (for example, 10–20 seed beads).
- These will sit on one side of your secret message.
Step 3: Bead the First Letter
- Look at the first letter in your written key.
- For each dot in that letter, string one dot bead.
- For each dash, string one dash bead (or your chosen dash combination).
When the dots and dashes of that letter are complete, add one spacer bead to mark the end of the letter.
Step 4: Complete the Word
- Repeat the process for each letter in your word.
- Always follow each letter with a single spacer bead.
- After the final letter in a word, add your chosen word gap (for example, three spacers or one special bead).
Continue until the entire phrase from your key is represented by beads on the cord.
Step 5: Balance the Design
- After you finish the last word, add the same number of plain starter beads that you used at the beginning.
- Hold the bracelet in a loose circle and check that the Morse message will rest roughly along the top of your wrist.
- If the bracelet feels too small, add a few more plain beads on each side of the message to increase the circumference.
Step 6: Tie and Secure the Knot
- Slide all the beads toward the center so there is minimal gap in the circle.
- Remove the tape but hold both ends of the cord firmly.
- Tie a series of tight overhand knots (for example, three in a row), gently stretching the bracelet between knots to seat them.
- Test the knot by pulling gently on the cord.
- Once secure, add a small dab of clear nail polish or jewelry glue directly on the knot to reduce the chance of slipping.
- After the glue dries, trim the excess cord and slide a bead over the knot to hide it if possible.
Alternative: Memory Wire Morse Code Bracelet
If you prefer a bracelet that keeps its round shape and requires no knot-tying, memory wire is a good option.
- Cut a coil of memory wire slightly longer than your wrist size.
- Use round-nose pliers to bend one end into a small loop to keep beads from sliding off.
- Follow the same beading logic as the stretch bracelet: starter beads, Morse message with spacers, ending beads.
- When finished, make another loop at the open end as close to the last bead as possible, then trim any extra wire.
Memory wire bracelets slip on and off like bangles but maintain your pattern in a clean, consistent circle.
Design Ideas to Customize Your Bracelet
Once you understand the core technique, you can personalize endlessly. Here are some ideas to spark creativity.
Color Themes
- Monochrome: Use one color family, such as different shades of blue, but keep dots and dashes clearly distinct.
- School or team colors: Represent a favorite club or team with their color palette.
- Rainbow: Use rainbow spacers between each letter, with neutral dots and dashes.
- Metallic accents: Add gold or silver spacers around the message for a more polished, jewelry-like look.
Meaningful Messages
- Encouraging words: calm, focus, hope, brave.
- Family names: one bracelet per family member to stack.
- Coordinates: encode important numbers such as latitude/longitude of a meaningful place.
- Affirmations: a short personal phrase to serve as a wearable reminder.
Layering and Sets
- Wear multiple bracelets, each with one word from a longer phrase.
- Create matching friendship bracelets that say the same thing or complementary words.
- Design parent–child sets where the adult and child share the same hidden message.
Using the Craft as a STEM Learning Moment
This project naturally introduces ideas about signals, coding, and communication. Educators and parents can turn it into a light STEM lesson.
- Explain that Morse code is an early digital code: every symbol is made from only two states (on/off), similar to the 0s and 1s used in computers today.
- Discuss how messages used to travel over telegraph wires as electrical pulses long before phones and the internet.
- Ask kids how they might design their own secret code using shapes, colors, or sounds.
- Compare Morse code to modern texting abbreviations or emojis as different ways to compress information.
Safety and Accessibility Tips
With a few adjustments, Morse code bracelets can be safe and enjoyable for a wide range of ages and abilities.
- Small parts: Keep beads away from toddlers and young children who still put objects in their mouths.
- Supervision: Provide close adult help with scissors, wire cutters, and pliers when needed.
- Visual supports: For kids who struggle with small text, print a large Morse chart and use contrasting bead colors.
- Fine motor support: Use larger beads and thicker cord for children who find tiny beads challenging to handle.
Frequently Asked Questions (FAQs)
Q: How long of a message can I fit on one bracelet?
A: That depends on bead size and wrist circumference. Short words, names, or brief phrases work best; if your message feels crowded, split it across two or more bracelets.
Q: Do I have to use different shapes for dots and dashes?
A: No, but you should use a clear visual difference. You can use the same bead shape in two distinct colors, or one bead for dots and two beads for dashes, as long as your system is consistent.
Q: What if I make a mistake in the middle of the pattern?
A: Slide the beads back off carefully until you reach the error, correct the sequence using your written key, then continue beading. Having your message and bead legend on paper helps you catch mistakes early.
Q: Can I make anklets or necklaces with the same technique?
A: Yes. Use the same Morse system but measure for a longer length and consider switching from stretch cord to beading wire and a clasp for durability, especially for necklaces.
Q: How do I keep the bracelet from breaking over time?
A: Use quality stretch cord or beading wire, avoid sharp-edged beads near the knot, tie multiple tight knots, and reinforce the knot with a small dab of glue or clear nail polish before trimming.
References
- STEM Activity: Create a Morse Code Bracelet — National Inventors Hall of Fame. 2020-06-09. https://www.invent.org/blog/stem-activity/morse-code-bracelet
- DIY Morse Code Bracelet Tutorial — Stitchology Crafts. 2021-03-15. https://www.stitchologycrafts.com/post/diy-morse-code-tutorial
- DIY Stretchy Morse Code Bracelets — Glue Sticks Blog. 2022-08-01. https://gluesticksblog.com/diy-stretchy-morse-code-bracelets-video/
- DIY Morse Code Bracelet Instructions — Ethic Goods. 2023-05-10. https://ethicgoods.com/pages/diy-morse-code-bracelet-instructions
- Morse Code: A Historical Summary — National Park Service. 2015-02-26. https://www.nps.gov/articles/000/morse-code.htm