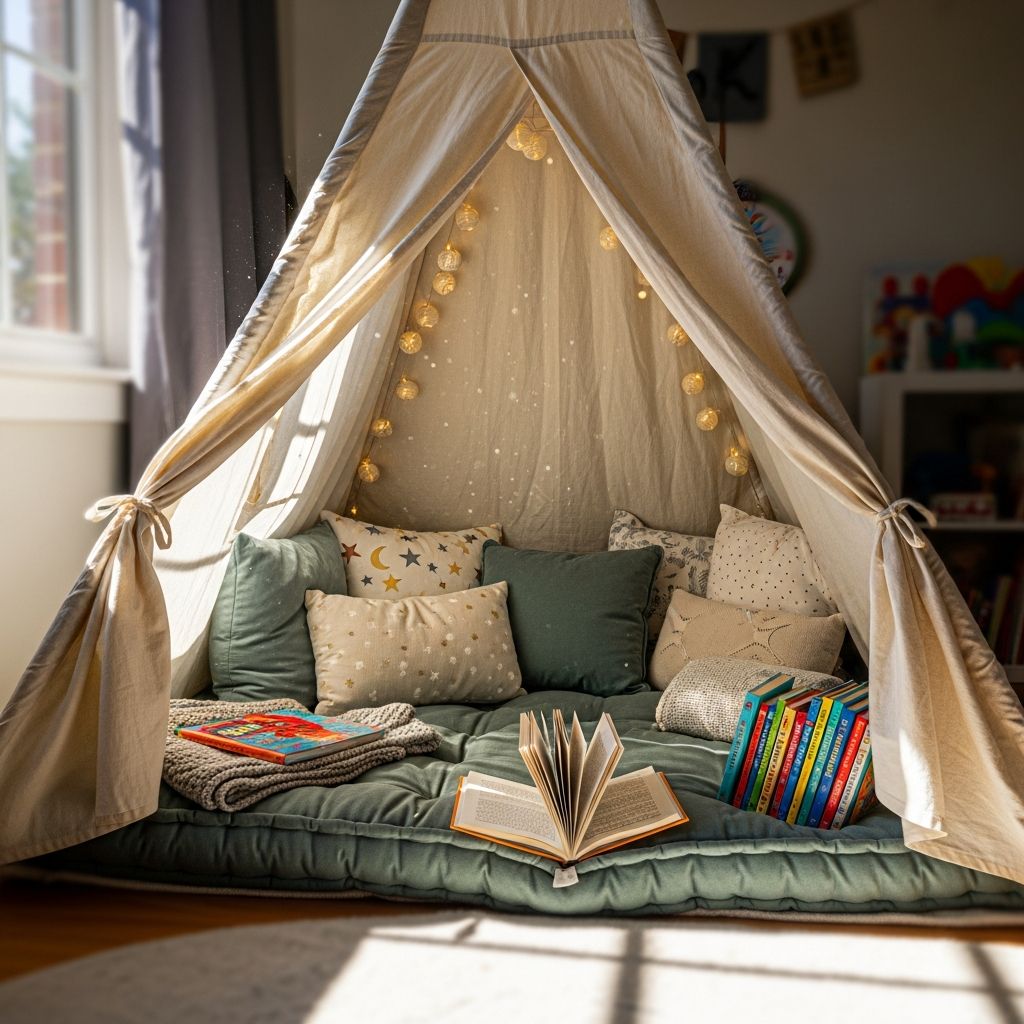
Turning a quiet corner of your home into a cozy reading tent is a simple way to spark your child’s imagination and make books feel special. This guide walks through planning, building, decorating, and safely enjoying a homemade reading tent using supplies most families already have.
Why Create a Reading Tent?
A reading tent transforms reading from a task into an inviting ritual, giving kids a private, comforting space that makes books feel like an adventure instead of an assignment. The small, enclosed area helps many children focus, unwind, and associate reading with calm and comfort rather than pressure or noise.
For parents and caregivers, a simple tent is an affordable project that can grow with your child: it can start as a picture-book nook for a toddler and later evolve into a quiet spot for older kids to journal, listen to audiobooks, or study.
Planning Your Perfect Book Nook
Before gathering supplies, spend a few minutes thinking about where the tent will live and who will use it. Planning ahead helps you choose the right size and style so the tent becomes a long-lasting part of your home rather than a short-term novelty.
- Age of the child: Younger kids may love bright colors and playful themes, while older kids might prefer softer tones and simple patterns.
- Available space: Measure the floor area and ceiling height to avoid building something that blocks doors, vents, or walkways.
- Portability: Decide whether you want a tent that stays up full time or one that can be folded and stored between uses.
Simple Material Options
You can build a charming reading tent using items already on hand, or purchase just a few basics. Below are flexible options rather than a single rigid shopping list, so you can adapt the project to your home and budget.
| Component | Easy Household Options | Optional Upgrades |
|---|---|---|
| Cover fabric | Flat bed sheets, curtains, or lightweight blankets | Canvas, muslin, or patterned fabric yardage |
| Floor base | Extra comforter, rug, yoga mat, or folded blankets | Foam play mats with a washable cover |
| Support structure | Dining chairs, table edges, or a sturdy clothes rack | Wooden dowels or PVC pipes tied into an A-frame |
| Lighting | Battery-powered clip-on light or small lamp placed safely outside | LED string lights with batteries and cool bulbs |
| Comfort items | Throw pillows, stuffed animals, small blankets | Beanbag chair, floor cushions, or bolster pillows |
Choosing the Right Spot at Home
The ideal location for a reading tent is quiet, safe, and easy for an adult to glance into. Corners of bedrooms, playrooms, or living rooms often work well because they naturally feel tucked away but not completely hidden.
Avoid areas near heaters, active doorways, or stairs, and consider natural light: a spot near a window can feel bright during the day, while a darker corner works well if you plan to rely on soft, battery-powered lighting.
Three Easy Tent Styles
There is no single correct way to make a reading tent. Here are three flexible styles that can be created with minimal tools and adjusted depending on your materials and space.
- Chair-back tent: Drape a sheet over two chairs placed back to back to create a quick tunnel-style tent that is simple to set up and remove.
- Wall-anchored canopy: Use removable hooks on a wall or ceiling to hang a sheet or curtain that pools on the floor, forming a soft cocoon around a reading cushion.
- Freestanding frame: Build a simple A-frame using dowels or lightweight poles, then drape fabric over the top, securing it with clips or ties.
Step-by-Step: Chair-Back Reading Tent
This method is perfect for first-time crafters and renters who want something quick, tool-free, and reversible. It works best for one or two small children at a time.
- Arrange the chairs: Place two sturdy chairs back to back, leaving a gap of about the width of a pillow between them to form the tunnel.
- Prepare the floor: Lay down a blanket, rug, or folded comforter beneath the gap to make the base soft and inviting.
- Drape the fabric: Spread a flat sheet over both chair backs so it covers the top and hangs down on either side, forming a tent shape.
- Create an entrance: Pull one side of the sheet slightly forward and tuck or clip the front corners to the chair legs, leaving an open doorway.
- Add comfort: Arrange pillows or a beanbag inside along with a small basket of books.
- Light it up: Attach a battery-powered clip light to the chair back outside the fabric so the bulb does not touch the sheet, aiming the beam into the tent.
Step-by-Step: Simple A-Frame Tent
For a more permanent or polished reading nook, a basic A-frame structure adds stability while still being easy to move. This approach requires tying poles together but can still be low-tool and beginner-friendly.
- Gather poles: Use four equal-length dowels or lightweight poles for the sides and one longer pole for the ridge along the top.
- Form two triangles: Cross two poles at the top like an upside-down V, tie them together securely with strong cord, and repeat for the second pair.
- Add the top ridge: Position the long pole across the two V-shaped ends and tie it in place at each end so it does not shift.
- Check stability: Gently spread the bases of the triangles until the frame stands on its own without wobbling.
- Drape the cover: Lay a large sheet or piece of fabric over the frame, centering it over the ridge so both sides hang evenly.
- Secure the sides: Use clothespins, clips, or simple ties to fix the fabric to the lower parts of the frame, leaving one side partially open as a doorway.
- Set up the floor: Slide in pillows, blankets, and a low basket of books once the frame feels solid and safe.
Design Ideas Kids Will Love
Once the structure is up, styling the inside is where the magic happens. Involving your child in these decisions helps them feel ownership of the space, which can make them more eager to spend time reading there.
- Color themes: Use your child’s favorite colors for pillows, throw blankets, or a small rug to tie the space together.
- Seasonal touches: Add paper snowflakes in winter, paper flowers in spring, or cardboard stars and moons for a night-sky theme.
- Personalization: Hang a homemade sign with your child’s name, or string up artwork they have created on a piece of yarn with clothespins.
Lighting and Atmosphere
Good lighting makes reading easier and more comfortable, but in a tent, it also sets the mood. Soft, warm light usually works best to keep eyes relaxed and the atmosphere cozy.
Battery-operated lights are typically safer than plug-in lamps inside fabric spaces. Place lights so the bulbs do not touch cloth or pillows, and show your child how to turn them on and off independently as part of the reading ritual.
Safety Tips for Indoor Tents
Because a reading tent combines fabric, kids, and sometimes lights, it deserves the same safety attention as any other piece of children’s furniture or decor. A few simple precautions can prevent accidents and keep the tent enjoyable for everyone.
- Use stable, well-balanced supports that do not tip easily when bumped or leaned on.
- Avoid open flames, candles, or hot bulbs anywhere near the tent fabric or bedding.
- Keep the entrance clear so children can crawl in and out without getting tangled in cords or loose cloth.
- Regularly inspect clips, ties, and knots to ensure nothing has loosened over time.
Organizing Books Inside the Tent
The way books are displayed can influence how often children choose to read. A large, crowded shelf outside the tent can feel overwhelming, whereas a small, curated selection inside makes choosing a book feel simple and inviting.
- Rotate a small set of books weekly to keep choices fresh and interesting.
- Use a basket, shallow box, or low crate so children can see covers rather than just spines.
- Include a mix of easy favorites and slightly more challenging titles that you can read aloud together.
Encouraging Reading Habits with the Tent
Building the tent is only the first step; turning it into part of a daily routine helps strengthen reading habits. A consistent, enjoyable ritual creates positive associations with both the space and the books used there.
- Schedule “tent time”: Choose a regular time of day, such as just after dinner or before bed, when the tent becomes the go-to spot for quiet reading.
- Join your child: Sit in or beside the tent to read together, especially at the beginning, so your child links the space with attention and connection.
- Let the child lead: Allow them to choose the books, even if that means repeating favorites often, to keep the experience joyful and stress-free.
Keeping the Tent Clean and Tidy
Because a reading tent often includes fabric covers, pillows, and blankets, it collects dust and crumbs over time. Light maintenance protects both the materials and your child’s comfort.
- Shake out blankets and pillows weekly and wash them according to their care labels.
- Vacuum or sweep under the tent regularly, especially if snacks are occasionally allowed.
- Set simple rules like “books stay open inside, not on the floor outside” to keep the area organized.
Ideas for Small Spaces
Even if you live in a compact home or apartment, a reading tent can still work with a few creative adjustments. Focus on vertical space and items that fold or roll away when not in use.
- Use a single ceiling hook and a circular hoop to hang a curtain that can be tied back against the wall when your child is done reading.
- Choose a folding cushion or yoga mat for the floor so the entire setup can be stowed in a closet or under a bed.
- Position the tent in a corner where it can overlap with existing furniture, such as at the foot of a bed.
Fun Add-Ons for Extra Magic
Once the basic reading tent feels established and well-used, you can gradually add special touches that keep the space feeling new. These extras do not need to be expensive and can often be homemade.
- Storytime props: Keep a small basket with puppets, felt characters, or simple costumes related to favorite stories.
- Audio options: Add a portable speaker or kid-friendly audio device for gentle music or audiobooks during quiet time.
- Activity basket: Include sketchbooks and crayons so children can draw scenes from their books or create their own stories after reading.
Frequently Asked Questions
How long does it take to make a reading tent?
A basic chair-back tent can be ready in about 15–20 minutes once you have gathered your supplies, while a more structured A-frame may take around an hour, especially if you are tying or adjusting poles for the first time.
What is the best fabric to use?
Lightweight but opaque fabrics, such as cotton sheets or curtains, work especially well because they create privacy without making the inside feel stuffy. Thick blankets can be used in colder rooms but may need extra secure supports due to their weight.
Can siblings share the same tent?
Yes, as long as the tent is large enough and the frame is sturdy, siblings can comfortably share the space. Consider adding extra pillows and clear rules about taking turns choosing books to keep the atmosphere peaceful.
Is it safe to let kids nap in the tent?
Short, supervised naps can be fine if the tent is well-ventilated and away from hazards, but overnight sleep is usually better in a regular bed designed for that purpose. Always ensure there are no cords, loose ties, or heavy objects overhead before allowing any sleeping in the tent.
How often should the tent be taken down?
If the tent is in a high-traffic area, you may decide to fold it away daily to preserve space and prevent damage. In a dedicated playroom or bedroom, you can leave it up longer and simply refresh the books and wash the fabrics as part of regular cleaning.
Bringing It All Together
A DIY reading tent does not need to be complicated, perfectly styled, or expensive to be deeply meaningful to a child. What matters most is the sense of comfort, attention, and imagination it represents whenever your child crawls inside with a favorite book.
By taking the time to choose a cozy spot, use safe and simple materials, involve your child in the design, and weave tent time into your daily rhythm, you create far more than just a small structure—you build a welcoming doorway into stories, curiosity, and lifelong reading habits.