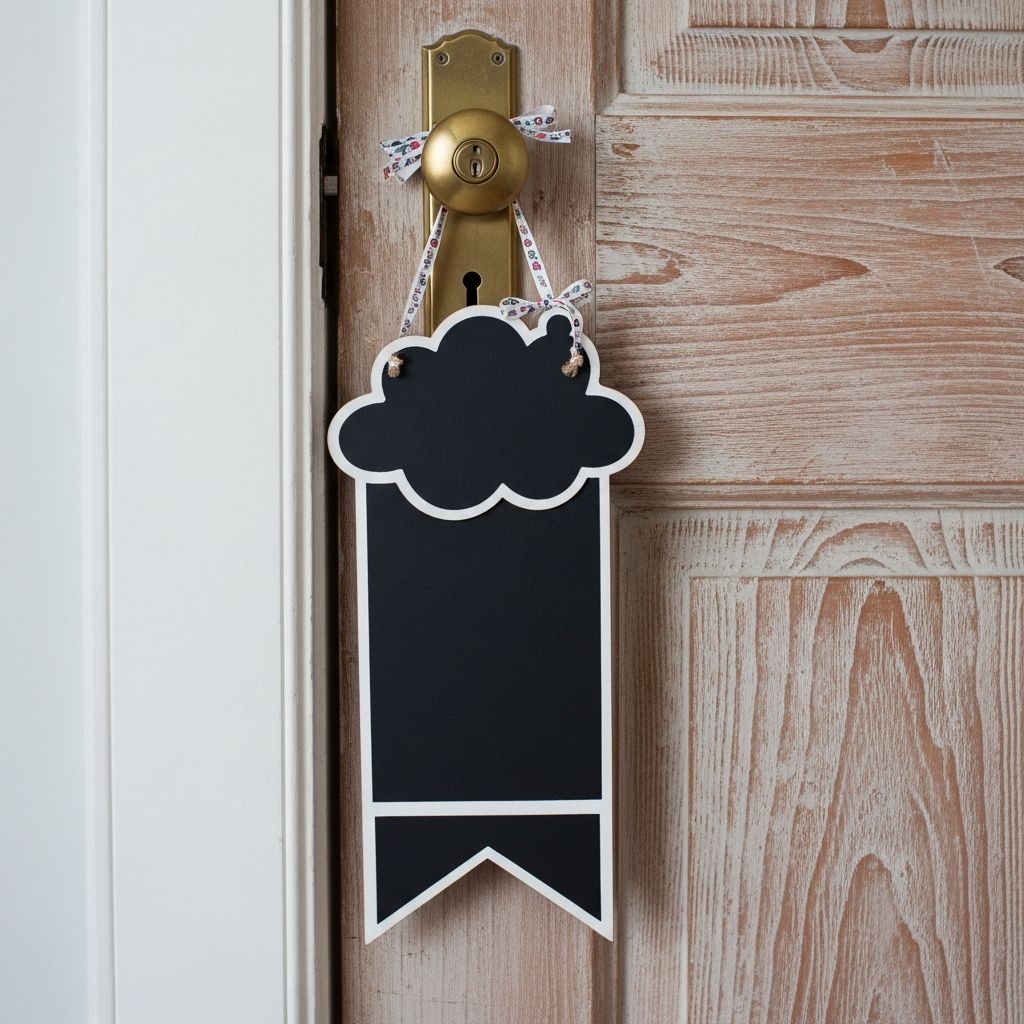
Chalkboard door hangers are an easy, stylish, and budget-friendly way to add personality to any room. Instead of a generic plastic sign, you can craft a reusable, writable piece of decor that reflects your style and changes with your needs. Whether you want a playful message for a child’s bedroom, a quiet-please note for a home office, or a seasonal greeting for your front door, a custom chalkboard hanger can do it all.
This guide walks you through everything from choosing materials to painting, lettering, and displaying your finished piece. The instructions are written from scratch and are designed to help beginners and experienced crafters alike create a polished, long-lasting project.
Why Chalkboard Door Hangers Are Worth Making
Before getting into the step-by-step method, it helps to understand why this project earns a spot on your DIY list. A chalkboard door hanger is more than just a craft; it is a flexible communication tool and decorative accent.
- It is reusable and erasable, so you can update messages for parties, study time, naps, or holidays without buying new decor.
- It can be customized to match your color palette, interior style, or a child’s favorite theme.
- It is small enough to complete in an afternoon, but stylish enough to look store-bought when finished carefully.
Essential Materials and Tools
You can build a chalkboard door hanger with very basic crafting supplies. Most items are available at craft stores, online, or even in the seasonal decor aisle of discount shops. Choose quality materials where it matters (like paint and sealer) to make your sign last longer.
| Item | Purpose | Tips for Choosing |
|---|---|---|
| Wooden door hanger blank | Base surface of your sign | Look for a flat, smooth piece with a pre-cut hole or handle opening. |
| Chalkboard paint | Creates the writing surface | Choose a formula made for wood; black or dark green works best for contrast. |
| Foam or soft-bristle brush | Applies paint smoothly | Use a wider brush for large areas and a narrow one for edges. |
| Painter’s tape | Masks off borders or shapes | Helps create neat frames, stripes, or color-blocked sections. |
| Acrylic craft paint | Adds color to borders and decorative details | Pick colors that coordinate with your room or door color. |
| Chalk or chalk markers | Writes your messages | Standard chalk wipes off easily; markers give sharper lines. |
| Fine-grit sandpaper | Smooths the wood | Use lightly to remove rough spots before painting. |
| Ribbon, twine, or hook | Allows you to hang the sign | Coordinate the color and style with your decor. |
| Clear sealer (optional) | Protects painted areas (not the chalkboard surface) | Use on decorative borders and backs to resist wear. |
Planning Your Design Before You Paint
Good planning turns a simple wooden blank into a thoughtful piece of decor. Instead of jumping straight into painting, take a few minutes to think about where your sign will hang and what you want it to communicate most often.
- Decide on the primary purpose: privacy sign, welcome message, schedule reminder, or seasonal greeting.
- Sketch a rough layout on paper with a border, main writing area, and any decorative icons (stars, hearts, arrows, or simple illustrations).
- Choose a color scheme that will stand out against your door while still complementing adjoining rooms.
Step 1: Prepare and Smooth the Wooden Surface
Proper preparation helps your paint adhere smoothly and prevents splinters, especially important if the sign will be within reach of children. A few minutes of sanding makes a noticeable difference in the final finish.
- Lightly sand the front, back, and edges of the wooden blank using fine-grit sandpaper.
- Wipe away dust with a dry cloth or slightly damp paper towel and allow the surface to dry completely.
- Inspect for cracks or knots; minor imperfections can add character, but fill deep holes with wood filler if desired.
Step 2: Map Out the Chalkboard Area
Rather than painting the entire surface in chalkboard paint, many crafters prefer to leave a painted border, frame, or accent color around the writing area. This gives the hanger a more intentional, finished look.
- Use a pencil and ruler to lightly outline the central rectangle or shape where the chalkboard surface will go.
- Apply painter’s tape along the outside of your pencil lines to keep the chalkboard area crisp.
- Decide whether you will paint the border in a solid color, pattern, or leave it as natural wood for a rustic feel.
Step 3: Paint the Chalkboard Surface
Chalkboard paint is the heart of this project. Applying it in thin, even coats helps avoid streaks and gives you a surface that erases cleanly. Take your time with this step and follow the drying recommendations on your paint container.
- Stir the chalkboard paint thoroughly to mix the pigments and ensure a consistent finish.
- Use a foam brush or roller to apply a thin coat within the taped-off area, brushing in the same direction.
- Allow the first coat to dry completely, then add a second coat for solid coverage.
- Peel off the painter’s tape carefully while the paint is still slightly soft at the edges to avoid chipping.
Step 4: Add Borders, Frames, and Color Accents
Once the chalkboard section is dry to the touch, you can move on to decorating the edges and surrounding areas. This is where your door hanger shifts from functional to uniquely yours.
- Use acrylic craft paint to color the border in one or two coordinating shades.
- Add simple patterns like stripes, small dots, chevrons, or scallops to frame the writing area.
- Consider painting the back of the hanger as well, especially if it will be seen when a door is left open.
Step 5: Condition the Chalkboard Surface
Before writing your first message, you should “condition” the chalkboard paint to help it erase cleanly. This quick step helps prevent permanent ghost outlines from the first words or drawings you add.
- After the chalkboard paint has cured for the time recommended on the label (often at least 24 hours), take a piece of standard white chalk.
- Lay the chalk on its side and rub it across the entire chalkboard area, covering it with a light chalk haze.
- Wipe the surface clean with a soft cloth or chalkboard eraser. The board is now ready for regular use.
Hanging Options and Hardware Ideas
There are several ways to display your finished chalkboard door hanger. The best method depends on the door material, the weight of the sign, and whether you want to avoid leaving marks.
- Ribbon or twine loop: Thread a length of ribbon or jute through the top hole of the hanger and tie it into a bow or knot, then hang from an existing hook or removable adhesive hook.
- Over-the-door hook: Use a metal or plastic hanger that slips over the top of the door, ideal for renters who prefer not to add hardware.
- Small nails or screws: For a permanent solution on wooden doors, mount a small hook or screw where you want the hanger to rest.
Message Ideas for Different Rooms
One of the most enjoyable parts of owning a chalkboard door hanger is changing the message to fit daily life. Use the ideas below as a starting point and adapt them to match your personality and routines.
| Location | Suggested Uses |
|---|---|
| Child’s bedroom | Quiet time notices, reminders about bedtime, or playful doodles drawn together. |
| Home office | “In a meeting” notes, deadlines, or daily motivational phrases. |
| Front door | Seasonal greetings, party directions, or friendly welcome messages. |
| Kitchen or pantry | Short shopping lists, menu ideas, or reminders about leftovers. |
| Guest room | Wi-Fi details, check-out times for visitors, or a personalized welcome note. |
Styling Themes and Creative Variations
Once you grasp the basic method, it is easy to experiment with different looks and themes. Instead of making just one sign, you might find yourself creating a set for various seasons, rooms, or even gifts.
- Rustic farmhouse: Leave some wood grain visible, use twine for hanging, and add simple white painted details like arrows or laurel branches.
- Modern minimal: Choose a solid neutral border (white, gray, or black) with clean lines and sleek lettering.
- Kids’ theme: Add bright colors, simple shapes like stars or animals, and maybe a name painted permanently above the chalkboard area.
- Holiday-ready: Make one base sign and change only the drawings or chalk colors for each holiday.
Tips for Neat Chalkboard Lettering
Lettering does not have to be perfect to be charming, but a few easy techniques can make your writing more legible and attractive. Practice on scrap paper first if you are nervous about spacing or style.
- Lightly sketch guidelines with chalk and a ruler; write your message, then erase the lines around the letters.
- Use a combination of block letters and cursive for visual interest, keeping the most important words larger.
- If using liquid chalk markers, let the ink dry completely before touching it to avoid smearing.
Basic Care and Maintenance
With simple care, your chalkboard door hanger can stay crisp and clean for a long time. Regular gentle cleaning and avoiding harsh chemicals are the keys to maintaining the writing surface and the painted border.
- Erase chalk with a soft cloth or felt eraser rather than anything abrasive.
- If ghost images remain, lightly wipe the board with a barely damp cloth and let it dry fully.
- Avoid spraying cleaner directly onto the chalkboard area; moisture can affect the paint over time.
Frequently Asked Questions
Can I use regular wall paint instead of chalkboard paint?
Regular wall paint will not behave the same way as chalkboard paint. It may accept chalk marks, but it rarely erases fully and can quickly become stained or cloudy. For a truly reusable writing surface, it is worth investing in paint that is specifically formulated to function as a chalkboard.
Is it possible to make a magnetic chalkboard door hanger?
If you want your sign to hold lightweight magnets as well as chalk messages, you can apply a compatible magnetic primer under your chalkboard paint. Follow the instructions on the primer carefully and allow plenty of drying time between coats for the best results.
What if I make a mistake with the paint design?
Minor paint errors can usually be fixed by letting the area dry and painting over it with another thin layer. For larger issues, you can sand gently to smooth raised edges before repainting. Remember that small imperfections are often invisible once the sign is hanging and in use.
Are chalk markers permanent on chalkboard paint?
Most chalk markers are designed to be removable, but some formulas can leave faint traces, especially if left in place for a long period. Test your markers on a small corner of the board first and erase them after a few minutes to see how easily they come off. If they stain, reserve those markers for decorative details you plan to keep.
Can children help with this project?
Children can definitely participate, especially in the design and decorating stages. Adults should handle sanding and any cutting, but kids can paint borders, choose colors, and of course draw or write messages once the chalkboard is ready. This project makes an excellent family craft that results in something practical and fun.
Bringing Your Custom Door Hanger to Life
Crafting a chalkboard door hanger is an approachable way to personalize your home without complex tools or advanced skills. With a simple wooden base, a few coats of chalkboard paint, and some imaginative details, you create a sign that evolves with your daily life. Use it as a quiet reminder, a cheerful welcome, or a creative outlet that can be rewritten whenever inspiration strikes.