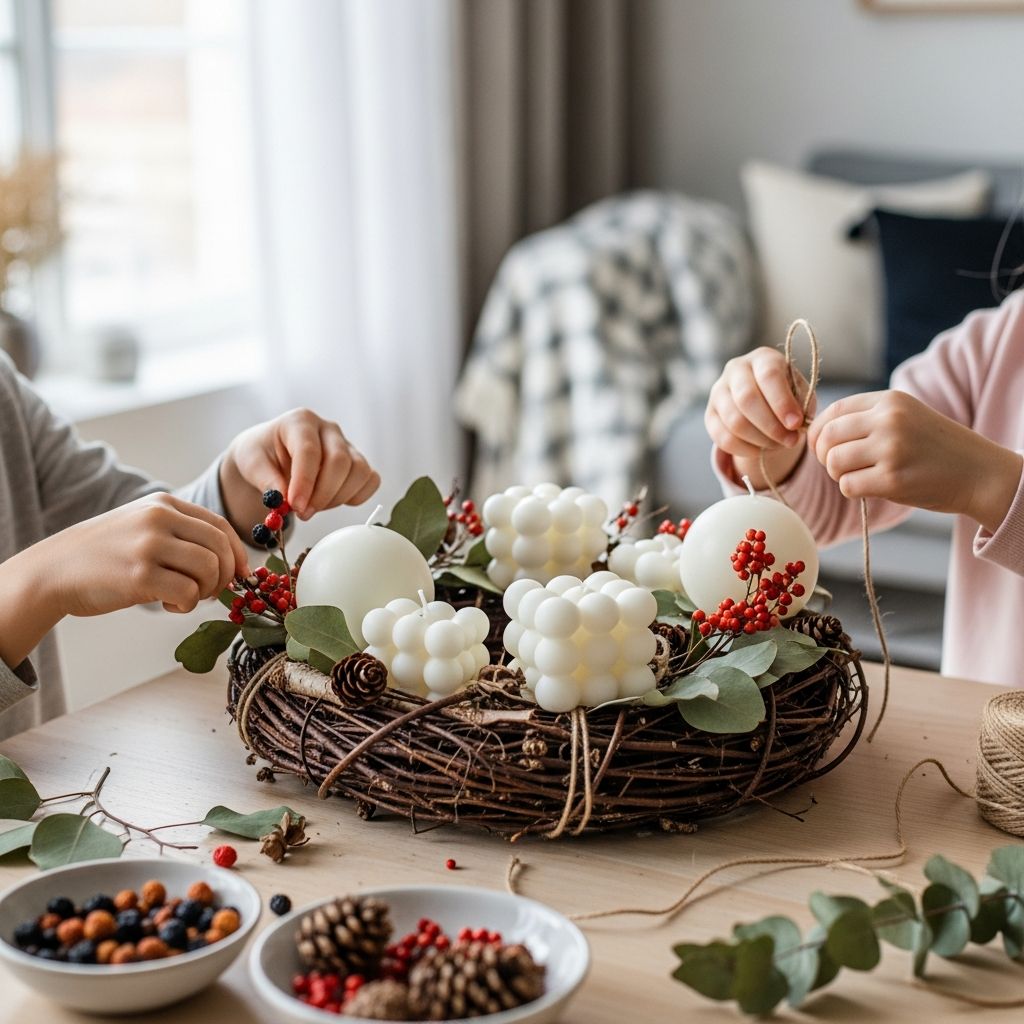
A bubble candle wreath is a playful, kid-friendly twist on traditional Scandinavian winter decorations, turning cardboard, tissue paper, and faux candles into a glowing centerpiece or crown for seasonal celebrations. This project is designed to be simple, safe, and flexible, so families can adapt it to different ages, colors, and holiday traditions without needing advanced craft skills.
Why Make a Bubble Candle Wreath?
Winter holidays often center on light, warmth, and gathering, and a handmade candle wreath brings all three together in a way that kids can meaningfully participate. Crafting this wreath gives children a creative role in decorating the home while opening opportunities to talk about traditions, kindness, and sharing during the darker months.
- Encourages creativity with color, texture, and shape.
- Uses inexpensive, easy-to-find materials that are simple to adapt.
- Provides a gentle introduction to Scandinavian-inspired winter customs.
Materials and Tools
The project is intentionally designed around basic craft supplies, many of which may already be in your home or classroom. Substitutions are welcome; the goal is a soft, rounded “bubble” look rather than perfection.
- Cardboard sheet (cereal box or shipping box thickness)
- Round household objects for tracing (large plate and smaller bowl)
- Pencil and ruler
- Craft knife (for adults) and/or child-safe scissors
- Green paint (tempera or acrylic) and a paintbrush
- Tissue paper, crepe paper, or light-weight colored paper in greens and accent colors
- Glue stick and liquid white glue
- Battery-operated tea lights or LED “birthday candle” lights
- Optional: cotton balls, pom-poms, felt scraps, ribbon, glitter glue, or stickers
- Hole punch or skewer (for creating candle holes, if needed)
Planning the Wreath Shape
Instead of starting with pre-cut forms, this project uses cardboard to form a custom ring that can be scaled for a centerpiece, a wall hanging, or a wearable crown. Making the base from scratch also gives kids a sense of ownership and shows them how simple household materials can become sturdy structures.
- Place the large plate on the cardboard and trace around it for the outer circle.
- Center a smaller bowl inside the first circle and trace it for the inner cut-out.
- Use a ruler to check that the cardboard band is at least 5–7 cm wide for stability.
- Decide whether the wreath will be a centerpiece, wall decor, or crown and adjust the diameter accordingly.
Cutting and Reinforcing the Base
The cardboard ring forms the backbone of the wreath, so a little extra care here makes the rest of the craft much easier. Adults should handle any cutting that requires a craft knife, while older kids can help with trimming and smoothing edges.
- Carefully cut along the outer circle, then the inner circle, to remove the center.
- If the cardboard is thin, cut a second identical ring and glue the two rings together for strength.
- Place heavy books on top while the glue dries to keep the ring flat.
- Lightly sand or trim any rough edges so that small hands can touch it safely.
Adding Candle Slots or Platforms
Candle placement depends on how you plan to display the wreath and what kind of flameless lights you use. The goal is stability and balance, so the candles look intentional and do not wobble when the wreath is moved.
- For tea lights: Draw small circles where you want candles to sit and cut shallow depressions or glue on small paper rings as “nests.”
- For tall LED candles: Use a hole punch or skewer to make narrow openings where the candle bases can slot in.
- For centerpiece-only use: Candles can simply rest on top of the ring if they have wide, flat bases.
Painting the Green Foundation
Painting the ring green creates a leafy foundation that hides cardboard and gaps between the paper bubbles. Even if children later leave tiny spaces here and there, the painted base will still read as foliage and keep the design cohesive.
- Lay the ring on scrap paper or newsprint to protect the table.
- Paint the top and sides of the ring in green, varying shades if you have them.
- Allow the paint to dry thoroughly before adding any paper elements.
- Optionally, dab lighter green or yellow on top for a mottled, leafy effect.
Creating the Paper Bubble Leaves
The soft, rounded “bubbles” come from scrunched pieces of tissue or crepe paper, each forming a small tuft that mimics leaves or moss. Children usually enjoy this tactile step, and the process is forgiving, since irregular shapes simply add texture and charm.
- Cut tissue or crepe paper into rectangles roughly the size of your palm.
- Place a finger in the middle of each rectangle and gently scrunch it around your fingertip to form a loose cone or bubble shape.
- Twist the base of the bubble slightly so it is easier to glue down.
- Prepare a pile of bubble leaves before gluing so kids can focus on arranging them.
Gluing on the Bubble Layers
Layering the paper bubbles around the ring builds volume and depth, turning a flat ring into a lush, textured wreath. The key is overlapping and slightly tilting each bubble so that no obvious straight lines appear.
- Start on the outer edge of the ring, gluing down the twisted ends of the first row of bubbles.
- Work in one direction, slightly overlapping each bubble with the previous one.
- Add a second row toward the inner edge, staggering the bubbles to cover gaps.
- Continue adding layers until the cardboard is completely hidden and the wreath looks thick and full.
Accent Colors and Berries
Once the greenery is in place, a few accent colors can suggest berries, flowers, or ribbons without overwhelming the design. Encouraging children to choose the accent palette helps them feel connected to the aesthetic choices and seasonal meaning behind the wreath.
- Use small bits of red tissue paper or pom-poms to represent berries.
- Add white or gold bubbles for a snowy or festive effect.
- Glue on tiny felt leaves or stars for additional visual interest.
Attaching the Flameless Candles
Because open flames and paper crafts do not mix safely, this design always relies on battery-operated lights. Even with faux candles, adults should be responsible for inserting and removing them, particularly if the wreath is worn as a crown.
- Test each flameless candle to make sure it turns on and off easily.
- Insert candles into the prepared slots or nests, adjusting surrounding paper for support.
- If needed, use a small blob of removable adhesive putty to keep candles steady.
- Show children how to switch the candles on and off gently to avoid damaging the wreath.
Centerpiece, Wall Art, or Crown?
The same basic wreath structure can serve multiple purposes, which makes this craft especially versatile for families and classrooms. Choosing a function ahead of time will guide decisions about size, weight, and decoration density.
| Use | Recommended Size | Key Adjustments |
|---|---|---|
| Table centerpiece | 30–40 cm outer diameter | Keep top surface fairly flat; ensure candles are low and stable. |
| Wall or door decor | 25–35 cm outer diameter | Add a loop of ribbon at the back; lighter paper and fewer candles work best. |
| Wearable crown | Sized to child’s head | Use extra-strong cardboard, minimal weight, and only very light flameless candles. |
Child Safety and Age Adjustments
With a few thoughtful modifications, this project can engage toddlers, older children, and even teens in age-appropriate ways. Younger kids can focus on scrunching paper and choosing colors, while older kids handle tracing, planning, and styling the final wreath.
- Toddlers: Pre-cut and pre-paint the ring; invite them to stick pre-formed bubbles where you apply glue.
- Early elementary: Let them help trace circles, paint the base, and arrange bubble leaves.
- Pre-teens and teens: Challenge them to design symmetrical patterns or experiment with more sophisticated color schemes.
Connecting to Scandinavian Traditions
Many Nordic winter celebrations highlight the contrast between darkness and light, often through candles, greenery, and simple white clothing. A bubble candle wreath offers a playful, accessible way to reference those themes without requiring historical accuracy or complex costumes.
- Talk with kids about the symbolism of light in the dark season as they craft.
- Use the wreath during breakfast or evening story time to mark a special seasonal moment.
- Encourage children to think of the wreath as a reminder of warmth, welcome, and caring for others.
Creative Variations on the Design
Once the basic wreath has been mastered, families can reinterpret it for other seasons or themes, teaching children that a single idea can be stretched in many directions. Adjusting colors, shapes, and add-ons makes the project interesting year after year.
- Snowy forest wreath: Use pale green and white tissue, with silver accents and star-shaped sequins.
- Spring meadow wreath: Replace some green bubbles with pastel flowers made from folded tissue.
- Birthday ring: Create a smaller ring and use bright colors, adding one candle for each year.
Tips for Crafting with Groups
This wreath project adapts well to classrooms, scout groups, or holiday parties, especially when adults break the process into stations. Planning ahead with pre-cut materials keeps the focus on creativity and storytelling rather than waiting for tools to be shared.
- Prepare cardboard rings and pre-cut paper bubbles before children arrive.
- Set up separate areas for painting, bubble-making, and gluing to avoid congestion.
- Provide labeled trays for each child to keep their wreath components organized.
Display and Storage Suggestions
Because the wreath relies heavily on paper, gentle handling and dry storage will extend its life beyond a single season. Involving kids in the care of their creations also reinforces respect for handmade objects and the time invested in them.
- Keep the wreath away from open flames, radiators, and humid windows.
- Turn off flameless candles when not in use to preserve batteries.
- Store the wreath in a shallow box with tissue padding to protect the bubbles.
Frequently Asked Questions
Can real candles be used in this wreath?
No. The wreath is built from cardboard and paper, which are both highly flammable. Always use battery-operated tea lights or LED candles and supervise children whenever lights are turned on.
How long does the project take from start to finish?
For a single wreath, plan about two to three hours including drying time for paint, though much of that time can be broken into shorter sessions. Families often paint and cut one day and return to bubble-making and decorating the next.
What if I do not have tissue paper?
Light-weight gift wrap, paper napkins, or thin scrap paper can all substitute for tissue. Slightly thicker paper will produce firmer, more sculptural bubbles but may require stronger glue.
Can this be adapted for very young children?
Yes. Adults can handle all cutting and painting in advance, leaving toddlers to press pre-made paper bubbles into glue spots. The emphasis for very young children should be on sensory exploration rather than precision.
How can I make the wreath feel more personal?
Invite children to tuck in tiny drawings, handwritten wishes, or small photographs between the paper bubbles. These hidden details transform the wreath into a memory-filled keepsake that can be revisited in future winters.
Encouraging Reflection and Ritual
Beyond its decorative appeal, the bubble candle wreath can anchor small daily rituals during the winter season, such as a brief moment of gratitude or a shared reading time. Turning on the faux candles together, even for a few minutes, signals a pause from ordinary busyness and helps children associate handmade objects with comfort and togetherness.