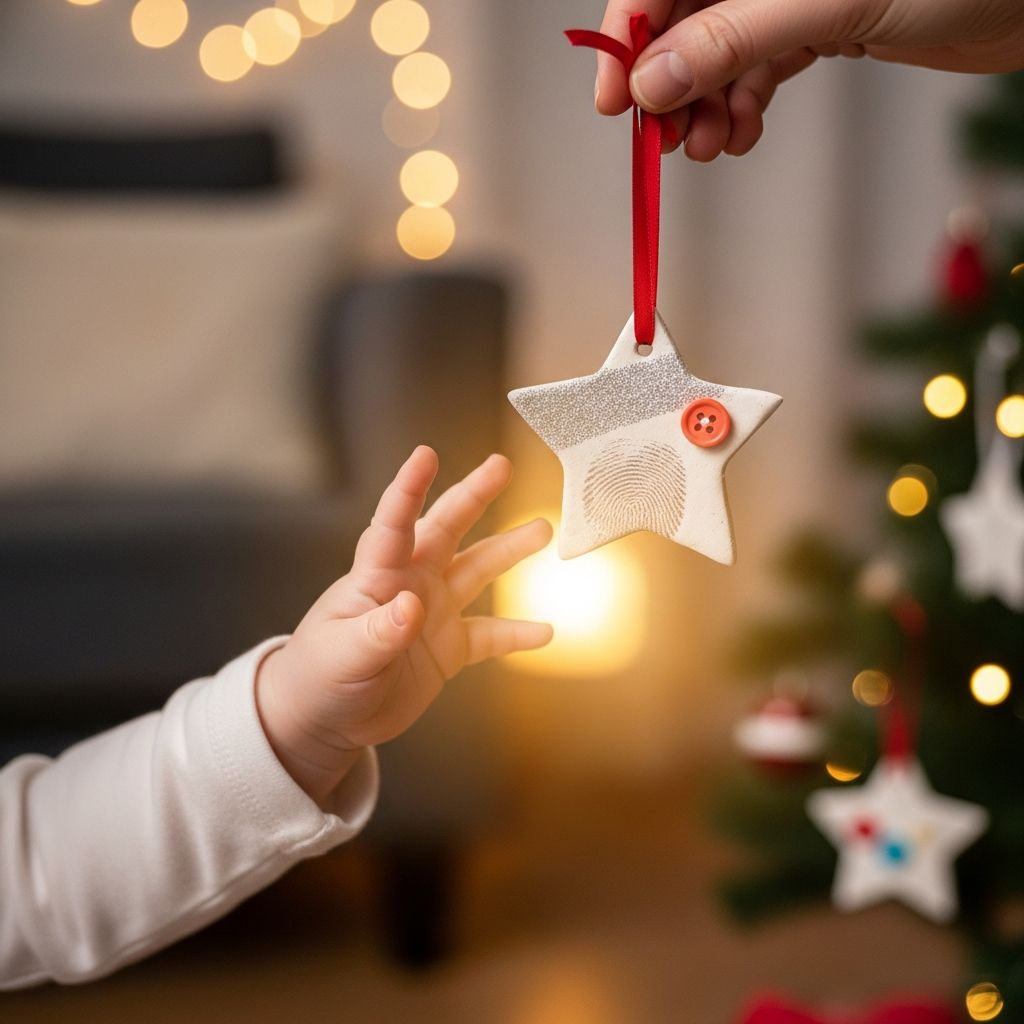
Your baby’s first year passes in a blur of new sounds, sleepy snuggles, and milestones that seem to arrive overnight. A homemade ornament dedicated to this first season together becomes more than a decoration; it turns into a tiny time capsule you’ll unpack every year with a full heart.
This guide walks you through planning and creating a baby’s first ornament using approachable materials, simple steps, and thoughtful personalization ideas. You’ll also find safety tips, ways to display and protect your keepsake, and answers to common questions from busy new parents.
Why Make a Homemade Baby Ornament?
There are countless beautiful store-bought ornaments labeled “Baby’s First,” but a homemade version carries a different kind of meaning. When you invest time, creativity, and your baby’s tiny details into the design, you’re preserving more than a date—you’re preserving a feeling.
- Personal connection: The ornament reflects your family’s story, not a mass-produced design.
- Hands-on memory: Every brushstroke or pressed fingerprint becomes part of the memory you’re creating.
- Growing tradition: Starting with baby’s first year, you can repeat the ritual annually and watch the collection grow.
Choosing the Style of Your Keepsake
Before gathering supplies, decide what kind of ornament best fits your style, skills, and time. You don’t have to be “crafty” to create something beautiful; even the simplest designs can be deeply meaningful.
| Ornament Style | Key Features | Best For |
|---|---|---|
| Impression Ornament | Captures a handprint, footprint, or thumbprint in a shaped base. | Parents who want to remember how tiny their baby was. |
| Photo Ornament | Frames a favorite baby picture with date and name details. | Families who take lots of photos and want a visual highlight. |
| Memory-Filled Ornament | Uses a clear ornament filled with small keepsakes, like a hospital band or ribbon. | Parents with several small mementos they’d like to protect. |
| Story Tag Ornament | Includes a short note or “baby stats” (weight, time of birth, etc.). | Parents who love journaling and words. |
Gathering Supplies Without Overwhelm
New parents rarely have extra time or energy, so this project is built around flexible options. You can choose one style or combine elements to suit what you already have at home.
- Base materials: Air-dry clay, homemade salt dough, or unfinished wood or ceramic discs.
- Detail tools: A rolling pin or sturdy cup, a straw or skewer to make a hanging hole, and a butter knife or cookie cutter for shaping.
- Decoration supplies: Non-toxic paint, ink pads safe for skin, permanent markers for adults, and small embellishments like ribbon or flat-backed gems.
- Finishing and hanging: Clear sealant (water-based for indoor use), ribbon, twine, or ornament hooks.
Keep a damp cloth or wipes nearby to clean little hands quickly, and set everything up on a tray or baking sheet to contain the mess.
Step-by-Step: Creating an Impression Ornament
An impression ornament is one of the most powerful ways to capture just how tiny your baby is in this season. The process is simple, but it usually works best with two adults—one to gently guide the baby and one to manage the materials.
- Prepare the workspace. Cover your table with parchment, freezer paper, or a plastic mat. Have wipes, a soft towel, and any baby essentials within reach.
- Shape the base. Roll your chosen material (clay or dough) to about 0.5–0.75 cm thick. Use a round cutter, a jar lid, or a small bowl to cut a neat shape.
- Add the hanging hole. Use a straw or skewer to poke a hole near the top of the ornament, at least 0.5 cm from the edge so it remains strong.
- Practice the motion. Before involving the baby, rehearse gently pressing your own hand into a scrap piece so you can feel how much pressure is needed.
- Gently press baby’s hand or foot. One adult cradles the baby while the other supports the hand or foot, pressing evenly onto the base. If the baby curls fingers or wiggles, embrace the imperfect print—it’s part of the story.
- Smooth edges if desired. Use a finger or a small tool to neaten the border, but avoid touching the impression itself.
- Dry or bake according to material. Follow the instructions for the dough or clay you’ve chosen, allowing the ornament to fully dry and harden before decorating.
Decorating with Safe, Simple Details
Once the base is dry, you can add color and words to bring your keepsake to life. Think of the ornament as a tiny story: name, year, and one or two details you want to remember.
- Paint the background: Use soft colors like white, cream, or pastel shades to keep the baby’s impression as the focal point.
- Highlight the print: After the base coat dries, lightly brush a contrasting color over the raised areas of the hand or foot to make the impression stand out.
- Add lettering: Use a fine-tip pen or paint marker to write your baby’s name, the year, and perhaps a short phrase like “you were so small” or “first winter.” Keep text minimal so it stays readable.
- Include tiny icons: Simple hearts, stars, snowflakes, or holly leaves can tie the ornament visually to the holiday season.
Creative Personalization Ideas
The most memorable ornaments often include small details that reflect your family’s unique story. You can customize the look and message even if you’re using very basic materials.
- Color themes: Match your ornament to your holiday decor, your baby’s nursery palette, or your favorite seasonal colors.
- Symbolic touches: Add a tiny painted element like a moon for night feeds, musical notes if you sang lullabies, or a little house to represent your first home together.
- Hidden message on the back: Write a short note to your future self about something your baby is doing this year, like a favorite sound or habit.
- Sibling collaboration: Let older siblings contribute a small dot of paint, a fingerprint star, or their name around the edge.
Memory-Filled and Photo Ornaments
If impressions feel too intense with a squirmy newborn, try a memory-filled or photo-based ornament instead. These options are especially good for parents who already have little keepsakes set aside.
Memory-Filled Ornament
- Use a clear plastic or shatter-resistant ornament that opens for filling.
- Add small, lightweight items such as a snippet of ribbon from a baby shower gift, a printed copy of the hospital bracelet information, or a small rolled-up note with birth details.
- Finish with a ribbon bow and a tiny tag labeled with your baby’s name and the year.
Photo Ornament
- Print a high-quality photo sized to fit a small frame-style ornament or a lightweight cardstock circle.
- Attach the photo securely, then seal the surface with clear, non-tacky sealant to prevent sticking or fading.
- Add a decorative border with paint, washi tape, or a simple metallic pen outline.
Keeping Baby Safe During Craft Time
Crafting with a baby nearby means thinking through safety before you begin. The ornament should be safe to handle while you’re working and durable enough once finished to pose minimal risk in a busy home.
- Choose non-toxic materials: Look for products labeled non-toxic and suitable for use around children, especially paints and sealants.
- Supervise constantly: Keep small objects, tools, and packaging away from your baby’s reach to avoid choking or scratching hazards.
- Secure finishing touches: If you use embellishments like gems or buttons, adhere them firmly and consider placing them away from areas little hands might grab.
- Use soft or shatter-resistant bases: If the ornament might be handled in the coming years, opt for materials that won’t break into sharp pieces.
Protecting and Storing Your Keepsake
A little care after the holidays helps your ornament last long enough for your baby to one day hang it themselves. Treat it with the same tenderness you put into making it.
- Seal the surface: Once fully dry, coat your ornament with a clear, appropriate sealant to protect paint, ink, and tiny details.
- Label the storage box: Use a small container or padded box labeled with your child’s name and the year.
- Keep away from heat and moisture: Store ornaments in a cool, dry place to prevent cracking, warping, or mold.
- Wrap gently: Use tissue paper or soft fabric to cushion the ornament, especially if it has raised impressions or decorations.
Turning One Ornament into a Family Tradition
Once you craft the first ornament, you may find yourself wanting to repeat the ritual each year. Over time, your tree can become a visual timeline of your child’s growth and changing interests.
- Annual theme: Each year, choose a simple theme like a new favorite toy, color, or phrase your child says and reference it in the ornament.
- Growth markers: Alternate between handprint ornaments, small drawings by your child, and photo ornaments to document milestones.
- Storytelling night: When decorating the tree, set aside a few minutes to talk about each year’s ornament and what your child was like at that age.
Simple Timeline for Busy Parents
Many new parents worry they won’t have time to finish a project like this. Breaking the process into small, manageable steps makes it less overwhelming.
| Day | Task | Estimated Time |
|---|---|---|
| Day 1 | Gather supplies, set up workspace, shape base, and take the impression. | 30–45 minutes |
| Day 2 | Paint base colors and add simple details once the ornament is dry. | 20–30 minutes |
| Day 3 | Add text, apply sealant, and attach ribbon or twine for hanging. | 20–30 minutes |
FAQs About Baby’s First Homemade Ornament
Do I have to use a handprint or footprint?
No. While impressions are popular, you can create a meaningful ornament using a photo, tiny keepsakes, or simple painted symbols. The goal is to capture the memory of this first year, not to follow a specific formula.
What if my baby won’t open their hand?
Many babies naturally curl their fingers, which can make a flat handprint tricky. You can gently support each finger as you press, opt for a footprint instead, or use multiple small fingerprints to form shapes like a wreath or heart.
Can I involve my baby safely in decorating?
Babies can participate in very simple, supervised ways. For example, you can lightly press their hand into a non-toxic paint-covered sponge and then onto paper that you later cut and apply to the ornament. Avoid giving them direct access to paints, brushes, or small items.
What if I don’t finish before the holidays end?
There is no deadline on memory-making. You can work on the ornament in the new year and still label it with the year of your baby’s first holiday season. The meaning remains the same, and you’ll appreciate it just as much when you unpack it next year.
How can I make multiples for grandparents?
Once you find a design you love, repeat the basic steps using separate bases, then personalize each one with names or short notes on the back. Grandparents often cherish these ornaments as much as parents do, especially when each piece has a small detail tailored to them.
Making Space for Quiet Joy
Crafting a baby’s first homemade ornament is less about perfection and more about presence. Even if the paint smudges or the impression is imperfect, the ornament reflects the real life you are living right now—messy, tender, and full of new beginnings.
In future years, when your child is taller, louder, and more independent, that small ornament will remind you of how far you have both come. It will be a touchstone for gratitude, a physical reminder that time moves quickly, and that pausing to create something together is always worth it.