A smooth, bouncy blowout is one of the fastest ways to make hair look polished, put together, and expensive—without actually leaving the house. Done well, it can add shine, volume, and movement, and even extend the time between wash days. The key is less about fancy products and more about good technique, smart prep, and a little patience.
Why Blowouts Look So Different From Everyday Drying
Letting hair air-dry or blasting it quickly with hot air tends to emphasize frizz, uneven waves, or limp roots. A true blowout uses controlled heat and tension, working in sections to smooth the cuticle and shape the hair as it dries. Think of it as molding your hair into place rather than just drying water out of it.
When you understand what makes a blowout work—direction of airflow, the role of the brush, and the timing of products—you can recreate that “just left the salon” finish in your own bathroom.
Know Your Hair Before You Start
Before picking up a dryer, take a moment to assess your hair type and goals. What works for fine, slippery hair will not be ideal for thick, coily curls, and the wrong choices can lead to puffiness, flatness, or unnecessary damage.
Use the table below as a quick guide to how your hair type can shape your blowout strategy.
| Hair Type | Main Goal | Best Styling Focus |
|---|---|---|
| Fine / Flat | Add body without weighing hair down. | Lightweight volumizing products, small sections, lifted roots. |
| Thick / Coarse | Control bulk and reduce frizz. | Smoothing products, firm brush tension, higher heat with protection. |
| Curly / Wavy | Choose between smoothness or defined waves. | Heat protectant, careful sectioning, round brush shaping. |
| Damaged / Fragile | Minimize breakage and dryness. | Lower heat, extra protection, less frequent blowouts. |
Essential Tools and Products for a Successful Blowout
You do not need a drawer full of professional gadgets to get a great blowout, but a few well-chosen basics make a big difference in both results and hair health.
- Blow dryer with nozzle: A concentrator nozzle directs air down the hair shaft, helping to smooth the cuticle and reduce frizz.
- Round brush: Choose ceramic or mixed bristle; larger barrels create looser movement, smaller barrels create more curl and lift.
- Clips for sectioning: Strong, non-snag clips keep hair divided so you can focus on one area at a time.
- Heat protectant: A must-have to shield hair from high temperatures and reduce dryness and breakage.
- Styling support: Volumizing mousse or spray for fine hair; smoothing cream or serum for thick or frizzy hair.
- Finishing product: Lightweight hairspray, shine spray, or a small amount of oil for the ends to lock the style in place.
Pre-Blowout Wash: Setting the Stage
A blowout starts in the shower. Heavy products, residue, or poorly rinsed conditioner can instantly sabotage your results by causing flat roots or sticky mid-lengths.
- Use a shampoo that matches your hair type and focus on cleansing the scalp rather than scrubbing the ends.
- Apply conditioner from mid-length to ends only, avoiding the roots to prevent greasiness and loss of volume.
- Rinse thoroughly until the hair feels clean, not slippery or coated.
Proper Towel-Drying: Where Frizz Often Begins
What happens immediately after you step out of the shower matters more than most people realize. Roughly rubbing hair with a towel lifts the cuticle, leading to frizz and breakage.
- Gently squeeze out excess water with a soft towel or T-shirt instead of twisting and wringing.
- Blot and press rather than rub; the goal is to remove water, not create friction.
- Leave hair damp, not dripping—this will speed up the blowout and reduce heat exposure.
Product Application: Building a Supportive Base
Think of your products as the scaffolding that holds the blowout in place. Too little and your style may fall flat; too much and hair feels heavy or sticky.
- Apply a heat protectant evenly from roots to ends, combing through to ensure full coverage.
- For fine hair, use a volumizing mousse or root spray primarily at the scalp area to encourage lift.
- For thick, curly, or frizz-prone hair, smooth a small amount of cream or serum through mid-lengths and ends, avoiding heavy application at the roots.
The Rough-Dry Stage: A Crucial, Often Skipped Step
Blowouts are much easier when you do not start with sopping wet hair. Rough-drying means partially drying the hair with just your hands and the dryer before you bring in the round brush.
- Set the dryer to medium heat and high airflow.
- Use your fingers to lift and shake the hair at the roots while directing airflow from roots downward.
- Stop when hair is about 70–80% dry; leaving some moisture allows the brush to smooth and shape more effectively.
Sectioning: Making the Process Manageable
Trying to work on all of your hair at once is frustrating and inefficient. Sectioning transforms the blowout into a series of small, achievable tasks.
- Divide hair horizontally from ear to ear, clipping the top portion out of the way.
- Work with sections roughly the same width as your round brush; too large, and the heat will not reach evenly.
- As you progress, create additional sections on the crown and sides, keeping everything organized with clips.
Brush and Dryer Coordination: The Core Technique
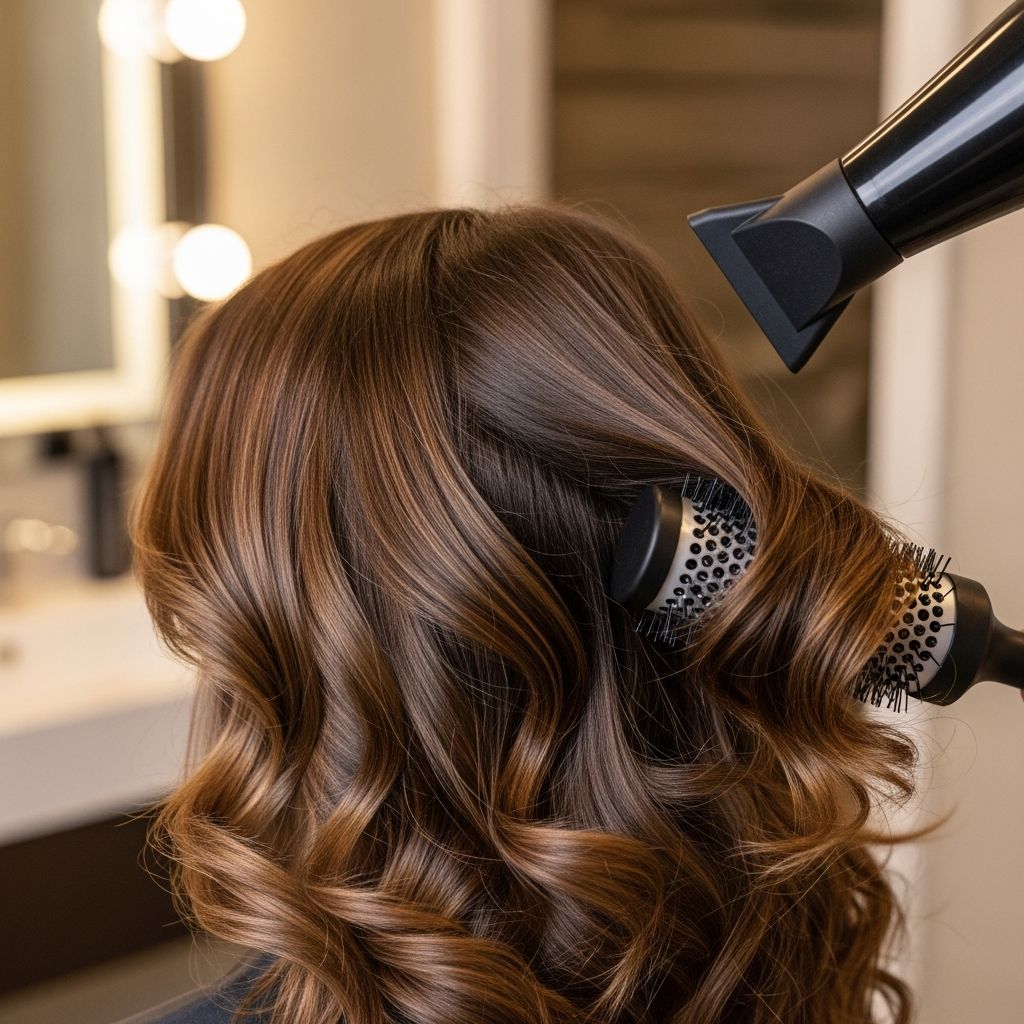
At the heart of a professional-looking blowout is the coordination between brush and dryer. You are drying the hair in the direction you want it to lay, using steady tension to smooth the strands.
- Place the round brush under a section close to the roots and lift slightly to encourage volume.
- Point the dryer nozzle downward along the hair shaft, following the brush from roots to ends.
- Keep the dryer moving; holding heat in one spot can cause damage or discomfort.
Choosing Your Finish: Straight, Curved, or Bouncy
The way you rotate the round brush at the ends of your hair determines the final shape of your blowout. Small adjustments create very different looks.
- Sleek straight: Keep tension high and pull the brush straight down with minimal curl at the ends.
- Soft bend: Roll the brush once or twice at the ends, then slowly release while drying to create a gentle curve.
- Full bounce: Wrap the ends several times around the brush and hold for a few moments with warm air, then let the section cool before releasing.
Using the Cool Shot to Lock In Shine and Shape
Most dryers include a cool-shot button for a reason. Heat shapes the hair, but cool air helps set that new shape. Skipping this step can make a blowout fall faster, especially in humid weather.
- Once a section is fully dry and styled, switch to cool air while the hair is still wrapped around the brush.
- Hold for several seconds to let the hair cool in position.
- Gently unwind or slide the brush out rather than yanking, which can cause frizz or knots.
Face-Framing Sections: The Most Visible Area
The hair around your face is usually the first part anyone notices. Spending a bit more time here can elevate the entire style, even if the back is simpler.
- Take smaller sections around the face so you have more control over direction and bend.
- For an open, lifted effect, blow dry sections away from the face, wrapping them outward around the brush.
- For a more classic, polished look, roll sections slightly under toward the chin or cheekbones.
Finishing Touches and Frizz Control
When every section is dry, the right finishing step can turn a good blowout into a great one. This is also where things can go wrong if too much product is applied too quickly.
- Lightly mist a flexible-hold hairspray from an arm’s length away rather than saturating individual areas.
- Use a pea-sized amount of serum or oil only on mid-lengths and ends to add shine and tame flyaways.
- Avoid touching the hair excessively as it cools; fingerprints and friction can create frizz.
Common Blowout Mistakes and How to Fix Them
Even with good tools and products, a blowout can fall flat or puff up if a few basic principles are ignored. The good news is that most issues have simple solutions.
- Problem: Puffy roots and frizzy ends. Solution: Dry in the direction you want the hair to lay, focus the airflow downward, and increase brush tension on the ends.
- Problem: Flat, greasy-looking roots. Solution: Use less conditioner near the scalp and concentrate volumizing products at the roots before rough-drying.
- Problem: Style falls within hours. Solution: Ensure hair is fully dry before finishing, use the cool shot to set sections, and add a light-hold hairspray.
Adapting the Blowout to Different Hair Lengths
Length changes how you handle the brush and section sizes, but the underlying principles are the same: section, tension, direction, and thorough drying.
- Short hair: Use a smaller round brush to avoid tangling and focus on lifting at the roots for shape.
- Medium hair: Use medium sections and a mid-sized barrel for a balance of smoothness and movement.
- Long hair: Work with narrower sections and a larger brush; take time to fully dry each portion to prevent frizz.
How to Make a Blowout Last for Days
One of the biggest benefits of a good blowout is longevity. With the right habits, you can stretch the style over several days, saving both time and heat exposure.
- Sleep on a smooth pillowcase and loosely secure hair in a soft scrunchie or high, loose ponytail.
- Use dry shampoo at the roots on day two or three to absorb oil and revive volume.
- Refresh bent or flattened sections by lightly misting with water or leave-in conditioner, then re-blowdrying only those areas.
Safety and Hair Health: Protecting Your Strands
Heat styling does not have to destroy hair, but it does demand respect. Overdoing heat or skipping protection can slowly lead to dryness, split ends, and breakage.
- Keep the dryer at a safe distance from the scalp and avoid holding it in one spot for too long.
- Limit full blowouts to a few times per week, filling in with air-dried or heat-free styles when possible.
- Schedule regular trims and consider occasional deep conditioning treatments to maintain softness and elasticity.
Frequently Asked Questions About Blowouts
How long should an at-home blowout take?
Timing depends on hair length, thickness, and your experience level. At first, expect to spend 30–45 minutes on a full blowout; with practice, the process often speeds up significantly.
Can a blowout work on naturally curly or coily hair?
Yes, but patience and prep matter more for textured hair. Use ample heat protectant, work in smaller sections, and rely on firm brush tension, allowing more time for each area to fully dry and smooth.
Is it better to use high heat to finish faster?
High heat can be helpful for thick or very resistant hair, but it should always be balanced with proper protection and consistent movement. For many people, medium heat with good technique is enough and less damaging over time.
Why does my blowout look great at first but collapse in humidity?
Humidity disrupts the bonds you set with heat, especially if the cuticle never fully smoothed or the hair was not completely dry. Using an anti-humidity spray, sealing with cool air, and avoiding very steamy environments right after styling can all help.
Do I need multiple brushes for a professional result?
One well-chosen round brush can work for most people, especially when starting out. Over time, you might add a smaller barrel for tighter curls or a larger barrel for extra volume, but it is not mandatory for a polished blowout.