Transforming a plain room into a shimmering undersea world is easier than it looks when you break the project into a few simple zones: entrance, backdrop, table, and activities. This guide walks through each area step by step so you can host a mermaid party that feels custom and thoughtful without requiring professional decorating skills.
Choosing Your Mermaid Party Style
Before buying supplies, decide what kind of mermaid atmosphere you want to create: soft and dreamy, bold and tropical, or a mix of both. Having a clear style in mind will help you avoid random impulse purchases and keep the whole party looking cohesive in photos.
Instead of copying a single picture exactly, think about a few descriptive words like “shimmery,” “playful,” or “vintage ocean” and use those as your guiding theme. This approach allows you to put your own spin on the decor and tailor it to the guest of honor’s personality.
Color Palettes That Feel Underwater
The right colors instantly signal “mermaid” even before guests notice the details. You can build your party around two or three main hues and then add one metallic or iridescent accent for extra sparkle.
- Classic lagoon: Teal, aqua, and seafoam with silver or holographic accents.
- Pastel reef: Lavender, blush pink, mint, and pearly white.
- Tropical tide: Turquoise, coral, sunny yellow, and touches of gold.
- Deep sea glam: Navy, emerald, plum, and iridescent or chrome details.
Once your palette is chosen, use it consistently in balloons, table covers, plates, and ribbons so all the elements feel like they belong together.
Entrance Ideas That Set the Scene
The entrance is the first glimpse guests get of your underwater kingdom, so a few small touches here can create a lot of excitement. Aim for something that feels like crossing a boundary from the everyday world into a mermaid cove.
- Hang sheer blue or green curtains on either side of the doorway to mimic rippling water.
- Attach simple paper fish, shells, and star shapes to a string and drape them as a hanging garland.
- Place a “Welcome to the Mermaid Lagoon” sign at kid height so young guests can read it as they walk in.
- Scatter a few battery-operated tea lights in glass jars filled with sand or Epsom salt to resemble glowing sea pearls.
These details do not need to be expensive; many can be made with cardstock, markers, and items you already have at home.
Designing a Mermaid Photo Corner
A dedicated photo area encourages guests to take pictures and gives you a natural spot to place the cake or gift table nearby. You can keep it simple with a flat backdrop or layer materials for more dimension.
Layered Backdrop Wall
Start with a solid base, such as a plastic tablecloth or fabric sheet in one of your main colors. Then add a second layer that brings movement, like vertical streamers, fringe curtains, or strips of crepe paper cut into waves.
- Use overlapping scallop shapes cut from cardstock to hint at mermaid scales.
- Add a few cut-out seaweed shapes that stretch from the bottom up to break the straight lines.
- Include at least one metallic or iridescent material for light reflection in photos.
Finish the area with a small stool or cushion where the birthday child can sit for photos, and include a basket of simple props like cardboard shells and fish tails on sticks.
DIY Mermaid Balloon Cluster
Instead of building a full arch, group balloons in clusters that rise from the floor or frame one side of the backdrop. This is less time-consuming and still very impressive visually.
- Mix solid balloons with a few confetti-filled or pearl-finish balloons for texture.
- Attach ribbon strands or iridescent gift wrap strips to the bottom of each cluster to mimic floating seaweed.
- Incorporate one or two larger statement balloons shaped like shells, stars, or hearts to anchor the display.
Table Styling for an Undersea Feast
Whether you are serving a full meal or just snacks and cake, the party table doubles as a major decor feature. Treat it as a landscape where the surface is your ocean floor and each item adds to the story.
Tabletop Layers and Centerpieces
Begin with a base tablecloth in your main color and then add a narrow runner or folded fabric remnant across the middle to create contrast. If you do not have a runner, place overlapping paper doilies or cut scalloped strips of paper instead.
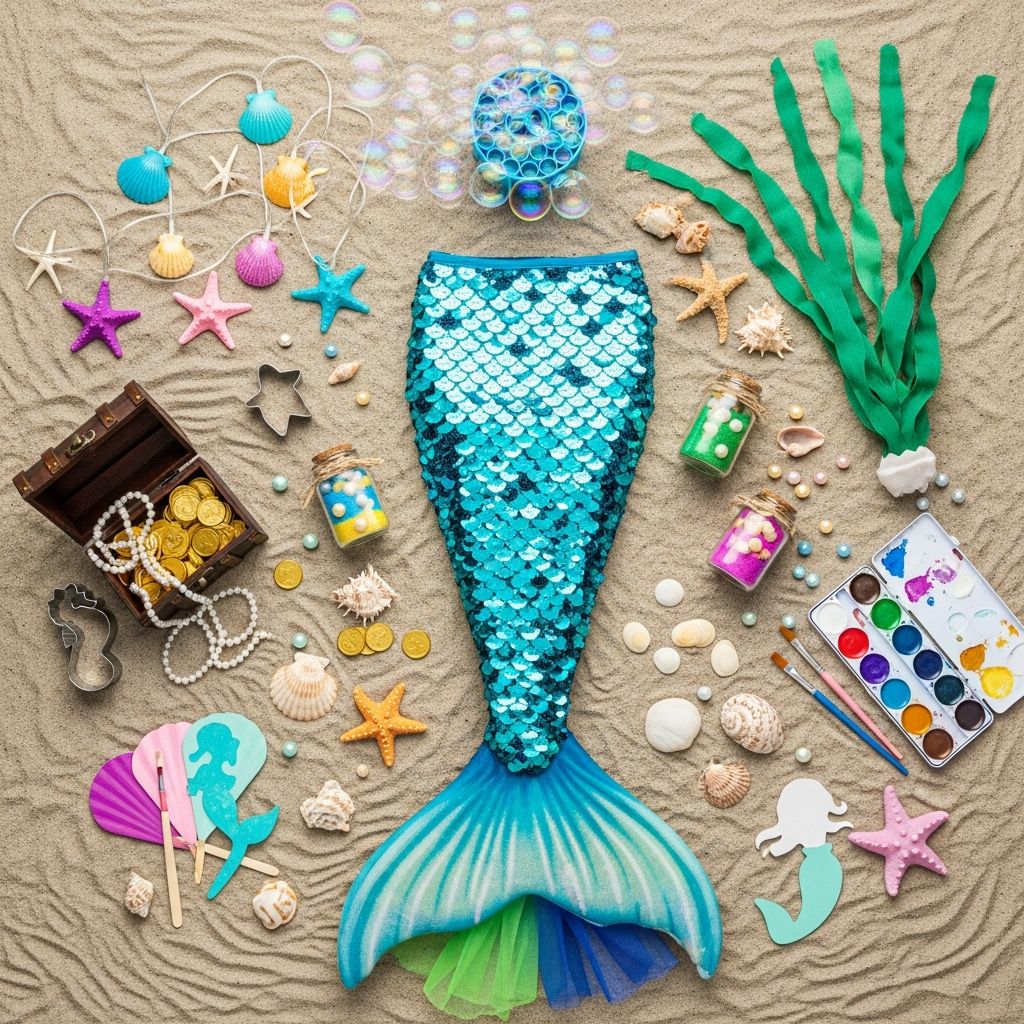
- Use glass jars or vases filled with sand, small stones, or tinted water as simple coral “towers.”
- Arrange seashells, faux pearls, or smooth glass beads around the jars like treasures.
- Place a few figurines such as fish, seahorses, or friendly crabs to bring characters into the scene.
| Area | Budget Option | Upgraded Option |
|---|---|---|
| Table cover | Single plastic tablecloth in teal or lavender | Fabric cloth with a shimmery overlay or netting |
| Runner | Strip of kraft paper painted with waves | Sequined or iridescent fabric remnant |
| Centerpiece | Glass jar of sand with a paper shell topper | Cluster of shells, faux coral, and LED lights |
| Place settings | Solid color plates with hand-drawn shell napkin rings | Themed plates and printed shell or tail napkins |
Place Settings with Mermaid Details
Individual place settings make each guest feel special and help keep the table tidy. You don’t need elaborate supplies; a few small, repeated details go a long way.
- Wrap cutlery in a napkin and tie it with ribbon, adding a small paper shell or starfish cutout.
- Write each guest’s name on a card shaped like a pearl, shell, or tail and place it at their seat.
- Use clear cups and drop a few colored glass beads at the bottom for a treasure-chest feel.
Handmade Mermaid Decor Projects
If you enjoy crafting, creating a few handmade pieces can make your party look unique without requiring a large budget. Here are several projects that adapt easily to different ages and skill levels.
Paper Scale Garland
A scale garland is a simple way to decorate walls, front edges of tables, or even doorways. It creates a mermaid-tail illusion without needing any complex cutting machines.
- Cut circles from cardstock or sturdy colored paper using scissors or a circle punch.
- Fold the top quarter of each circle over a string or piece of twine.
- Glue or tape the folded flap in place so the lower part of the circle hangs freely like a scale.
- Layer the circles so they overlap slightly, alternating colors in your chosen palette.
Upcycled Sea Glass Jars
Turn empty jars into soft, sea-glass-inspired accents using diluted craft paint. These jars can hold flowers, LED candles, or craft supplies during the party and then be reused as bedroom decor afterward.
- Mix a small amount of blue or green acrylic paint with water and a drop of dish soap.
- Brush the mixture onto the outside of the jar in thin layers, letting each coat dry.
- Finish with twine wrapped around the jar neck and a glued-on shell or charm.
Simple Mermaid-Themed Activities
Decor sets the mood, but activities keep guests engaged and give them a chance to be creative. Aim for a mix of movement, crafting, and quiet options so different personalities feel comfortable.
Treasure Craft Station
Set up a small table where kids can design their own mermaid treasures to take home. This doubles as a party favor and a structured activity early in the party.
- Provide cardboard shapes (hearts, shells, circles) along with markers and glitter glue.
- Offer flat-back plastic gems, sequins, and foam shapes that can be glued on easily.
- Label each project with the child’s name and set it aside to dry until pickup time.
Undersea Movement Games
For high-energy kids, incorporate a few themed games that do not require expensive props. Adjust difficulty based on the age group.
- Ocean currents: Play music and have kids dance like different sea creatures; pause the music and call out a new creature each time.
- Pearl relay: Use spoons and small balls as “pearls” that kids must carry across the room without dropping.
- Seaweed maze: Stretch yarn or streamers between chairs to form a pretend seaweed forest guests must navigate without tearing it.
Food Presentation with a Mermaid Twist
You don’t have to prepare elaborate themed recipes to stay on theme; renaming everyday snacks and plating them thoughtfully can have a big impact. Focus on color, shape, and labels to reinforce the underwater idea.
- Serve sliced fruit on a large tray arranged like a rainbow reef.
- Offer simple crackers or pretzels in small cups labeled with playful ocean names.
- Use cupcake liners to hold small portions of candy or popcorn so kids can easily carry them.
If you’re decorating a cake yourself, consider a smooth frosting finish with a few shell candies or sugar pearls instead of complex sculptures. A cleaner design often looks more polished and lets your backdrop and table decor shine.
Planning and Setup Timeline
A little planning goes a long way toward keeping the party setup stress-free. Spreading tasks over several days also gives you time to adjust if something doesn’t turn out as expected.
- One to two weeks before: Choose your color palette, gather inspiration, and make a simple supply list.
- Three to four days before: Cut paper shapes, assemble garlands, and paint any jars or signs.
- Day before: Hang backdrops that are out of reach, prep the table layout, and organize activity supplies.
- Party day: Inflate balloons, set food on the table, place final decor, and turn on any lights.
Keeping a simple checklist on your phone or on paper ensures you don’t forget key details like batteries for lights or tape for last-minute adjustments.
Frequently Asked Questions About Mermaid Parties
How can I decorate for a mermaid party on a small budget?
Focus on a strong color scheme and one main feature wall rather than trying to fill every corner of the room. Use paper-based projects, repurposed jars, and a few well-placed balloons to create impact without buying lots of specialized decor.
What if I am not very crafty?
Select two or three simple projects, such as a scale garland, a basic backdrop, and a decorated table runner. Most of the visual magic comes from repetition of colors and shapes, not from complex techniques, so even basic cutting and taping can look impressive when done consistently.
How far in advance can I make decorations?
Paper garlands, painted signs, and upcycled jars can be made one to two weeks in advance and stored flat or in a box. Balloons, fresh flowers, and food elements should be handled within a day of the event for best results.
Do I need matching themed plates and cups?
Matching tableware can be fun but is not required; solid-color plates that fit your palette often look more polished and are usually easier on the budget. You can bring in the theme through napkins, labels, or a few printed tags instead of relying on fully themed packs.
How can I involve the birthday child in the decorating?
Invite the guest of honor to choose the color palette and help with simpler tasks like sticking shell cutouts on a sign or sorting craft supplies by color. Participation makes the child proud of the finished space and turns prep time into a shared memory instead of a chore.