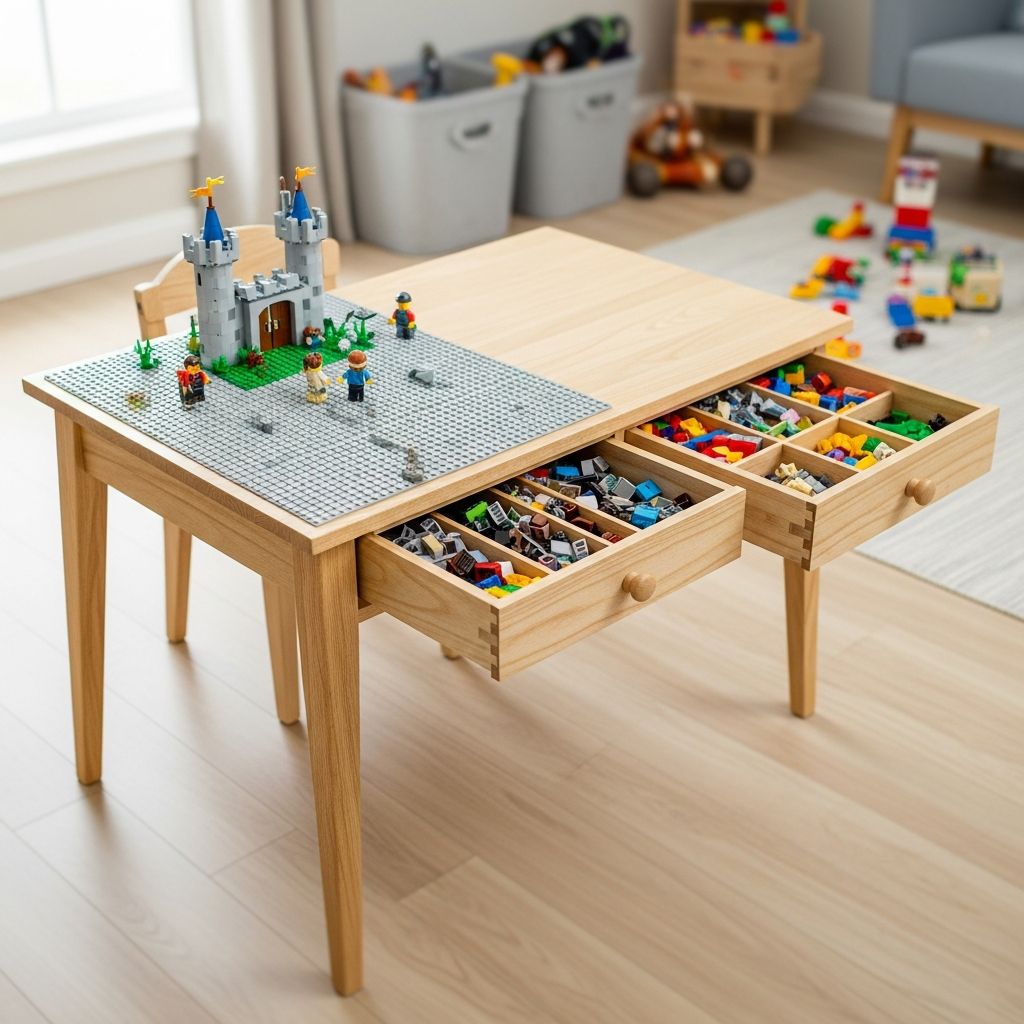
Transforming a simple side table into a dedicated LEGO play station is an easy project that can dramatically reduce clutter and give kids a creative zone of their own. With a few baseplates, a sturdy table, and a bit of planning, you can build a space that encourages open-ended play, keeps bricks off the floor, and can evolve as your child grows.
Why Build a LEGO Table Instead of Buying One?
Ready-made LEGO tables can be expensive, take up awkward space, and may not match your home’s style. A DIY version lets you customize size, color, and storage while often costing far less than store-bought options.
- Cost control: Reuse a table you already own or pick up an inexpensive one.
- Custom fit: Size the surface for the number and style of baseplates you prefer.
- Style flexibility: Match your existing decor or kids’ room theme.
- Adaptability: Swap plate types (LEGO, DUPLO, road plates) as play needs change.
Planning Your LEGO Table: Key Decisions
A few thoughtful choices up front make the finished table much more functional and durable.
1. Choosing the Right Table Base
Almost any low, stable table can work as a foundation: a side table, coffee table, or even an old nursery nightstand. Focus on comfort and safety for your child’s age.
- Height: Aim for a height that allows your child to play while seated or standing comfortably.
- Stability: Wide legs or a sturdy base reduce tipping risk, especially when kids lean on the table.
- Surface size: Measure the top to determine how many baseplates will fit without overhang.
- Condition: A table with minor dings is fine; deep cracks or wobbly legs should be repaired or avoided.
2. Choosing Between LEGO and DUPLO
Standard LEGO plates and larger DUPLO plates are not interchangeable, so it helps to think ahead about how your child will use the table.
- For toddlers: DUPLO baseplates are easier to use and safer for small hands.
- For preschoolers and up: Standard LEGO plates offer more detail and complexity.
- Mixed families: You can create zones: half DUPLO, half LEGO, or use removable inserts.
3. Permanent vs. Removable Baseplates
How you attach the plates determines whether you can easily reconfigure the table in the future.
| Attachment Method | Pros | Cons |
|---|---|---|
| Glue (permanent) | Very secure, won’t shift when kids build, easy to wipe clean | Hard to remove, can damage table finish, no quick reconfigurations |
| Heavy-duty tape | Holds well, often removable, simpler than glue | May leave residue, plates can lift at corners over time |
| Hook-and-loop (Velcro) strips | Removable and repositionable, easy to replace damaged plates | Plates can shift slightly during intense play, dust can affect grip |
Supplies and Tools Checklist
Part of the appeal of this project is that it uses very simple materials. Many families already own most of what they need.
Essential Materials
- 1 low, sturdy table (side table, coffee table, or kids’ table)
- LEGO or DUPLO baseplates sized to your tabletop
- Strong adhesive: construction adhesive, heavy-duty double-sided tape, or hook-and-loop strips
- Optional: painter’s tape for marking and alignment
- Optional: small bins or baskets for brick storage
Basic Tools
- Measuring tape or ruler
- Pencil or washable marker for light markings
- Utility knife or scissors (for trimming adhesive)
- Cleaning cloth for preparing the tabletop
If you plan to cut baseplates to fit around edges or corners, you may also want a fine-tooth saw and sandpaper, but many parents avoid cutting plates by selecting a table that fits full-size plates.
Step-by-Step: Building a Simple LEGO Table
The following method focuses on simplicity: no power tools required, minimal mess, and easy adjustments if you change your mind later.
Step 1: Measure and Map the Play Surface
- Measure the usable area of the tabletop (inside any raised lip or molding).
- Check the size of your baseplates (common sizes include 10\” × 10\” and 15\” × 15\”).
- On paper, sketch how many plates you can fit in rows and columns without hanging over the edge.
Leaving a narrow border around the plates can be helpful for catching stray bricks and protecting edges from bumps.
Step 2: Test the Layout Without Adhesive
- Place the plates on the table in your planned arrangement.
- Use actual LEGO bricks to connect the plates across their seams; this ensures the studs align perfectly so creations can span multiple plates.
- Slide plates gently to remove any visible gaps or overlaps.
Once everything looks aligned and the bricks sit flat across the joins, you’re ready to mark the final positions.
Step 3: Lightly Mark Plate Positions
- With the plates still in place, run thin strips of painter’s tape around the outside edges, sticking the tape onto the tabletop.
- Lift the plates away; the tape now outlines exactly where they should return.
- If you prefer not to use tape, you can mark tiny reference dots with a pencil at the corners.
Step 4: Attach the Baseplates
Choose your attachment method and follow the manufacturer’s instructions for best results.
- For glue: Clean the surface, apply a thin, even layer within the taped area, then press plates into place and weigh them down while drying.
- For heavy-duty tape: Apply strips to the back of each plate, especially near corners and edges, then align with your tape outline and press firmly.
- For hook-and-loop strips: Stick one side to the table and the mating side to the plate corners; align and snap into place.
Reattach a few LEGO bricks across the seams as the adhesive cures, to help keep plates perfectly aligned.
Step 5: Add Storage and Finishing Touches
Even the best LEGO table becomes frustrating if there’s nowhere to put all the loose bricks. Thoughtful storage encourages kids to tidy up and makes it easier to find pieces again.
- Slide plastic bins or baskets under the table for large brick collections.
- Hook soft fabric bags to the sides of the table with removable hooks for minifigures or specialty pieces.
- Label containers with simple words or pictures so young children can match pieces back to their home.
- Add felt pads or rug grippers under table legs if it tends to slide on hard floors.
Design Ideas to Personalize Your LEGO Table
Once the basic build is complete, you can tailor the table to your child’s interests and your home’s space constraints.
Play Zones on a Single Surface
- Use multiple colors of baseplates to define different zones: blue for water, green for grass, gray for city streets.
- Create a building zone on one side and a display zone on the other to show off finished creations.
- Mark roads or rivers with removable washi tape to inspire storytelling and imaginative play.
Tables for Small Spaces
- Use a compact side table that can double as a nightstand or coffee table when not in use.
- Add casters with locks so the table can roll out for play and tuck away afterward.
- Consider an under-bed tray style table that slides away when playtime is over.
Grows-With-Them Adjustments
- Start with DUPLO plates and switch to LEGO plates later by using removable attachment methods.
- As kids get older, integrate storage drawers or sorter trays for tiny specialty pieces.
- Provide building challenges or idea cards in a small tray to extend the table’s use into school-age years.
Safety, Durability, and Cleaning Tips
Safe, durable play furniture supports long-term use and reduces the risk of accidents and injuries.
Safety Considerations
- Stability first: Heavier tables or those with a wide footprint are less likely to tip if a child leans on them.
- No sharp edges: If the tabletop or plates create sharp corners, soften them with corner guards.
- Secure attachments: Ensure plates are firmly attached so small children cannot peel them off and chew on adhesive.
- Supervision for small parts: Follow age recommendations for small LEGO pieces to reduce choking risk.
Keeping the LEGO Table Clean
- Wipe plates with a slightly damp cloth to remove dust and crumbs; avoid soaking the studs.
- Use a soft brush or a clean toothbrush to dislodge dirt from between studs.
- If the table base is wood, follow the finish manufacturer’s cleaning guidelines to avoid damage.
FAQ: DIY LEGO Table
Q: Can I remove the plates later without ruining the table?
A: If you use hook-and-loop strips or quality double-sided tape designed for interior surfaces, you can usually remove or replace plates with minimal damage. Strong construction adhesives may leave residue or pull up finish when removed.
Q: How many baseplates do I need for a typical side table?
A: It depends on your table size. Many small side tables fit either four 10\” × 10\” plates or a combination of one large plate and a few smaller ones. Measure your tabletop and compare to plate dimensions before buying.
Q: Is it safe to cut LEGO baseplates to fit?
A: Yes, experienced DIYers sometimes trim baseplates with fine-tooth saws or rotary tools. If you are not comfortable with tools, it is easier and safer to design around full plates and choose a table that matches their dimensions.
Q: Will LEGO bricks still fit across the seams between plates?
A: They will if the plates are aligned correctly. Use LEGO bricks to bridge plates during layout so you can adjust until seams are tight and bricks sit flat across the joins.
Q: How do I keep the table from becoming a mess of random pieces?
A: Invest in a few labeled containers or small drawers, and build tidy-up time into your routine. Grouping pieces by type (bricks, plates, wheels, minifigures) makes play smoother and teaches kids simple organizing skills.
References
- How I Built a DIY IKEA LEGO Table For Kids — Kids Activities Blog. 2012-03-15. https://kidsactivitiesblog.com/8741/how-to-build-a-lego-table/
- How to Make Your Own Lego Table — Bumblebee Linens Blog. 2018-06-10. https://bumblebeelinens.com/blog/how-to-make-your-own-lego-table/
- Mega Lego Table — Kreg Tool. 2020-08-01. https://learn.kregtool.com/plans/mega-lego-table/
- DIY IKEA LEGO Table with Storage — Abby Organizes. 2016-02-04. https://justagirlandherblog.com/diy-ikea-lego-table-with-storage/
- How We Made our DIY Lego Table — Simplify the Chaos. 2023-02-16. https://simplifythechaos.com/2023/02/16/how-we-made-our-diy-lego-table/
- Toy-related Injuries Among Children in the United States, 1990–2011 — Journal of Clinical Pediatrics. 2014-07-01. https://pubmed.ncbi.nlm.nih.gov/24717701/
- Lego Table Project Plans — Woodlark Blog. 2021-05-01. https://woodlarkblog.com/product/lego-table-pdf-plans/