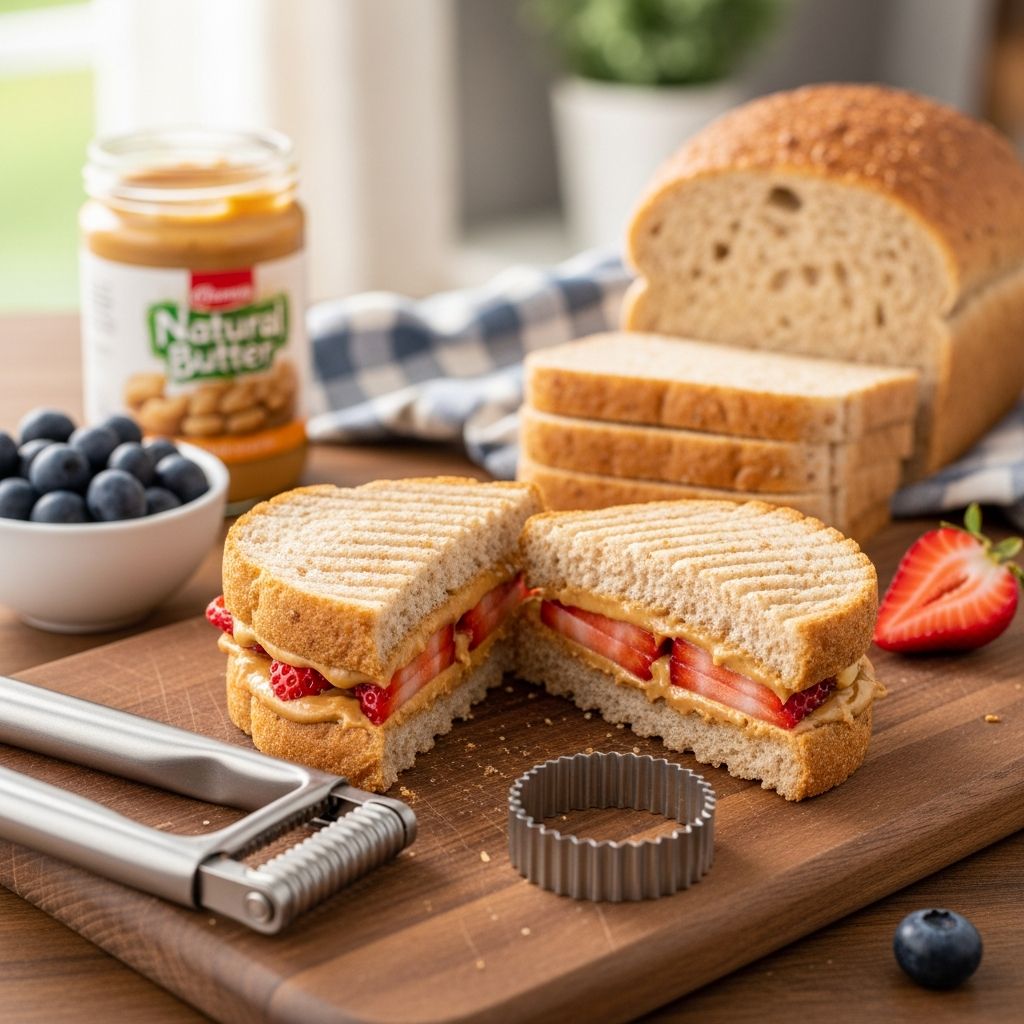
Why Homemade Uncrustables Are a Game-Changer for Busy Families
For parents juggling work, school drop-offs, and after-school activities, packing a lunch that’s both nutritious and appealing to kids can feel like a daily challenge. Store-bought Uncrustables are convenient, but they often come with long ingredient lists, added sugars, and a higher price tag. Making your own version at home solves all of that.
Homemade Uncrustables let you control exactly what goes into each sandwich. You can choose whole-grain or low-sugar bread, use natural nut or seed butters, and skip artificial preservatives. Plus, they’re incredibly versatile—perfect for picky eaters, allergy-friendly diets, and even adult lunchboxes.
What Exactly Is an Uncrustable?
An Uncrustable is a sealed, crustless sandwich where the filling is completely enclosed between two slices of bread. The edges are crimped or pressed together so the filling doesn’t leak out, and the crusts are removed before sealing. This creates a neat, portable sandwich that’s easy for small hands to hold and eat.
Originally popularized as a frozen, ready-to-eat product, Uncrustables are now widely recreated at home. The homemade version is often healthier, more affordable, and customizable to fit any dietary preference or restriction.
Benefits of Making Your Own Uncrustables
- Healthier ingredients: Choose bread with whole grains, no high-fructose corn syrup, and minimal additives.
- Cost-effective: A batch of homemade Uncrustables costs significantly less than buying them pre-made.
- Dietary control: Easily adapt for nut-free, gluten-free, dairy-free, or vegan diets.
- Reduced food waste: Use leftover bread and fillings instead of letting them go stale.
- Fun for kids: Letting children help assemble their own sandwiches encourages them to try new foods and feel ownership over their lunch.
Essential Tools and Supplies
You don’t need fancy equipment to make great Uncrustables at home. Here’s what works best:
Basic Tools
- Soft sandwich bread: Sliced white, whole wheat, or gluten-free bread that’s not too dense or holey.
- Butter knife or small spatula: For spreading fillings evenly without tearing the bread.
- Cutting board or clean surface: A stable workspace for assembling sandwiches.
- Sandwich sealer/cutter (optional): A circular cutter with a crimping edge makes sealing and shaping easy, but it’s not required.
- Fork (alternative to sealer): Press the tines around the edge of the sandwich to crimp and seal.
- Freezer-safe bags or containers: For storing Uncrustables in the freezer.
Optional but Helpful
- Round cookie cutter or glass (for shaping)
- Parchment paper (to prevent sticking when freezing)
- Labeling tape or markers (for date and filling type)
Choosing the Right Bread
The bread you choose affects both texture and how well the sandwich seals. Here’s what to look for:
- Soft texture: Avoid very crusty or artisan breads; they’re harder to seal and more likely to tear.
- Even thickness: Consistent slices help the sandwich seal evenly around the edges.
- Minimal holes: Bread with large air pockets can let fillings leak out during sealing.
- Healthier options: Whole grain, sprouted grain, or low-sugar breads are great for adding fiber and nutrients.
Let bread sit at room temperature before using. Cold bread straight from the fridge is more likely to crack or crumble when pressed.
Popular Filling Combinations
One of the biggest advantages of homemade Uncrustables is the ability to mix and match fillings. Here are some family-tested ideas:
Classic Peanut Butter & Jelly
- Spread a thin layer of peanut butter (or sunflower seed butter for nut-free) on one slice.
- Add a smaller amount of jelly or jam in the center, leaving a border around the edges.
- Top with a second slice and seal.
Protein-Packed Variations
- Tuna or chicken salad: Mix canned tuna or shredded chicken with a small amount of mayo or Greek yogurt, plus finely chopped celery, onion, or herbs.
- Ham and cheese: Use thinly sliced deli meat and a slice of cheese or a smear of cream cheese.
- Hard-boiled egg salad: Mashed eggs with a little mayo, mustard, and seasonings.
Vegetarian and Plant-Based Options
- Hummus and veggies: Spread hummus and add finely chopped cucumber, carrot, bell pepper, or olives.
- Avocado mash: Mix mashed avocado with a squeeze of lemon juice and a pinch of salt; add shredded chicken or cheese if desired.
- Bean spreads: Refried beans, black bean mash, or white bean dip with a touch of spices.
Sweet and Satisfying
- Nut butter and banana: Spread nut or seed butter, add thin banana slices, and a sprinkle of cinnamon.
- Cottage cheese and fruit: Use small-diced fruit like peaches or berries with a layer of cottage cheese.
- Yogurt and granola: For a breakfast-style Uncrustable, use a thick Greek yogurt and a light sprinkle of granola (best eaten fresh, not frozen).
Step-by-Step Assembly Guide
Follow these steps to make perfectly sealed, leak-proof Uncrustables every time:
- Prepare ingredients: Have bread at room temperature, fillings ready, and tools within reach.
- Lay out bread slices: Place half the slices on a cutting board, flat side up.
- Spread fillings: Apply the main spread (like nut butter or hummus) first, then add any additional fillings (jelly, meat, cheese, veggies) in the center, leaving a ½-inch border around the edges.
- Top with second slice: Place the remaining bread slices on top, aligning the edges as closely as possible.
- Seal the edges:
- If using a sandwich sealer: Press the outer ring down to cut and remove the crust, then press the inner crimping ring to seal the edges.
- If using a fork: Run the tines around the perimeter of the sandwich, pressing firmly to pinch the two slices together.
- Remove crusts (if not already done): Trim any remaining crust with a knife or use the sealer to cut a clean circle.
- Label and store: Place in a labeled container or bag with the date and filling type.
Freezing and Storage Tips
Homemade Uncrustables are ideal for batch prep and freezing. Here’s how to store them safely:
Freezing for Long-Term Storage
- Arrange assembled Uncrustables in a single layer on a baking sheet lined with parchment paper.
- Freeze for 1–2 hours until solid, then transfer to freezer bags or airtight containers.
- Label with the date and filling type.
- Store for up to 2 months for best quality.
Refrigerator Storage
- Keep in an airtight container in the fridge for 3–5 days.
- Use fillings with high moisture (like avocado or fresh fruit) first, as they can brown or become soggy over time.
- For school lunches, pack in an insulated lunchbox with an ice pack if the sandwich will be eaten several hours after packing.
Thawing and Serving
- Take frozen Uncrustables out of the freezer the night before and let them thaw in the fridge.
- For a cold, slightly frozen texture, pack them frozen in the morning; they’ll be soft by lunchtime.
- Do not refreeze once thawed.
Customizing for Dietary Needs
Homemade Uncrustables are easy to adapt for common dietary restrictions:
Nut-Free Options
- Use sunflower seed butter, soy nut butter, or tahini instead of peanut or almond butter.
- Ensure all bread and spreads are certified nut-free if required by school policy.
Gluten-Free Versions
- Choose a soft gluten-free sandwich bread that holds together well.
- Be extra gentle when sealing, as gluten-free bread can be more fragile.
Dairy-Free and Vegan
- Use plant-based spreads (nut/seed butters, hummus, avocado) and dairy-free cheese if desired.
- Choose jams and jellies without gelatin or animal-derived ingredients.
Lower-Sugar and Higher-Protein
- Opt for no-sugar-added jams, chia jam, or fruit compote.
- Add ground flax, chia seeds, or protein powder to nut butter for extra fiber and protein.
- Pair with high-protein sides like cheese sticks, yogurt, or hard-boiled eggs.
Smart Packing and Lunchbox Pairings
An Uncrustable is a great centerpiece, but a balanced lunch includes a variety of food groups. Here are some easy, kid-friendly pairings:
| Food Group | Easy Add-Ins |
|---|---|
| Fruits | Apple slices, grapes, berries, banana, orange segments |
| Vegetables | Carrot sticks, cucumber rounds, cherry tomatoes, bell pepper strips |
| Protein | Cheese cubes, yogurt, hard-boiled eggs, turkey roll-ups, edamame |
| Grains | Whole grain crackers, pretzels, mini muffins, popcorn |
| Drinks | Water, milk, or unsweetened milk alternatives |
Use bento-style containers or divided lunchboxes to keep foods separate and appealing. Include a small ice pack to keep perishable items safe, especially in warmer months.
Getting Kids Involved in the Process
Letting children help with making Uncrustables turns lunch prep into a fun, educational activity. Here’s how to involve them safely:
- Let them choose the filling combination for the week.
- Have them spread nut butter or hummus (with supervision if using knives).
- Let them place toppings like banana slices, cheese, or jelly.
- Allow them to press the sealer or use a fork to crimp edges (with guidance).
- Let them help label containers or pick fun lunchbox accessories.
When kids help make their lunch, they’re more likely to eat it and feel excited about trying new foods.
Common Mistakes and How to Avoid Them
Even simple recipes can go wrong if a few key details are overlooked. Here’s how to troubleshoot common issues:
- Filling leaks out: Use less filling and leave a clear border around the edges. Press the seal firmly and evenly.
- Bread tears or crumbles: Use room-temperature bread and avoid overfilling. Press gently but firmly when sealing.
- Sandwich doesn’t stay sealed: Make sure the edges are pinched all the way around. If using a sealer, press the crimping ring down fully.
- Browning or sogginess: Use acidic ingredients (like lemon juice) with avocado, and eat high-moisture fillings within a day or two.
- Freezer burn: Wrap sandwiches tightly in parchment or plastic before placing in freezer bags, and remove as much air as possible.
Frequently Asked Questions (FAQs)
Q: Can I make Uncrustables without a special sealer?
A: Yes! A fork works perfectly. Simply press the tines around the edge of the sandwich to crimp and seal the two slices together. A round glass or cookie cutter can also be used to shape the sandwich before sealing.
Q: How long do homemade Uncrustables last in the freezer?
A: For best quality, use within 2 months. Store in airtight freezer bags or containers, labeled with the date and filling type.
Q: Are Uncrustables safe to eat if they’re still slightly frozen at lunchtime?
A: Yes, many kids enjoy them slightly frozen. Just make sure the filling is safe to eat cold (avoid raw meat or undercooked eggs) and pack them in an insulated lunchbox with an ice pack.
Q: Can I use fresh fruit in Uncrustables?
A: Yes, but use fruits that hold up well, like banana, apple, or berries. Avoid very juicy fruits (like watermelon) that can make the bread soggy. Best eaten within a day or two, not frozen.
Q: How do I prevent the bread from getting soggy?
A: Use a barrier layer like nut butter, cream cheese, or hummus between the bread and wet fillings (like jelly or fruit). Avoid overfilling and store in an airtight container.
Q: Can I make breakfast-style Uncrustables?
A: Absolutely! Try combinations like cream cheese and fruit, cottage cheese and berries, or even a small amount of scrambled egg and cheese. Best eaten fresh or refrigerated, not frozen.
Final Thoughts: A Simple, Sustainable Lunch Solution
Homemade Uncrustables are more than just a trendy lunchbox item—they’re a practical, customizable solution for busy families. By making them at home, you save money, reduce packaging waste, and give your family control over what they eat.
With a little prep on the weekend, you can have a week’s worth of lunches ready to go. Whether you stick to classic PB&J or experiment with savory fillings, these sealed sandwiches are sure to become a staple in your household.
References
- Food Safety for School Lunches — U.S. Department of Agriculture, Food Safety and Inspection Service. 2023-08-15. https://www.fsis.usda.gov/food-safety/safe-food-handling-and-preparation/food-safety-education/get-answers/food-safety-fact-sheets/safe-food-handling/backgrounder-school-lunch-food-safety
- Dietary Guidelines for Americans 2020–2025 — U.S. Department of Health and Human Services and U.S. Department of Agriculture. 2020. https://www.dietaryguidelines.gov/
- Child Nutrition and Meal Patterns — U.S. Department of Agriculture, Food and Nutrition Service. 2023. https://www.fns.usda.gov/cn