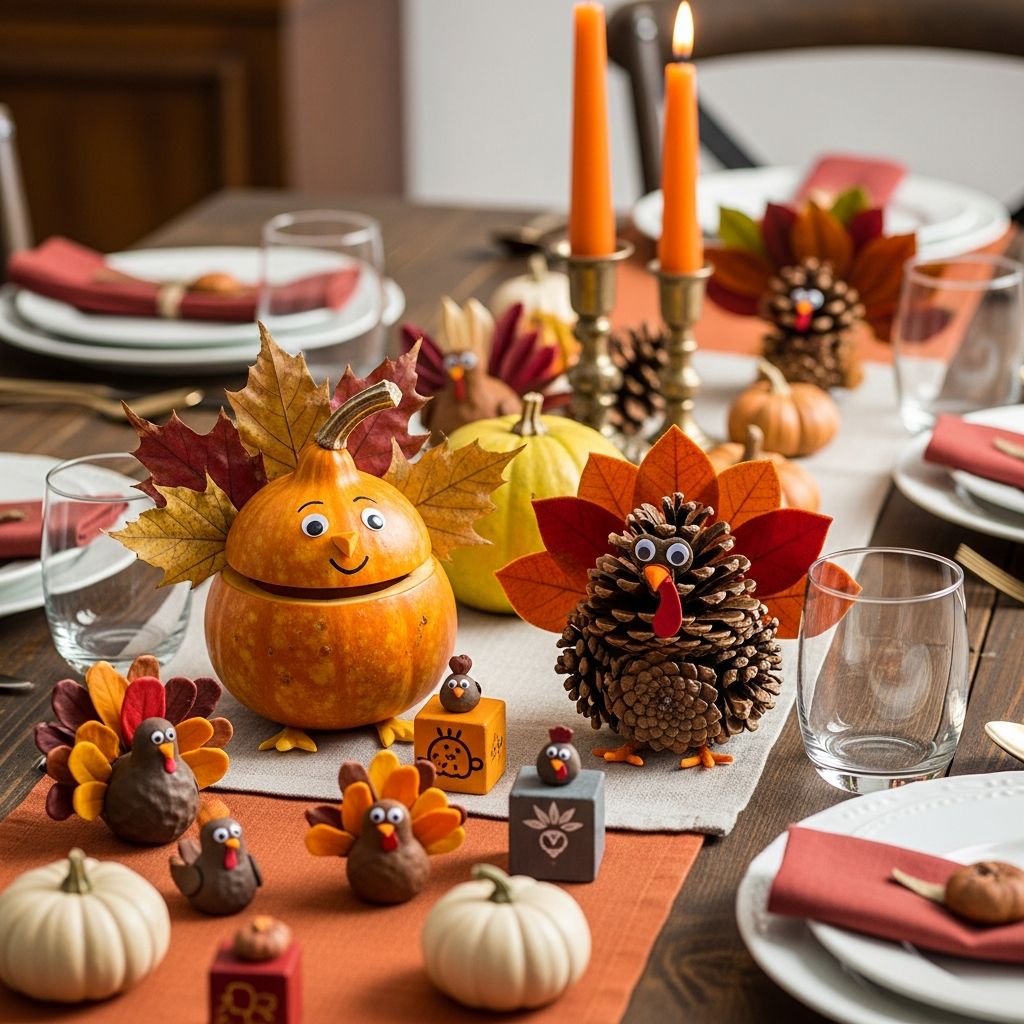
Transform your Thanksgiving table into a cozy, memorable scene with handmade turkey crafts that double as decorations, place cards, and keepsakes. This guide walks you through simple, family-friendly projects that add personality and gratitude to every place setting.
Why Turkey Crafts Belong on the Thanksgiving Table
Thanksgiving is about slowing down, sharing food, and expressing gratitude, and handmade turkey decorations reinforce all three. When each guest sees a tiny turkey made just for them, the table feels thoughtful, playful, and personal instead of generic.
Crafting together before the meal also acts as a low-pressure activity that brings kids and adults into the same creative space. The finished turkeys become conversation starters, icebreakers for new guests, and sweet mementos that can be tucked away and reused year after year.
Planning Your Craft Session
A bit of planning keeps the crafting fun instead of frantic, especially when you are preparing a big meal at the same time. Decide in advance who will participate, how many turkeys you want to make, and whether you will create them days ahead or on the morning of the feast.
Think about your table style: rustic, playful, minimalist, or colorful. Choosing a style first makes it easier to select colors, materials, and embellishments that feel cohesive without demanding perfection.
Suggested Materials and Tools
- Cardstock or construction paper in fall colors (brown, red, orange, yellow, deep green).
- Safety scissors, glue sticks, and optionally a low-temp glue gun for adults.
- Markers, colored pencils, or pens for names and details.
- Googly eyes, buttons, or drawn eyes for facial expressions.
- Mini clothespins, paper cups, or folded cards for turkey bodies.
- Stickers, washi tape, ribbon, or twine for decorative accents.
Core Concept: A Turkey That Holds a Name
The central idea behind many turkey table crafts is simple: combine a turkey-shaped design with a way to display a guest’s name. This turns a basic decoration into a practical place card that helps with seating and feels like a tiny gift.
Once you have a basic turkey silhouette and a way to attach or insert a name card, you can adapt the project for different ages, materials, and table aesthetics. The following variations all revolve around this concept and can be mixed and matched for your unique celebration.
Project 1: Standing Paper Turkey Place Cards
These standing turkeys are easy to mass-produce and look charming lined up along the table. They use folded cardstock for stability, making them a good choice if you have limited supplies or need a project that stores flat until dinner.
Allow younger children to handle coloring and feather decoration while older kids and adults cut shapes and write names. This division of tasks keeps everyone involved without overwhelming small hands.
Step-by-Step Instructions
- Cut rectangles of sturdy cardstock and fold each one in half to form a tent shape.
- Draw or trace a simple turkey body on the front panel, including a round head and plump body.
- Cut feather shapes from contrasting paper colors: long ovals or teardrops work well.
- Glue feathers in a fan shape behind the body, letting them peek over the top and sides.
- Add eyes, a beak, and a wattle using markers or small pieces of colored paper.
- Write the guest’s name neatly on the front, beneath or alongside the turkey design.
Design Ideas to Try
- Monochrome elegance: Use a single color family (all neutrals or all jewel tones) and rely on texture from pens, glitter, or embossed paper.
- Kids’ gallery: Let children draw each turkey’s face and feathers in their own styles, turning the table into a mini art show.
- Gratitude twist: On the back of each card, invite guests to write one thing they are thankful for and share it during the meal.
Project 2: 3D Cup Turkeys with Hidden Treats
For a more dimensional look, transform small paper cups into turkeys that can hide candies, notes, or small toys. These make ideal settings for a kids’ table, where discovering a surprise inside the turkey becomes part of the celebration.
Because the base is a cup, this project stands up firmly and travels well if you are bringing decorations to someone else’s home. You can also adapt the size by switching to larger or smaller cups as needed.
How to Build a Cup Turkey
- Cover the outside of the cup with brown paper or paint it in a warm brown tone.
- Cut large feather shapes from colorful paper and arrange them in a fan behind the cup.
- Attach the feathers to the back of the cup with strong glue or tape.
- Create a small circle of paper for the turkey’s head and glue it to the rim of the cup.
- Add facial features: eyes, a triangle beak, and a wattle, drawn or cut from paper.
- Attach a name tag to the front of the cup or hang a small label from twine around the base.
- Fill the cup with wrapped treats, a thank-you note, or activity prompts for children.
Fillings and Variations
- Sweet surprises: Use wrapped candies, chocolates, or small cookies for dessert-ready place settings.
- Activity cups: Tuck in crayons, small puzzles, or conversation starters for younger guests.
- Wellness theme: Include herbal tea bags, positive affirmations, or mini self-care items for adult guests.
Project 3: Clothespin Turkeys That Clip to Anything
Clothespin turkeys are tiny, versatile decorations that can perch on napkins, glasses, or menu cards. They require only a few small pieces of paper and allow children to experiment with patterns and color placement.
Because these crafts are quick, consider creating extras to clip onto party favors, garlands, or gift bags for hosts and neighbors.
Creating the Clothespin Turkeys
- Paint or color wooden clothespins in brown or a coordinating color and let them dry.
- Cut mini feather shapes from colorful paper or use pre-cut leaf shapes in autumn tones.
- Glue the feathers to one side of the clothespin so they fan out above the top.
- Attach a small paper circle or oval for the turkey’s head on the same side.
- Draw or glue on eyes and a tiny beak, keeping expressions playful and varied.
- Clip a small card with the guest’s name into the clothespin’s jaws or clamp it onto a folded napkin.
Display Options
- Napkin perches: Clip each turkey to a rolled or folded napkin at each seat.
- Glass markers: Attach turkeys to the rims of glasses so guests can identify their drinks.
- Menu holders: Use clothespins to hold a printed menu upright at the center of the table.
Choosing the Right Project for Your Table
Different tables and guest lists call for different styles of turkey décor. A kids’ table may benefit from brighter colors and treats, while a formal table might call for more muted tones and streamlined designs.
The table below can help you quickly choose a project that fits your time, skill level, and desired atmosphere.
| Project Type | Difficulty | Best For | Main Materials |
|---|---|---|---|
| Standing Paper Turkey Place Cards | Easy | Large gatherings, limited time | Cardstock, markers, scissors, glue |
| 3D Cup Turkeys with Treats | Moderate | Kids’ table, small dinner parties | Paper cups, colored paper, candy or small gifts |
| Clothespin Turkeys | Easy to Moderate | Flexible décor, party favors | Clothespins, paint or markers, small paper feathers |
Making the Crafts Accessible for All Ages
A successful family craft session accommodates different attention spans, motor skills, and interests. Offer tasks suitable for each age group so no one feels sidelined, and emphasize that every turkey can look different and still be perfect.
Consider preparing some pieces in advance, such as pre-cut feathers or pre-folded cards, so younger children can jump into decorating. Meanwhile, older kids and adults can handle more detailed cutting, writing, and assembly.
Age-Appropriate Roles
- Toddlers: Stick on pre-cut feathers and googly eyes, scribble colors onto feathers, or place treats into cups.
- Early elementary: Cut simple shapes, write their own names, and choose color combinations.
- Teens: Design templates, manage hot glue when needed, and style the final table layout.
- Adults: Oversee safety, coordinate timing with meal prep, and help with any precision cutting.
Styling Your Thanksgiving Table with Handmade Turkeys
Once the crafting is complete, the fun continues as you arrange your turkeys around the table. Aim for a balance between festive decoration and enough free space for platters, drinks, and elbows.
Layering textures and heights helps the table look intentional rather than cluttered. Think of your turkeys as accents that guide the eye rather than dominate every inch of surface area.
Simple Styling Tips
- Group turkeys in small clusters around candlesticks, pumpkins, or a main centerpiece to create mini-scenes.
- Use a consistent color palette across napkins, plates, and turkeys so the table feels unified.
- Keep at least one clear zone in the center of the table for serving dishes and family-style platters.
Time-Saving and Stress-Reducing Strategies
Holiday crafting should be enjoyable, not another item that creates pressure during an already busy season. Setting realistic expectations and simplifying steps will help you enjoy the process as much as the finished look.
Instead of aiming for flawless, magazine-style results, focus on creating a warm atmosphere and shared memories. Imperfect turkeys with crooked feathers or uneven eyes often become the most beloved pieces on the table.
Practical Shortcuts
- Use pre-cut shapes or store-bought embellishments to cut down on prep work.
- Limit yourself to one or two turkey styles to avoid juggling multiple complex projects.
- Spread the work over several days, making pieces in small batches whenever you have a spare moment.
Frequently Asked Questions About Turkey Table Crafts
How far in advance can these turkey crafts be made?
Most paper-based turkey crafts can be made several weeks before Thanksgiving if stored in a dry place away from direct sunlight. For pieces holding edible treats, wait until a few days before the holiday to fill cups or containers so the food remains fresh.
What if I have very little time on the holiday itself?
If time is tight, focus on one quick project like standing paper place cards, and keep designs minimal. You can always embellish further next year, but even simple turkeys with names written in a nice pen will add warmth and care to your table.
How can I make the crafts more sustainable?
Choose recycled cardstock, avoid glitter that is difficult to dispose of responsibly, and save your turkeys to use again in future years. You can also encourage guests to take their turkey home and display it as seasonal décor instead of throwing it away.
What if some guests do not celebrate Thanksgiving traditionally?
Use the turkey crafts as a celebration of togetherness rather than focusing strictly on the holiday’s history. Emphasize gratitude, community, and good food, and consider neutral messages like “Thankful for You” that welcome guests from all backgrounds.
Can these ideas work for classrooms or community events?
Yes. Adapt the projects by simplifying steps and creating reusable templates for kids to trace in larger groups. Add name spaces for students or participants, and use the turkeys to designate seats, assign group roles, or label shared dishes at potlucks.
Bringing It All Together
Turkey table crafts take a familiar holiday symbol and turn it into a hands-on expression of care for every person at the table. Whether you choose simple folded cards or elaborate 3D centerpieces, the act of making them becomes part of your Thanksgiving ritual.
As you refine your designs year after year, your home can slowly accumulate a quirky flock of handmade turkeys, each linked to specific gatherings and stories. Over time, these small paper birds may become just as cherished as the heirloom dishes and family recipes they accompany.