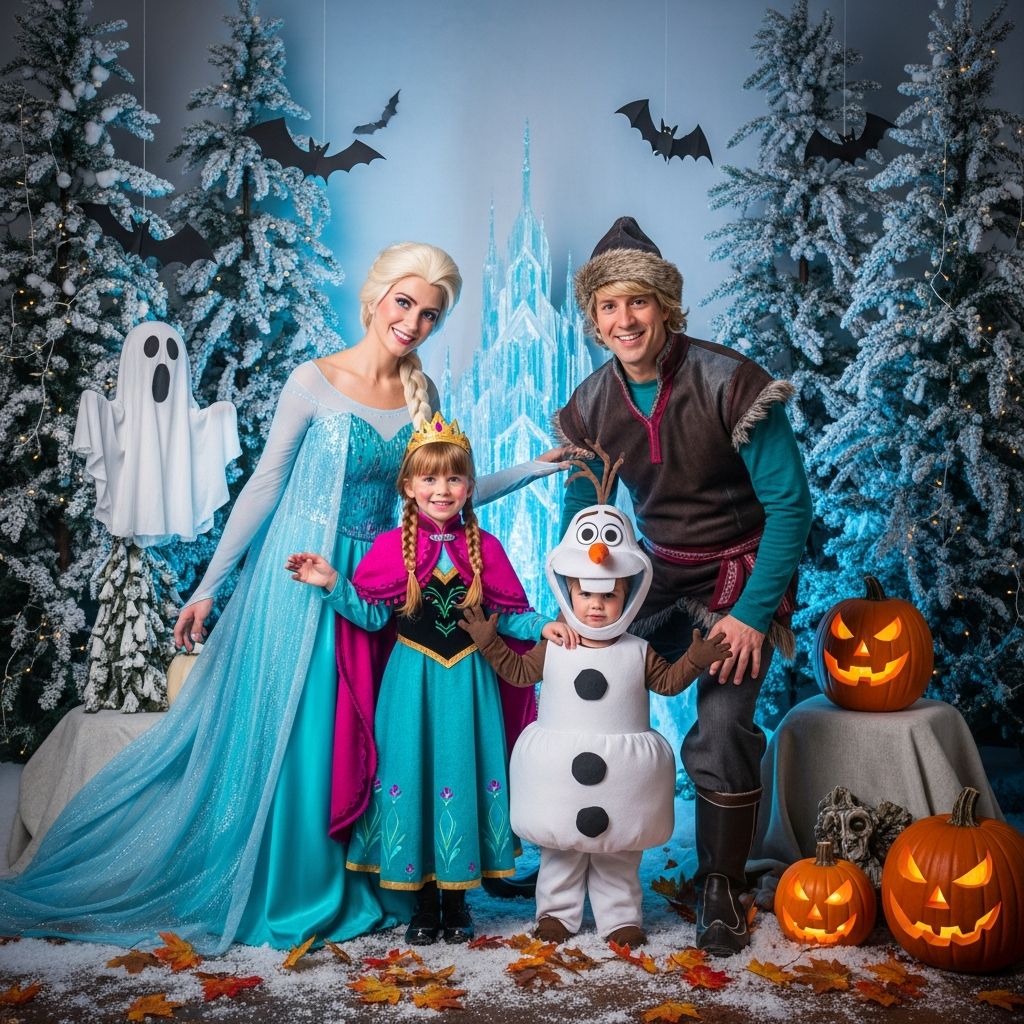
If your kids dream of ice palaces and summer-loving snowmen, you can bring that magic to life with simple, budget-friendly Frozen-inspired costumes made right at home using basic shirts, fabric paint, and a few sparkly details.
Why Make Your Own Frozen-Inspired Costumes?
Store-bought costumes can be pricey, uncomfortable, and often fall apart after a single night of trick-or-treating. Creating your own Frozen-inspired outfits lets you control the comfort, durability, and unique style of every piece.
- Save money by using clothes you already own or inexpensive basics.
- Customize designs for any age, body type, or sensory needs.
- Turn costume-making into a fun family craft activity before Halloween.
Planning Your Frozen Costume Project
Before opening any paint bottles or sprinkling glitter, take a few minutes to plan. A little preparation keeps the project stress-free and ensures everyone ends up with a costume they love.
- Pick characters: Decide who will be Anna, Elsa, Olaf, and any supporting roles like Kristoff or Sven.
- Set a budget: List what you already own (white shirts, leggings, brushes) and what you need to buy.
- Choose a workspace: Cover a table with newspaper or an old plastic tablecloth, and work in a well-ventilated area.
Core Supplies for All Costumes
Most Frozen-inspired T-shirt costumes can be created with the same basic set of materials, which helps keep costs low and simplifies your shopping trip.
| Item | Recommended Use |
|---|---|
| Plain pre-washed T-shirts (white or solid colors) | Base for Anna, Elsa, and Olaf torsos |
| Fabric paint (blue, teal, black, brown, yellow, pink) | Costume bodices, trim, buttons, and details |
| Cardboard inserts | Placed inside shirts to prevent paint bleed-through |
| Paintbrushes (small and medium) | Broad areas and delicate decorative lines |
| Glitter, sequins, or fabric-safe gems | Elsa sparkle, snowflake accents, and icy highlights |
| Chalk or washable marker | Light sketching of designs before painting |
| Wax paper or plastic sheet | Protects your work surface from paint |
Pre-washing shirts helps paint adhere better and reduces shrinkage after the design is complete. Always read the fabric paint instructions for specific drying and heat-setting requirements.
General Painting Tips for Costume Shirts
Whether you are painting a snow queen bodice or a carrot-nosed snowman, a few universal painting tips will give your designs a polished, wearable look.
- Slide a piece of cardboard or thick paper inside the shirt to keep the paint from seeping through.
- Sketch light guidelines with chalk or a washable marker before painting.
- Work from large background areas to smaller decorative details to avoid smudging.
- Allow each color section to dry before layering another color on top.
- Plan for at least one full day of drying before wearing the shirt.
Elsa-Inspired Costume Shirt
The Elsa look is all about icy blues, gentle gradients, and plenty of shimmer. Instead of a full gown, this design turns a simple T-shirt into a comfortable, glittery top that pairs easily with leggings or a skirt.
Design Concept
Imagine a fitted bodice shape in soft blue tones on the front of the shirt, with snowflake-inspired sparkles sprinkled across the top area. This creates the illusion of Elsa’s dress without any complicated sewing.
- Use light blue or aqua for the main bodice shape in a soft V or sweetheart curve.
- Add a second, slightly lighter blue layer on top to suggest translucent icy fabric.
- Sprinkle glitter or attach sequins while the paint is still slightly wet for a frozen sparkle effect.
Step-by-Step Instructions
- Place a cardboard insert inside a white or pale blue shirt.
- Lightly sketch a V-shaped bodice on the front, starting just below the collar and ending around mid-torso.
- Fill the outlined shape with your main blue fabric paint using a medium brush.
- While that layer is still tacky, add a lighter blue layer near the top of the V for dimension.
- Sprinkle cosmetic-grade glitter, or gently press sequins into the paint in scattered patterns.
- Let the shirt dry flat for several hours, then carefully shake off any loose glitter.
Finishing Touches for Elsa
- Pair the shirt with a tulle skirt or sparkly leggings for added drama.
- Create a simple cape from sheer fabric or a lightweight curtain panel and attach it to the shoulders with safety pins or snaps.
- Style hair in a side braid and dust it with temporary glitter hair spray.
Anna-Inspired Costume Shirt
Anna’s look is warmer and earthier, with deep blues, dark bodice tones, and touches of gold and floral patterns. A T-shirt version mimics the structure of her outfit while remaining soft and easy to move in.
Design Concept
The Anna-inspired shirt uses a dark painted bodice section, a bright waistband or belt, and simple stylized leaf or floral patterns to suggest embroidery. Even very basic shapes can read as decorative stitching from a distance.
- Paint a dark bodice shape that covers the central chest area, stopping before the shoulders.
- Add a horizontal stripe to represent a belt or transition to the skirt.
- Include simple curving vines or teardrop shapes to echo embroidery.
Step-by-Step Instructions
- Insert cardboard into a white or light-colored shirt and smooth out any wrinkles.
- Outline a rounded or sweetheart-shaped bodice with a dark fabric paint color such as black, navy, or charcoal.
- Fill the bodice area with paint, working in thin layers to avoid stiff fabric.
- After the dark base dries, add a bright band across the lower chest to mimic a decorative belt.
- Use a small brush and contrasting colors (yellow, green, pink) to add simple floral shapes or lines.
- Allow the design to dry completely before moving or folding the shirt.
Finishing Touches for Anna
- Combine the shirt with a blue skirt or leggings and dark boots.
- Add a cape or shawl in rich red or magenta using fleece or felt.
- Braid hair into two plaits and use a bit of white hair spray for a subtle “frost” streak.
Olaf-Inspired Costume Shirt
Olaf’s costume is delightfully simple and perfect for kids who prefer comfy, no-fuss outfits. A plain white shirt becomes a friendly snowman with a few circles, lines, and a big happy face.
Design Concept
The Olaf design focuses on bold shapes that are easy to recognize from across the street. Large black circles for buttons, a carrot-inspired nose, and cheerful eyes make this shirt fun to paint and wear.
- Use white as the base shirt color to represent snow.
- Paint two or three large black circles down the front for “coal” buttons.
- Add a smiling mouth and wide eyes near the top, leaving room for a felt or painted carrot nose.
Step-by-Step Instructions
- Place a cardboard insert into a white shirt and smooth the fabric.
- Decide whether you want a full face on the chest or just the body details with the face on a hat.
- For the body, paint round black buttons down the center of the shirt, spacing them evenly.
- Optionally, sketch a playful smile and eyes in the upper chest area and fill them in with black and white paint.
- Create stick arms with thin lines of brown paint extending from the sides of the shirt.
- Let the shirt dry thoroughly before adding accessories.
Finishing Touches for Olaf
- Wear white leggings or sweatpants to keep the snowman look consistent.
- Make a carrot nose from orange felt or craft foam and attach it to a headband or elastic strap.
- Add twig-like hair with brown pipe cleaners twisted onto a headband.
Coordinating a Family Frozen Theme
Once each shirt is painted and dry, it is time to pull the looks together as a matching group. A coordinated Frozen-inspired family is instantly recognizable and perfect for photos.
- Choose a consistent color palette for accessories so the group feels unified.
- Assign supporting characters to extra family members, such as Kristoff, Sven, or even a mountain guide, using neutral or earth-toned clothing.
- Plan a short photo session before heading out to trick-or-treat while costumes are still clean and crisp.
Care, Comfort, and Safety Tips
DIY costumes should be as comfortable and safe as they are cute. Paying attention to fabric, fit, and visibility ensures everyone enjoys the evening from start to finish.
- Use soft, breathable shirts and avoid scratchy materials against sensitive skin.
- Keep glitter and sequins away from areas that rub against seatbelts or car seats.
- Add reflective tape or glow sticks for nighttime visibility, especially on darker costumes.
- Double-check that paint is fully dry and heat-set if required, so costumes do not smear or stain.
FAQs: DIY Frozen-Inspired Halloween Costumes
Do these costume shirts require sewing?
No, the shirt designs rely entirely on fabric paint and basic craft supplies. Any optional capes or skirts can be made with minimal or no sewing by using safety pins, fabric glue, or iron-on tape.
How long do the painted designs last?
When applied according to the paint manufacturer’s directions and fully heat-set if recommended, the designs typically hold up for multiple wears and gentle washes. Turning shirts inside out and using cold water helps preserve the artwork.
Can younger children help with the painting?
Yes, children can help with simple tasks such as dabbing on glitter or filling in large areas of color, while adults handle outlines and finer details. Cover sleeves and table surfaces to protect from enthusiastic brush strokes.
What if drawing the bodice shapes feels intimidating?
You can practice the design on paper first, or lightly sketch the main shapes with chalk directly on the shirt until you are satisfied. For an even easier option, use basic geometric shapes—rectangles, simple curves, or straight lines—that still suggest the character’s outfit.
Can these costumes work for school events as well as Halloween night?
Absolutely. Because the base is a regular T-shirt, kids can move, play, and sit comfortably at school, fall festivals, or themed birthday parties, without needing to manage long skirts or heavy layers.
Making Magical Memories on a Budget
Frozen-inspired T-shirt costumes strike a balance between creativity and practicality. With a few evenings of painting and drying time, your family can step into a world of ice, snow, and warm hugs without sewing skills or expensive outfits.
Most importantly, these projects give kids a sense of ownership over their costumes. When children help design and decorate their own Anna, Elsa, or Olaf shirts, the final look becomes more than a costume—it becomes a handmade memory.