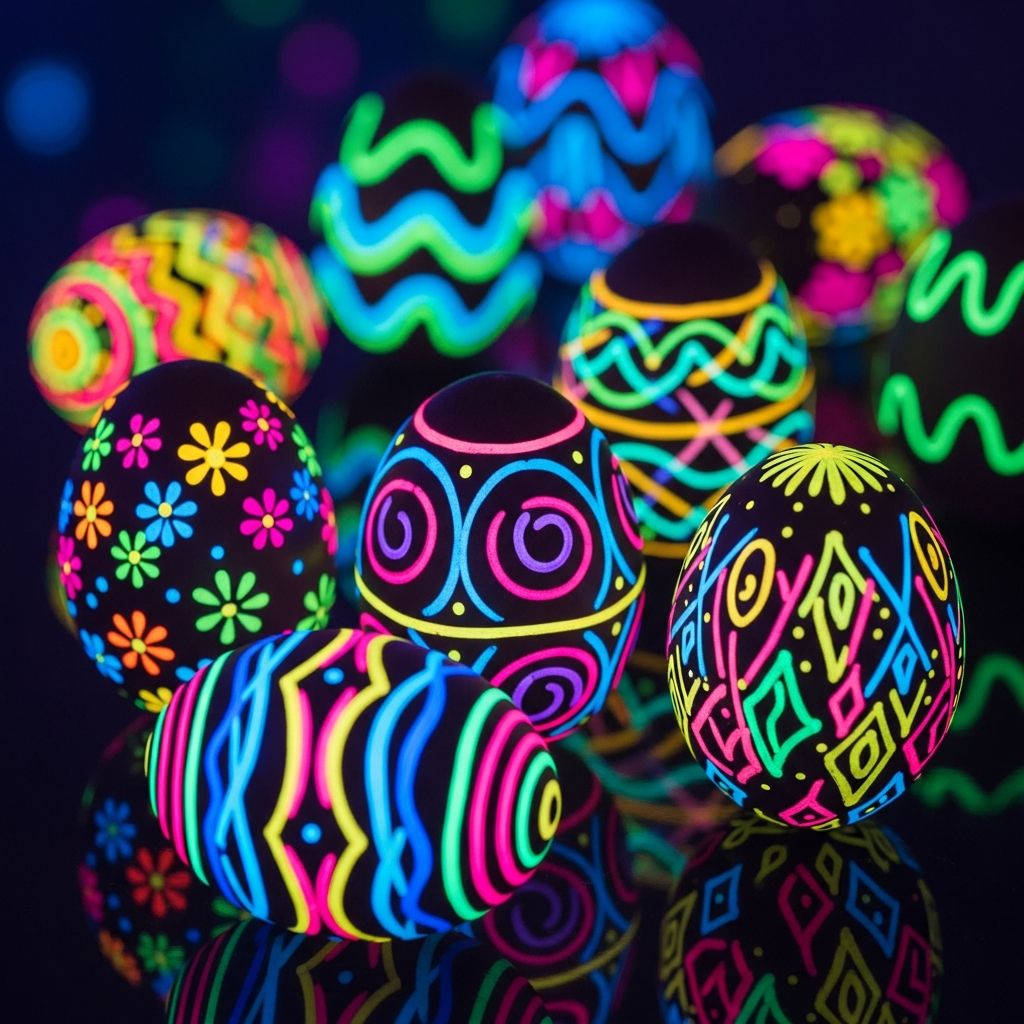
Neon Easter eggs are the perfect way to level up traditional egg dyeing, turning a simple family activity into a bright, modern craft that looks incredible in daylight and under blacklight.
Why Neon Eggs Are Worth the Hype
Classic pastel eggs are timeless, but neon eggs bring a bold, modern twist that kids and adults both love. The intense colors show up beautifully in photos, look amazing as centerpieces, and can turn an ordinary egg hunt into a glowing adventure.
Because neon dyes tend to be highly pigmented, you can achieve dramatic effects with simple techniques like layering, partial dips, and speckling. Even beginner crafters can create eggs that look like they came from a designer holiday spread.
Supplies You Will Need
This project uses easy-to-find materials so you can focus on creativity rather than hunting down specialty supplies. Adjust quantities based on how many eggs you plan to decorate.
- White eggs (hard-boiled or empty, blown-out shells)
- Neon or bright liquid food coloring (gel or liquid)
- Very hot water (almost boiling)
- White vinegar
- Cups, jars, or small bowls for dye
- Spoons or tongs for handling eggs
- Paper towels and an old dish towel or tray liner
- Rubber gloves (optional but helpful for avoiding stained hands)
- Blacklight or LED strip (optional for extra glow)
- Wax crayons, stickers, or tape for resist techniques (optional)
If you want extra shimmer, you can also add a small amount of edible glitter, mica powder intended for food use, or a light coating of vegetable oil to make colors appear even more vibrant.
Safety and Setup Tips Before You Start
Before diving into neon colors, prepare your workspace so cleanup is quick and stress-free. Neon dyes can be strong, so planning ahead prevents stains and spills from becoming a problem.
- Cover your table with kraft paper, a plastic tablecloth, or a garbage bag cut open.
- Set out a drying area lined with paper towels, a wire rack, or the cutouts from an egg carton.
- Wear old clothes or aprons, and consider gloves if you are handling concentrated dye.
- Keep hot water away from small children; let adults handle pouring and mixing.
- If you plan to eat the eggs later, use food-safe dyes and keep eggs refrigerated once finished.
Step-by-Step: Basic Neon Egg Dye
This simple neon dye method is the foundation for all the other creative techniques in this guide. Once you master this base, you can layer on more advanced designs with ease.
1. Prepare the Eggs
- Hard-boil the eggs and let them cool completely before dyeing.
- For display-only eggs, you can use hollowed eggshells or plastic craft eggs labeled as dyeable.
- Wipe each egg gently with a damp cloth to remove any residue that might resist the dye.
2. Mix a Bright Neon Dye Bath
Use the table below as a starting point for each color, then adjust intensity according to the look you want. Stronger color usually means more drops of dye and more time in the bath.
| Component | Suggested Amount | Notes |
|---|---|---|
| Very hot water | 1 cup (about 240 ml) | Hotter water dissolves color more evenly. |
| White vinegar | 1 teaspoon | Helps the dye bond to the eggshell. |
| Neon food coloring | 20–30 drops | Use fewer drops for softer neon, more for ultra-bright. |
To mix, pour hot water into each cup, add the vinegar, then stir in your neon dye. Make a separate cup for each color so you can layer, blend, and experiment.
3. Dye the Eggs
- Use a spoon to lower an egg gently into the first color bath.
- Let the egg sit for 3–8 minutes, checking occasionally; the longer it sits, the more intense the color.
- Rotate the egg now and then to avoid pale spots or marks from the cup.
- Lift the egg out, let excess dye drip back into the cup, then place it on the drying rack or paper towels.
Once you are comfortable with basic dipping, you can start layering multiple colors on the same egg to create glow-like gradients and dramatic patterns.
Creative Neon Techniques for Next-Level Eggs
Neon color is only the beginning. With masking, double-dipping, and simple tools, you can create designs that look complex without requiring advanced art skills.
Half-Dip and Tilt Designs
Half-dipped eggs are modern, graphic, and surprisingly easy to make. Instead of fully submerging the egg, you only dip part of it, creating a crisp visual line or angled color block.
- Hold the egg horizontally and lower one end into the dye so only half is submerged.
- For an angled effect, tilt the egg slightly as you hold it in the dye.
- Let it rest until the color is strong, then remove and dry.
- Once dry, flip the egg and dip the opposite side in a second neon color for a bold two-tone effect.
Layered Glow Gradients
Gradients work especially well with neon shades because intense colors blend into each other with a striking ombré effect. Use lighter shades first and darker shades later for the smoothest transition.
- Start with a light neon color (for example, yellow or bright lime) and dye the entire egg.
- After the egg dries, dip only the bottom third into a deeper color like electric blue or hot pink.
- For a three-color gradient, repeat with a third shade, dipping just the very bottom of the egg.
- Gently rotate the egg while it is partially submerged to soften the line where one color meets another.
Resist Art with Tape and Crayons
Resist techniques leave crisp white or light-colored lines where the dye cannot reach the shell. This approach is ideal for geometric patterns, initials, or simple doodles.
- Draw on cooled eggs with a white wax crayon to create stars, stripes, or names.
- Alternatively, wrap thin strips of painter’s tape or washi tape around the egg.
- Dye the egg in a bright neon color and let it dry fully.
- Carefully remove the tape or admire the areas where the wax resisted the dye, revealing crisp designs.
Speckled Neon Galaxy Eggs
For a cosmic look, combine deep neon shades with splatters of lighter or contrasting colors. The result resembles miniature galaxies, nebulae, or abstract artwork.
- Dye your eggs a rich base color like deep violet or teal.
- Once dry, dilute a bit of neon dye with a small amount of water.
- Use a stiff paintbrush or clean toothbrush: dip it lightly into the dye, then flick the bristles toward the egg to create tiny specks.
- Layer speckles from different colors, letting each layer dry for a few minutes before adding the next.
Making Your Neon Eggs Glow Even More
Neon eggs look amazing on their own, but there are a few simple tricks for turning them into eye-catching decor for your Easter table, mantle, or egg hunt. Presentation can enhance the brightness and make every egg feel special.
- Place neon eggs in white or clear bowls to emphasize the colors.
- Use shredded white paper, crinkle-cut filler, or neutral-colored Easter grass to avoid competing with the neon tones.
- For evening events, arrange eggs near small LED lights or a blacklight strip to make the neon hues appear even more electric.
- Lightly buff dry eggs with a drop of vegetable oil on a paper towel to give them a subtle sheen (skip this if you plan to add marker or paint details afterward).
Fun Variations for Different Age Groups
Neon egg decorating can be tailored to toddlers, school-aged kids, and adults alike. Adjust the techniques and tools so everyone can participate at a level that feels fun and achievable.
For Toddlers and Preschoolers
- Pre-dye eggs in soft neon shades so little ones can decorate with stickers, dot markers, or simple stamps.
- Offer large cups and wide spoons so they can gently dip eggs with help.
- Limit the palette to two or three colors to avoid muddy results.
For School-Age Kids
- Introduce half-dips, gradients, and resist techniques with tape or crayons.
- Challenge them to design themed sets, like “underwater neon,” “outer space,” or “emoji eggs.”
- Encourage them to keep a paper sketch of designs they want to try, then match their drawings to the finished eggs.
For Teens and Adults
- Experiment with intricate line art using fine-tipped paint pens or metallic markers on top of dried neon bases.
- Try graphic black-and-neon combos by adding black outlines or patterns after the dye has set.
- Create coordinated collections to match a specific color scheme for your table setting or party decor.
Display Ideas for Neon Easter Eggs
Once your neon eggs are ready, use them as more than just hunt prizes. They can transform your home into a bright, cheerful celebration of spring.
- Arrange neon eggs in a clear glass vase or wide jar as a centerpiece.
- Place one egg at each place setting with a name written on it as a personalized place card.
- Create a “glow station” by grouping eggs around a small blacklight for evening gatherings.
- Mix neon eggs with pastel ones for a layered, dimensional look on trays and platters.
Care, Storage, and Food Safety Tips
Egg safety is important, especially if you plan to eat your dyed eggs later. A few simple habits keep your craft safe and delicious.
- Use only food-safe dyes if the eggs will be eaten.
- Return hard-boiled eggs to the refrigerator within two hours of decorating.
- Keep eggs away from surfaces that may not be food-safe, such as raw wood or craft-only tools.
- Discard any eggs that crack significantly during boiling or decorating, or use them only for display.
Neon Easter Eggs Quick Reference Table
Use this quick guide as a handy reference while you work so you can balance color, intensity, and design style.
| Goal | What to Do | Pro Tip |
|---|---|---|
| Strong, vivid color | Use 25–30 drops of neon dye and soak for at least 5 minutes. | Stir dye baths occasionally to avoid uneven patches. |
| Soft neon pastels | Use 10–15 drops of dye and shorten soak time to 2–3 minutes. | Start pale; you can always re-dip for more intensity. |
| Multi-color gradients | Layer colors from light to dark in separate dips. | Let eggs dry completely between each new color. |
| Sharp lines and shapes | Use tape or wax crayon before dyeing. | Press tape edges firmly to prevent color seepage. |
| Shiny finish | Buff dry eggs with a tiny amount of vegetable oil. | Use just enough oil to add sheen without making eggs slippery. |
Frequently Asked Questions About Neon Easter Eggs
Can I eat neon-dyed eggs?
Yes, as long as you use food-safe colorings and handle the eggs properly. Keep boiled eggs refrigerated, avoid leaving them at room temperature for long periods, and discard any that crack or sit out longer than recommended.
How do I keep the colors from looking muddy?
Limit how many colors you layer on a single egg and let each layer dry before adding another. Combining too many contrasting shades can create brownish tones, so stick to related colors (like pink and orange or blue and green) for cleaner blends.
Do I need a blacklight for neon eggs to look good?
No blacklight is required; neon eggs will still look bright and striking in normal lighting. However, a blacklight can make certain dyes appear extra vivid and is a fun addition for evening egg hunts or parties.
Can I use brown eggs for this project?
You can, but the results will be different. On brown shells, neon colors appear deeper and more muted, creating a jewel-toned effect instead of a bright, glowing look. For the boldest neon, white eggs are the best choice.
How far in advance can I decorate the eggs?
If you intend to eat them, follow standard hard-boiled egg guidelines and enjoy them within about a week, storing them in the refrigerator. For decorative-only eggs made from hollow shells or plastic, you can craft them days or even weeks in advance.
Bring Neon Magic to Your Next Easter
With a handful of simple supplies and a willingness to experiment, you can transform ordinary eggs into neon masterpieces that light up your Easter celebration. Mix and match techniques, encourage every family member to put their own twist on the designs, and enjoy a creative tradition that feels fresh year after year.