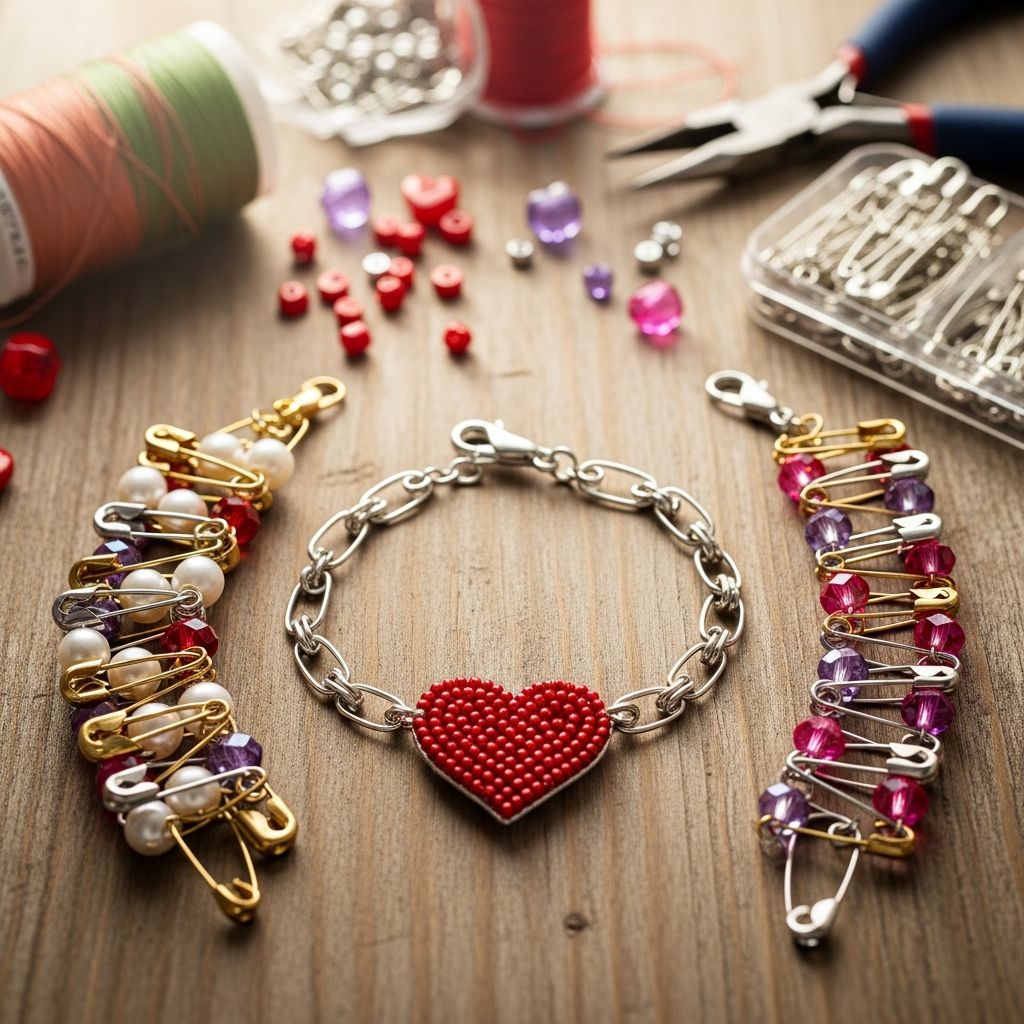
Valentine’s Day is the perfect excuse to slow down, get creative, and make something heartfelt by hand. Instead of buying jewelry, you can turn simple safety pins and beads into sparkling bracelets that carry a personal message, favorite colors, or fun patterns.
Why Safety Pin Bracelets Make Great Valentine Gifts
Safety pin bracelets are wonderfully simple, but they look impressively detailed when finished. They’re ideal for Valentine’s Day because each bracelet can be tailored to the person receiving it, making every piece feel thoughtful and unique.
- They use inexpensive, easy-to-find materials, so you can make several bracelets without spending much.
- The project works well for kids, teens, and adults, making it a great family or classroom activity.
- Bracelets can be customized with favorite colors, initials, or tiny heart patterns for a romantic or friendly touch.
- They are lightweight, comfortable to wear, and stack beautifully with other Valentine’s accessories.
Supplies Checklist for Valentine’s Bracelets
Gathering all your materials before starting makes the crafting process smoother and more enjoyable. Use this list as a quick reference when planning a bracelet-making session.
- Medium to small safety pins (uniform size works best)
- Seed beads or small glass/plastic beads in Valentine colors (reds, pinks, whites, metallics)
- Clear elastic beading cord or thin stretch cord
- Scissors suitable for cutting elastic
- Small dishes, trays, or muffin tins to sort bead colors
- Measuring tape or ruler to size the bracelet accurately
- Optional: small charm beads, letter beads, or heart-shaped beads
- Optional: fabric ribbon to hide knots or add a bow accent
For younger children, larger beads and slightly bigger safety pins are easier to handle. Older kids and adults may enjoy working with tiny seed beads for more intricate designs.
Planning Your Valentine Color Scheme and Pattern
Before stringing any beads, spend a few minutes choosing colors and patterns. This simple planning step makes the finished bracelet look intentional instead of random.
- Classic Valentine palette: Red, light pink, white, and metallic gold or silver.
- Soft and romantic: Blush pink, lavender, pearl white, and transparent beads.
- Bold and modern: Hot pink, black, and silver, with the occasional red bead for contrast.
- Friendship style: Rainbow colors with a few heart-colored beads sprinkled throughout.
You can plan a simple repeating pattern like red–white–pink–white, or design tiny heart shapes by clustering similar colors on certain pins. Sketching your pattern on paper helps keep track while you bead.
Basic Bracelet Structure Explained
Understanding the basic structure of a safety pin bracelet helps the project feel less intimidating. The bracelet is essentially rows of beaded pins held together by two parallel strands of elastic.
- Each safety pin acts like a narrow, vertical bead that carries a small stack of accent beads.
- Two lengths of elastic thread through the looped ends and pointed ends of the pins, forming top and bottom rows.
- When the elastics are tied into circles, the pins curve naturally around the wrist and form a flexible band.
Once you grasp this structure, you can change the look of the bracelet simply by altering bead colors, pin orientation, or the number of pins used.
Step-by-Step: Building Your First Valentine Safety Pin Bracelet
Use the following instructions as a general guide. Measurements and bead counts can be adjusted for different wrist sizes and personal preferences.
Step 1: Measure the Wrist
Wrap a flexible tape measure loosely around the intended wearer’s wrist. Add approximately 2–3 centimeters (or about an inch) to that number to provide comfort and room for the bracelet’s curve.
- For children’s wrists, fewer pins and shorter elastic lengths are usually sufficient.
- For adults, you may need additional pins and longer elastic to achieve a full, brick-like band.
Step 2: Cut the Elastic Cord
Cut two pieces of elastic, each about three to four times the measured wrist length. The extra length provides working room for threading and knotting without beads sliding off the ends.
- Keep a slight stretch in mind; elastic will loosen slightly with wear and knotting.
- If uncertain, cut a bit longer rather than shorter; excess can always be trimmed later.
Step 3: Bead the Safety Pins
Open each safety pin carefully and slide on beads in your planned color order. Leave a small gap at the end so the pin can close securely without forcing the beads.
- Fill each pin consistently (for example, 6–8 beads per pin) to create a uniform band.
- Try different combinations: all red on some pins, alternating pink and white on others, or small heart motifs using a darker bead in the center.
- Close the pin firmly and check that it latches completely to prevent beads from slipping off.
Step 4: Arrange Pins in Order
Lay all beaded pins on a flat surface with the beads facing the same direction. Now decide the order they will appear on the bracelet to maintain your pattern.
- Group pins in small sets if you are using a repeating color sequence.
- Alternate heavily decorated pins with simpler ones for visual rhythm.
Step 5: Thread the First Elastic Strand
Tie a temporary knot at one end of the first elastic piece to stop pins and beads from slipping off. Begin threading the elastic through the round loop at the base or head of each pin—use the same end on every pin for this first strand.
- Slide one pin onto the elastic, then add a plain spacer bead (optional), then another pin.
- Continue until you have threaded all pins or reached the desired bracelet length.
- Make sure the beaded sides of the pins all face the same direction to keep the front of the bracelet consistent.
Step 6: Add the Second Elastic Strand
For the second elastic piece, lightly knot one end and begin threading through the opposite openings of the same pins. This creates two parallel lines of elastic that hold the pins firmly in place.
- If you used the rounded loop for the first strand, use the pin’s other end for the second strand.
- Check that the pins are not twisted; bead faces should all point outward.
Step 7: Test the Fit and Adjust
Before making permanent knots, wrap the unfinished bracelet around the wrist to check comfort and coverage. Add or remove a pin or two if the bracelet feels too tight or too loose.
- Adjust spacing beads between pins if extra length is needed without adding more pins.
- Ensure the bracelet slides on comfortably without overstretching the elastic.
Step 8: Tie Secure Knots
Once satisfied with the fit, tie the ends of each elastic strand into tight knots. Pull each knot firmly and repeat several times to prevent slipping.
- Use a surgeon’s knot or multiple square knots for extra security.
- Trim excess elastic, leaving a small tail to avoid sudden unraveling.
Step 9: Finish with a Polished Touch
To hide knots and add a romantic flair, wrap a short piece of ribbon around the knot area and tie into a small bow. This decorative detail also introduces an extra pop of Valentine color.
- Choose satin ribbon for a dressy look or sheer ribbon for a light, airy style.
- Secure the bow with a tiny dab of clear-drying glue if the bracelet is for active children.
Valentine Design Ideas and Themes
Once the basic technique feels comfortable, you can experiment with themed patterns that tell a story or highlight a relationship. These ideas work well for friends, partners, and family members.
- Sweethearts: Alternate deep red and blush pink pins, then add one white pin every fifth position to mimic tiny candy hearts.
- Initials and names: Sprinkle letter beads between pins to spell a nickname or special word like “LOVE” or “BFF.”
- Ombre romance: Start with dark red pins on one side, transitioning to pink, then pale pink, and finally white across the band.
- Hidden message: Use different bead colors to represent a secret code only you and the recipient understand.
Because the structure is flexible, you can match bracelets to outfits, Valentine’s party themes, or classroom colors for coordinated group gifts.
Safety Tips for Crafting with Pins and Beads
Although this project is beginner-friendly, safety should always come first, especially when working with children. Safety pins and small beads require supervision and some common-sense precautions.
- Close every pin completely before handing it to a child or adding it to the bracelet.
- Keep beads and tiny materials away from infants and toddlers to avoid choking hazards.
- Use a flat, well-lit surface so pins are less likely to roll away or be stepped on.
- Encourage children to pass pins by the closed side, never by the sharp tip.
For very young crafters, consider having an adult pre-bead and close all pins, leaving only the threading and color arranging to children.
Gift Presentation Ideas for Valentine’s Day
Presentation can be just as delightful as the bracelet itself. Simple packaging transforms a small handmade craft into a keepsake gift that looks intentional and special.
- Slip the bracelet around a heart-shaped piece of cardstock with a short handwritten message.
- Place it inside a small organza bag or mini gift box with tissue paper in matching colors.
- Attach the bracelet to a Valentine card and secure it with removable washi tape.
- Create matching pairs and label them “Best Friends Bracelets” for classroom exchanges.
Adding a note about the color choices or pattern meaning can make the gift feel even more personal and sentimental.
Quick Reference: Materials and Sizing Table
The table below offers a rough guideline for wrist sizes and typical material amounts. Adjust as needed for bead size, pin size, and personal comfort.
| Wrist Type | Approx. Wrist Circumference | Suggested Number of Pins | Elastic Length (per strand) |
|---|---|---|---|
| Young child | 12–14 cm (4.75–5.5 in) | 18–24 pins | 45–55 cm (18–22 in) |
| Older child / tween | 14–16 cm (5.5–6.25 in) | 22–28 pins | 50–60 cm (20–24 in) |
| Teen / small adult | 16–18 cm (6.25–7 in) | 26–32 pins | 55–65 cm (22–26 in) |
| Average adult | 18–20 cm (7–7.75 in) | 30–36 pins | 60–70 cm (24–28 in) |
These numbers are estimates; always test the bracelet on the intended wrist before tying final knots to ensure a comfortable fit.
Frequently Asked Questions
How secure are safety pin bracelets for everyday wear?
When the pins are fully closed and the elastic is knotted several times, safety pin bracelets hold up well to normal daily activities. For very active children or sports, it is best to remove the bracelet to avoid snagging on clothing or loosening the pins over time.
Can metal sensitivity be an issue?
Some people are sensitive to certain metals, especially nickel, which may be present in inexpensive safety pins. Choose high-quality, nickel-free, or coated pins for anyone with known skin sensitivities, and avoid wearing the bracelet too tightly.
What type of elastic cord works best?
Clear elastic beading cord or jewelry stretch cord is ideal because it is strong, flexible, and blends in visually between the pins. Avoid very thick cord that might not pass through safety pin openings easily, and steer clear of weak elastic thread that frays quickly.
Can these bracelets be washed?
Light spot cleaning with a soft, slightly damp cloth is usually safe, but soaking the bracelet in water can weaken the elastic over time. To keep the colors bright and the structure strong, remove the bracelet before bathing or swimming.
Is this project suitable for classroom Valentine exchanges?
Yes, safety pin bracelets make excellent classroom or group Valentine gifts when planned and supervised carefully. Prepare materials ahead of time, pre-bead pins for very young children, and create simple instruction cards so helpers can assist quickly.
Extending the Craft Beyond Valentine’s Day
While the focus here is Valentine’s Day, this bracelet technique adapts seamlessly to other celebrations. Changing color schemes and bead shapes instantly transforms the mood of the project.
- Use pastels and flower beads for spring or Mother’s Day projects.
- Try school colors and letter beads for graduation gifts or team spirit bracelets.
- Incorporate autumn tones and leaf charms for fall festivals or Thanksgiving favors.
- Create wintry designs with blues, silvers, and snowflake charms for the holiday season.
Once you learn the basics with Valentine colors, you can return to this simple method again and again, customizing bracelets for nearly any occasion.