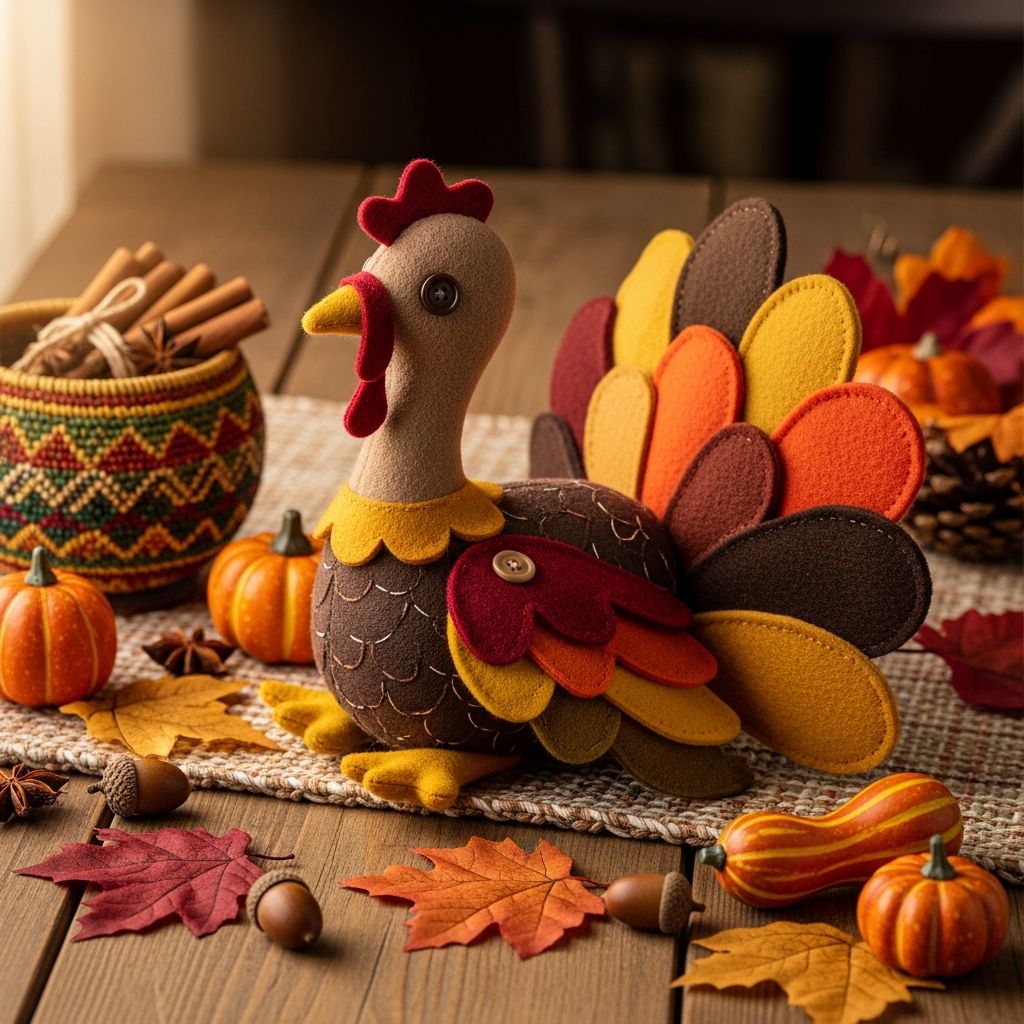
Thanksgiving often centers on food and family, but adding a handmade turkey plush doll to your celebration brings a special kind of warmth to the table. A soft, huggable turkey becomes more than just décor; it turns into a keepsake that reminds everyone of time spent together creating something with care.
This guide walks you through how to design, sew, and personalize your own Thanksgiving turkey plush from start to finish, even if you are a beginner with a needle and thread. Along the way, you will find practical tips, display ideas, and answers to common questions so your stuffed turkey can proudly return every fall for years to come.
Why Make a Turkey Plush for Thanksgiving?
Handcrafting a turkey plush doll adds a creative touch to a holiday that is already full of tradition and gratitude. Instead of relying only on store-bought decorations, you can introduce a soft character that reflects your family’s style and sense of humor.
- It becomes a reusable centerpiece or shelf accent that appears every November as a familiar friend.
- Kids can safely play with a plush turkey before and after the big meal, unlike fragile ceramic decorations.
- Making the plush together turns into an activity that naturally sparks conversations about what everyone is thankful for.
Whether you are creating one plush as a gift or planning a flock for the entire extended family, this project offers a cozy way to celebrate the season.
Planning Your Plush: Style, Size, and Personality
Before cutting any fabric, take a moment to imagine what kind of turkey you want to make. Planning the look and feel of your plush keeps the project focused and helps you choose the right materials.
Choose a Style That Fits Your Home
Turkey plush dolls can be whimsical, rustic, cartoonish, or sleek and minimal depending on your decorating style. A farmhouse-inspired home might call for muted browns and creams, while a colorful playroom could handle bright reds, oranges, and yellows.
- Classic cute: Round body, big eyes, and oversized beak for a friendly kids’ toy.
- Rustic décor: Textured fabrics, plaid details, and earthy tones for a cozy mantel display.
- Modern simple: Clean shapes, limited colors, and minimal details to blend with contemporary décor.
Sketching a quick front view and side view on scrap paper is often enough to clarify your design and guide your pattern shapes.
Decide on Size and Use
The size of your turkey plush will change how it is used, displayed, and stored between holidays. Consider where it will live most of the time before choosing dimensions.
| Size | Approximate Height | Best Use |
|---|---|---|
| Mini | 10–15 cm (4–6 in) | Place settings, party favors, tiered trays |
| Medium | 20–30 cm (8–12 in) | Centerpieces, sofa décor, child’s cuddle toy |
| Large | 35–45 cm (14–18 in) | Photo prop, focal point on hearth or entry table |
Smaller plushies are quicker to sew and use less fabric, while larger turkeys are more dramatic and photogenic for holiday snapshots.
Materials and Tools You Will Need
You can adapt this project to what you already have in your sewing stash, but a few key materials will make your turkey plush look polished and hold up to yearly use. Aim for soft, durable fabrics that can handle gentle handling or an occasional spot clean.
- Soft fabric for the body, such as fleece, flannel, or minky in brown or tan.
- Contrasting fabric for feathers: reds, oranges, yellows, and patterned scraps work well.
- Felt sheets for the beak, wattle, eyes, and small decorative accents.
- Polyester fiberfill or other plush stuffing to create a soft, squeezable shape.
- Thread to match or contrast your fabric, plus embroidery floss if adding stitched details.
- Basic tools: fabric scissors, pins or clips, hand-sewing needles, and a sewing machine (optional but helpful).
- Optional safety eyes or buttons, provided the plush will not be used by children under three.
If young children will be handling the toy, plan to sew or embroider the facial details so there are no small parts that could be pulled off or swallowed.
Designing a Simple Turkey Pattern
A turkey plush pattern is easier than it looks when broken down into basic shapes. Instead of searching for complex templates, you can draft your own with a pencil, paper, and a plate or cup for tracing curves.
Core Body and Head Shapes
Start by deciding whether your turkey will have a separate head or a single continuous silhouette. A single rounded bean or oval shape is easier to sew, while a distinct head gives you more room for expressions and accessories.
- Draw an oval or rounded pear shape for the main body, sized to your preferred height.
- Sketch a slightly smaller circle or oval for the head if you want it to be separate.
- Add two small ovals or rectangles with curved ends for feet that will peek out at the bottom.
Cut these paper shapes out and quickly tape them together to check proportion. Adjust until the turkey looks balanced when viewed from the side and front.
Feathers, Beak, and Wattle
The feathers and facial details are where your turkey plush gains personality. This is an ideal moment to involve kids by letting them choose colors or arrange feather shapes like a fan.
- Draw several long teardrop or leaf shapes in different sizes for tail feathers.
- Create a small diamond shape that can be folded in half to form the beak.
- Sketch a soft, droplet-like piece for the wattle that can hang from one side of the beak.
Label each pattern piece and note how many copies you need from fabric. Keeping everything organized at this stage makes the sewing part smoother.
Step-by-Step: Sewing Your Thanksgiving Turkey Plush
The following step sequence outlines a beginner-friendly approach that you can adapt for hand sewing or machine sewing. Take your time and enjoy the process, especially if you are crafting with children or friends.
1. Cut and Prepare the Fabric Pieces
Pin or clip each paper pattern piece to the fabric, aligning straight edges with the grain of the fabric when possible. Cutting on the grain helps your plush hold its shape and reduces unnecessary stretching.
- Cut two body pieces (front and back) from your main fabric.
- Cut head pieces if separate, plus pairs of feet.
- Cut multiple feather pieces from your chosen accent fabrics.
- Cut small felt shapes for beak, wattle, and eyes, or prepare safety eyes.
Stack matching pieces together so you do not lose track of what will be sewn to what later in the process.
2. Assemble and Layer the Feathers
Tail feathers create the dramatic fan behind the turkey, so arrange them on the table first to test different combinations. Overlapping colors and varying lengths makes the final plush look more dynamic and interesting.
- Layer feathers in a semi-circle and lightly mark their placement on the back body piece with tailor’s chalk.
- Baste (temporarily sew) the feather bases onto the right side of the back body piece within the seam allowance.
When the body pieces are sewn together later, the feather bases will be hidden in the seam, leaving only the colorful ends peeking out like a festive fan.
3. Sew the Body and Stuff It
Place the front and back body pieces right sides together, ensuring the feathers are sandwiched inside and pointing inward. This looks strange at first, but they will flip outward when the body is turned right side out.
- Sew around the edge with a medium seam allowance, leaving a small opening at the bottom or side for turning.
- Trim any excess fabric at curves and clip notches into seam allowances where needed to avoid bulk.
- Turn the body right side out through the opening, gently pulling feathers into place.
- Stuff the body with fiberfill, starting with small tufts to avoid lumps and pressing stuffing into corners.
Once you are happy with the shape, close the opening with a ladder stitch or another inconspicuous hand stitch.
4. Add the Head, Face, and Feet
Attaching the head and facial details brings the plush to life. You can securely sew these pieces, or for an intentionally decorative look, use visible hand stitching around felt shapes.
- Sew or glue the beak and wattle to the head piece, then add eyes using embroidery, felt circles, or safety eyes.
- Attach the head to the top front of the body by hand stitching all the way around its base.
- Stuff and sew the feet pieces, then stitch them to the bottom front of the body so they peek out.
Adjust the expression by slightly shifting the eye placement or tilting the beak; even minor changes can make your turkey look sleepy, cheerful, or mischievous.
Safety and Durability Tips for Family-Friendly Plushies
If your turkey plush will be handled frequently by children or used as a toy, paying attention to safety from the beginning is essential. A few thoughtful choices during construction help the plush withstand enthusiastic hugs and play.
- Avoid buttons, beads, or loose embellishments for very young children and opt for embroidered or felt details instead.
- Use strong thread and reinforce seams at stress points like the neck, wings, and base of the tail.
- Do not overstuff to the point of straining seams; a slightly softer plush is more forgiving and easier to squeeze.
Always check local safety guidelines for handmade toys if you plan to sell your turkey plush at craft fairs or online marketplaces.
Creative Variations to Personalize Your Turkey
Once you finish one turkey plush, it is hard to resist imagining a whole flock dressed for different roles. Custom details help your creation feel uniquely connected to your family and traditions.
- Add a tiny fabric apron, bow tie, scarf, or pilgrim-style hat using felt scraps.
- Embroider the year or a short message like “Give Thanks” on one feather or on the tummy.
- Use plaid, denim, or upcycled shirt fabric for feathers to match your existing décor.
- Create a “family” of turkeys by changing their sizes and accessories to represent parents, grandparents, and kids.
Personal touches make the plush doll even more meaningful when it is brought out each Thanksgiving as part of your annual rituals.
Displaying Your Turkey Plush for Maximum Holiday Charm
Once your turkey plush is complete, the fun continues as you decide where to feature it during the holiday season. Thoughtful placement can turn a simple stuffed toy into a memorable conversation piece.
- Use it as a centerpiece on a low table, surrounded by faux leaves, small pumpkins, and candles in safe holders.
- Perch it on a mantel or bookshelf with other autumn accents like pinecones and framed family photos.
- Place a smaller plush at each child’s spot at the kids’ table as a take-home surprise.
Many families also like to include their turkey plush in annual photos, creating a visual record of children growing up alongside the same soft friend year after year.
Care, Storage, and Long-Term Preservation
A well-made turkey plush can last through many holiday seasons if you care for it properly when Thanksgiving is over. Proper storage protects the fabric and stuffing so it emerges from the box each year looking fresh and inviting.
- Spot clean stains with a damp cloth and mild soap, avoiding harsh scrubbing that could distort the fabric.
- Allow the plush to air dry completely before packing it away to prevent musty smells.
- Store in a breathable fabric bag or box away from direct sunlight, extreme heat, or dampness.
If you added embroidered dates or messages, consider taking a quick photo each year to document the plush as part of your evolving celebrations.
SEO-Friendly Quick Tips for Turkey Plush Crafters
Many makers like to share their turkey plush creations online for friends, family, or potential customers. A few simple content and photography habits can make your project easier to find and more appealing on blogs and social media.
- Use descriptive phrases like “DIY Thanksgiving turkey plush” and “handmade stuffed turkey toy” in image captions and post titles.
- Photograph the plush in bright natural light on a simple background with a few seasonal props.
- Include close-ups of details such as feathers, stitching, and embroidered faces to showcase your craftsmanship.
Sharing the story behind your plush—why you made it and how your family uses it—often resonates just as strongly as the finished photos.
Frequently Asked Questions About Thanksgiving Turkey Plush Dolls
How long does it take to make a turkey plush?
For a beginner working at a relaxed pace, a medium-sized turkey plush usually takes an afternoon or weekend to complete. The time varies depending on how many decorative details you add and whether you are sewing by hand or with a machine.
Can this project be done with children?
Yes, children can help with age-appropriate tasks like choosing fabrics, arranging feathers, and stuffing the body. Adults should handle cutting, pinning, and any steps involving sharp tools or hot irons to keep the experience safe and fun.
Do I need a sewing machine?
A sewing machine makes the project faster but is not required; careful hand stitching works well for smaller plushies or for crafters who enjoy slower, meditative sewing. Using sturdy stitches like backstitch and reinforcing seams will help a hand-sewn plush hold up over time.
What stuffing is best for turkey plush dolls?
Polyester fiberfill is the most common choice because it is lightweight, washable, and easy to adjust while stuffing. If you prefer natural materials, clean wool roving can also work, though it may change feel slightly over years of use.
Can I turn this into a gift or keepsake?
Absolutely; a handmade turkey plush makes a thoughtful hostess gift, child’s toy, or yearly surprise for relatives. Adding a stitched name, date, or brief message transforms it from a simple decoration into a sentimental heirloom.