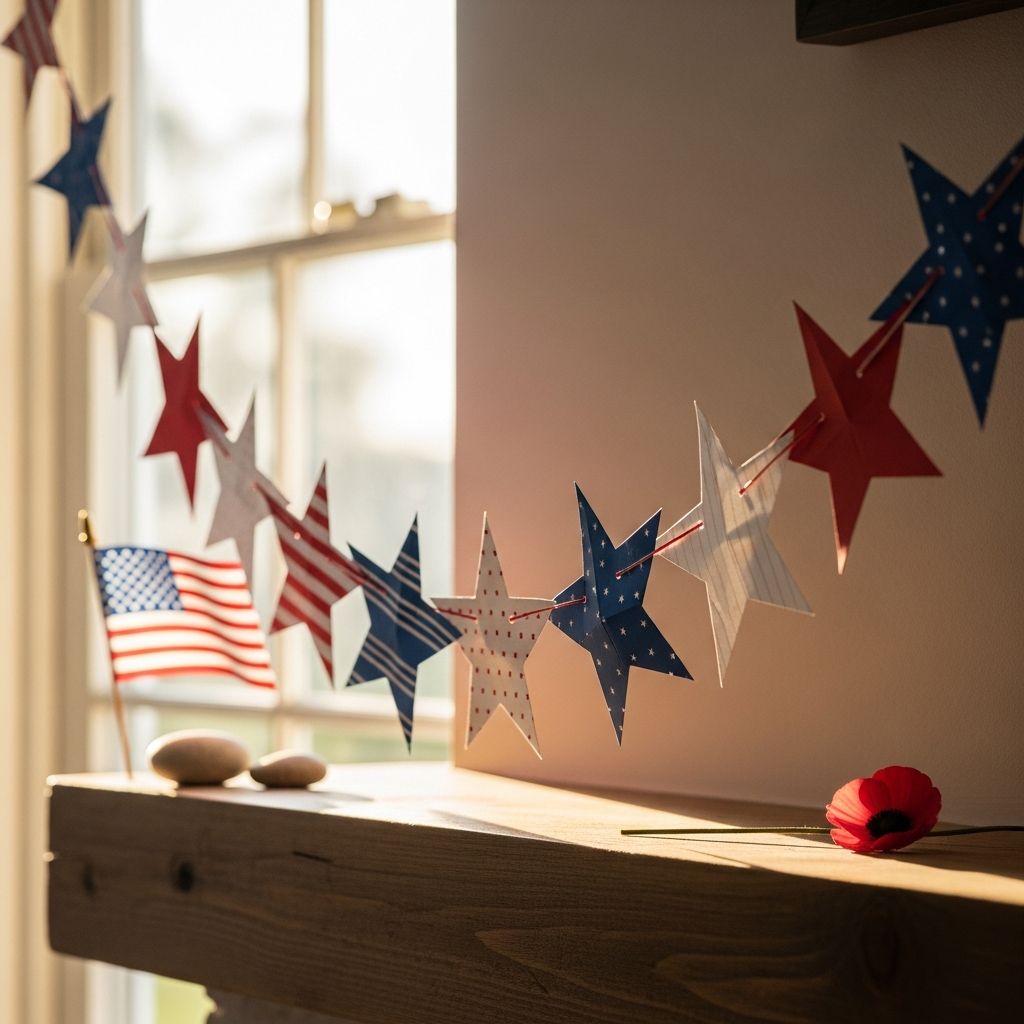
Memorial Day is more than a three-day weekend; it is an opportunity to slow down, remember, and talk with children about gratitude and service in a way they can understand. A simple star garland made from paper becomes both a festive decoration and a conversation starter about the meaning behind the red, white, and blue.
Why a Star Garland Is Perfect for Memorial Day
Stars are a natural symbol for patriotic holidays, echoing the stars on the flag while remaining easy enough for even young children to recognize and help create. A star garland works across many spaces, from a small apartment balcony to a classroom bulletin board, and can be adapted to virtually any skill level.
Because the project uses basic craft materials, families can focus less on shopping and more on talking, remembering, and enjoying time together. The finished garland feels cheerful and celebratory, but the process of making it offers quiet moments to share stories, names, and memories of those who have served.
Supplies You Will Need
You can customize this project with what you already have at home, but the list below offers a helpful starting point. Choose sturdy paper if you want the garland to last beyond a single holiday, and softer materials like yarn or baker’s twine if children will be handling the strand often.
- Red, white, and blue cardstock or construction paper
- Star-shaped cookie cutters, stencils, or star punches (optional but helpful)
- Scissors or child-safe scissors
- Hole punch or crafting awl
- String, baker’s twine, yarn, or thin ribbon
- Glue stick or white school glue
- Markers, crayons, or colored pencils (for messages and decoration)
- Optional: glitter glue, stickers, washi tape, sequins
- Optional: clear contact paper or self-adhesive laminating sheets for durability
If crafting with very young children, gather the materials in advance and pre-cut some of the shapes so kids can focus on decorating and stringing. This keeps the project fun and prevents frustration with more challenging cutting steps.
Planning Your Garland Design
Before cutting anything, decide on the overall look of the garland, including length, color pattern, and where you plan to display it. A little planning helps you prepare enough stars and ensures your final decoration feels intentional rather than thrown together at the last minute.
Think about how you will use color: you can alternate red, white, and blue in a repeating sequence, cluster stars by color in small groups, or create sections with different themes, such as a row of names followed by a row of plain decorative stars.
| Design Style | Color Pattern | Best For |
|---|---|---|
| Classic Patriotic | Red, white, blue repeating across the strand | Front porches, mantle displays, cookout backdrops |
| Memory Garland | Neutral background with star colors mixed as desired | Classrooms, scouting events, or family memorial corners |
| Kids’ Doodle Garland | Any combination of colors plus drawn patterns | Playrooms, kids’ bedrooms, and art-focused activities |
| Outdoor-Friendly Garland | Laminated or taped stars in high-contrast colors | Fences, patios, and garden parties |
Step-by-Step Instructions
These steps use paper stars strung onto a length of twine or ribbon, but you can adjust the details depending on the tools and materials you have. For example, using a star punch speeds up the process, while tracing around a cookie cutter offers more involvement for kids who enjoy drawing.
1. Create Your Star Shapes
Start by preparing the stars that will eventually form the body of your garland. Children old enough to use scissors safely will enjoy cutting out the shapes, while adults or older siblings can help with tracing and more precise cutting.
- Decide how many stars you want. As a general rule, plan for one star every 3–5 inches of garland length.
- Trace or punch star shapes from your red, white, and blue paper. Vary the sizes slightly for a more playful look.
- For thicker stars, glue two layers of paper together before cutting, or cut duplicate stars to glue back-to-back later.
2. Decorate With Messages and Details
Decoration can be purely visual or can include words and names that bring deeper meaning to the display. Give children ideas but let them lead with their own creativity, whether they prefer bold patterns or simple, meaningful words.
- Invite kids to write short words like “honor,” “thank you,” or “courage” on some of the stars.
- Write names or initials of family members, friends, or community members who have served, if appropriate.
- Add stripes, dots, or simple flag-inspired patterns using markers and crayons.
- Use stickers, small star stamps, or washi tape to add texture and sparkle without creating too much mess.
3. Prepare Stars for Stringing
Once the stars are decorated and dry, take a moment to prepare them for hanging. The way you attach them will affect how the garland drapes and how sturdy it feels when handled or hung outdoors.
- Use a single hole punch to add a hole near the top of each star point, or two holes side by side if you want the stars to lay flat.
- If your paper is thin, reinforce each hole with a small piece of clear tape before punching through to help prevent tearing.
- Alternatively, skip the punched holes and plan to glue the stars directly onto the twine instead of threading them.
4. String the Garland
Stringing the garland is usually the most satisfying step for kids, as they begin to see the decoration come together. Keep the strand flat on a table while working so stars do not slide out of place or twist more than you like.
- Cut a length of string or ribbon longer than you think you will need to allow room for tying at each end.
- Thread the string through each star hole in your desired color order, leaving equal spacing between stars.
- To keep stars from sliding, tie small knots before and after each star, or secure the back with a dot of glue.
- If you are gluing stars onto the string instead, lay out the stars face down, place the string across them, and glue a second star on top to sandwich the string.
5. Finish and Display
Once assembled, the garland only needs a few small adjustments before it is ready to hang. Encourage kids to choose the display spot, which helps them feel proud of their contribution to the family’s holiday traditions.
- Trim any excess string but leave enough at each end for tying to hooks, nails, or tape.
- Hang the garland across a mantle, along a porch railing, over a dessert table, or around a window frame.
- Check that stars face forward and gently twist or adjust any that have flipped during hanging.
Meaningful Variations for Different Ages
The basic paper star garland can easily be adapted for toddlers, school-age children, teens, or mixed-age groups. Adjusting the materials and expectations for each age level keeps everyone engaged and safe while contributing in a way that suits their abilities.
Consider turning the project into a yearly ritual, inviting children to add a new star each Memorial Day. Over time, the garland becomes a visual record of their growth as artists and of the memories your family has chosen to honor together.
Ideas for Toddlers and Preschoolers
- Pre-cut large stars from cardstock so young children only need to decorate.
- Offer chunky crayons, washable markers, and non-messy stickers instead of glitter.
- Let them help place stars on the string while an adult handles tying and trimming.
Ideas for School-Age Kids
- Invite them to trace and cut some of the stars themselves with child-safe scissors.
- Encourage them to write short notes of thanks on the backs of stars that only the family knows are there.
- Ask them to measure and mark equal spacing along the string using a ruler for a math tie-in.
Ideas for Teens and Group Projects
- Have teens design themed sections of the garland, such as one row featuring inspiring words and another row highlighting historical dates.
- Involve them in planning, from calculating materials to designing how the garland will frame a doorway or photo backdrop.
- For clubs or youth groups, let each person create one or two stars that reflect their personal connection to service or gratitude.
Tips for Durability and Outdoor Use
If you would like your garland to last more than one day or to withstand a bit of outdoor breeze, consider a few simple upgrades. Strengthening the paper and protecting the decorations will help your garland survive handling, transport, and light weather changes.
- Choose heavier cardstock or thin cardboard instead of lightweight construction paper.
- Cover each star with clear contact paper before punching holes to create a water-resistant surface.
- Use strong twine or narrow ribbon rather than thread, which can tangle or break more easily.
- Hang the garland in a sheltered spot, such as under a covered porch, to avoid direct rain and strong wind.
Incorporating Reflection and Conversation
Beyond the fun and color, this craft offers a gentle opening to talk with children about why Memorial Day exists. As hands are busy tracing, cutting, and gluing, kids are often more comfortable asking questions and listening to stories than they would be during a formal conversation.
You might choose to dedicate certain stars to specific people, to write simple phrases expressing gratitude, or to read a short age-appropriate explanation of the holiday while everyone works. The goal is not to deliver a history lecture but to connect meaningfully with one another while creating something beautiful together.
Frequently Asked Questions
How long does this project take?
The time needed depends on how many stars you plan to make and how elaborate the decorations are. A small garland of 10–15 stars can usually be completed in under an hour, while a longer, message-filled garland might stretch across an afternoon, especially with younger helpers.
Can this garland be reused for other patriotic holidays?
Yes, a simple red, white, and blue star garland works well for several holidays, including Memorial Day, Flag Day, and the Fourth of July. If you want to reuse it, avoid writing specific dates directly on the stars, or place those dated stars on removable clips so they can be swapped out.
What if I do not have star-shaped tools?
Perfect stars are not required for this project; hand-drawn shapes add charm and personality. You can fold paper to create simple symmetrical stars or even substitute hearts, circles, or flag-shaped rectangles if that is easier for your group.
Is this craft suitable for classrooms?
This project adapts well to classroom use, especially when broken into stations such as tracing, cutting, decorating, and stringing. Consider having students each create one star and then connecting them into a single class garland to display in a hallway or on a bulletin board.
How can I make the garland more eco-friendly?
To reduce waste, use recycled paper, old gift bags, or the blank sides of printed documents for your stars. When the garland has reached the end of its life, remove any tape or non-paper decorations and recycle the remaining paper components where facilities allow.
A handmade patriotic star garland offers more than decoration. It creates a space for gratitude, storytelling, and togetherness, turning simple paper shapes into a meaningful tradition your family or group can return to every Memorial Day.