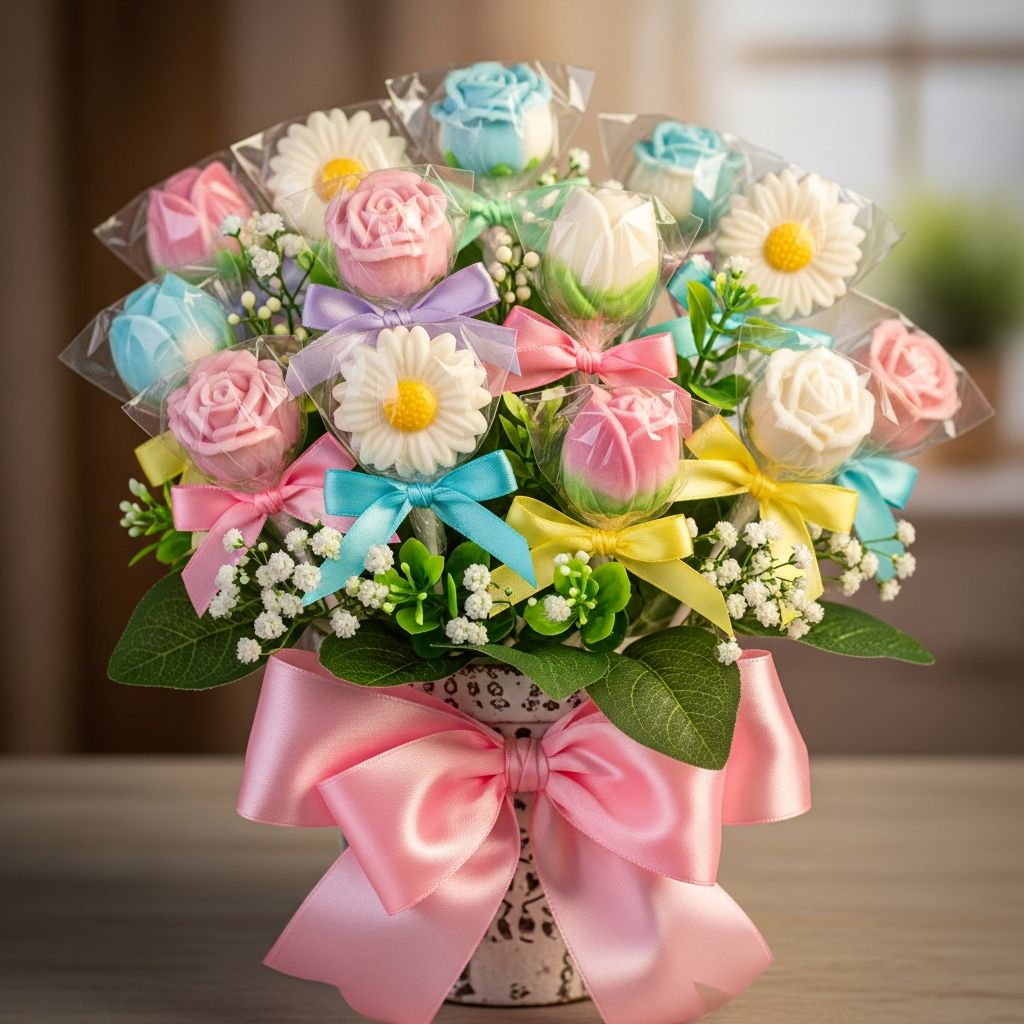
A homemade lollipop bouquet is a playful twist on traditional flowers, combining bright colors, candy, and creativity into one memorable gift. It is budget-friendly, customizable for any style, and perfect for showing appreciation on Mother’s Day or any day you want to celebrate Mom.
Why a Lollipop Bouquet Makes a Perfect Mom Gift
Fresh flowers are lovely, but they fade quickly, while a lollipop bouquet turns into a treat Mom can enjoy for days or share with friends and family. It also allows children and adults to collaborate on a gift that feels personal, thoughtful, and just a little whimsical.
- It doubles as decor and dessert, brightening a table before becoming a sweet snack.
- It can be tailored to your mom’s favorite colors, flavors, and style, from minimalist to maximalist.
- It works for any skill level; even beginners can successfully assemble a charming bouquet with a few simple steps.
Planning Your Lollipop Bouquet Design
Before buying supplies, take a moment to imagine the finished bouquet so you can shop and craft with intention. Thinking through colors, size, and theme helps avoid last-minute stress and ensures the gift looks cohesive rather than thrown together.
- Color palette: Choose two or three main colors inspired by spring, Mom’s favorite shades, or a room where the bouquet will be displayed.
- Style: Decide whether you want a classic “flower pot” look, a wrapped hand bouquet, or a modern arrangement in a glass jar.
- Portion size: Consider how many people might share the candy; more guests usually means using a larger container and extra lollipops.
Materials and Tools Checklist
Gathering all materials in advance makes the crafting process smooth and enjoyable. You can adjust this list based on what you already have at home and how elaborate you want your bouquet to be.
| Item | Purpose | Suggested Alternatives |
|---|---|---|
| Lollipops (assorted flavors) | Form the “flowers” in the bouquet. | Chocolate pops, cake pops, or marshmallow pops. |
| Container or vase | Holds the arrangement and anchors the foam. | Teacup, mug, small planter, or recycled jar. |
| Craft foam block or ball | Stabilizes lollipop sticks and creates the rounded shape. | Tightly packed floral foam or a dense styrofoam piece. |
| Tissue paper or shredded paper | Covers exposed foam and fills any gaps. | Fabric scraps or paper confetti. |
| Ribbon or twine | Adds a decorative finishing touch. | Lace, raffia, or yarn. |
| Craft glue or hot glue gun | Secures foam and embellishments. | Double-sided tape for light decorations. |
| Cardstock gift tag | Displays a handwritten message for Mom. | Small note card or folded scrapbook paper. |
Step-by-Step: Building the Candy Base
The base of the lollipop bouquet acts like the stem structure in a flower arrangement, so it needs to be secure and well balanced. Preparing this foundation first will make inserting the lollipops much easier and prevent tipping.
- Prepare the container: Clean and dry your chosen vase, mug, or pot. If it is lightweight, add a small layer of stones or beans at the bottom for extra stability.
- Shape the foam: Cut the foam to fit snugly inside the container, with the top slightly rounded or level with the rim, depending on the look you want.
- Secure the foam: Use craft glue or hot glue around the sides or bottom of the foam so it stays anchored inside the container once the lollipops are added.
Arranging the Lollipops Like Flowers
In this phase, the bouquet starts to look alive with color and height. Working methodically keeps the spacing even, but you can still leave room for a bit of spontaneity and playfulness.
- Sort the lollipops: Group them by color or flavor so you can decide whether to create color blocks or a random rainbow effect.
- Start at the outer edge: Insert the first circle of lollipops around the outer rim of the foam, angling them slightly outward like the petals of an open bloom.
- Fill toward the center: Add more lollipops in concentric rings, gradually working your way to the top center until the foam is covered.
- Check spacing: Step back occasionally to check for gaps or uneven areas and adjust any lollipops that look too high or low.
Adding Decorative Details and Personal Touches
A lollipop bouquet becomes truly special when it reflects Mom’s personality and your family’s story. Simple, low-cost embellishments can transform the arrangement from “cute” to “keepsake.”
- Tissue paper blossoms: Tuck small pieces of tissue paper between lollipops to resemble petals or leaves and to hide any visible foam.
- Ribbons and bows: Tie a ribbon around the container or create a bow at the front to echo your chosen color palette.
- Photo or message tag: Attach a tiny photo of you and Mom, or write a short handwritten note on a cardstock tag and secure it on a wooden skewer or stick.
Ideas for Customizing the Bouquet for Different Moms
No two moms are alike, and the best homemade gift feels tailored to the person receiving it. You can adapt the same basic technique to match her hobbies, tastes, and favorite colors.
- The tea-lover bouquet: Mix lollipops with individually wrapped tea bags folded into fan shapes and tucked around the base.
- The gardening mom bouquet: Use a small plant pot as the container, and add miniature plant markers with uplifting phrases instead of plant names.
- The minimalist mom bouquet: Choose lollipops in two neutral tones, use a plain white mug, and keep embellishments simple and streamlined.
Making It a Family Craft Activity
Creating the bouquet can be as meaningful as giving it, especially when children or multiple generations work together. Each person can have a role, making the gift a shared expression of gratitude.
- Young children can help sort lollipops by color, hand materials to adults, and stick tissue paper between candy pieces.
- Older kids can assist with drawing or lettering the gift tag, grouping colors, or planning the overall arrangement.
- Adults can handle cutting foam, using hot glue, and ensuring the bouquet remains stable and safe.
Display and Gifting Ideas
How you present the bouquet can elevate the entire experience for Mom. A bit of staging turns a simple craft project into the centerpiece moment of a celebration or quiet breakfast in bed.
- Place the bouquet at the center of a Mother’s Day brunch table with coordinating napkins and plates.
- Arrange it on a breakfast tray along with coffee, juice, and a handwritten card delivered first thing in the morning.
- Pair the bouquet with a framed photo, a favorite book, or a small plant to create a thoughtful gift bundle.
Safety, Storage, and Allergy Considerations
Since the bouquet is edible, it is important to think about ingredient labels and storage conditions. A little planning keeps the gift safe and fresh while still looking beautiful.
- Check candy labels for common allergens such as nuts, dairy, or gluten if Mom or other family members have sensitivities.
- Store the bouquet away from direct sunlight and heat to prevent wrappers from loosening or colors fading.
- If you expect the bouquet to last more than a few days, consider wrapping it loosely in clear cellophane to protect from dust.
Sample Lollipop Bouquet Variations
Once you master the basic technique, it becomes easy to adjust the theme and reuse the idea for other celebrations. A single concept can turn into a go-to gift solution throughout the year.
| Occasion | Color Theme | Extra Elements |
|---|---|---|
| Mother’s Day | Soft pastels or Mom’s favorite colors. | Heart-shaped tag, floral-patterned ribbon. |
| Birthday | Bright rainbow or metallic accents. | Mini balloons on sticks, “Happy Birthday” banner pick. |
| Teacher Appreciation | School colors or primary shades. | Pencil or crayon embellishments, apple-shaped tag. |
| Baby Shower | Soft pinks, blues, or gender-neutral pastels. | Baby-themed confetti, tiny pacifier charms. |
Frequently Asked Questions (FAQs)
How many lollipops do I need for one bouquet?
The number depends on the size of your foam base and how tightly you place the lollipops. A small mug-sized arrangement may require around 25–35 lollipops, while a larger flower pot can easily hold 50 or more.
Can I use different types of candy instead of lollipops?
Yes, as long as the candy is on a stick or can be attached to a stick, it will work in a similar way. You can mix traditional lollipops with chocolate pops, marshmallow pops, or even individually wrapped candies hot-glued to skewers.
How far in advance can I make the bouquet?
You can assemble the bouquet several days in advance if you store it in a cool, dry place. For best appearance and freshness, aim to finish the arrangement one or two days before giving it.
Is a lollipop bouquet suitable for moms who do not eat much sugar?
If you want to limit sugar, consider using sugar-free lollipops or mixing in small non-edible tokens, such as tiny notes of appreciation, coupons for experiences, or miniature self-care items attached to sticks.
How do I keep the bouquet from tipping over?
Choose a sturdy, wide-bottomed container and ensure the foam fits snugly inside. Adding a layer of stones, beads, or dry beans to the bottom of the container can also help weigh it down and keep it stable.
Turning a Simple Craft into a Lasting Memory
A lollipop bouquet might be made from everyday materials, but the real value lies in the time and care poured into each step. When Mom sees a colorful, handmade bouquet created just for her, the message is clear: she is loved, appreciated, and worth every sweet detail.
Whether you keep the design simple or experiment with elaborate themes, this project offers a charming way to celebrate Mother’s Day and create a keepsake moment that everyone will remember long after the last lollipop is gone.