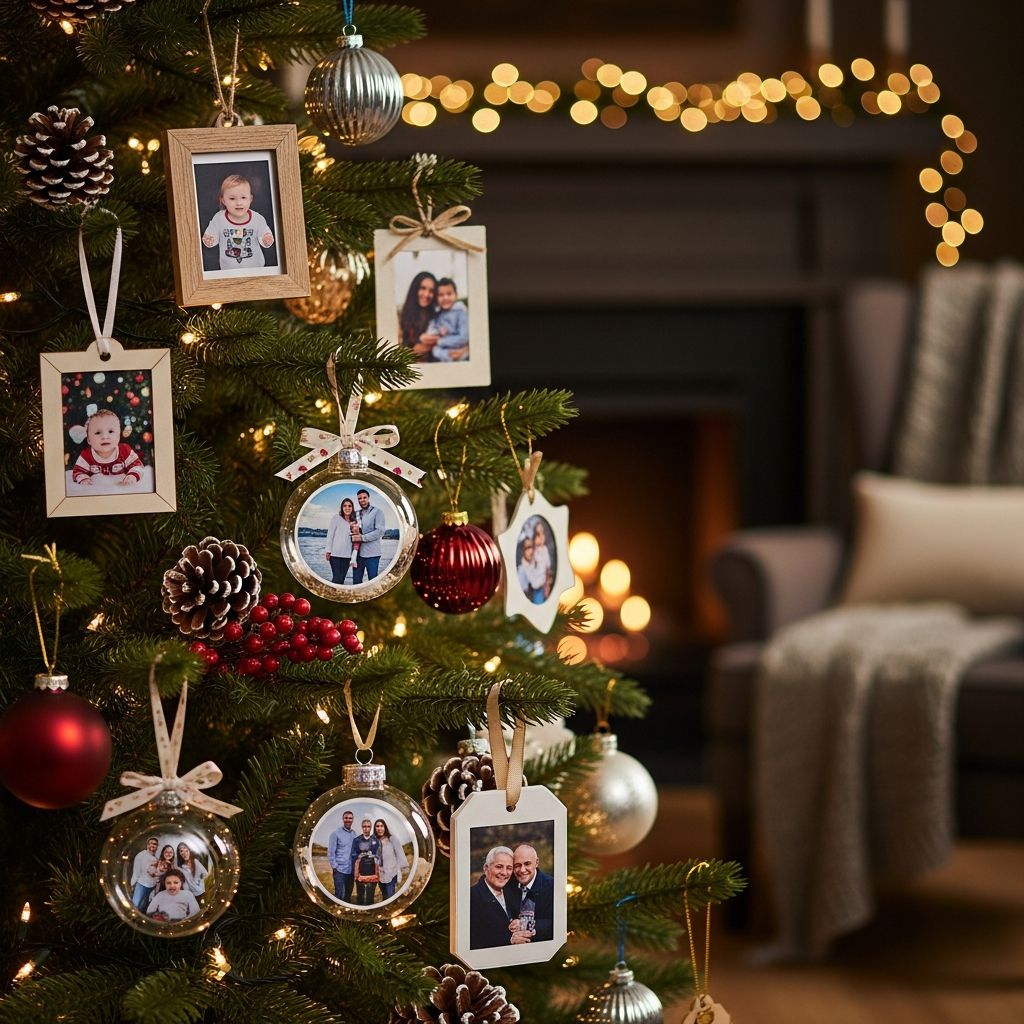
Holiday trees become far more special when they tell the story of your family. One of the easiest ways to do that is by turning favorite pictures into family photo ornaments that celebrate milestones, personalities, and traditions. Instead of buying only generic baubles, you can create custom keepsakes that will make everyone pause and reminisce each year you unpack them.
This guide walks you through practical and creative ideas for making photo ornaments, from ultra-simple print-and-hang options to more artistic DIY designs. You will also find tips for choosing photos, keeping them safe over time, and involving kids of all ages in the process.
Why Add Family Photos to Your Christmas Tree?
Photo ornaments blend decoration with storytelling. Beyond looking pretty, they help children build a sense of identity and continuity as they see themselves and loved ones represented in family spaces during important rituals like holiday decorating, which researchers note can reinforce shared family values and traditions.
- Celebrate milestones: Mark first holidays, new homes, graduations, engagements, or new pets.
- Honor relatives: Keep grandparents, extended family, and loved ones who have passed away close during the season.
- Document growth: See how kids change from year to year with a visual timeline on the tree.
- Create conversation: Guests naturally ask about the stories behind each picture.
- Build tradition: Making one new ornament per year can become a cherished family ritual.
Choosing the Right Photos for Ornaments
Not every photo will translate well onto a small ornament. A bit of planning will help your designs look clean, legible, and intentional.
Photo Selection Tips
- Focus on faces: Pick images where faces are large and centered; tiny details will get lost at ornament size.
- Use bright, high-contrast images: Light, clear photos are easier to see across the room.
- Crop distractions: Tight cropping reduces background clutter and makes the subject pop.
- Mix candid and posed: Combine silly moments, holiday snapshots, and formal portraits.
- Vary time periods: Include both older photos and recent ones for a sense of history.
Print Quality and Finishes
To help your ornaments last, choose printing options that can withstand light, handling, and time. Tests on photo preservation show that high-quality photo paper and pigment-based inks can remain stable for decades when stored in reasonable conditions. While ornaments are not stored like museum pieces, you can still benefit from durable prints.
- Photo paper: Semi-gloss or luster reduces glare while still giving vibrant color.
- Matte finish: Good for reducing fingerprints on frequently handled ornaments.
- Backup prints: Print a second copy of especially meaningful images in case an ornament breaks.
Simple, Beginner-Friendly Photo Ornament Ideas
You do not need advanced crafting skills or specialized equipment to begin. These easy options rely mainly on scissors, glue, and store-bought blanks.
1. Ready-Made Photo Frame Ornaments
Many craft and home stores sell small frames designed for hanging on a tree. These are the easiest path to instant personalization.
- Buy mini frames in your preferred style (wood, metal, glitter, rustic, or modern).
- Print photos slightly larger than the frame opening and trim to fit.
- Add a handwritten label on the back with the year and names.
- Use ribbon that matches your tree colors for a coordinated look.
2. Clear Fillable Ball Photo Ornaments
Clear plastic or glass ornament balls can be opened and filled with rolled or curved photos.
- Print your photo on lightweight paper and trim it into a circle or oval.
- Gently roll it into a tube and slip it inside the ornament.
- Let it uncurl and rest against the interior wall.
- Surround the photo with faux snow, glitter, confetti, or small paper stars.
3. Laminated Flat Photo Tags
Laminated ornaments are durable and kid-proof, making them ideal for households with young children. Laminating offers a moisture-resistant barrier that protects against spills and fingerprints.
- Print photos on cardstock or standard paper.
- Cut them into shapes such as circles, stars, or gift tags.
- Place them into laminating pouches and seal.
- Punch a hole at the top and add a ribbon or twine hanger.
Creative DIY Designs for Craft Lovers
If you enjoy crafting, you can turn photos into more elaborate art pieces using simple supplies like paint, paper, and wood. You do not need to copy any single style; instead, treat the photo as the star and build a small scene or design around it.
4. Mini Canvas Gallery Ornaments
Small stretched canvases give a painterly, art-gallery feel to your tree.
- Buy mini canvases or canvas boards from the craft aisle.
- Paint the edges or background in colors that complement your tree.
- Print photos slightly smaller than the canvas front.
- Attach photos with decoupage medium or strong glue, smoothing out bubbles.
- Seal the entire front lightly with decoupage for a unified finish.
5. Rustic Wood Slice Photo Discs
Wood slices offer a cozy, natural base that pairs well with farmhouse or cabin-style trees.
| Step | Action |
|---|---|
| 1 | Lightly sand the surface of each wood slice if needed. |
| 2 | Drill or confirm a small hole near the top edge for hanging. |
| 3 | Print and trim photos into circles or ovals to fit the slice. |
| 4 | Glue the photo to the wood; press firmly to adhere. |
| 5 | Seal with a clear, non-tacky topcoat once fully dry. |
Add details like hand-lettered names, burned-in dates (if you have a wood burner), or small painted stars around the edge.
6. Paper Layered Shadow Ornaments
Layering cut paper under and around a photo gives a shadow-box effect without needing an actual box.
- Cut a sturdy cardstock base in your chosen shape.
- Add a slightly smaller piece of patterned paper on top.
- Mount the photo on foam tape to raise it above the background.
- Embed tiny paper cutouts like trees, snowflakes, or hearts around the photo.
- Finish with a thin border of glitter glue or metallic pen.
Designing a Cohesive Photo-Themed Tree
It is possible to combine many different photos without your tree looking cluttered or chaotic. A few simple design decisions can tie everything together.
Color and Style Coordination
- Pick a limited palette: For example, white, gold, and forest green, or silver and blue.
- Repeat frame materials: Use mostly wood, or mostly black frames, to unify mixed photos.
- Balance photo ornaments with plain ones: Intermix solid-color balls to give the eye a place to rest.
- Place large photos lower: Heavier or bigger ornaments look better on sturdy lower branches.
Creating Themed Clusters
Organizing ornaments in clusters helps tell mini-stories within your larger tree.
- By person: A zone for each child, grandparent, or couple.
- By era: Childhood photos grouped together, then more recent ones.
- By event: Weddings, first-day-of-school photos, or travel memories.
Making Ornaments Kid-Friendly and Inclusive
Inviting children to participate in ornament-making can support their sense of competence and belonging in the family, aligning with research highlighting the importance of shared family activities for children’s emotional development.
Age-Appropriate Tasks
- Toddlers: Stickers, handing you ribbon pieces, choosing which photo goes where.
- Preschoolers: Gluing paper, sprinkling glitter into clear ornaments, placing foam shapes.
- School-age kids: Trimming photos, writing dates and names, planning themes.
- Teens: Designing layouts, digital editing, photographing the finished tree.
Safety Considerations
- Use plastic instead of glass ornaments with very young kids.
- Keep hot glue guns and sharp scissors under adult control.
- Hang fragile or sentimental ornaments higher out of reach of pets and small children.
Preserving and Storing Photo Ornaments
With a little care, your ornaments can last for years and become part of your family history. Guidance on photo preservation from archives emphasizes limiting exposure to extreme temperatures, moisture, and direct light.
Before You Pack Them Away
- Let glue cure fully: Ensure adhesives and sealants are completely dry before storage.
- Photograph your tree: Take a few wide shots and close-ups to record that year’s arrangement.
- Update records: If you keep a holiday journal, note any new ornaments and their stories.
Smart Storage Practices
- Use divided boxes: Place fragile or heavy ornaments in individual compartments.
- Wrap carefully: Wrap especially meaningful pieces in acid-free tissue or soft cloth.
- Store in stable conditions: Avoid attics or damp basements; aim for a cool, dry closet.
- Label containers: Mark boxes that contain photo ornaments so you can find them easily next year.
Yearly Traditions Built Around Photo Ornaments
Turning photo ornaments into a tradition can make each December feel connected to the last. Repeated, meaningful traditions have been linked with stronger family cohesion and a shared sense of identity across generations.
Ideas for Ongoing Traditions
- One ornament per year per child: Choose a photo that best represents that child’s year.
- Firsts series: First Christmas, first day of school, first home, first pet.
- Travel tree: If you travel, add one ornament per trip with a related photo.
- Story night: On one December evening, go around the tree and let each person describe the memory behind one of their ornaments.
Common Questions About Family Photo Ornaments
How do I keep photo ornaments from fading?
Use good-quality photo prints, avoid hanging the tree in direct strong sunlight, and consider sealing paper-based ornaments with a non-yellowing clear topcoat. Store them in a cool, dry place away from heat sources and moisture, following general guidelines for photo preservation.
Can I use home-printed photos, or do they need to be professionally printed?
You can use either. Professional photo labs typically use more durable inks and papers, but many modern home printers also produce good results if you use photo paper and choose high-quality settings. For especially meaningful or heirloom ornaments, consider professional prints for added longevity.
What if I want to change the photo later?
Choose designs that allow easy swapping, like mini frames with back openings or clear ornaments that can be opened. For glued or sealed designs, you can plan to make new ornaments in future years instead of replacing the photo.
How many photo ornaments are too many?
There is no strict rule. If your tree starts to feel visually crowded, mix in more simple, non-photo ornaments for balance. Some families dedicate one tree mainly to photos and keep a second, smaller tree for kids’ crafts or themed decor.
What is the best way to include relatives who live far away?
Ask them to send a favorite snapshot each year, either digitally or by mail, and create an ornament from it. You can mail them a corresponding ornament featuring your family so that both households share parallel keepsakes.
Getting Started This Season
You do not need to transform your entire tree at once. Begin with a single evening, a handful of printed photos, and a small set of simple ornaments. Over time, you will build a collection that turns unboxing decorations into a walk through your family’s story. Whether you prefer quick plug-and-play frame ornaments or more elaborate handmade pieces, photo ornaments can quietly anchor your holidays in memory, gratitude, and connection.
References
- Fiese BH, Foley KP, Spagnola M. Routine and ritual elements in family mealtimes. — New Directions for Child and Adolescent Development. 2006-03-01. https://doi.org/10.1002/cd.152
- Guide to Preservation of Photographs — Northeast Document Conservation Center (NEDCC). 2020-05-01. https://www.nedcc.org/free-resources/preservation-leaflets/5.-photographs/5.1-preservation-of-photographs
- Storing Family Photographs — Library of Congress. 2017-08-10. https://www.loc.gov/preservation/care/photo.html
- Christmas Craft Ornaments — Hobby Lobby. 2024-11-01. https://www.hobbylobby.com/christmas-decorations/christmas-crafts/christmas-craft-ornaments/c/58-800-801