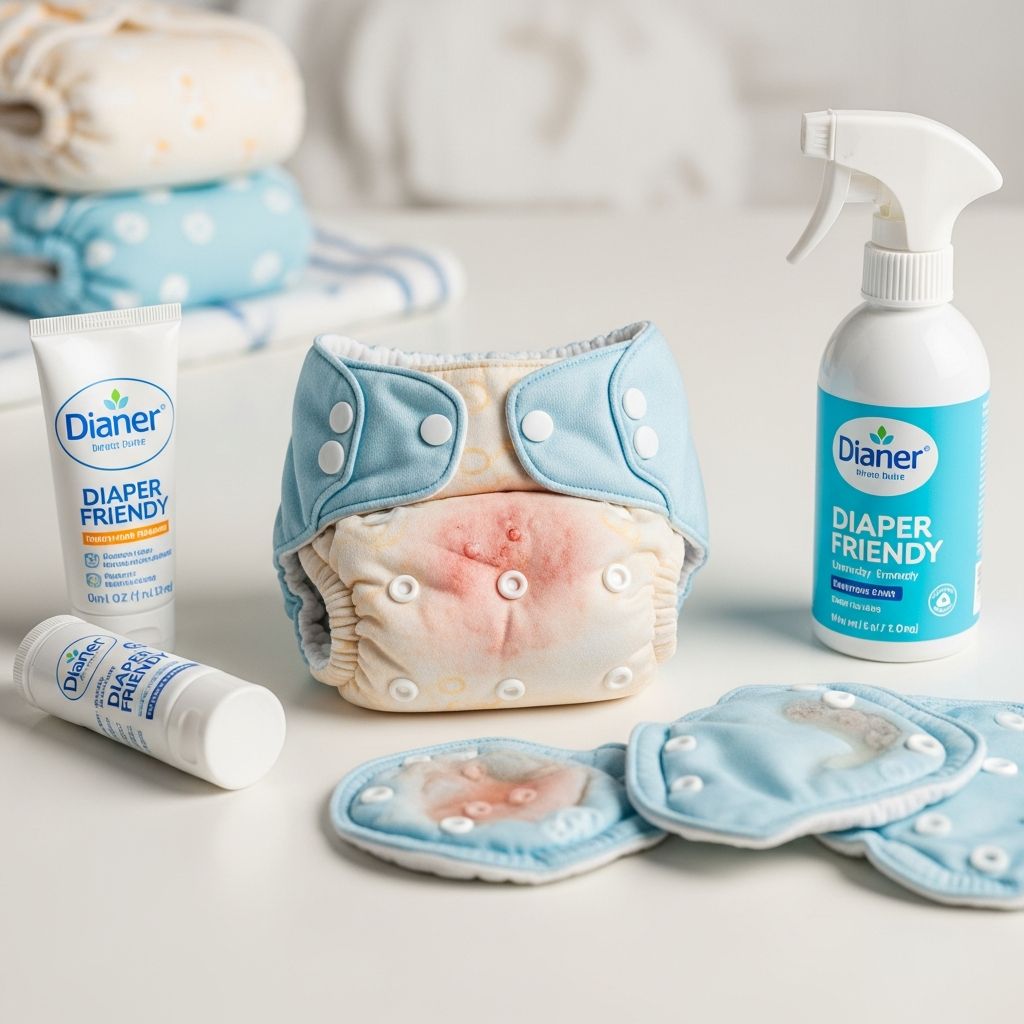
Choosing cloth diapers often feels like the healthy, eco-friendly, and budget-conscious choice. Yet many parents eventually run into the same two problems: rashes that won’t quit and covers that don’t seem waterproof anymore. This guide walks you through why these issues happen and how to fix them without giving up on cloth.
Why Cloth Diapers Sometimes Go Wrong
Cloth diapers work on a simple idea: an absorbent layer to hold moisture plus a barrier layer (usually PUL or TPU) to keep clothing dry. When either layer isn’t performing as designed, you see leaks, redness, or persistent smells.
Most problems fall into one or more of these categories:
- Build-up of detergent, minerals, or creams on the fabric
- Incorrect wash routine (too much or too little detergent, not enough water)
- Poor fit or not enough absorbency for your baby’s output
- Damaged waterproof layer or heat-related wear
- Skin irritation from moisture, friction, or infection rather than the diaper itself
Understanding Cloth Diaper Rashes
Parents often assume any rash in a diaper area is caused by the diaper, but the skin story is more complex. Diaper dermatitis is usually triggered by prolonged contact with moisture, urine, and stool, which alters the skin’s protective barrier and allows irritation and microbes to flourish.
Common Types of Diaper Rash
| Type of Rash | Typical Appearance | Possible Cause |
|---|---|---|
| Irritant contact rash | Flat, red patches where skin touches wet diaper most | Prolonged moisture, urine, or stool exposure |
| Candida (yeast) rash | Beefy-red, shiny rash with small red “satellite” spots | Overgrowth of yeast, often after antibiotics or long rash |
| Allergic/contact rash | Raised, itchy, sometimes in areas touching a specific material or product | Reaction to detergent, wipes, cream, or fabric |
How Cloth Diapers Can Contribute to Rash
- Trapped moisture: Some babies are more sensitive to feeling damp, especially with natural fibers directly on skin.
- Detergent or ammonia build-up: Residue left in diapers can irritate skin or increase the pH of urine, making rashes worse.
- Residual yeast or bacteria: After a fungal or bacterial infection, organisms can linger in fibers and keep re-irritating the skin if diapers aren’t fully disinfected.
- Friction: Bulky or stiff diapers can rub, especially at the thighs or waist, irritating already fragile skin.
- Barrier creams that don’t wash out: Thick, petroleum-based creams can coat fibers and trap moisture against the skin.
Step-by-Step Plan for Managing Diaper Rash with Cloth
Most mild diaper rashes improve within a few days when you combine good skin care with a smart cloth routine.
1. Change Diapers More Frequently
- Aim for every 2 hours during the day and as soon as possible after bowel movements.
- For rash-prone babies, consider nighttime changes instead of leaving one diaper on all night if skin is already irritated.
2. Protect the Skin Barrier
- Use a thick, fragrance-free barrier cream at each change for active rash, unless your pediatrician has prescribed a specific medicated product.
- If the cream is not cloth-safe, add a reusable fleece or cotton liner between baby and the diaper to keep ointment off the fibers.
- Allow a few minutes of air-drying when practical before putting the next diaper on.
3. Address Possible Yeast or Infection
If the rash is very red, has satellite spots, lasts more than a few days, or is not improving with barrier creams, yeast infection is a strong possibility.
- See a healthcare provider for a proper diagnosis and appropriate antifungal or antibacterial treatment.
- During treatment, discuss whether to use disposable diapers temporarily or how to thoroughly sanitize cloth.
4. Deep Clean and Disinfect Cloth Diapers After Yeast
When yeast has been present, your cloth diapers should be fully disinfected so the infection does not keep cycling back.
- Wash all diapers and inserts in hot water with adequate detergent.
- Use an appropriate disinfection step, such as a diluted chlorine bleach soak on absorbent inserts or a hot wash with an approved disinfecting additive, following manufacturer and safety guidelines.
- Rinse thoroughly to remove residue and let diapers dry completely before reuse.
Why “Waterproof” Cloth Diaper Covers Start Leaking
When a diaper cover or pocket that used to work suddenly starts leaving damp spots, you are usually dealing with one of three issues:
- Absorbency problem: The insert is simply full; leaks appear at leg holes or waistband.
- Repelling or compression leaks: Fibers push moisture out instead of drawing it in (often due to build-up or pressure from snug clothes).
- Compromised waterproof layer: The PUL/TPU has been damaged or worn out, so liquid passes through the shell.
Quick At-Home Tests for Cloth Diaper Leaks
- Bead test on the shell: Lay the clean, dry cover flat. Drip a bit of water on the outer side.
- If water beads up and can be wiped away, the waterproof layer is still functioning.
- If water soaks into the fabric and spreads, the waterproof coating may be compromised.
- Absorbency test on the insert: Slowly pour water onto the clean insert.
- If water pools then rolls off, the fibers are likely coated with residue and need stripping.
- If water absorbs easily but the diaper still leaks in real use, your baby likely needs more layers or more frequent changes.
- Fit check:
- Gaps at the thighs or back often explain sudden leaks, especially after a growth spurt or weight change.
Fixing Absorbency and Repelling Problems
Most absorbency-related leaks can be fixed with either more absorbent material or a targeted deep clean.
1. Right Fiber for the Right Job
- Natural fibers (cotton, bamboo, hemp) usually hold more liquid and are more tolerant of high-heat washing than microfiber.
- Microfiber absorbs quickly but can feel dry on the surface while being saturated inside and can be prone to repelling when coated with creams or detergent.
- For heavy wetters or nighttime, consider layering a fast absorber (cotton or microfiber) over a long-term holder (bamboo or hemp) in the pocket or under the cover.
2. Adjusting the Wash Routine
The goal is simple: fully clean diapers with no residue left behind. Problems appear at both extremes: too much detergent or too little, too soft water or very hard water.
- Use a wash cycle with enough water and agitation for the size of your load.
- Use an amount of high-quality detergent appropriate for heavily soiled items (diapers) and your water hardness.
- Add an extra rinse if you often see suds at the end of the wash.
- In hard water, consider a water softener or conditioner to reduce mineral build-up in fibers.
3. Stripping Cloth Diapers When Build-Up Is Severe
When diapers repel liquid, smell strongly of ammonia, or stay smelly even after washing, a one-time stripping routine can help remove accumulated detergent, oils, and minerals.
- Start with clean diapers: Wash as usual first.
- Prepare hot water: Fill a tub, sink, or top-loading washer halfway with very hot water (per fabric and manufacturer limits).
- Add a stripping agent: Use a commercial laundry treatment or a mineral-removing mix recommended for cloth diapers. Stir to dissolve.
- Soak inserts and absorbent parts for 4–6 hours, stirring occasionally. Avoid soaking PUL covers for long periods if the manufacturer cautions against it.
- Drain and squeeze out excess water.
- Rinse thoroughly: Run a full wash cycle without detergent to flush out loosened residue.
- Optional disinfecting step: For lingering odor concerns, follow with a carefully diluted bleach soak on inserts only, then wash again.
Stripping is hard on fabrics and should be used sparingly to fix past problems, not as a weekly habit.
Protecting and Troubleshooting Waterproof Covers
The thin waterproof membrane (often PUL/TPU) is what keeps wetness inside the diaper. Over time, this layer can weaken, peel, or become porous.
How Waterproof Layers Get Damaged
- Repeated high-heat drying beyond what the manufacturer recommends can accelerate breakdown.
- Boiling or very hot water used outside care guidelines can warp the laminate.
- Harsh chemicals or undiluted bleach can prematurely age the fabric.
- Simply heavy long-term use—all diapers eventually wear out.
Extending the Life of Your Covers
- Follow manufacturer temperature limits for washing and drying.
- Hang-dry covers when possible, or choose low-heat settings.
- Avoid strong solvents and undiluted bleach on shells.
- Rotate enough covers so the same ones are not in constant, daily heavy use.
When to Retire a Leaky Cover
If your bead test shows the outer fabric is absorbing water and not beading at all, and you have ruled out fit and absorbency problems, the waterproof layer may be truly worn out. At that point:
- Consider re-purposing the cover as a swim diaper shell (if it still fits well and you can monitor closely for leaks).
- Use it for training pants during potty learning when only minor dampness is expected.
- Retire it from regular nap or overnight use where reliable waterproofing is essential.
Optimizing Fit to Prevent Leaks and Red Marks
Even the cleanest, most absorbent diaper will leak if the fit is off.
Signs of Poor Fit
- Gaps at the legs where you can easily see inside the diaper.
- Deep red marks that last long after changes (a faint line is normal; sharp indentations are not).
- Leaks that always occur at the same spot (top of the back, thighs, or tummy).
Simple Fit Adjustments
- Check the rise snaps on one-size diapers; let them out as baby’s torso lengthens or close them more snugly on a smaller baby.
- Fasten the waist snug enough that you cannot easily pull the diaper down, but not so tight that it digs in.
- After fastening, run a finger around the leg elastic to ensure it sits in the underwear line crease, not on the thigh.
- Avoid very tight pants over bulky diapers, which can cause compression leaks—where pressure squeezes liquid out of the absorbent core.
Cloth Diaper Care and Safety Tips
Because diapers are used many times a day on sensitive skin, basic hygiene and safety are critical.
- Always store soiled diapers in a dry pail or wet bag with good airflow until wash day.
- Wash diapers at least every 2–3 days to reduce bacterial growth and odor.
- Keep laundry products, disinfectants, and essential oils out of reach of children and use according to label directions.
- When in doubt about a severe rash, fever, blisters, or open sores, seek medical evaluation promptly.
Frequently Asked Questions (FAQs)
Q: How can I tell if my baby’s rash is from cloth diapers or something else?
A: If a rash improves with more frequent changes, barrier cream, and air time, it is likely related to moisture and irritation rather than the diaper material itself. Rashes that persist more than a few days, form bright-red patches with satellite spots, or appear in skin folds may indicate yeast or another condition that needs medical evaluation.
Q: Do I need to switch to disposables every time there is a rash?
A: Not necessarily. Many rashes improve while continuing to use cloth if you change more often, protect skin with barrier creams and liners, and ensure diapers are fully clean. Healthcare providers sometimes recommend temporary disposables during yeast treatment to simplify disinfection, but this depends on the severity and your ability to sanitize cloth properly.
Q: Are natural detergents always better for cloth diapers?
A: Not always. Some very mild or soap-based detergents may not remove heavy soiling effectively, which can lead to build-up and odor over time. What matters most is using a detergent that rinses clean, is suitable for your water type, and is strong enough for heavily soiled laundry like diapers.
Q: How often should I strip my cloth diapers?
A: Stripping should be an occasional fix—for example, after months of an ineffective wash routine, when you buy used diapers, or when you have strong, persistent odors and obvious repelling. If you need to strip frequently, adjust your regular wash routine instead of relying on stripping as a routine step.
Q: When should I call the pediatrician about diaper rash?
A: Contact a healthcare provider if the rash is severe, lasts longer than a few days despite home care, is associated with fever, has open sores or blisters, or if you suspect yeast or bacterial infection. Professional guidance is especially important for newborns and young infants.
References
- Diaper Rash — American Academy of Dermatology Association. 2022-08-24. https://www.aad.org/public/diseases/a-z/diaper-rash-overview
- Diapering and Baby Skin Care — American Academy of Pediatrics / HealthyChildren.org. 2021-09-10. https://www.healthychildren.org/English/ages-stages/baby/diapers-clothing/Pages/Diapering-Your-Baby.aspx
- Candidal Diaper Dermatitis — StatPearls Publishing. 2023-08-14. https://www.ncbi.nlm.nih.gov/books/NBK559067/
- Stripping & Restoring Your Diapers — Nora’s Nursery. 2023-01-15. https://norasnursery.com/blogs/how-to/stripping-restoring-your-diapers