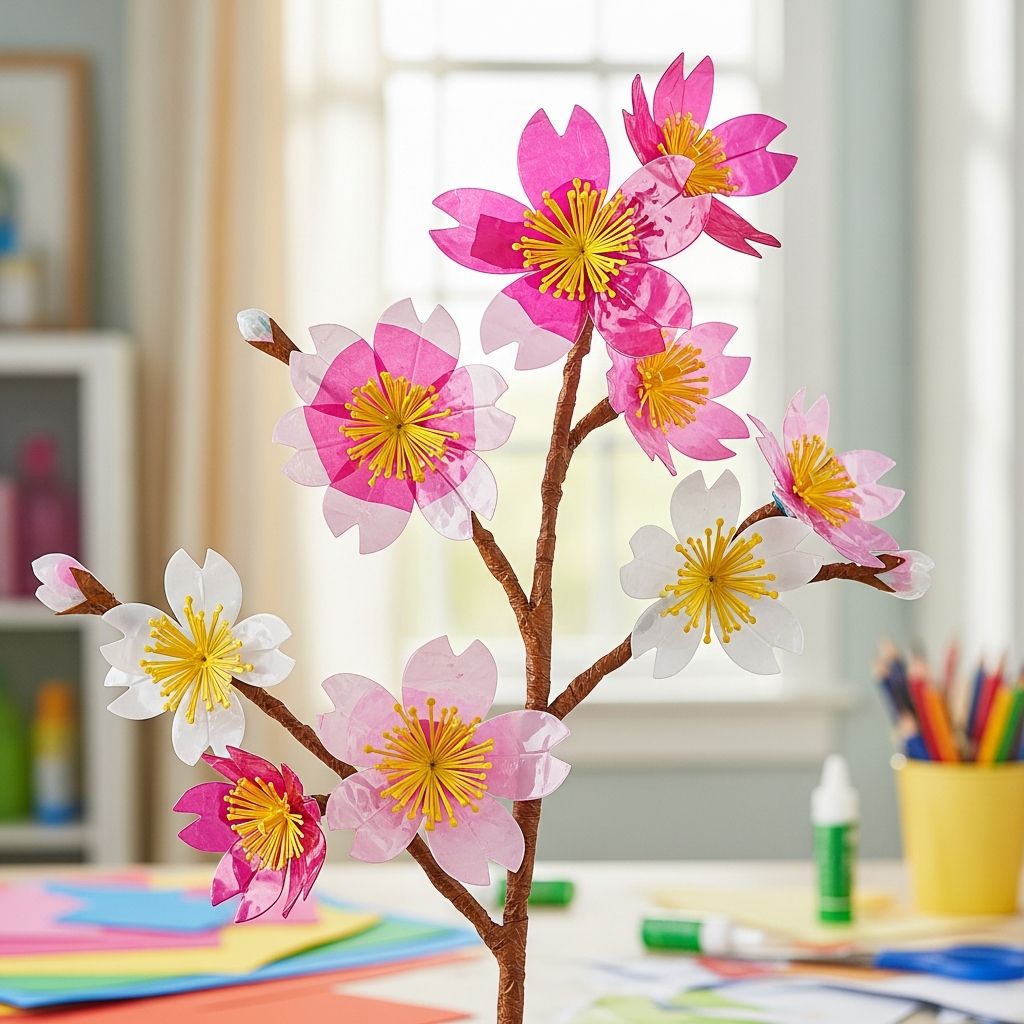
Empty soda bottles rarely feel special, yet with a little paint and imagination they can become magical tools for making soft clusters of cherry blossoms on paper, canvas, or even fabric. This guide walks you through an eco-friendly art project that turns single-use plastic into a reusable stamp while helping children explore color, texture, and the beauty of spring.
Why Cherry Blossom Art Is Perfect for Kids
Cherry blossoms are ideal subjects for children’s artwork because they are forgiving and playful: the petals can be irregular, the shapes can overlap, and the overall effect still looks graceful and intentional. Instead of focusing on perfect drawing skills, kids experiment with stamping, layering, and color blending, which makes this activity accessible to a wide range of ages and abilities.
Using a recycled soda bottle as a flower stamp also introduces a subtle lesson about sustainability. Children see with their own eyes how an item that might have gone straight into the recycling bin can be cleaned, repurposed, and turned into a creative tool they can use again and again.
Materials and Preparation Checklist
Before starting, gather your supplies and set up a simple painting station. Laying everything out in advance keeps the project fun and low-stress, especially when working with younger children.
- 1 clean, dry plastic soda bottle with a rounded, flower-shaped base
- Thick paper, cardstock, or a small canvas for the painting surface
- Washable acrylic or tempera paint in white, light pink, dark pink, and brown
- Paint palettes or shallow dishes for holding paint
- Paintbrushes of various sizes (thin for branches, medium for background)
- Paper towels or rags and a water cup for quick clean-up
- Protective coverings such as a tablecloth, newspapers, or an old sheet
- Smocks or old T-shirts to protect clothing
Take a minute to inspect the bottle base. Bottles with five rounded “bumps” on the bottom tend to create a natural blossom shape, making them especially effective for this project.
Step-by-Step: Painting the Cherry Blossom Scene
This project is designed so children can actively participate in every step. For preschoolers, adults may want to handle the branches while kids focus on bottle stamping; older kids can enjoy managing the entire process from start to finish.
1. Create a Simple Background
Begin by painting a soft background to suggest sky or light filtering through distant trees. This step does not need to be detailed, and in many cases a quick wash of color is enough.
- Choose a light color like pale blue, soft lavender, or creamy white.
- Use a wide brush to sweep the color across the page in gentle strokes.
- Leave some white patches; these lighter areas will add depth once the blossoms are layered on top.
- Allow the background to dry slightly so that the blossom colors remain crisp rather than blending too much.
2. Paint Tree Trunks and Branches
Next, add the tree structure that will support the blossoms. The branches do not need to be botanically accurate; simple sweeping lines create a beautiful effect.
- Use a thin brush with brown paint to draw a trunk that rises from the bottom or side of the paper.
- Extend several smaller branches outward and upward, letting them split into even finer twigs.
- Vary the line thickness slightly to imitate how real branches taper as they reach toward the sky.
- Optionally, mix a bit of black or dark gray into the brown for subtle shading along one side of the trunk.
3. Prepare the Blossom Colors
The magic of cherry blossoms comes from gentle shifts in color, from white to deep pink. Setting up a small range of hues will make the stamped flowers vibrant and interesting.
- Squeeze small puddles of white, pale pink, and darker pink paint onto a palette or onto separate plates.
- Invite children to blend a tiny bit of darker pink into the lighter shades, creating in-between tones.
- For a more realistic effect, keep white available to add highlights after the first round of stamping.
4. Turn the Bottle into a Blossom Stamp
Now comes the transformation: the soda bottle becomes a flower tool. This step tends to be the most exciting part for kids, as they realize a familiar object can behave like a stamp or brush.
- Dip the clean bottle base lightly into a pool of pink paint, making sure each of the rounded bumps gets coated.
- Press the painted base firmly onto the paper near the tip of a branch, then lift straight up to reveal a cluster of petals.
- Re-dip the bottle as needed, experimenting with different pink shades and paint thicknesses.
- Rotate the bottle slightly between prints so blossoms do not all face the same direction.
5. Layer Blossoms for Depth
Once the first blossoms are in place, adding additional layers will give the painting a lush, full appearance. Encourage children to keep stamping until the branches feel like they are bursting with flowers.
- Overlap some stamped blossoms so they look like clusters instead of isolated shapes.
- Add lighter blossoms on top of darker ones, or vice versa, to create the illusion of flowers at different distances.
- Stamp a few blossoms drifting away from the tree as if petals are caught on the breeze.
- Use a fingertip or cotton swab to add tiny flower centers in a darker color if desired.
6. Add Finishing Touches
Small details can transform a simple painting into a keepsake. Once the main shapes are dry, consider adding delicate accents that personalize the artwork.
- Dot white paint onto a few petals for highlights that catch the “sunlight.”
- Paint a distant horizon line or soft hills to suggest a landscape around the tree.
- Write the child’s name and date discreetly in a corner to document their work.
- Optional: sprinkle a small amount of eco-friendly glitter on wet paint for a gentle sparkle effect.
Educational Benefits of This Recycled Art Project
While kids see this activity as purely fun, it quietly supports multiple areas of learning. Parents and educators can use the painting process to talk about art, nature, and environmental responsibility all at once.
| Area | How the Project Helps |
|---|---|
| Fine motor skills | Children practice controlled movements when stamping with the bottle base and painting thin branches. |
| Color exploration | Mixing pinks and whites introduces basic color theory, blending, and shade variation. |
| Observation of nature | Looking at photos or illustrations of cherry trees encourages attention to seasonal changes and plant shapes. |
| Environmental awareness | Reusing a bottle highlights the concept of upcycling and offers a concrete example of creative re-use. |
| Emotional expression | Soft colors and repetitive stamping can feel soothing, giving children a calming way to express themselves. |
Variations for Different Ages and Settings
One strength of this craft is flexibility. With minor adjustments, the same basic idea can work for toddlers at the kitchen table, elementary students in a classroom, or older kids at a community event or art club.
Toddler-Friendly Adaptations
- Pre-paint the background and branches so toddlers can focus solely on stamping the blossoms.
- Use large sheets of paper taped to the table or floor to provide a generous area for free exploration.
- Offer only one or two paint colors at a time to prevent muddy mixtures.
Classroom or Group Projects
- Divide a large sheet of paper or roll of craft paper into sections, each with a branch, and let multiple children stamp blossoms together.
- Invite students to write short poems or haiku about spring to display alongside their artwork on a bulletin board.
- Assign small teams to handle different tasks: background painters, branch artists, and blossom stampers.
Advanced Ideas for Older Kids
- Experiment with black or dark blue paper and pastel-colored paint for a night-time blossom effect.
- Introduce simple shading concepts by placing more intense color on one side of each blossom cluster.
- Encourage kids to sketch buildings, lanterns, or bridges in the background to hint at cultural settings where cherry blossoms are celebrated.
Safety and Clean-Up Tips
A little preparation goes a long way in keeping this project both safe and easy to tidy up. The paints and tools are generally child-friendly, but thoughtful setup helps everyone relax and enjoy the process.
- Choose non-toxic, washable paints labeled for children, especially when crafting with toddlers and preschoolers.
- Thoroughly wash and dry the soda bottle before using it as a stamp to remove any residue or sharp edges from the label area.
- Cover surfaces and dress kids in smocks or old shirts to avoid stains on clothing and furniture.
- Keep a damp cloth or wipes close at hand so small spills or painty fingers can be cleaned quickly.
- Once finished, rinse the bottle base promptly so it can be stored and reused for future projects.
Displaying and Gifting Cherry Blossom Masterpieces
After the paintings have dried, displaying them thoughtfully reinforces your child’s sense of pride and accomplishment. These pieces can brighten up a room, decorate a classroom, or become heartfelt handmade gifts for loved ones.
- Frame individual paintings in simple frames or clip them onto a string with clothespins to create a seasonal gallery wall.
- Trim larger sheets into smaller cards for springtime greetings, Mother’s Day notes, or thank-you cards.
- Laminating flat paintings can turn them into reusable place mats or desk protectors.
- Photograph or scan artwork so children can preserve a digital collection of their creations over time.
Frequently Asked Questions
Can any plastic bottle be used for the blossoms?
Not all bottles create the same effect. Look for bottles with a rounded, flower-like base that has several distinct bumps or petals; this shape will translate into more recognizable blossoms when stamped with paint. If the base is too flat or angular, the prints may look more like abstract circles than flowers.
What type of paint works best?
Washable tempera or water-based acrylic paints usually work well on heavyweight paper or canvas. For very young children, tempera is a good choice because it rinses off hands and surfaces more easily, while acrylics create more opaque, saturated colors that older kids often enjoy experimenting with.
How can this project support a lesson about seasons?
Cherry blossoms make a natural bridge to talk about spring, plant life cycles, and how different regions of the world experience seasonal changes. Before or after painting, you can show children photos of cherry trees, discuss how buds appear, bloom, and eventually fall, and invite them to observe trees in their own neighborhood for signs of new growth.
Can this technique be used for other types of flowers?
Absolutely. By changing the paint colors and adding different details, the same stamping technique can suggest apple blossoms, wildflowers, or festive fireworks. Kids can experiment with yellow centers, green leaves, or multi-colored petals to invent entirely new imaginary plants.
What if my child is hesitant about painting?
Some children feel intimidated by drawing or painting, especially if they worry about making things look “real.” Using a bottle as a stamp removes that pressure and emphasizes process over perfection. Encourage them to consider each print an experiment, and remind them that nature itself is full of irregular, overlapping shapes that are beautiful precisely because they are not identical.
Expanding the Idea: More Recycled Art Explorations
Once children experience how fun and satisfying it is to turn an everyday object into an art tool, they are often eager to discover more possibilities hiding in the recycling bin. This cherry blossom painting can become the starting point for a whole series of creative experiments.
- Try stamping with other objects such as cardboard tubes, sponges, or bottle caps to explore new shapes and textures.
- Invite kids to design an entire “recycled garden” where each flower or leaf is created from a different upcycled tool.
- Keep a small basket of clean recycling items set aside specifically for art, so children associate sustainability with creativity, not just obligation.
By regularly incorporating repurposed materials into craft time, families and educators reinforce the idea that waste can become a resource. Over time, children begin to view the world around them as full of potential canvases and tools, which is a powerful way to nurture imagination and environmental responsibility together.