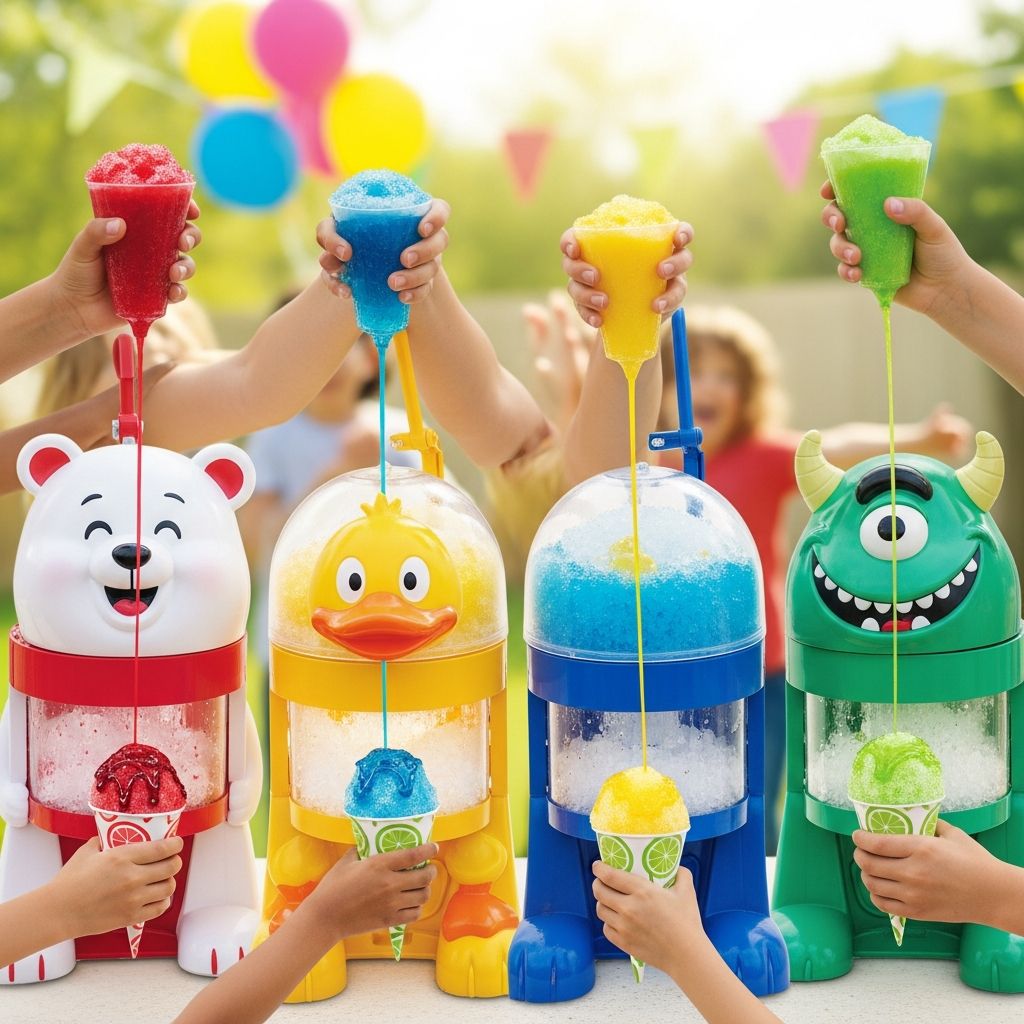
Character-themed snow cone makers combine two things kids love: familiar cartoon faces and icy, colorful treats. With a little planning, this simple gadget can anchor a whole afternoon of play, hands-on learning, and family togetherness.
Why Character Snow Cone Makers Are So Appealing
On the surface, a snow cone maker is just a small appliance that shaves ice, but the character design turns it into a toy that invites kids to participate. The bright colors, friendly face, and compact size make it far less intimidating than a full-size kitchen machine.
Instead of feeling like a grown-up tool, a character snow cone maker feels like part of the playroom that just happens to produce real food. That blend of fun and function is what makes children eager to help, press buttons, and serve treats to everyone in the room.
- Kids are more likely to try new flavors when they feel ownership over the process.
- Parents gain a low-stress way to let children “cook” without open flames or sharp knives.
- Families can stretch a simple gadget into themed parties, rainy-day activities, and birthday traditions.
Setting Up Your Snow Cone Station
A little advance setup avoids chaos once the machine comes out of the box. Think of your snow cone maker not as a standalone toy, but as the centerpiece of a small serving station where everything has a clear place.
Choose a sturdy, wipeable surface such as a kitchen island or a low table covered with a vinyl cloth. Make sure there is easy access to power if your unit is electric, and enough space for several kids to stand without bumping into one another.
Essential Tools and Supplies
- Snow cone maker (manual or electric, character-themed).
- Ice cubes or small ice blocks from your freezer.
- Flavor syrups in squeeze bottles or small pitchers.
- Paper cones, small cups, or reusable silicone cups.
- Small spoons or mini reusable spoons.
- Tray or shallow bin to catch spills and stray ice.
- Dish towel or paper towels for quick cleanups.
Optional Toppings and Extras
- Sprinkles or colored sugar for a crunchy finish.
- Mini marshmallows or gummy candies for decorating.
- Fresh fruit pieces such as strawberries or pineapple.
- Whipped cream for a special occasion topping.
Simple Steps: From Ice Cubes to Colorful Cones
The basic process is the same for most consumer snow cone machines, especially the small character-themed versions. The goal is to turn regular ice cubes into a fluffy, easy-to-eat pile of shaved ice, then soak it with syrup so each bite is flavorful.
Walk through the process slowly the first time. When kids understand the order of steps, they are better able to help without rushing or spilling.
- Prepare the ice: Freeze standard cubes ahead of time so you have more than you think you need. Small or half-size cubes tend to shave more easily than oversized ones.
- Check the machine: Ensure the top is securely latched, blades are fully covered by plastic housing, and any internal parts are correctly aligned according to the instruction manual.
- Add ice: With the unit turned off, open the lid and add a handful of cubes. Close the lid completely before any child touches the switch or crank.
- Shave the ice: Activate the motor or turn the crank with steady pressure. Encourage kids to use gentle, consistent force rather than pushing down hard, which can jam some machines.
- Catch the snow: Place a cup, cone, or small bowl under the chute to catch the shaved ice. Fill each serving in two layers rather than one big mound so syrup can soak evenly.
- Add flavor: Drizzle syrup over the first layer of ice, then add more shaved ice and finish with an additional swirl of flavor on top.
Kid Participation: Jobs for Every Age
Children enjoy snow cones even more when they have real responsibilities. Different steps of the process suit different ages and attention spans, so assign jobs that feel important but remain safe.
Rotating tasks keeps everyone engaged and reduces the chance of one child dominating the machine while others grow restless.
| Age Range | Suggested Tasks | Adult Involvement |
|---|---|---|
| 3–5 years | Choosing cup colors, placing empty cups under the chute, sprinkling toppings. | Direct supervision, adult runs the machine. |
| 6–8 years | Pouring syrups, pressing an on/off switch with guidance, helping measure ice. | Hand-over-hand support for switches or cranks. |
| 9–11 years | Operating the machine, refilling ice, organizing the serving line. | Adult nearby to monitor safety and troubleshoot. |
| 12+ years | Setting up station, cleaning parts, experimenting with new flavors. | Occasional check-ins, especially with electric models. |
Flavor Ideas Beyond Basic Syrup
Bottled syrup is the fastest way to flavor shaved ice, but customizing the options turns your character machine into a mini test kitchen. Think of each snow cone as a tiny canvas for flavor experiments rather than a one-note sugar bomb.
Offer a small selection of flavors at a time so kids are not overwhelmed by choice. A good starting point is one red, one blue, and one citrus or tropical option.
Fun Flavor Combinations
- Beach Day: Blue raspberry with a splash of pineapple syrup and a tiny umbrella pick.
- Berry Blast: Strawberry plus cherry, topped with a single fresh berry.
- Sunset Swirl: Orange and grape layered half-and-half in the cup.
- Melon Mix: Watermelon syrup with a squeeze of lime juice for tang.
- Vanilla Cream: Any fruit syrup drizzled with a bit of vanilla coffee syrup and a spoon of whipped cream.
If you prefer to minimize artificial colors, use fruit juices or homemade simple syrups with pureed fruit. Freezing juice into ice cubes and shaving them directly creates a mild, naturally flavored treat with less added sugar.
Keeping Things Safe and Low-Stress
Even a small, cute appliance still requires safety rules. Character snow cone makers usually enclose the blades inside the body of the machine, but kids should learn that anything with a motor or sharp interior parts deserves respect.
Before the first use, briefly explain basic rules as if they were part of the game: when the machine is on, hands stay off the top; only adults open the lid; and everyone keeps cords away from the edge of the table.
Safety Guidelines to Emphasize
- Always unplug the machine when it is not in use or being cleaned.
- Never insert fingers, spoons, or other objects into the ice chute.
- Dry hands before plugging in or operating any electric components.
- Use only ice—no hard candy, fruit pits, or other items that could damage blades.
- Store syrups out of reach of very young children between uses.
Designing a Character-Themed Snow Cone Party
A character snow cone maker can easily become the star of a themed party or playdate. Instead of hiring outside entertainment, build your activities around the machine and a few clever decorations that match its cartoon persona.
Think in zones: a serving station, a craft table, and a game area. This helps with flow so kids are not all clustered around the machine at once.
Party Planning Checklist
- Send invitations featuring the character and promise “make-your-own snow cones” on the front.
- Decorate the serving area with matching colors, simple banners, and paper cutouts of the character.
- Offer a short “training session” where the birthday child demonstrates how to get a snow cone.
- Set up a topping bar with labeled jars so kids can customize their creations.
- Rotate guests in small groups to the machine while others do crafts or outdoor games.
Games and Learning Activities With Snow Cones
Beyond eating, snow cones work surprisingly well as part of simple games and learning challenges. Because the treats melt quickly, many of these ideas encourage kids to observe, think, and move at the same time.
You can adapt each activity to the age group involved, making the most of the excitement the character machine already generates.
Educational Snow Cone Ideas
- Color Mixing Challenge: Let kids combine small amounts of different colored syrups in clear cups to predict and observe new colors.
- Flavor Voting Station: Create simple tally charts where children place stickers under their favorite flavors, then count and compare results.
- Melting Race: Give each child a plain ice mound and have them time how long it takes to melt at room temperature versus in the sun.
- Measurement Practice: Ask older children to measure syrups with teaspoons or tablespoons for consistent results.
Cleaning and Storage Tips
A fun snow cone session can lose its shine if cleanup feels overwhelming. Fortunately, most character snow cone makers are designed with removable parts and simple surfaces that wipe clean quickly.
Build cleanup into the activity so kids learn good habits. Assign one child to collect used cups, another to wipe the table, and an older helper to carry removable parts to the sink.
After-Use Routine
- Unplug the machine and allow any moving parts to stop completely before disassembly.
- Empty leftover ice and pour it into the sink instead of the trash to avoid dripping bags.
- Rinse removable pieces in warm, soapy water and let them air dry thoroughly.
- Wipe the exterior with a damp cloth, paying special attention to sticky syrup drips.
- Store the machine in a dry cabinet with its cord neatly wrapped to prevent tangles.
Frequently Asked Questions
How much ice do I need for a small gathering?
As a rough guideline, plan on about one to one and a half cups of ice per child-sized snow cone. For a playdate with four kids, filling one standard ice cube tray twice usually provides enough ice with a little extra for spills.
Can young children operate the snow cone maker themselves?
Very young children can participate, but they should not handle internal parts or operate the machine without an adult present. Give them simple jobs like choosing cups, adding toppings, or pressing the on/off switch with your hand over theirs.
Are character snow cone makers only for summer?
Although they are especially popular in hot weather, these machines work year-round. In cooler months, use the snow cone maker as part of a winter-themed movie night or holiday party, pairing icy treats with warm blankets and indoor activities.
What if I do not want to use sugary syrups?
You can flavor shaved ice with diluted fruit juice, homemade syrups made from real fruit, or lightly sweetened tea for older kids and adults. Offering smaller portions also lets children enjoy the novelty without overloading on sugar.
Is a character snow cone maker worth the storage space?
If your family enjoys themed parties, cartoon characters, or interactive kitchen play, the machine can become a reliable go-to activity. The key is to remember it exists: store it where you can see it, and bring it out not only for summer but also for special movie nights and milestone celebrations.
Making the Most of Your Character Snow Cone Maker
A character snow cone maker is more than a novelty kitchen gadget; it is a flexible tool for play, celebration, and learning. With a bit of structure and a sense of humor about the inevitable drips and spills, your family can turn a handful of ice cubes into an event that kids will talk about long after the last colorful cone melts away.
Whether you are hosting a birthday, planning a themed playdate, or simply trying to make a hot afternoon feel special, letting the character on the front of the machine “serve” the treats can bring extra delight to an already joyful ritual.